 Tim Wilkinson
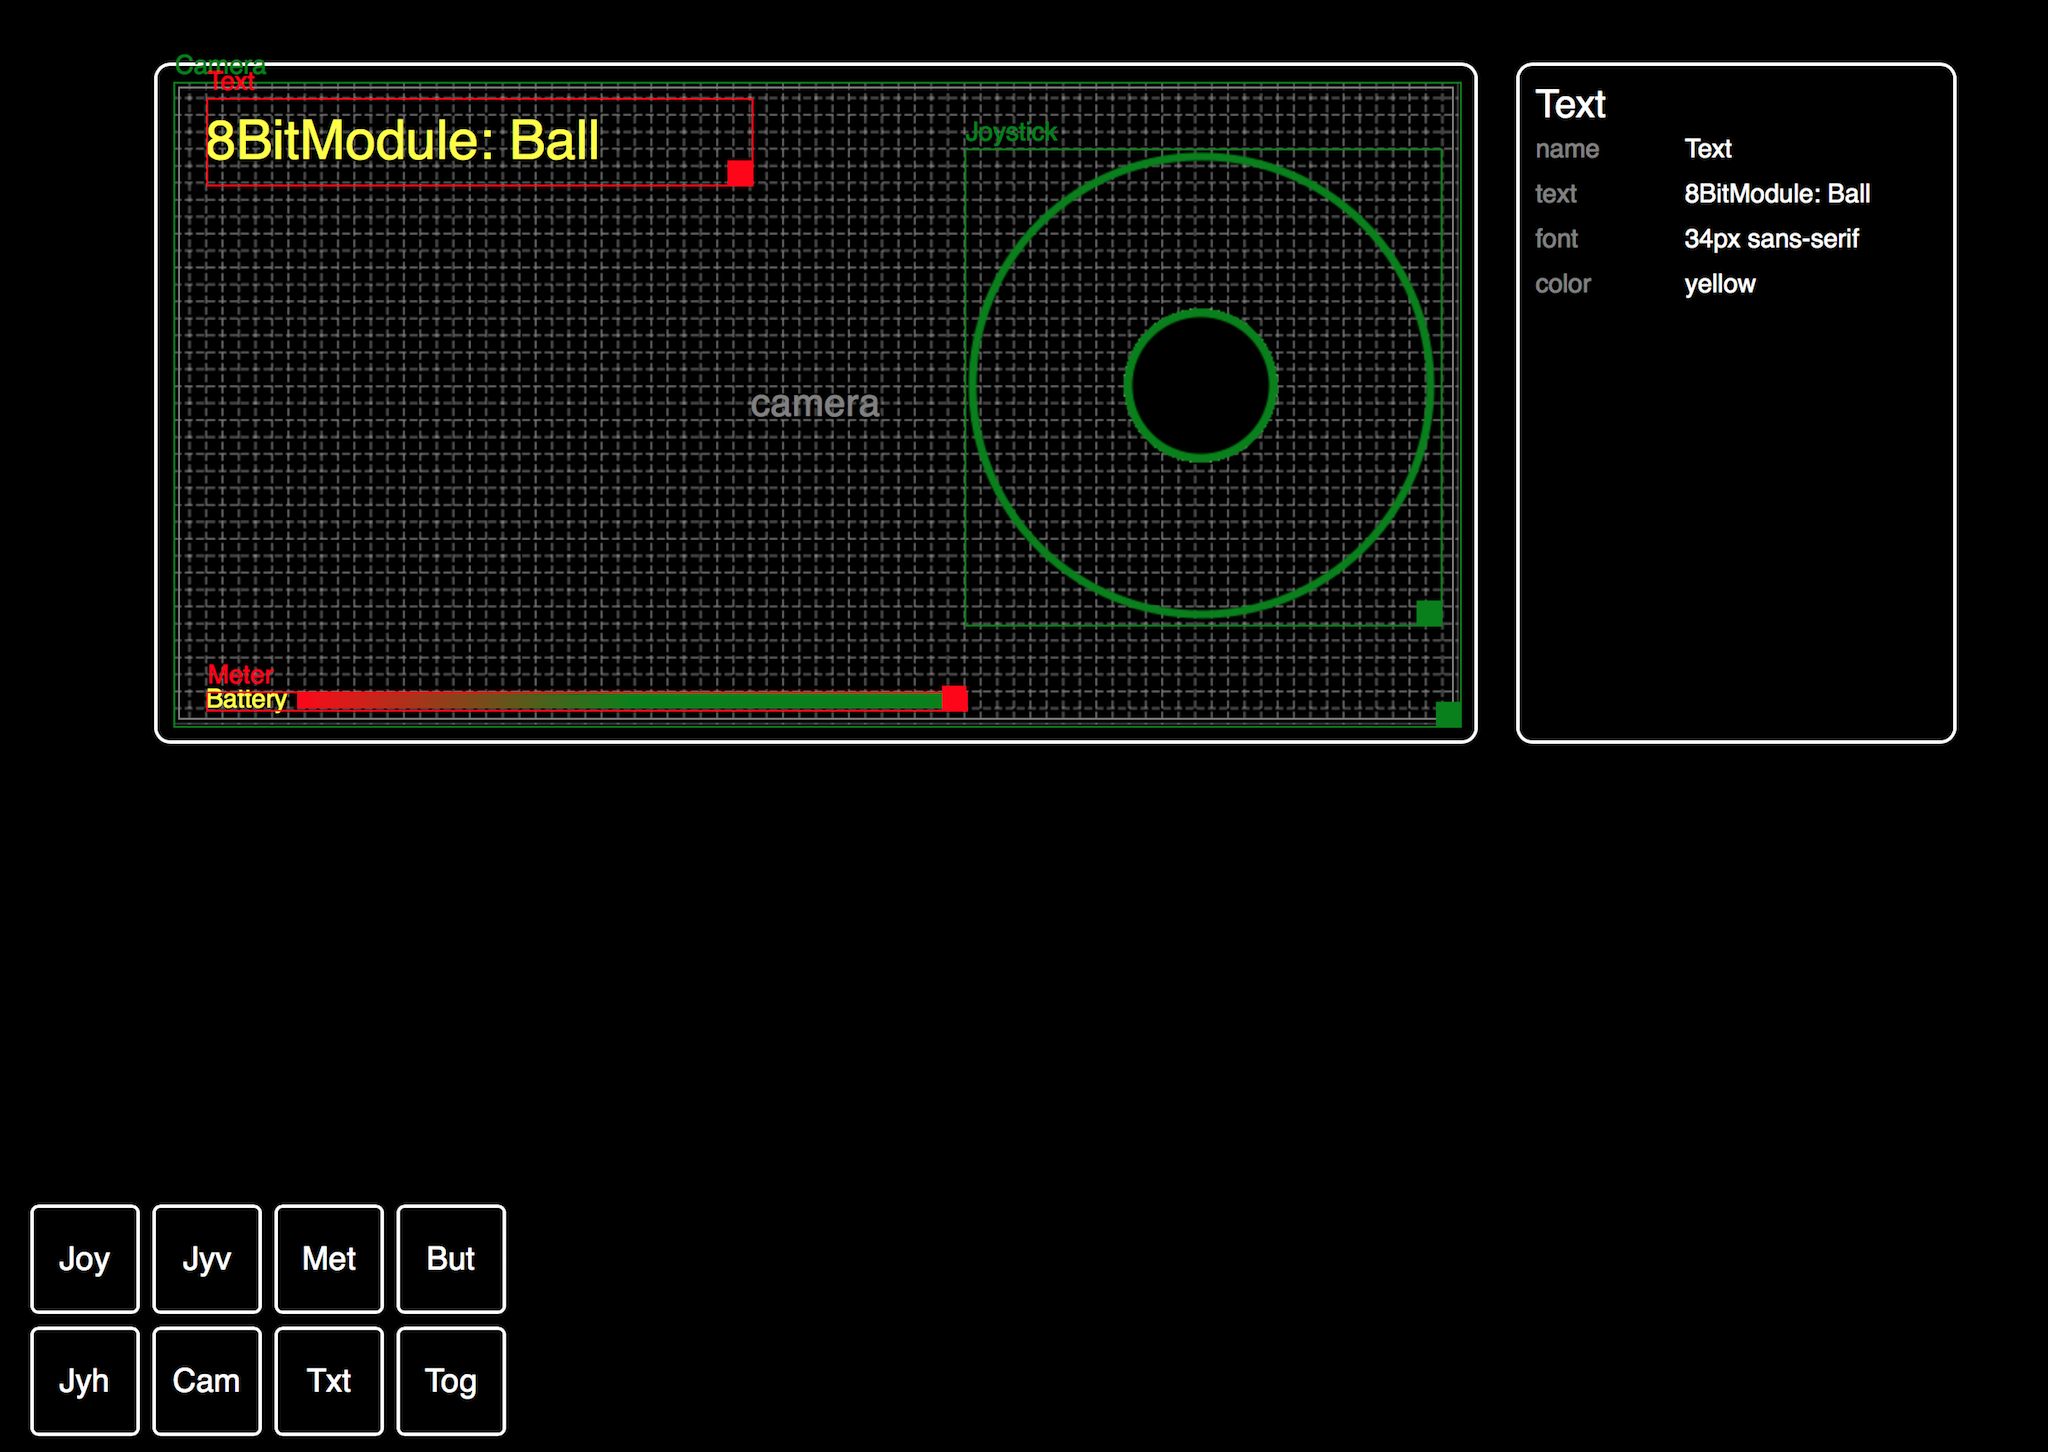 One of the original goals for this project was for robots built using the Module to be controlled by phone using a web browser. However, because each robot is unique, there is no one set of on-screen controls which are ideal for all robots. To address this we need a UI Designer; a tool for developer to drag-and-drop controls onto a virtual screen, and to include just the right controls in just the right places for each robot.
The photo above shows V1 of the UI Design tool. This lives under the UI tab in the Blockly code editor which is already part of the Module's software stack. The Designer has three basic parts:
- Virtual screen - the hatched space onto which tools can be arranged. Controls "snap" into place, which helps them move and scale depending on the size of the phone's screen.
- Properties - the properties of the current selected control allowing customization
- Controls - the periodic table-like set of controls which can be arranged on the screen.
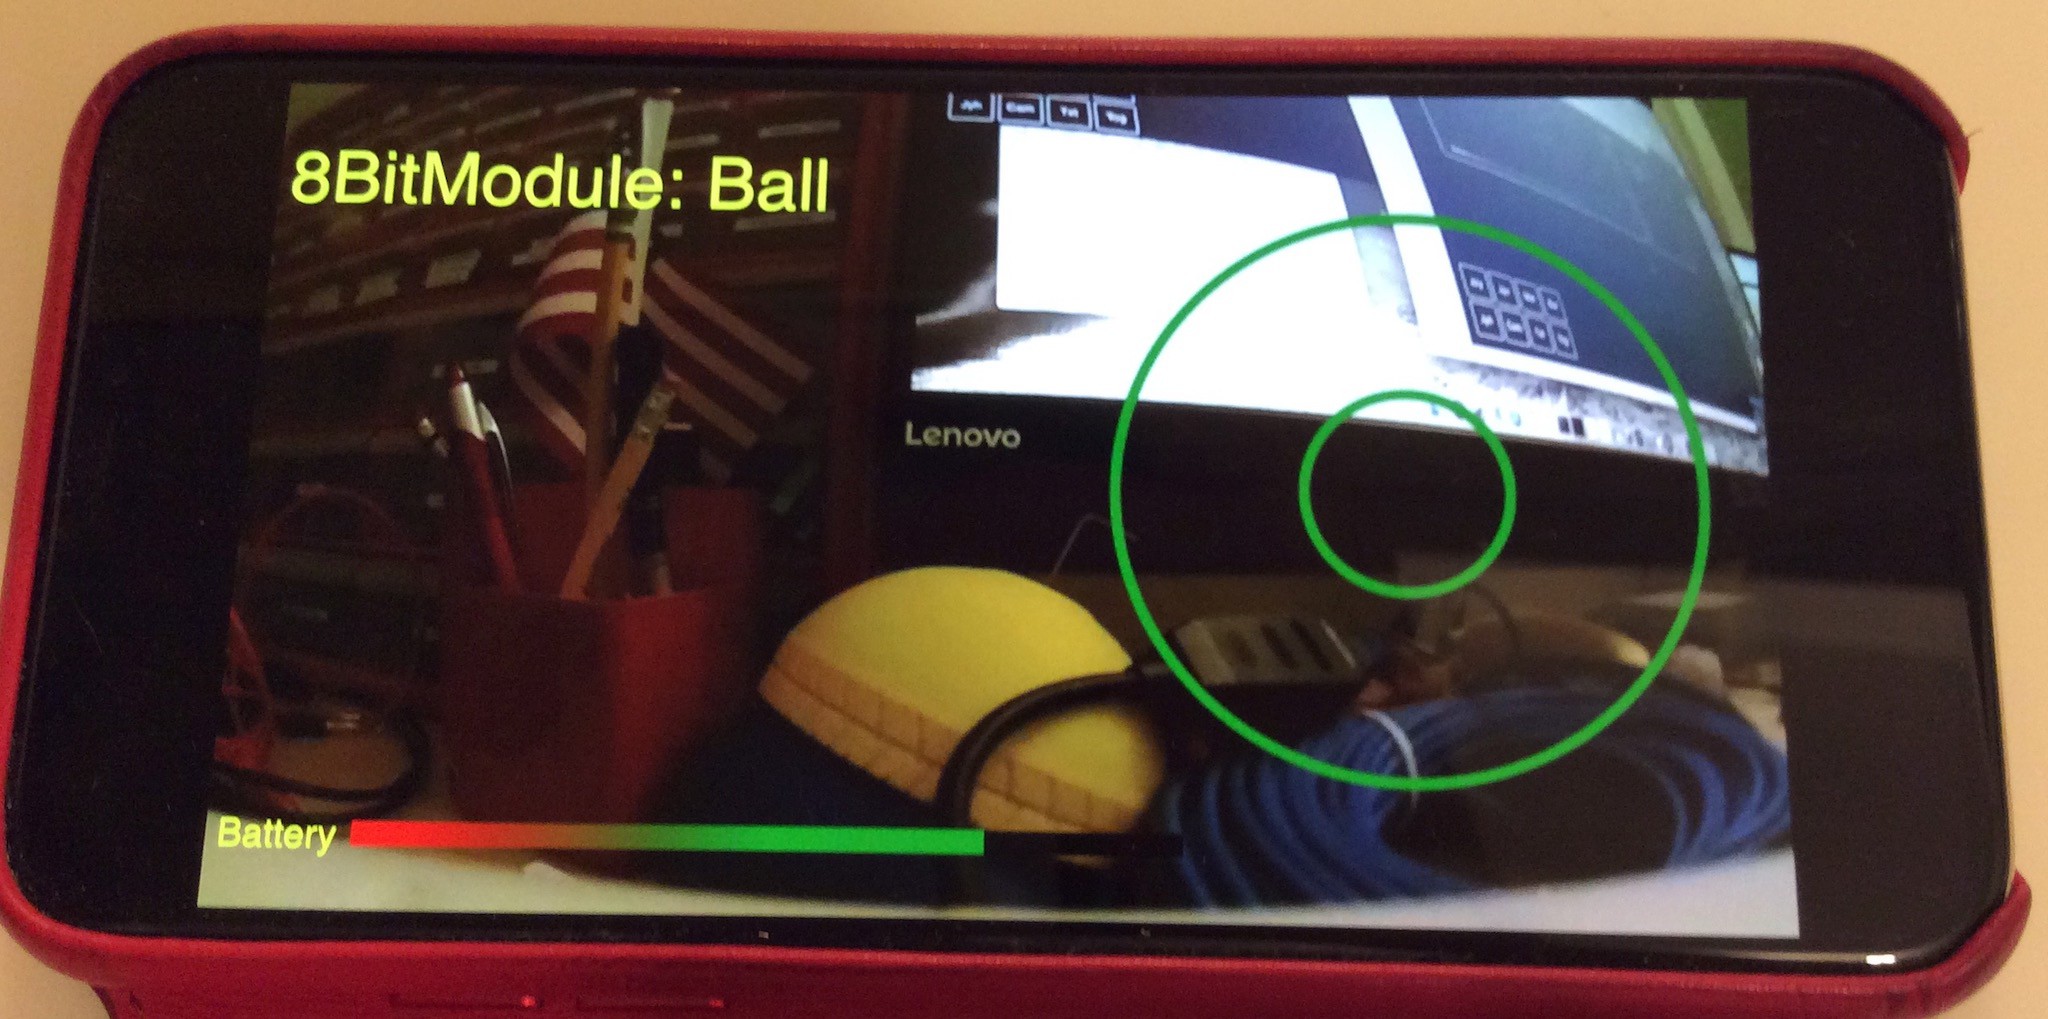
The design pictures shows a fairly basic arrangement: a 2-axis joystick (on the right) for robot control, a title (top/left), a meter (bottom/left) displaying the battery health, and behind everything a camera feed from the robot. When displayed on the phone it looks like this:
The controls themselves, once on screen, export their APIs by creating new Blocks in Blockly. Controls can either provide information (e.g. the current x,y location of the joystick), accept actions (e.g. setting the battery level) or both.
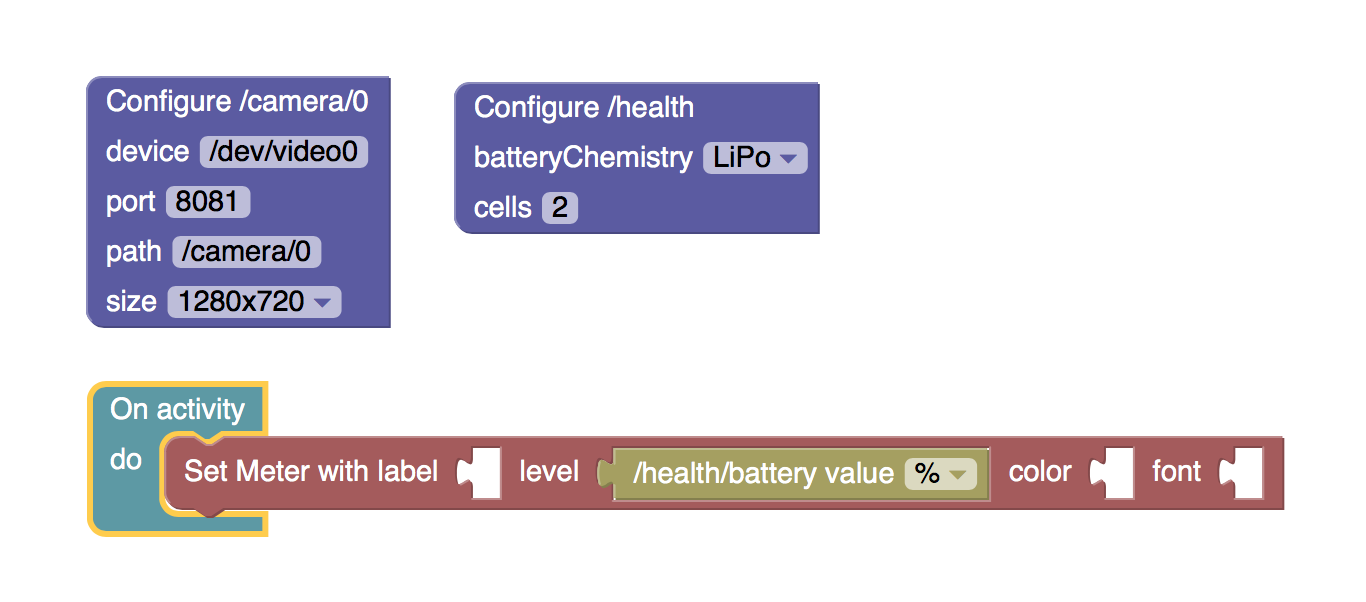
Here is a snipped of the code to run the robot. Two blocks configure the camera and battery chemistry. The final block runs an activity which uses the current battery health (0-100%) and set the level of the meter in the UI (which you can see on the phone screen).
Improvement
This is the first version of the UI and there are obvious improvements:
- Expand the controls available and make them more customizable.
- Design more appealing controls! What I have here is pretty basic; it would be good to find some design help to make this all look more polished and professional.
Discussions
Become a Hackaday.io Member
Create an account to leave a comment. Already have an account? Log In.