 aerospark
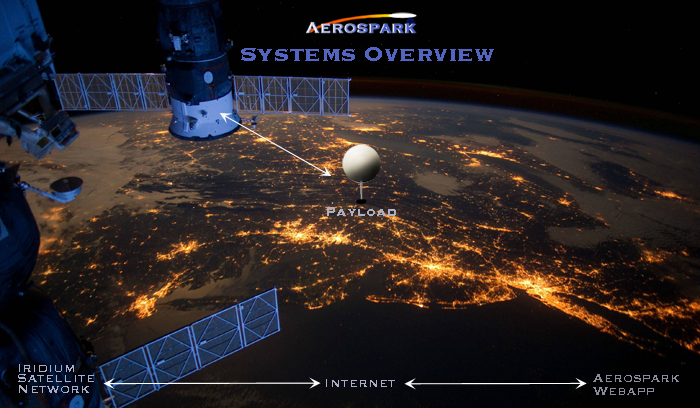
This project was developed to create a new type of high altitude platform with enhanced real-time tracking and control. It will also be used to launch a rocket from the payload at altitude from the balloon payload (A.K.A. a Rockoon). The major systems featured in this project are the Payload, the Iridium Satellite Network, and the Aerospark Webapp.
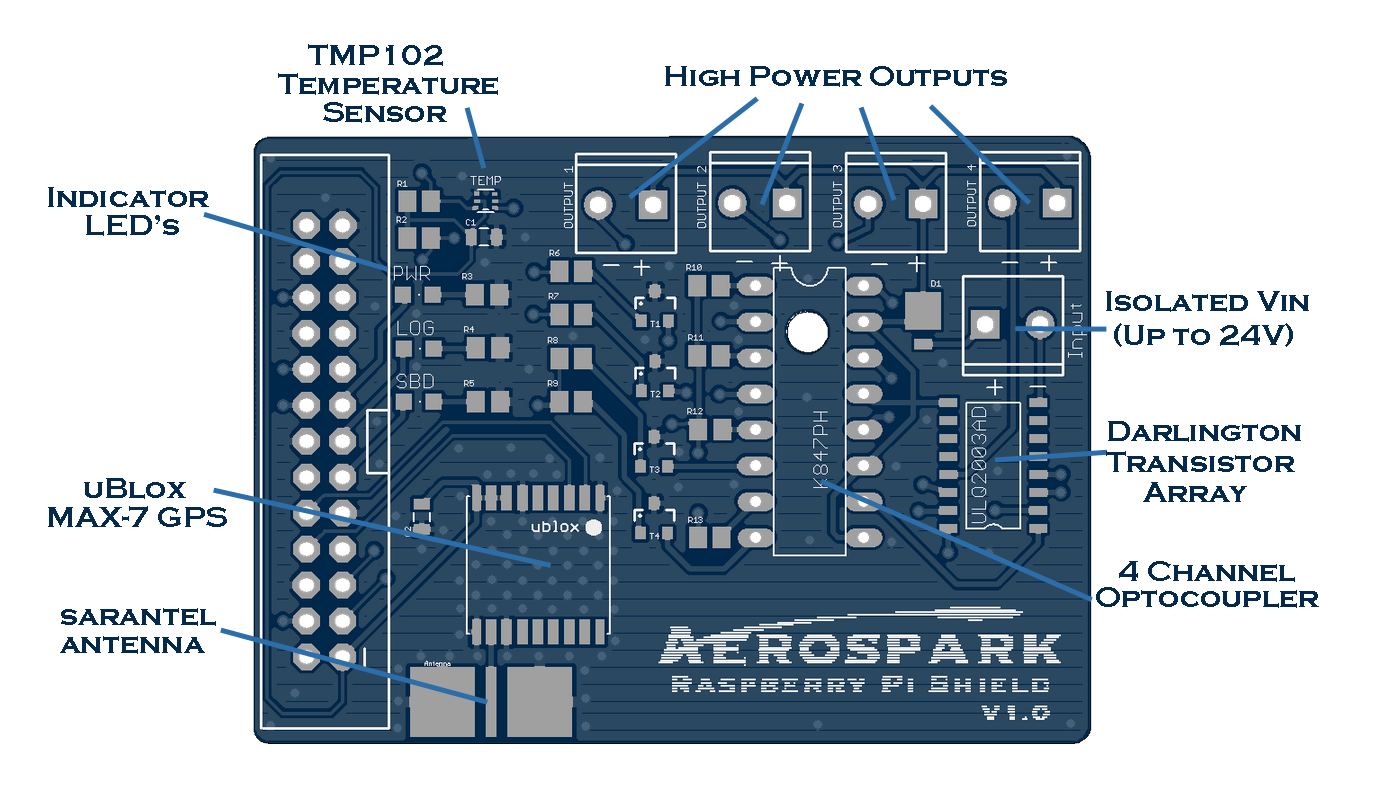
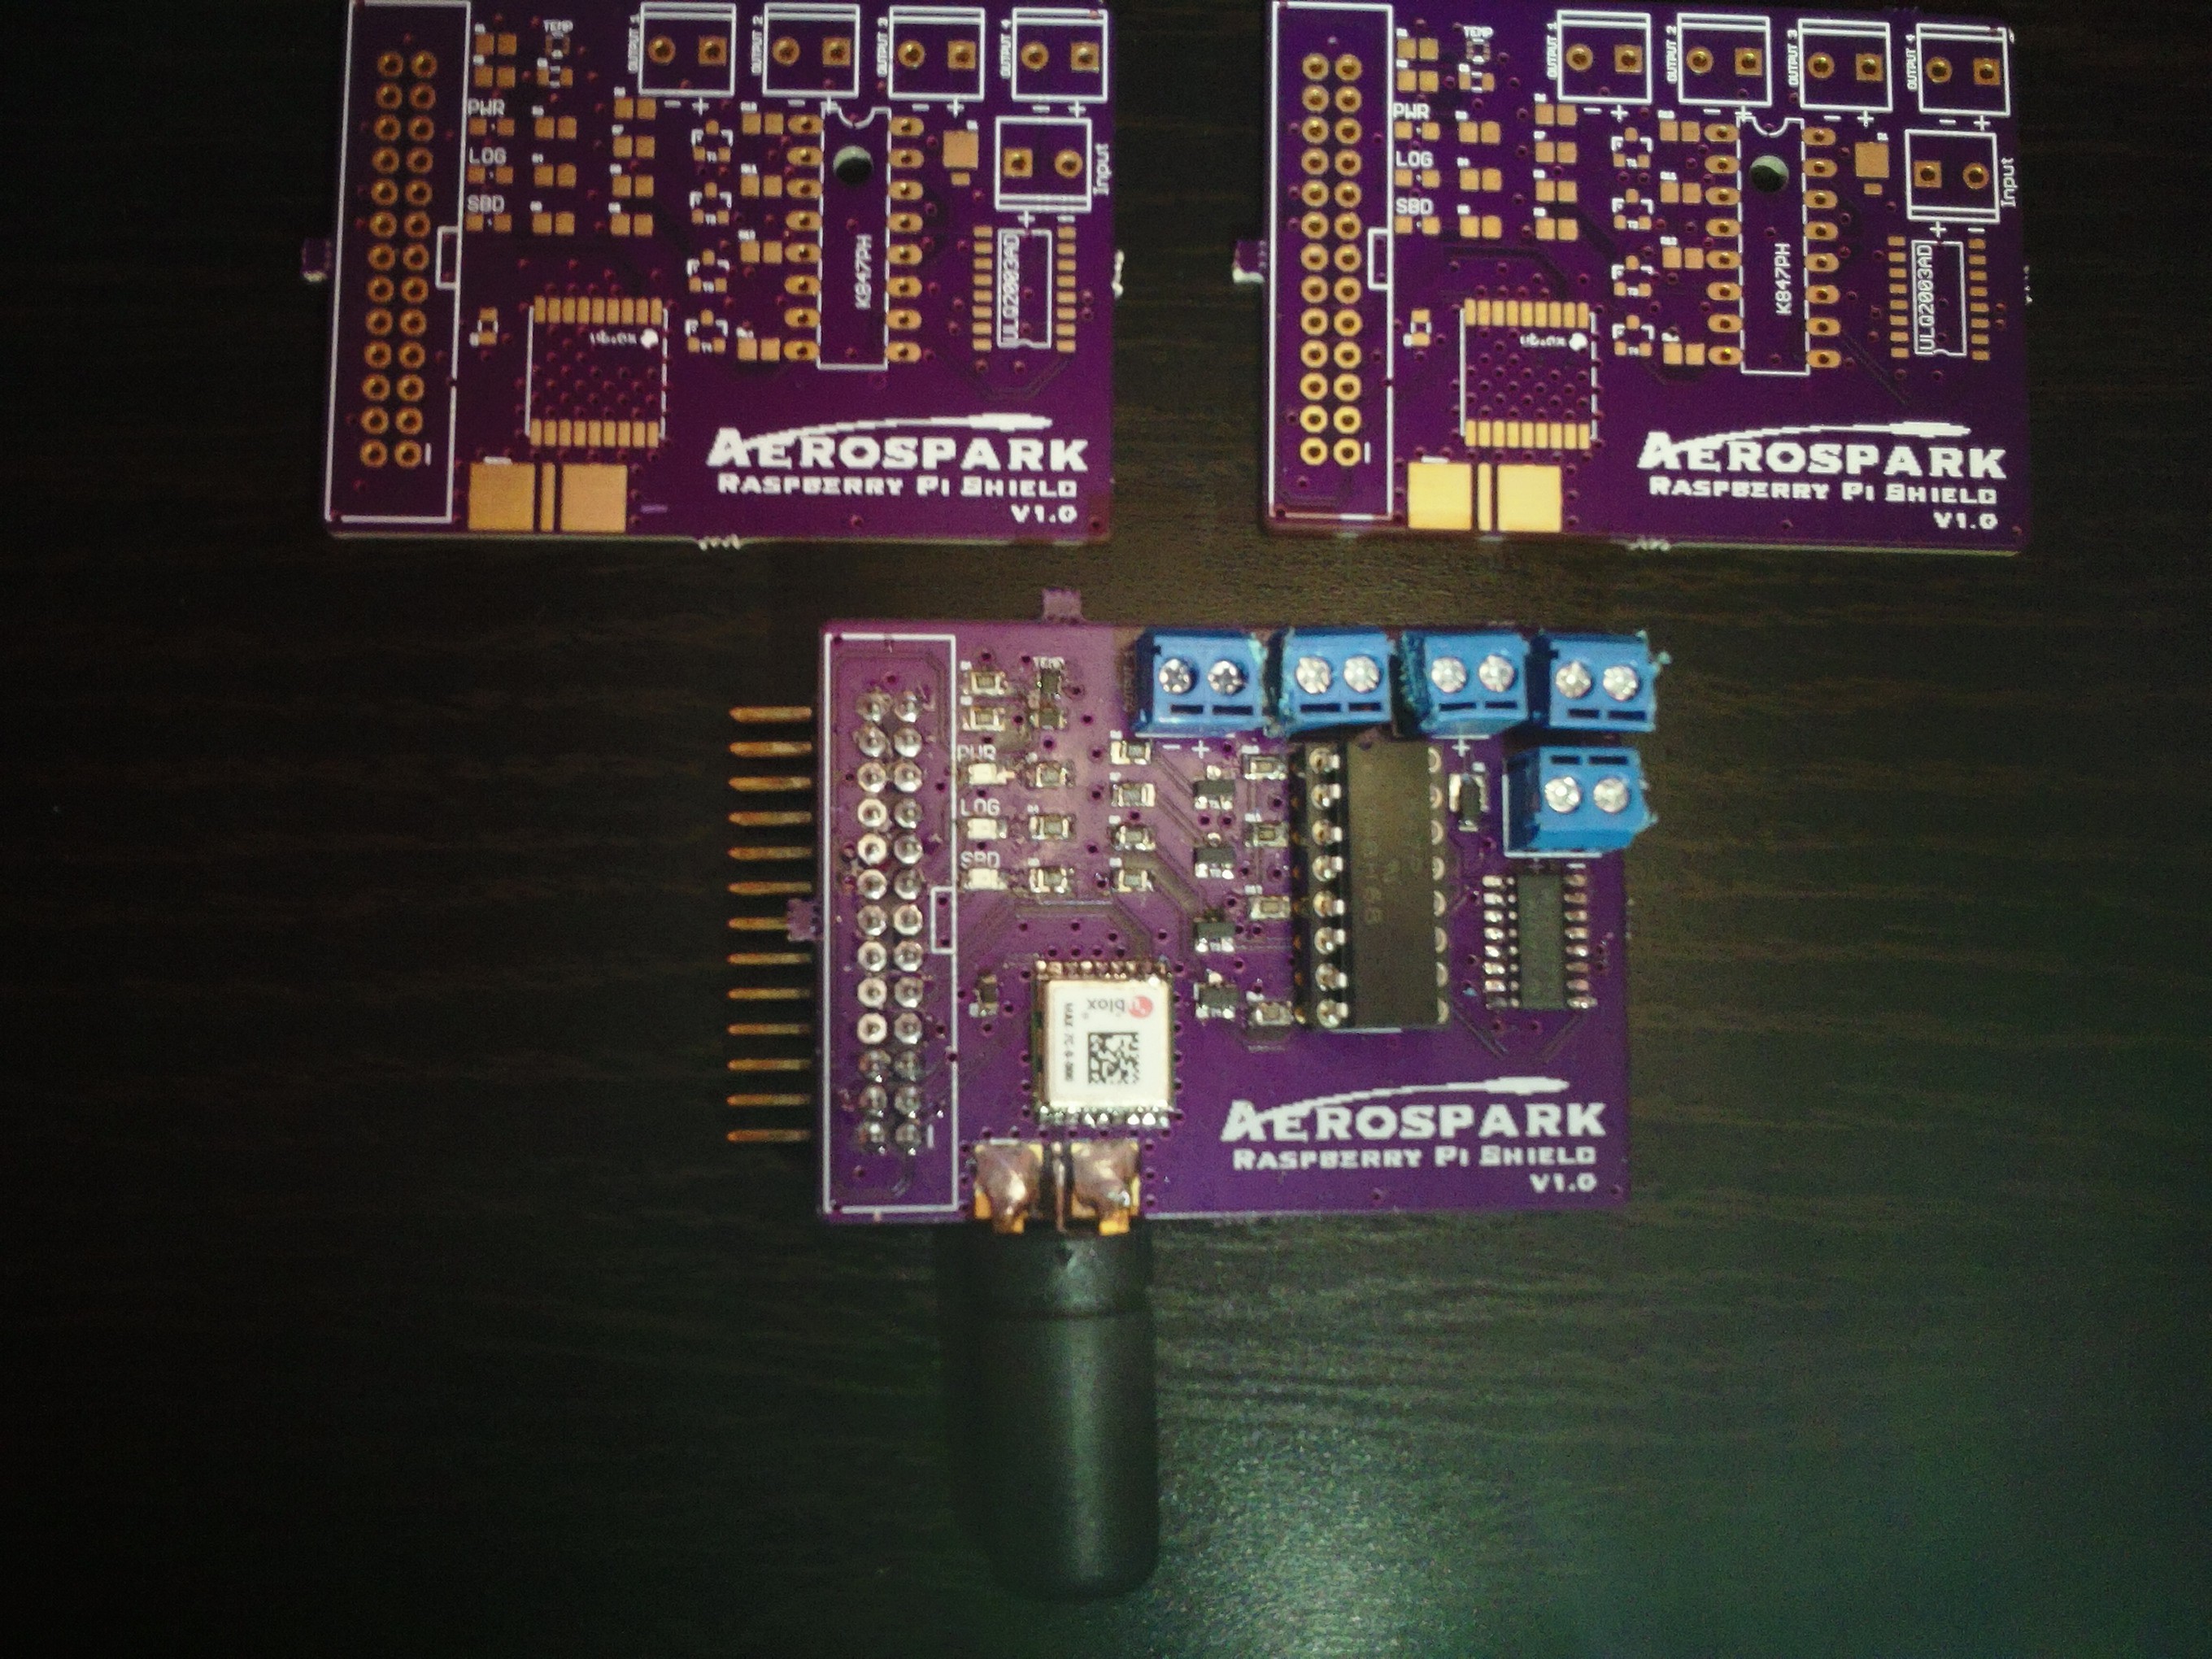
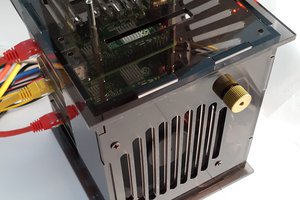
Payload: This contains a Raspberry Pi, RockBLOCK Iridum Unit, Aerospark Pi Shield, Batteries (2x 9V), Camera, and Rocket. One battery charges the Pi/RockBLOCK/Camera, and the other is used for auxiliary power (i.e. payload heating, rocket ignition, cable cutdown, parachute deployment charge, etc.). The RockBLOCK Iridium Unit is plugged into the Raspberry Pi's USB port and allows for communication with the Iridium Satellite network (approximately every 1 minute for up to 350 bytes of data).
Iridium Satellite Network: This is a satellite constellation of (currently) 66 active satellites providing global coverage 24/7 year round. The payload uses the RockBLOCK to connect to this network in order to send/receive data. The satellite network pushes the data to/from ground stations which are available through the internet.
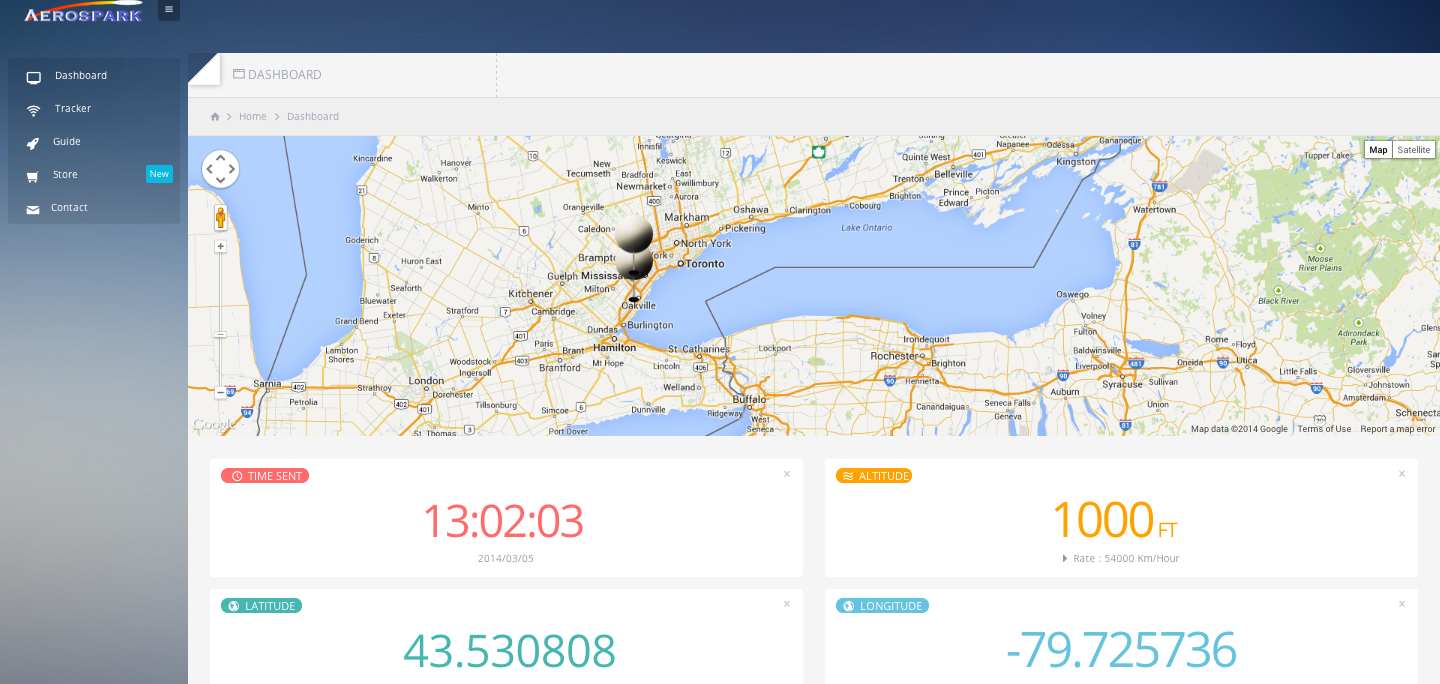
Aerospark WebApp: The website is setup to retrieve any data pushed from the payloads Iridium unit, as well as send data to the Iridium network for the payload to read. This is done through HTTP POST/GET requests to RockBLOCK servers.


 Jovan
Jovan
 eelco.rouw
 Enrico Miglino
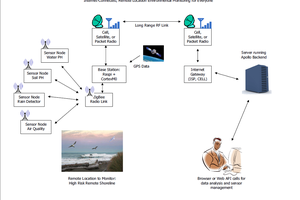
 x3n0x
x3n0x