 Just4Fun
The User key can be configured to act as the FLASH key of the nodeMCU (key connected to ESP-01 GP0IO) or as a generic user key connected to the GPA1 port of the GPIO expander (MCP23017).
Using Arduino IDE the second choice seems to be better, of course only if you have populated the GPIO expander.
To configure the User key there are two solder jumpers (SJ1 and SJ2) in the back side of the PCB:
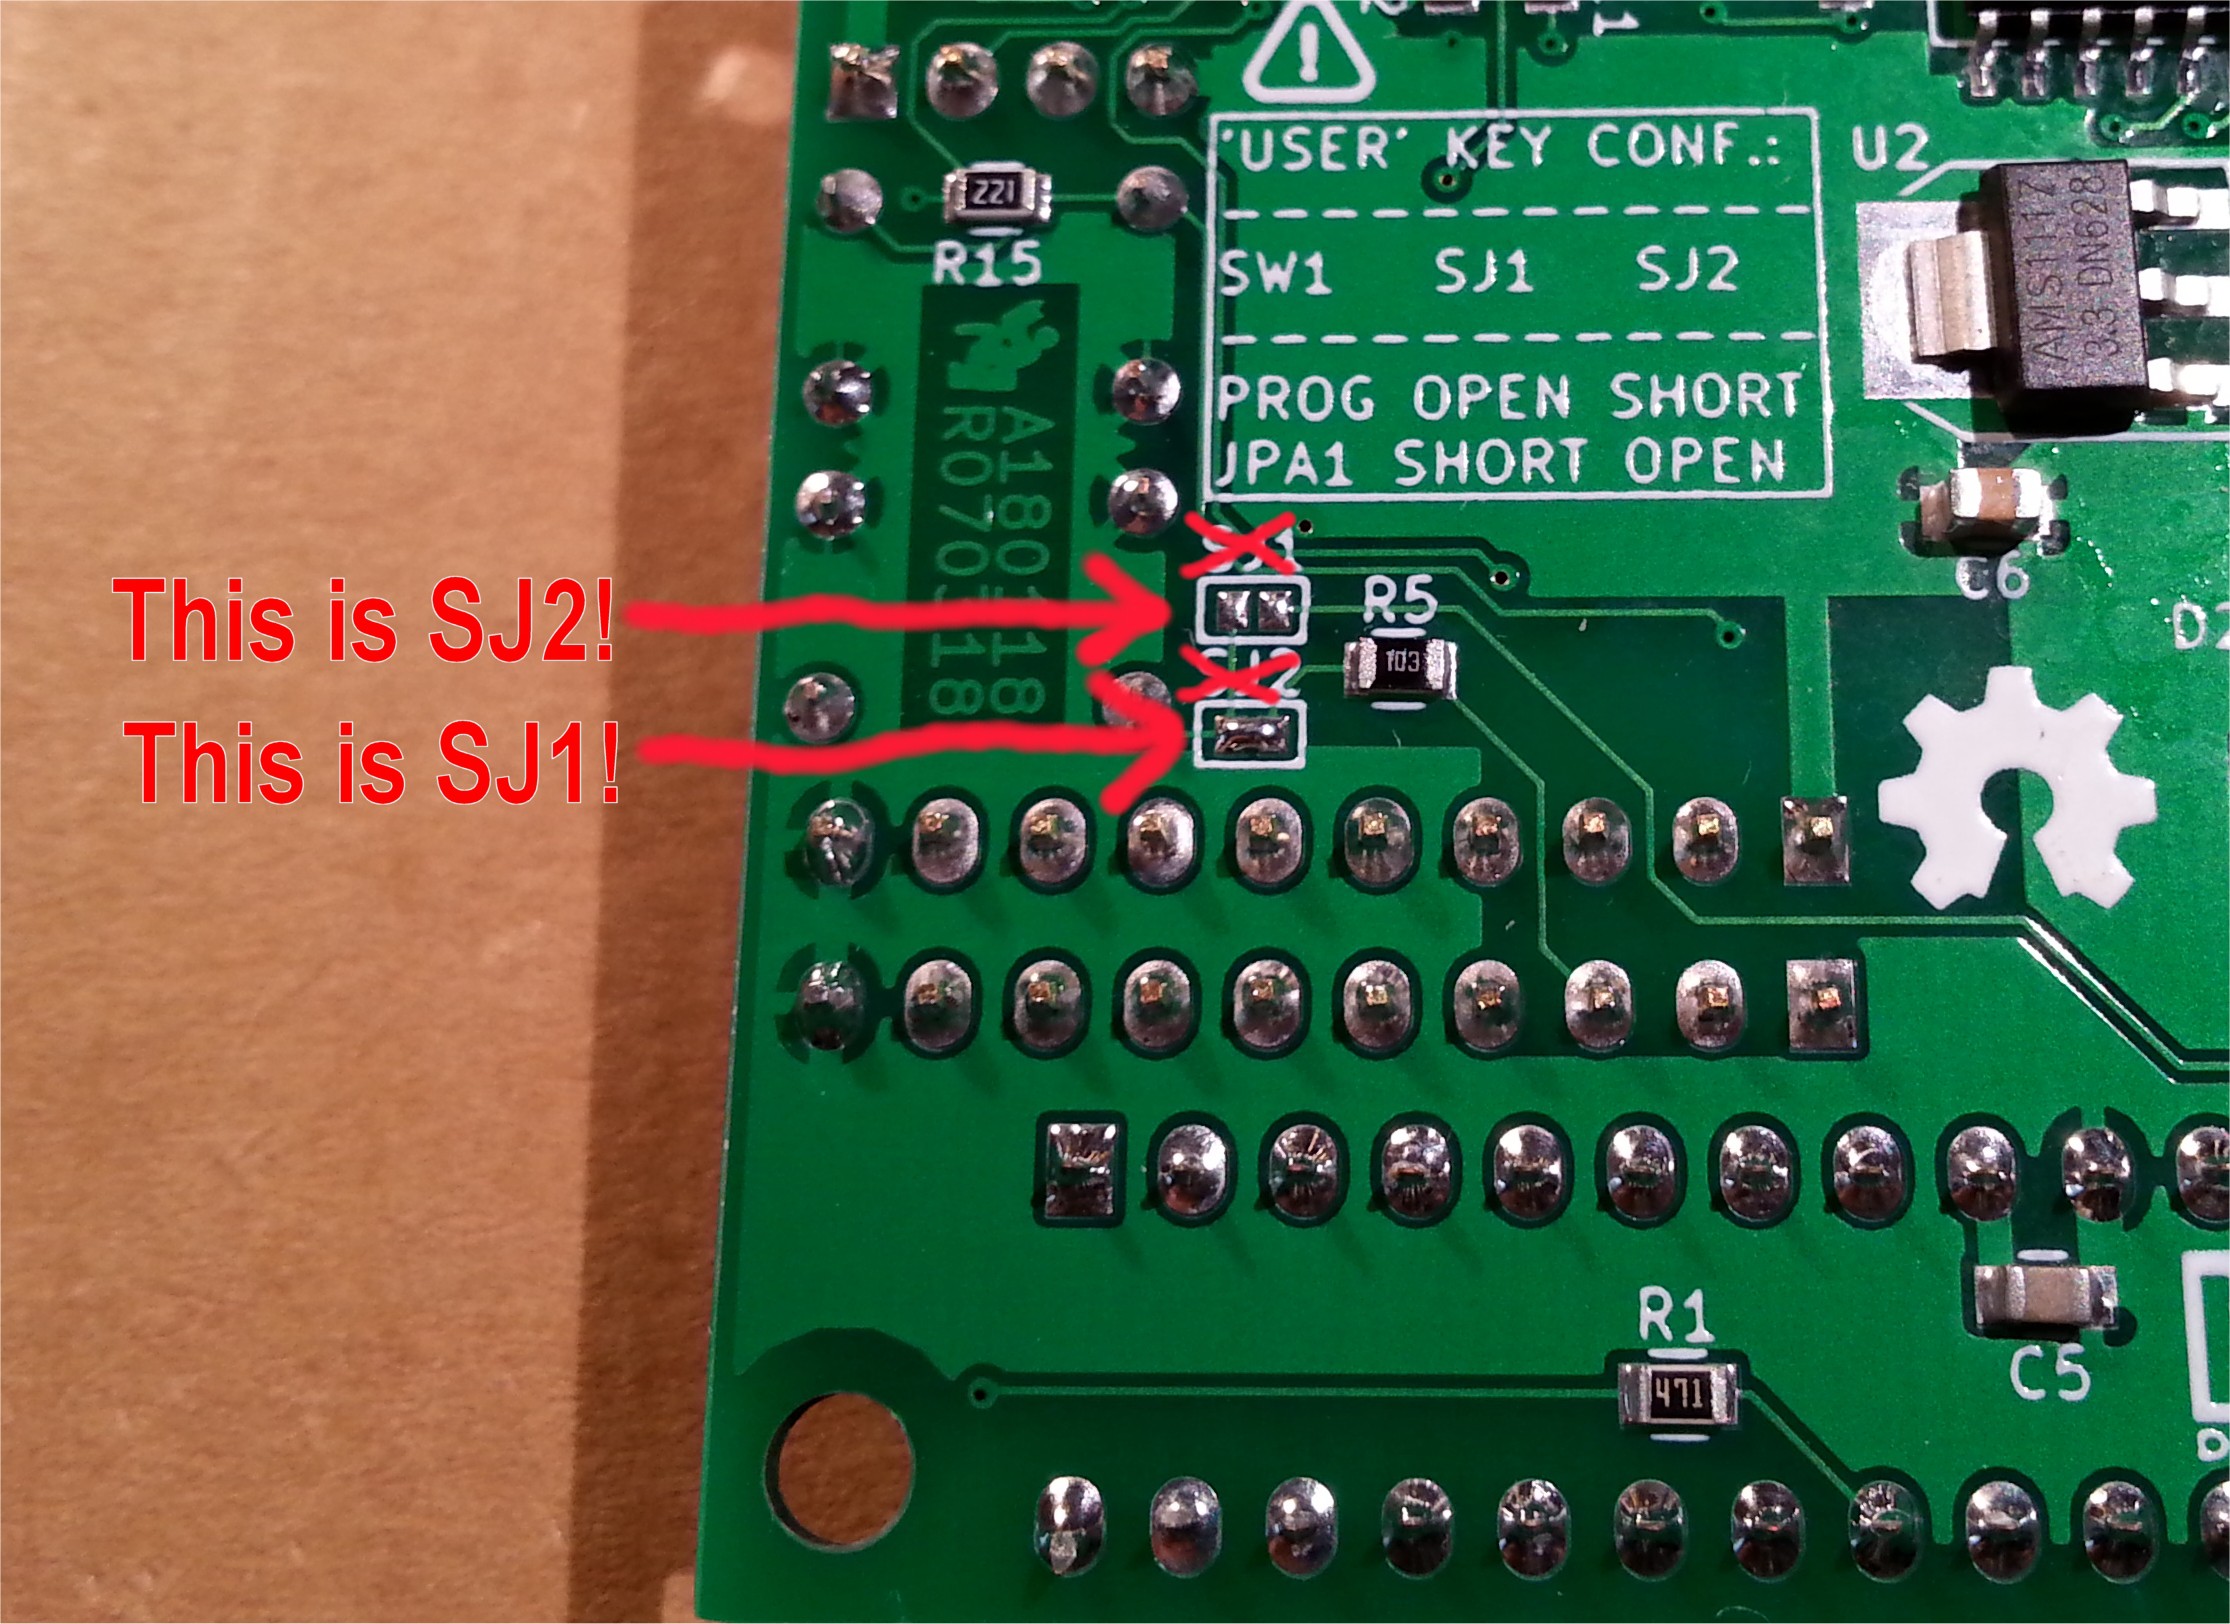
Note that the references SJ1 and SJ2 on the PCB are swapped. The photo shows the right position.
The table written near the two solder jumpers shows the two possible configurations.
In the previous photo the User key is configured (SJ1 shorted) to be connected to the GPA1 pin of the GPIO expander (see the schematic).
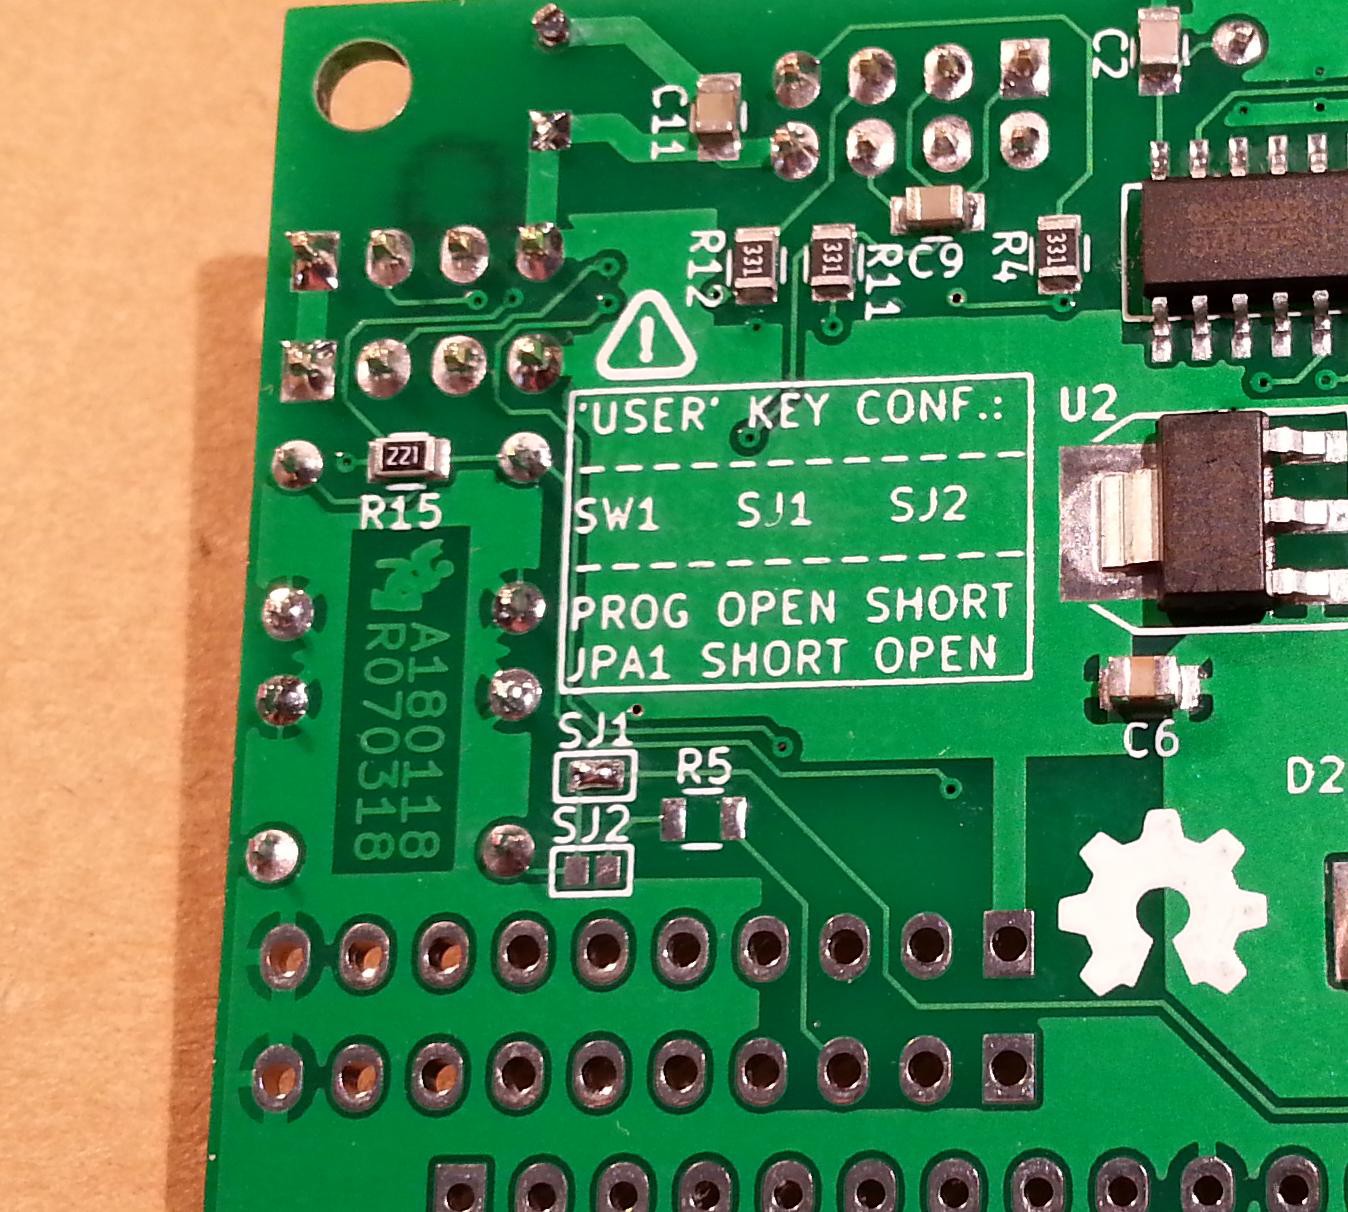
In the following photo the User key is configured to be connected to the ESP-01 GPIO0 pin (SJ2 shorted). In this case this is the only choice because the GPIO expander is not populated on the PCB:
Discussions
Become a Hackaday.io Member
Create an account to leave a comment. Already have an account? Log In.