 Michael Graham
TLDR: Physical Design hardened, turning on SW features. Kickstarter moved to November to focus on updating documentation & sharing everything!
New stuff since my last update:
*World Makerfaire + Makerfaire PDX events: I love meeting fellow makers, lots of awesome and skilled people bring amazing toys to geek out on at these events! And as always I walk away feeling like the future is bright with so many smart kids interested in making things and science in general. My toy set was well received by my target audience of parents and educators so that's encouraging too!

*Mug-O-Matic Gcode drawing algorythms are hardened and I am reaching the limit of what I think is achievable with this technology :) Ive discovered that drawing lines as a series of 0.5mm spaced dots will end up appearing as solid lines and it greatly improves accuracy because the servos dontd have to make small moves under load!d
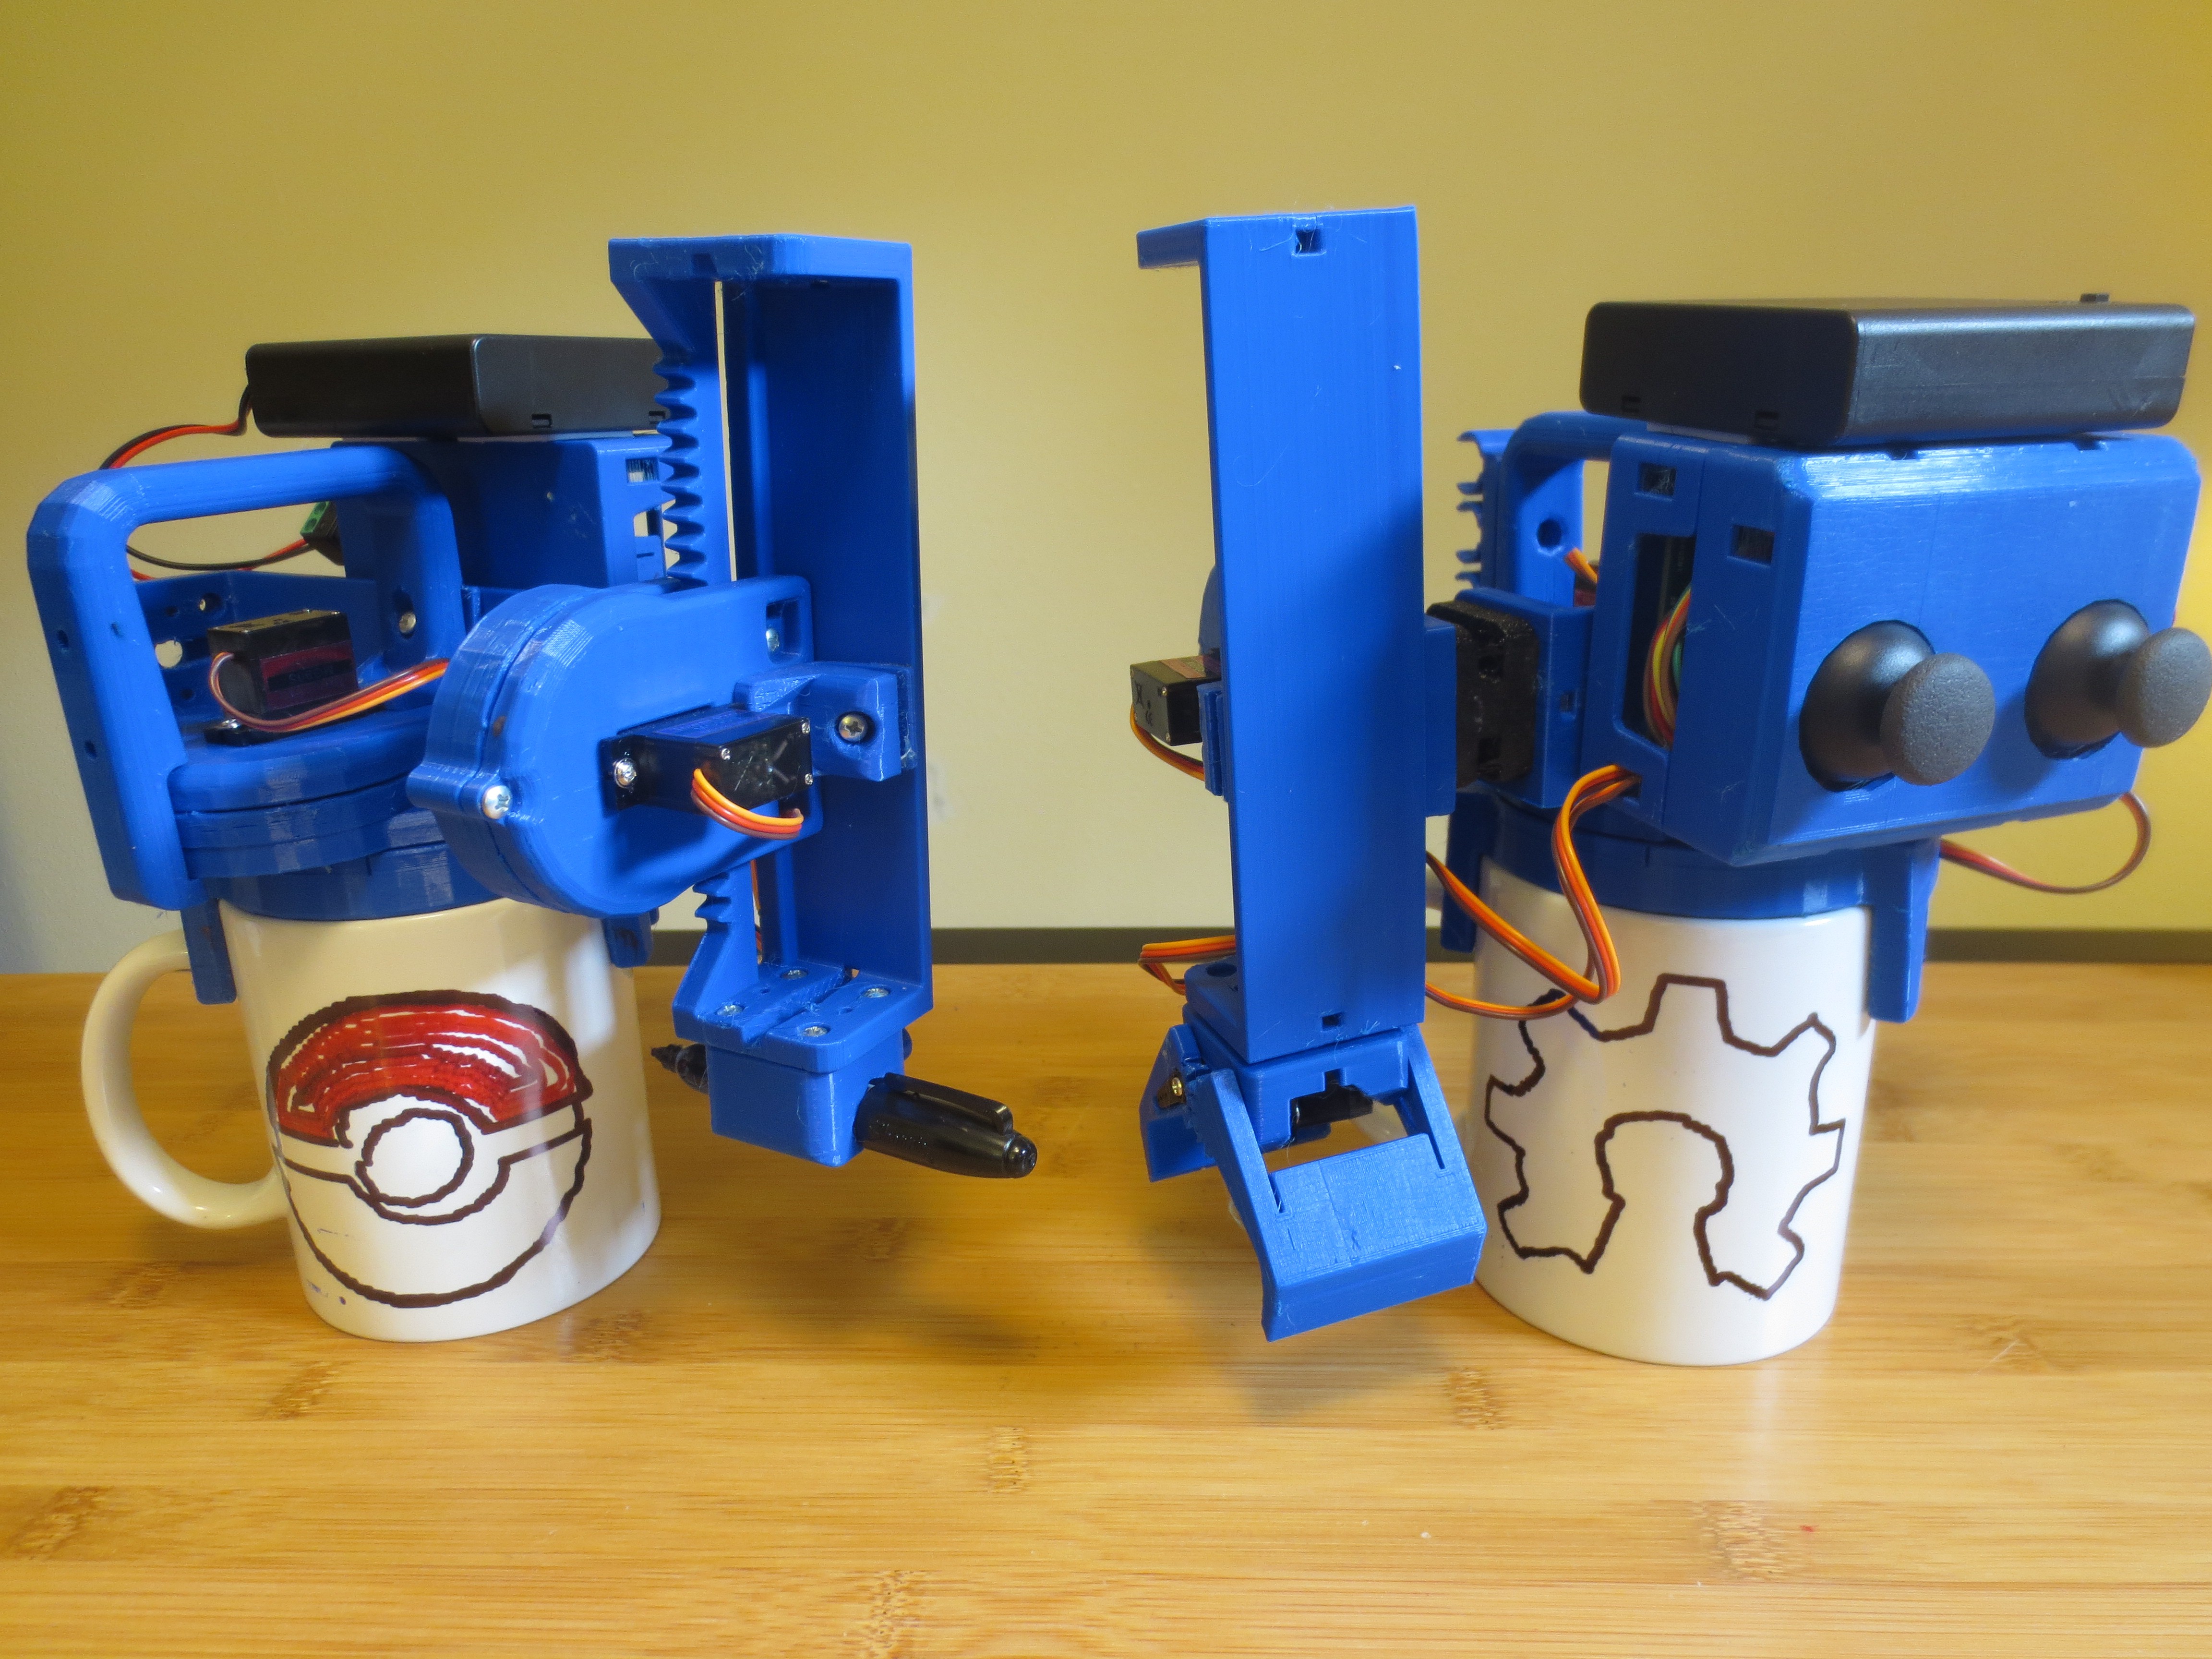
At Left is 'Basic kit', At Right is 'Basic + Expansion Kit'
PokeBall GO! You can draw with multiple colors if you set it up as two drawings & change the tool. The repeatability of this thing surprises even me!! (it traced the perimeters twice)
*Programming Updates: Ive gotten the bluetooth code & Dual joystick controls turned on too! Video of this thing in action here: https://www.facebook.com/michael.p.graham/videos/10156037951901379/
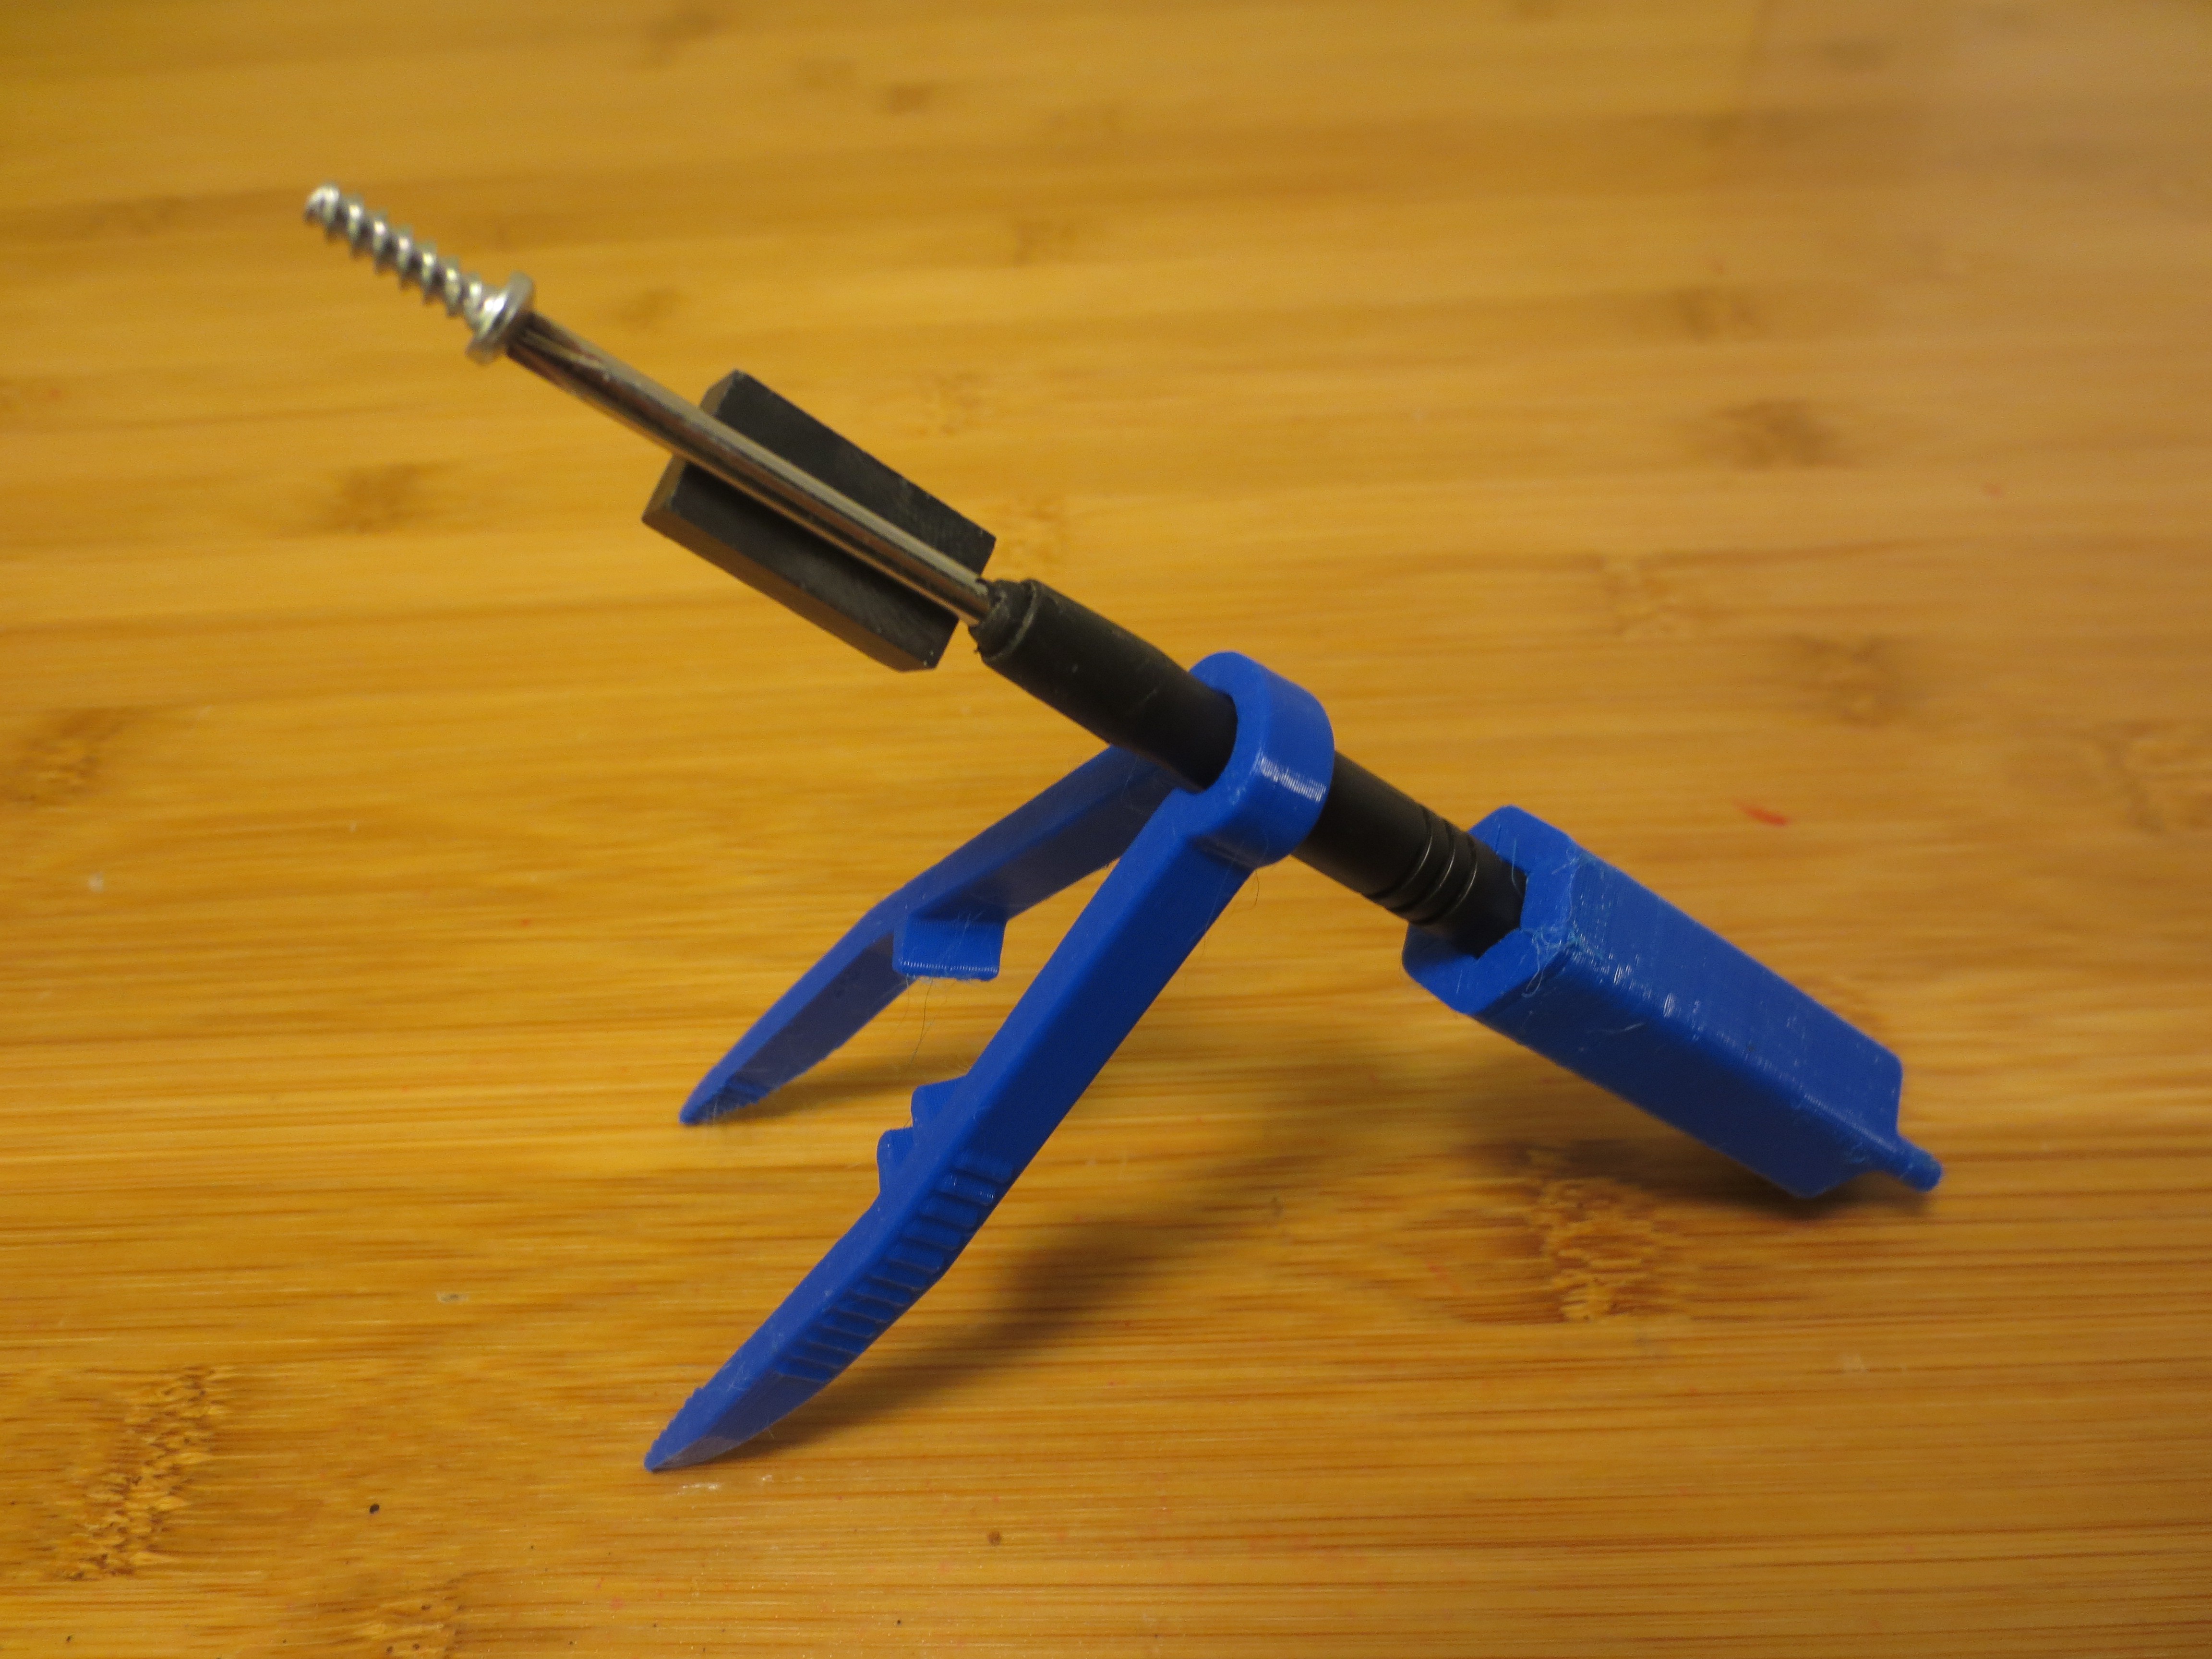
I wanted to take a second to show off my attention to detail here. The pic above is ALL the tools needed to assemble a TinyCNC. There is only one type of screw used everywhere, and the magnet keeps it attached to your driver to make it easy to handle. The screwdriver has a removable handle which also presses the servo horns on. And the tweezers are for routing cables and double as a ratchet-like handle attachment for the screwdriver :)
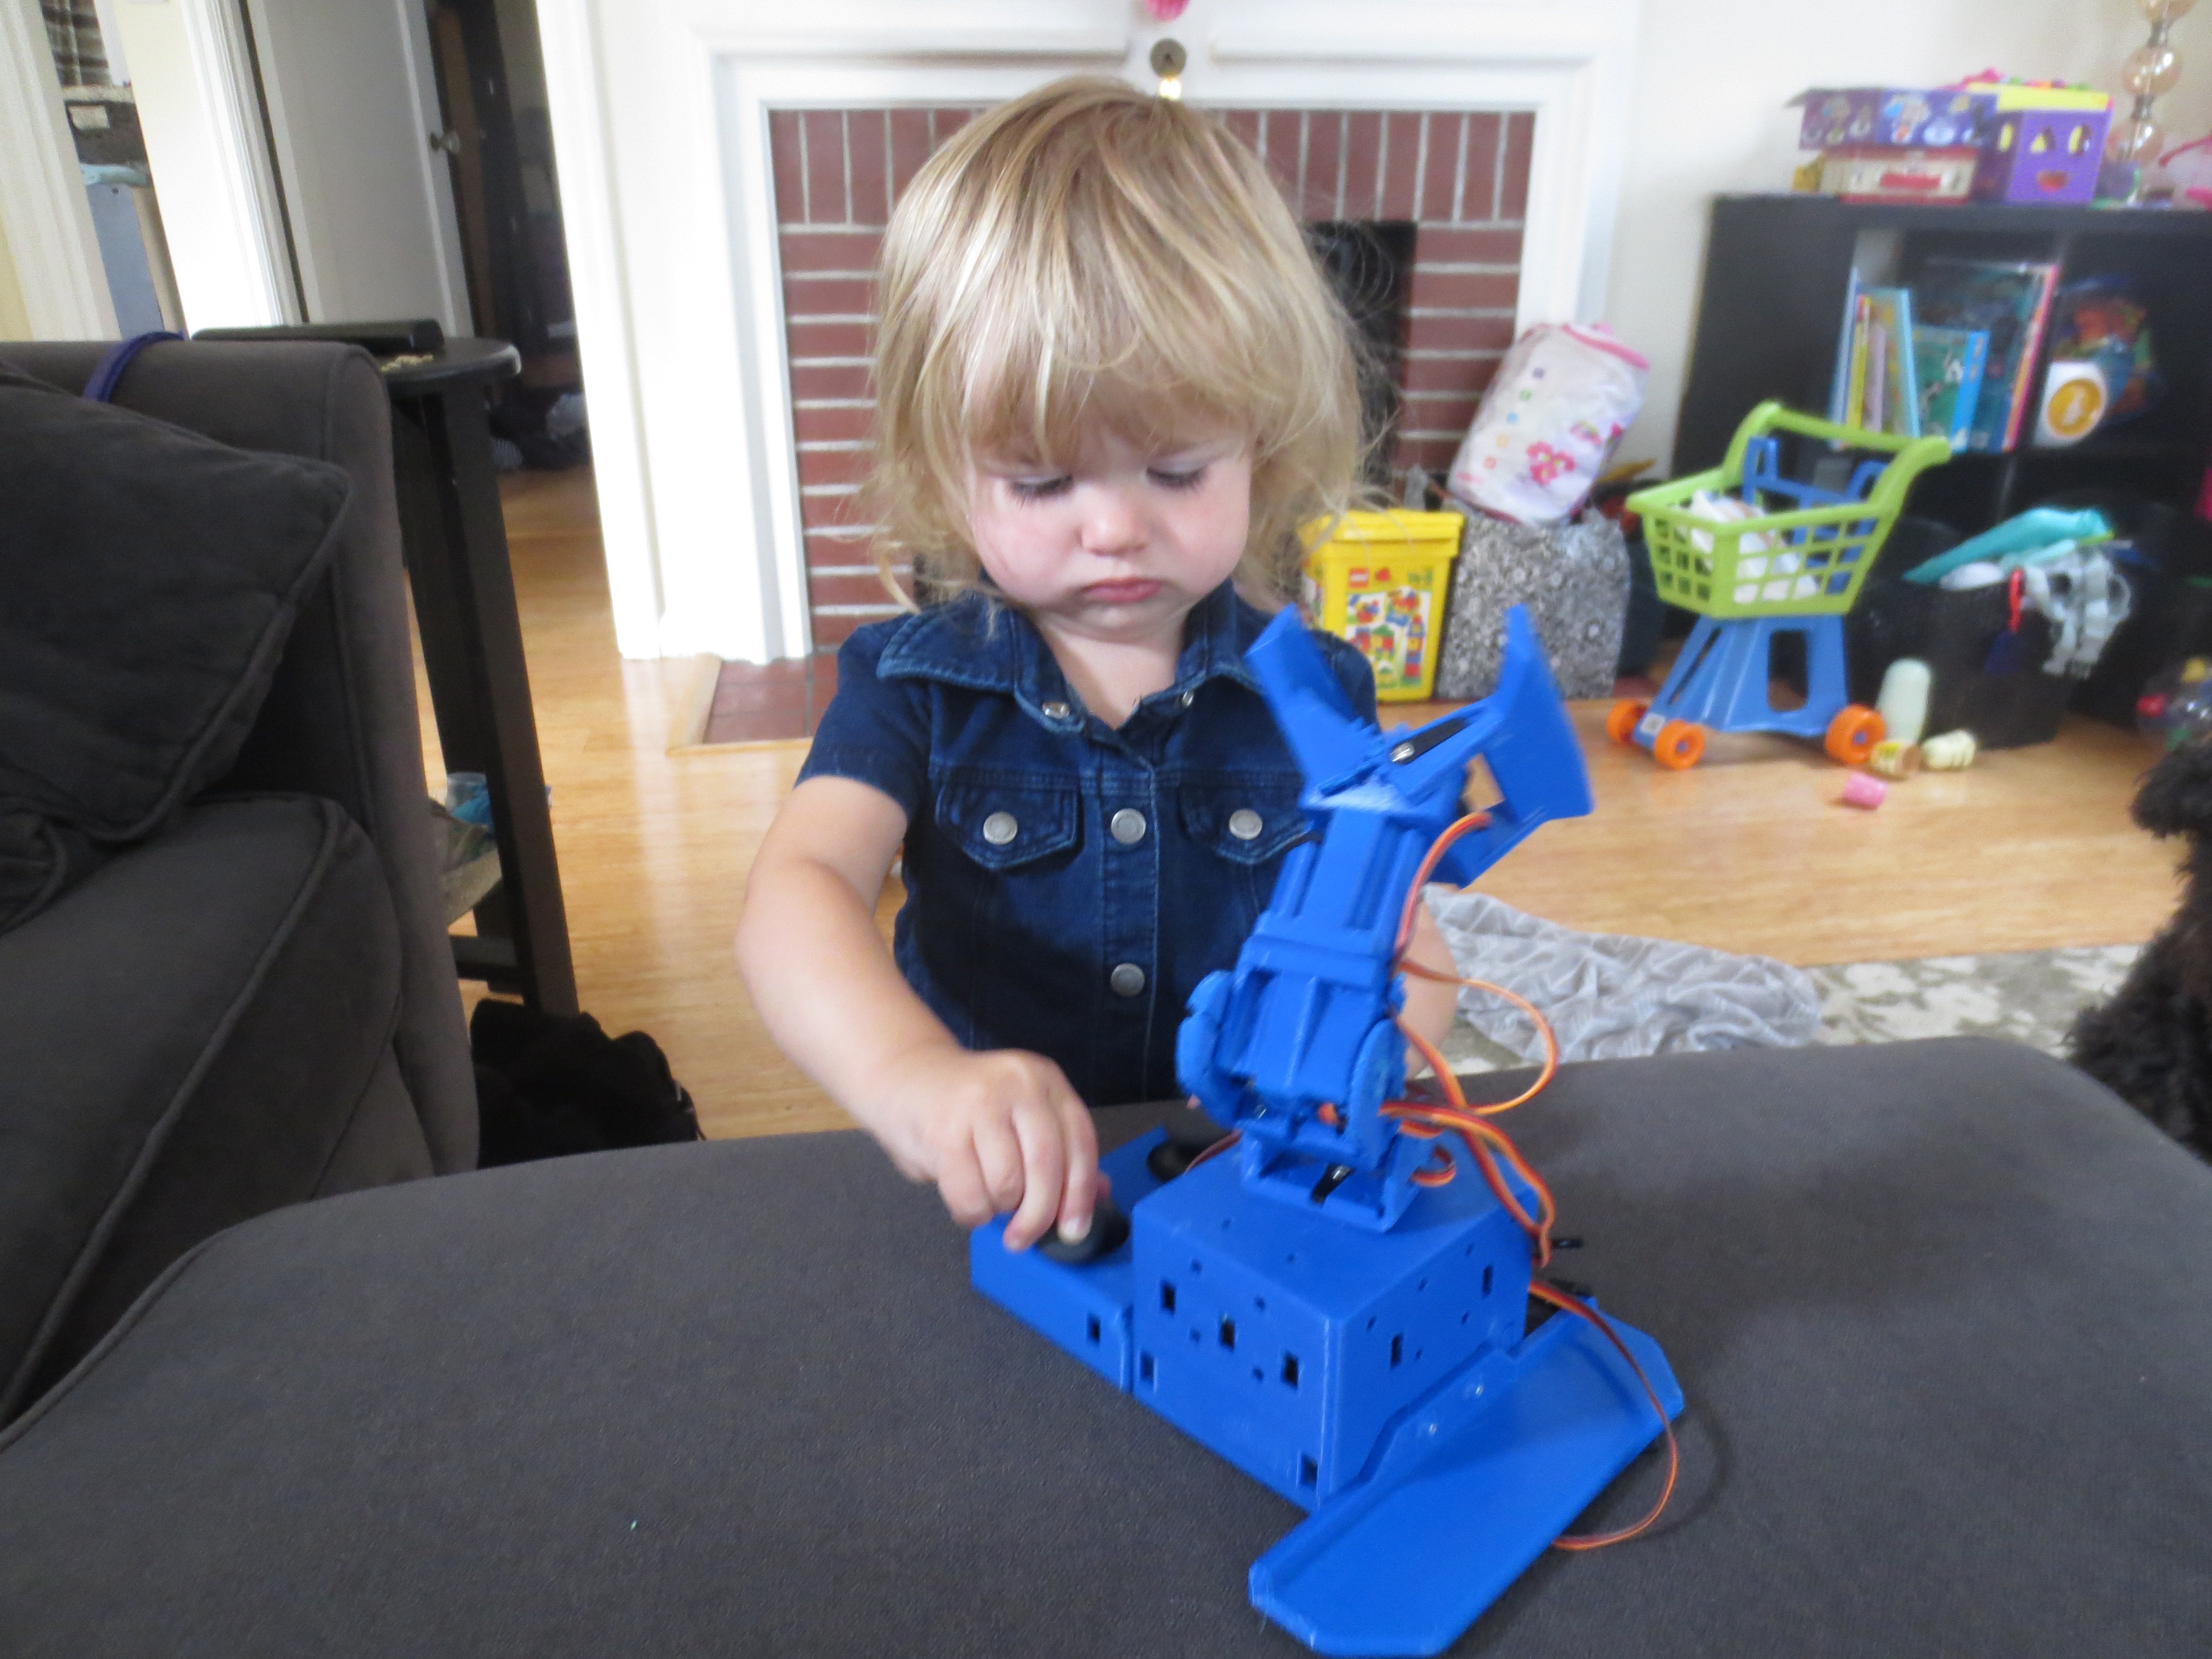
My favorite person playing with my favorite toy!
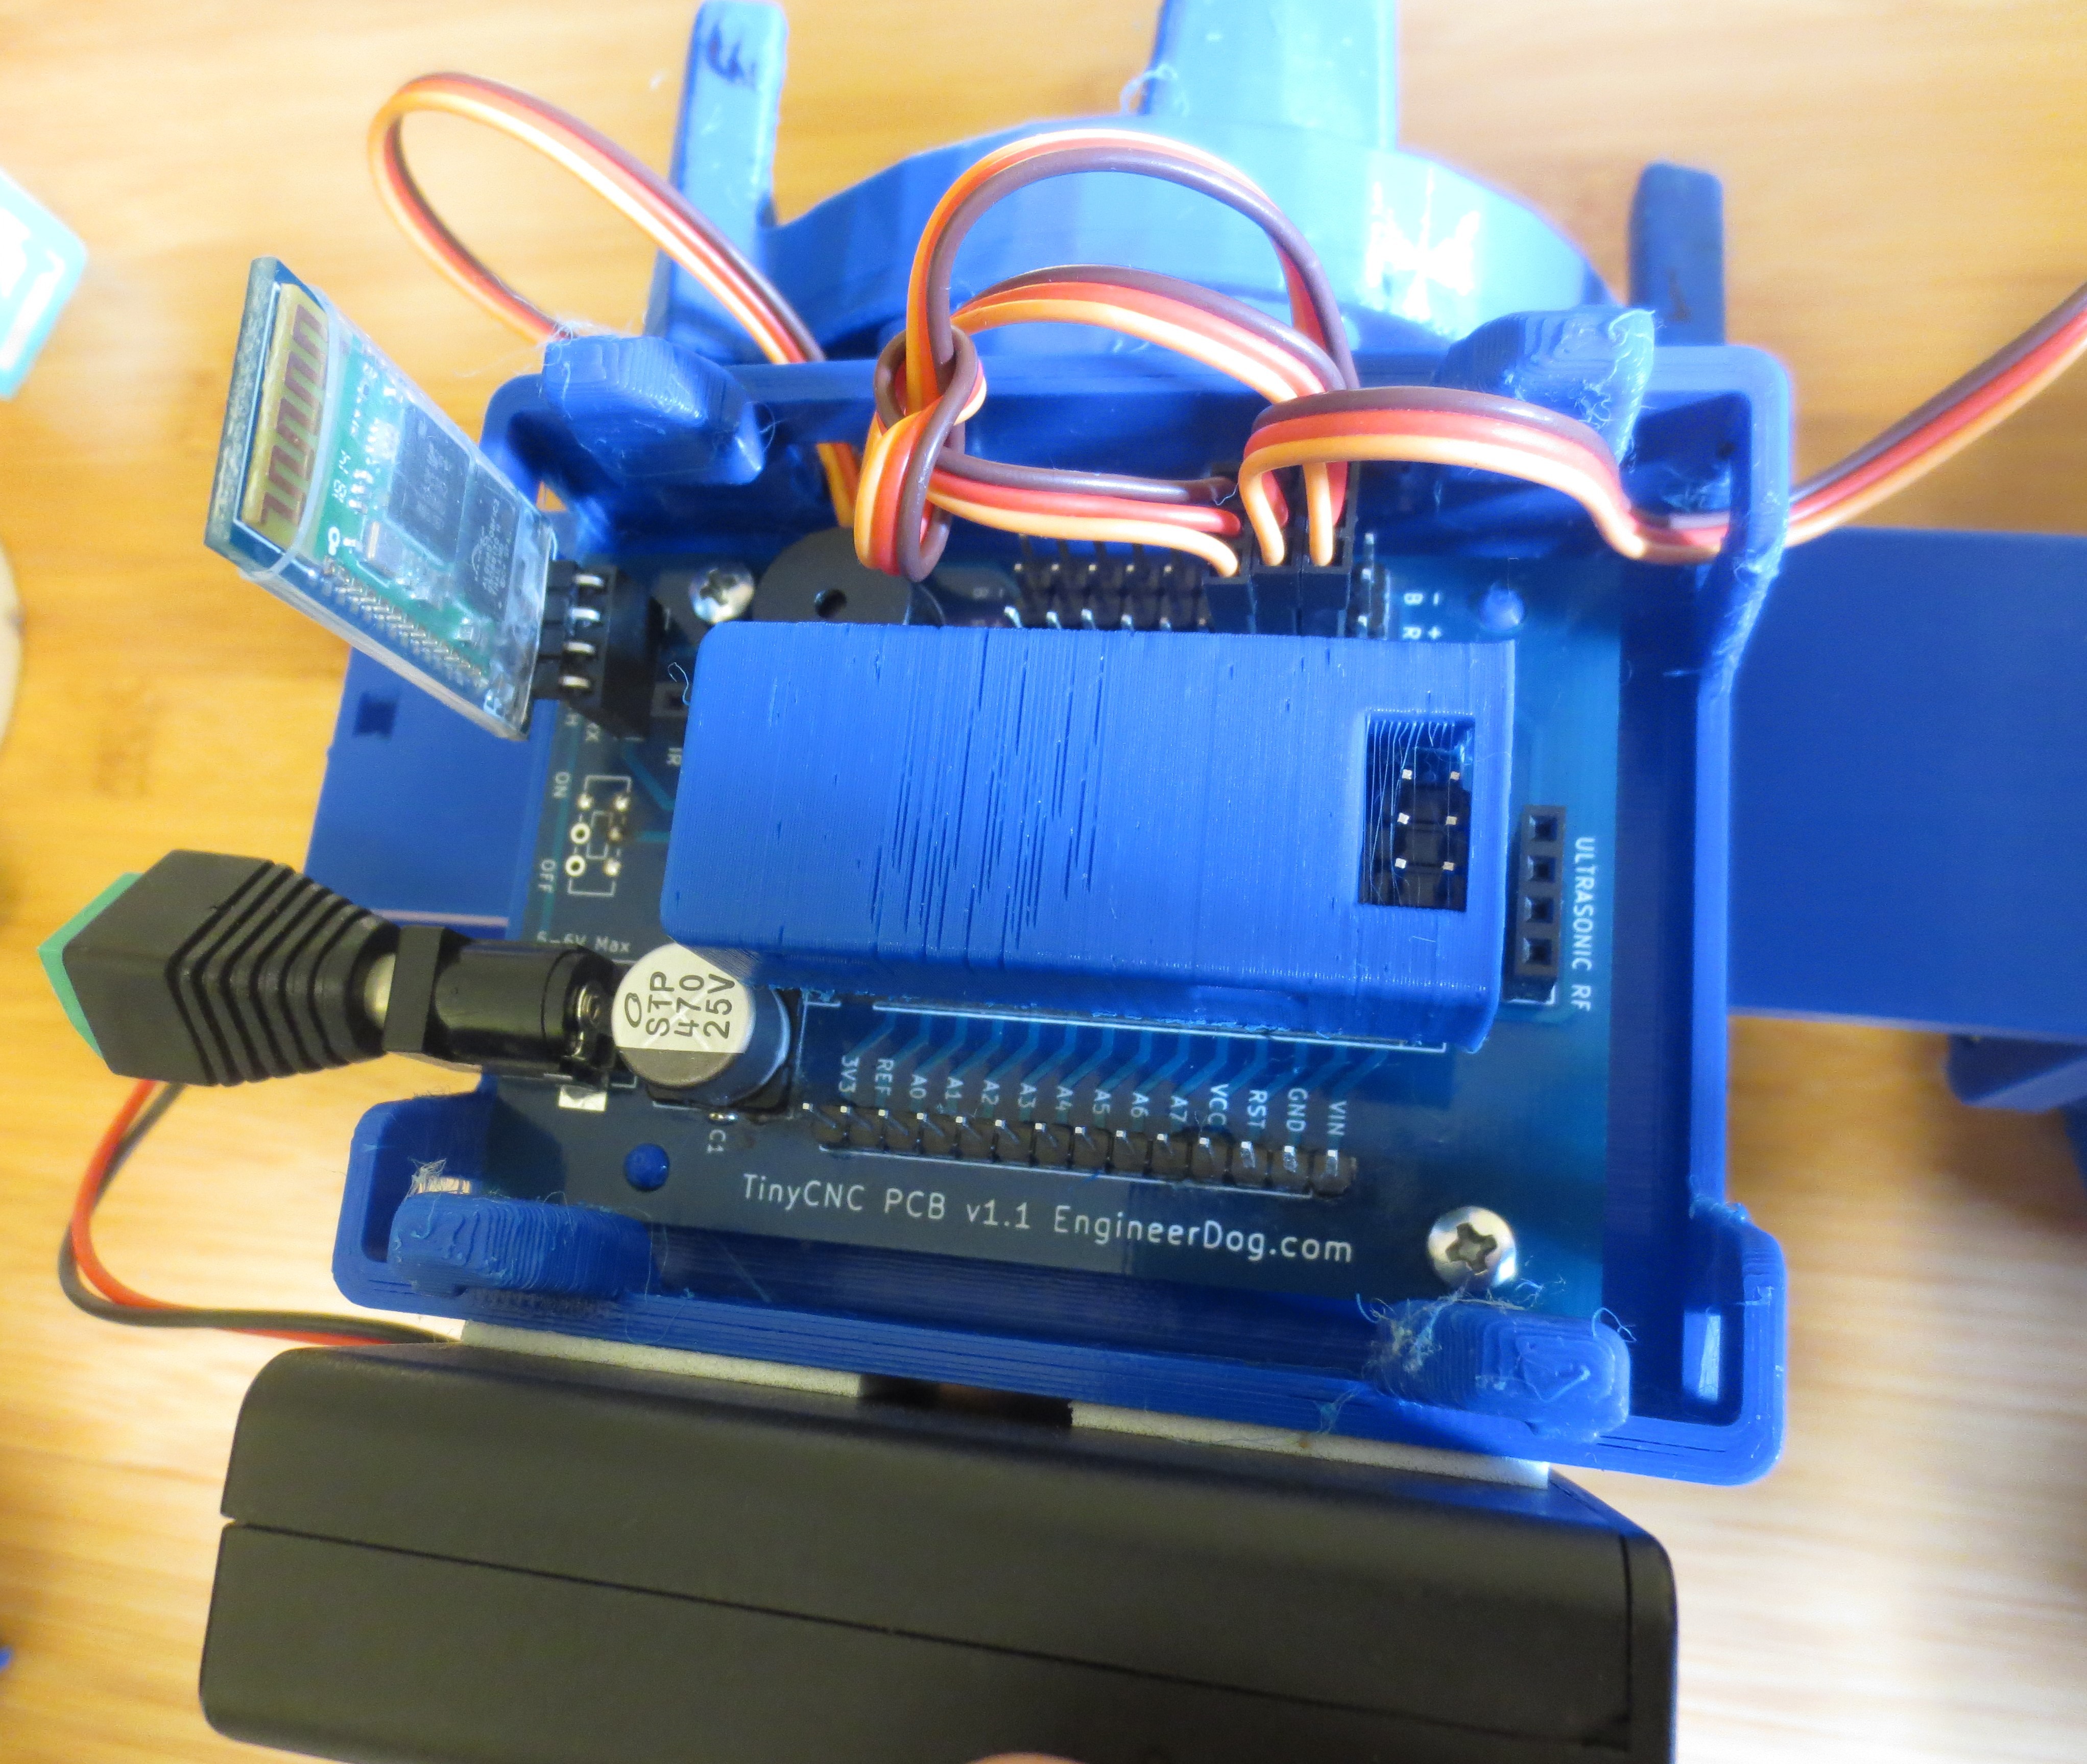
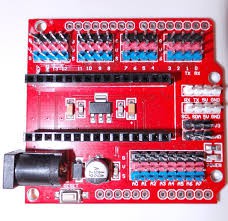
And finally, Showing off the customized PCB. Originally I was going to use the ubiquitous red colored Nano Breakout from China but I learned that even though its cheap, it is too limiting! The servos are driven THROUGH the nano's 5V output so it is limited on current & voltage in that way.
TinyCNC PCB is MUCH better than ol' red board. Note that this work is derived from MePed pcb by Scott Pierce at SpierceTech. He shared his work open source and I picked it up and adapted it to better suit my needs and per his license am also sharing it open source.
*My contributions: Additional pins for attaching 2 joystick controls. Added a Buzzer. Shifted components around to suit my container. Moved the bluetooth headers to block the nano's usb port when it is installed so the user doesnt try to have usb & bluetooth on at the same time (which doesnt work!) Removed i2C & ESP232 connections, & 3.3v power supply components as a cost reduction. Removed the on/off switch as a cost reduction. Updated traces to minimize the path resistance going to the servos to squeeze every last drop of power!
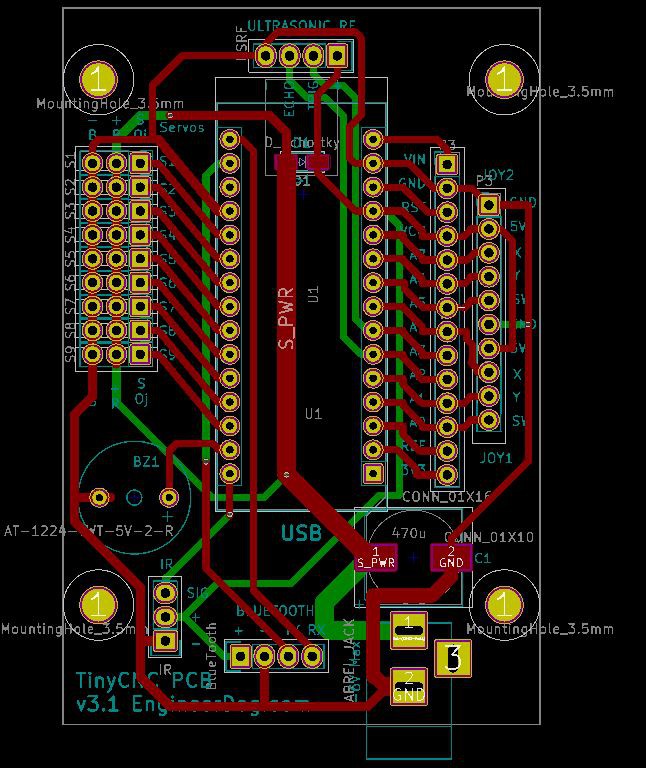
This PCB runs the servos directly rather than through the nano. Not only does this give them more power, but there is a safety benefit. When you plug in just the USB cable to the china board it will attempt to drive the servos while you program it, the USB can only provide ~500ma current so you better hope those servos arent stalled! This PCB separates the two so it wont move while you try to program it!
Also of interest is that Scott designed the board to run just off 6v power input. Which means he had to get clever and use a diode to limit the input voltage to 5V +/- 0.5V and power the nano through its VCC. The risk was selecting the desired voltage drop so that the board doesnt brown out or burn out if you connect different types of batteries to it.
Also of note, in the interest of squeezing out power Ive learned that the servos power output is a square function of their operating voltage, so every little bit extra goes a long way! I power Mug-O-Matic with 4x AA Energizer Ultimate Lithium batteries. They arent rechargeable but they last a long time and dont sag on voltage as they age so they are totally worth it over alkaline or Nickle-type rechargeable.
Discussions
Become a Hackaday.io Member
Create an account to leave a comment. Already have an account? Log In.