Rudolph
-
Video!
10/22/2018 at 08:21 • 0 commentsWoot, the contest entry video is done and uploaded with almost 6 hours to spare! I'd like to thank the Academy... but they really didn't have anything to do with it. All thanks be to kiddo for handling the recording and then editing it all together at (near) the last minute.
-
Receiver example code
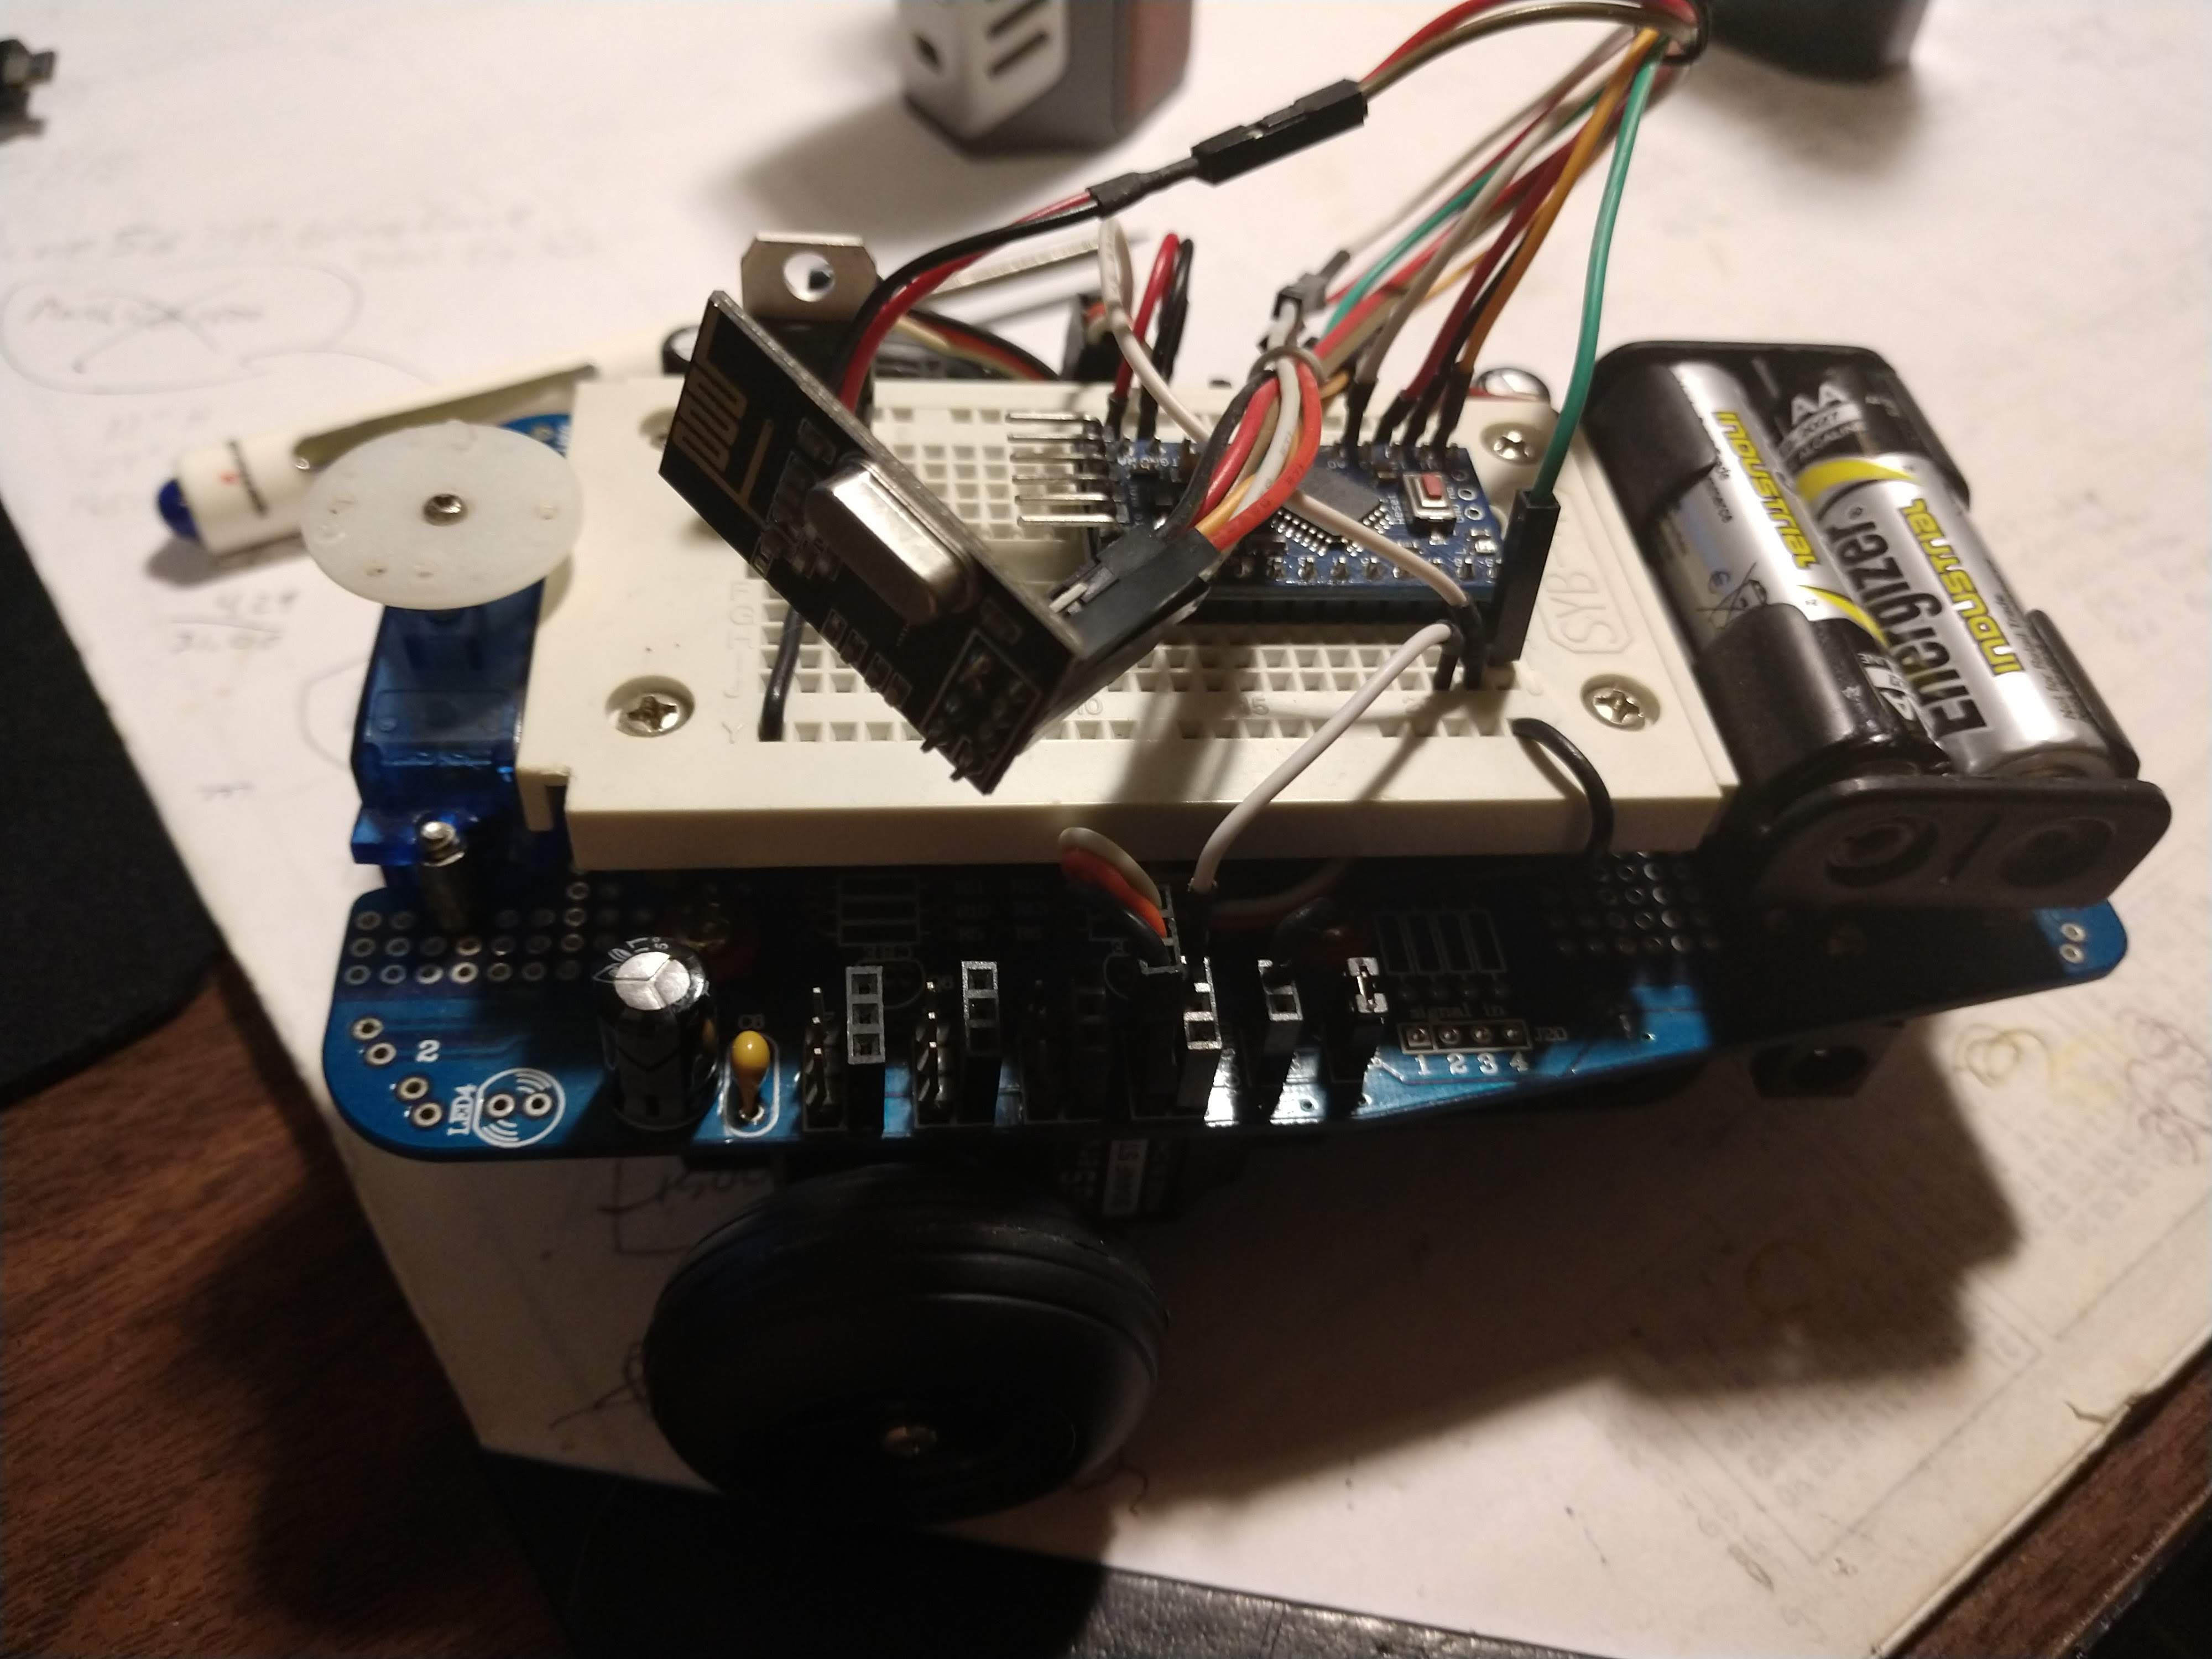
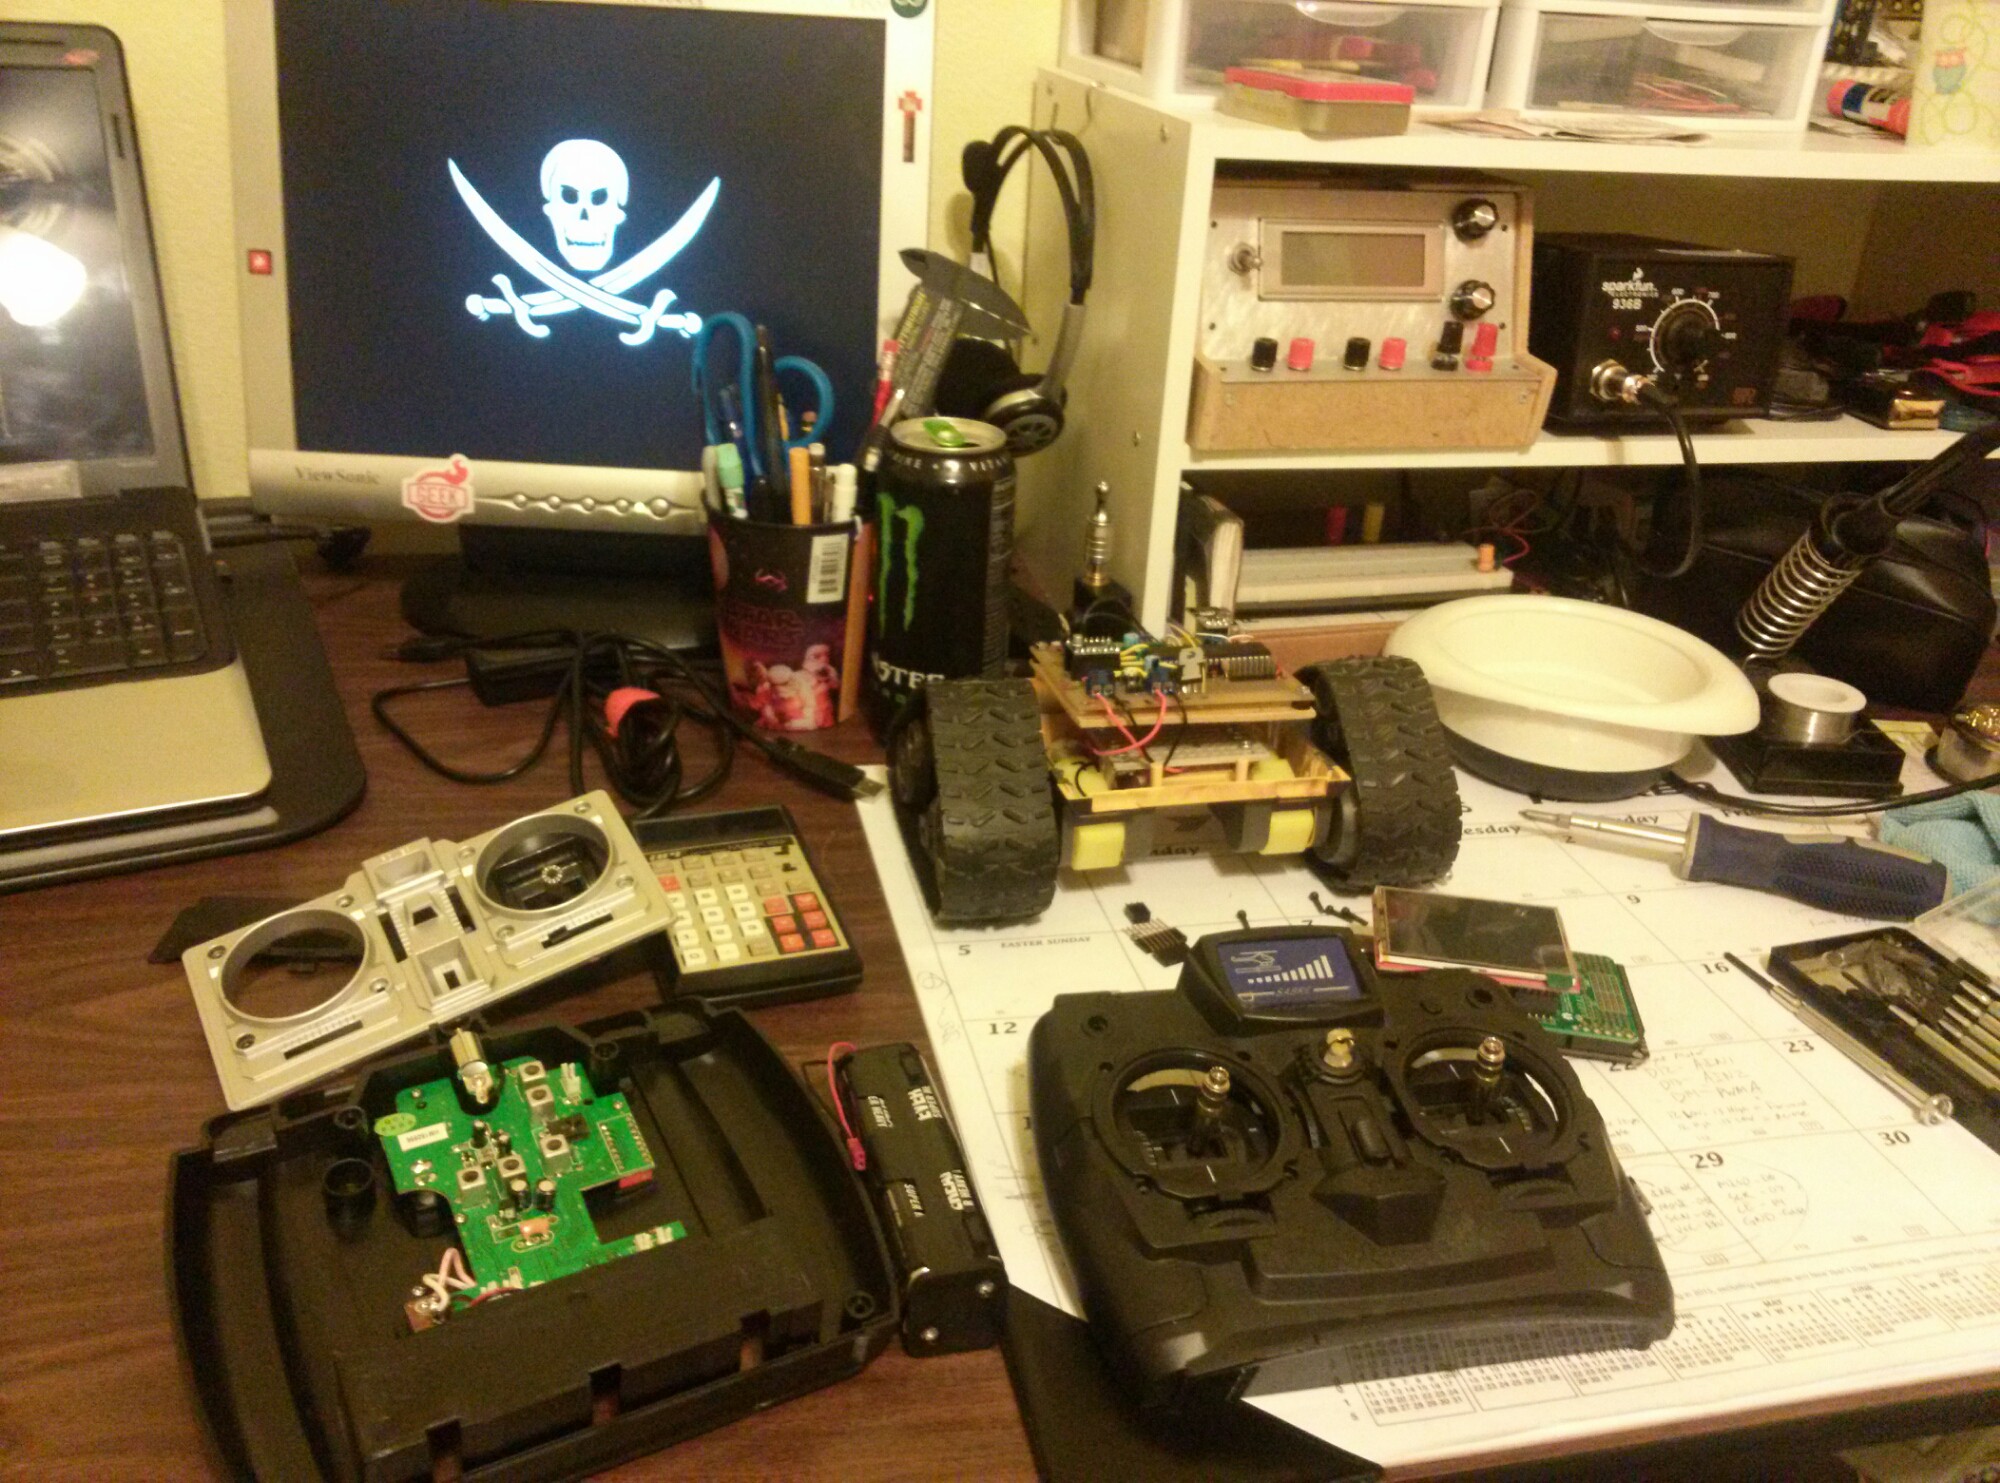
10/21/2018 at 07:49 • 0 commentsGot some more work done last night and tonight, resulting in working receiver code in the form of an example robot. I used the old Mr. General platform that's been kicking around for years, and a knockoff Arduino Pro Mini for brainz. You can see/grab the code at GitHub.
![]()
-
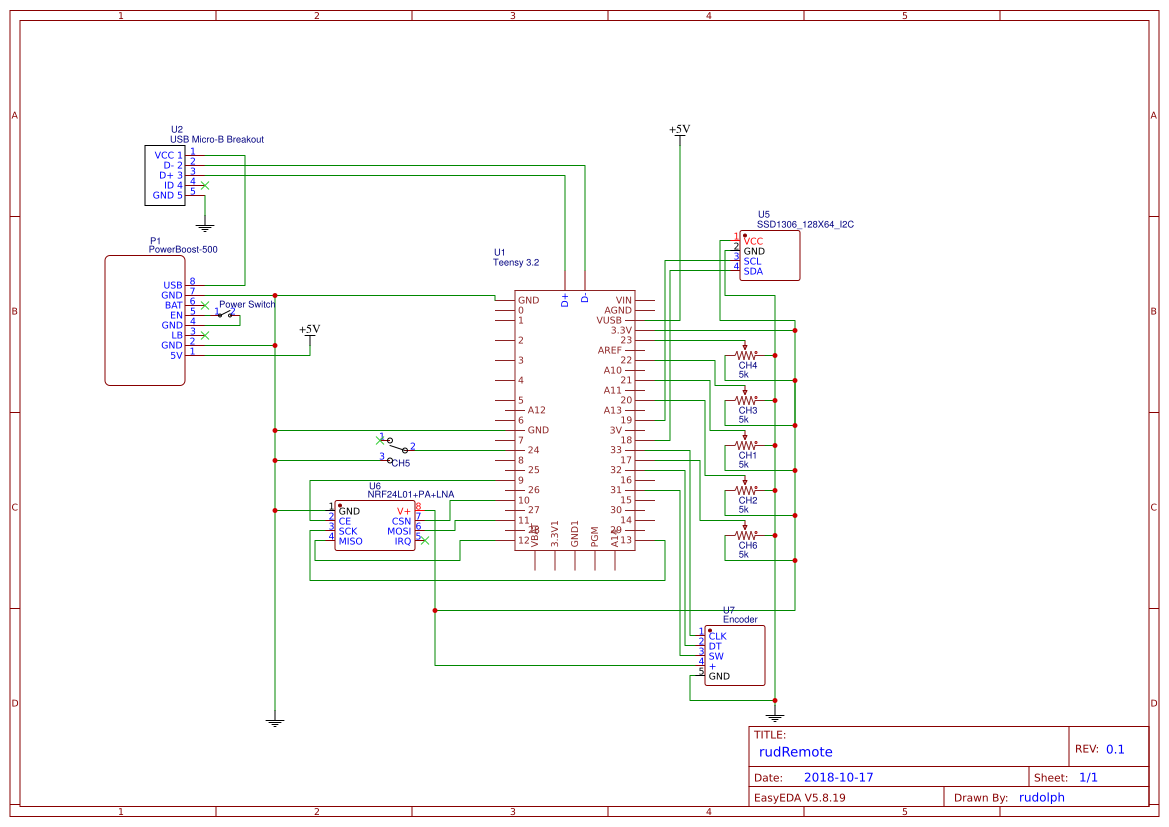
Schematic is done
10/19/2018 at 02:32 • 0 commentsTook me a while to get it done, but I finally knocked out a schematic for this thing. Part of why it took so long is that I spent a decent amount of time finding an online schematic maker to use on the Chromebook instead of just firing off Eagle on the computer. Then another bit of time to figure out just how to represent some of the parts... Still, a schematic of the project is finally available, and it can be found (and tweaked) via its EasyEDA project page.
![]()
(please forgive my lack of schematic skillz)
-
OLED, menu, flying thing
05/28/2018 at 12:19 • 0 commentsBeen noodling around with just how to do menus on this thing. I probably had 5 or 6 attempts before finally getting one that seemed right. At the moment it's a few placeholders and such, but the core functionality is there. When the remote is first turned on it shows the "choose a mode" menu to select between Robot Mode and Crazy Mode. After that, when in the main screen, clicking the encoder button takes it into menu selection. Here's a short video showing where it's at right now.
As you can imagine, Crazy Mode is what talks to the Crazyflie. Choose that one and the remote successfully sends flying commands to the 'copter. Again, doggo was not impressed with the sounds of the Crazyflie.
There's still plenty to be done. I really want to be able to set the sticks' min/max values from the remote itself instead of hardcoded (these old sticks seem to migrate a bit). And that info should be saved to EEPROM. Speaking of EEPROM, I also want to make it remember the last mode it was set to and default to that on power up instead of dropping to the Choose Mode menu at boot. While trying to come up with other things that should be menu-mo-tized I realized that the Teensy breakout board kit included a watch crystal for the Teensy's RTC. So I figure to add a clock (you can see the fake placeholder clock in the upper-right corner in the video). I also want to tap into battery power for a battery level icon, as well as figure out how to determine if it's plugged in and charging and show an icon for that instead of battery level.
-
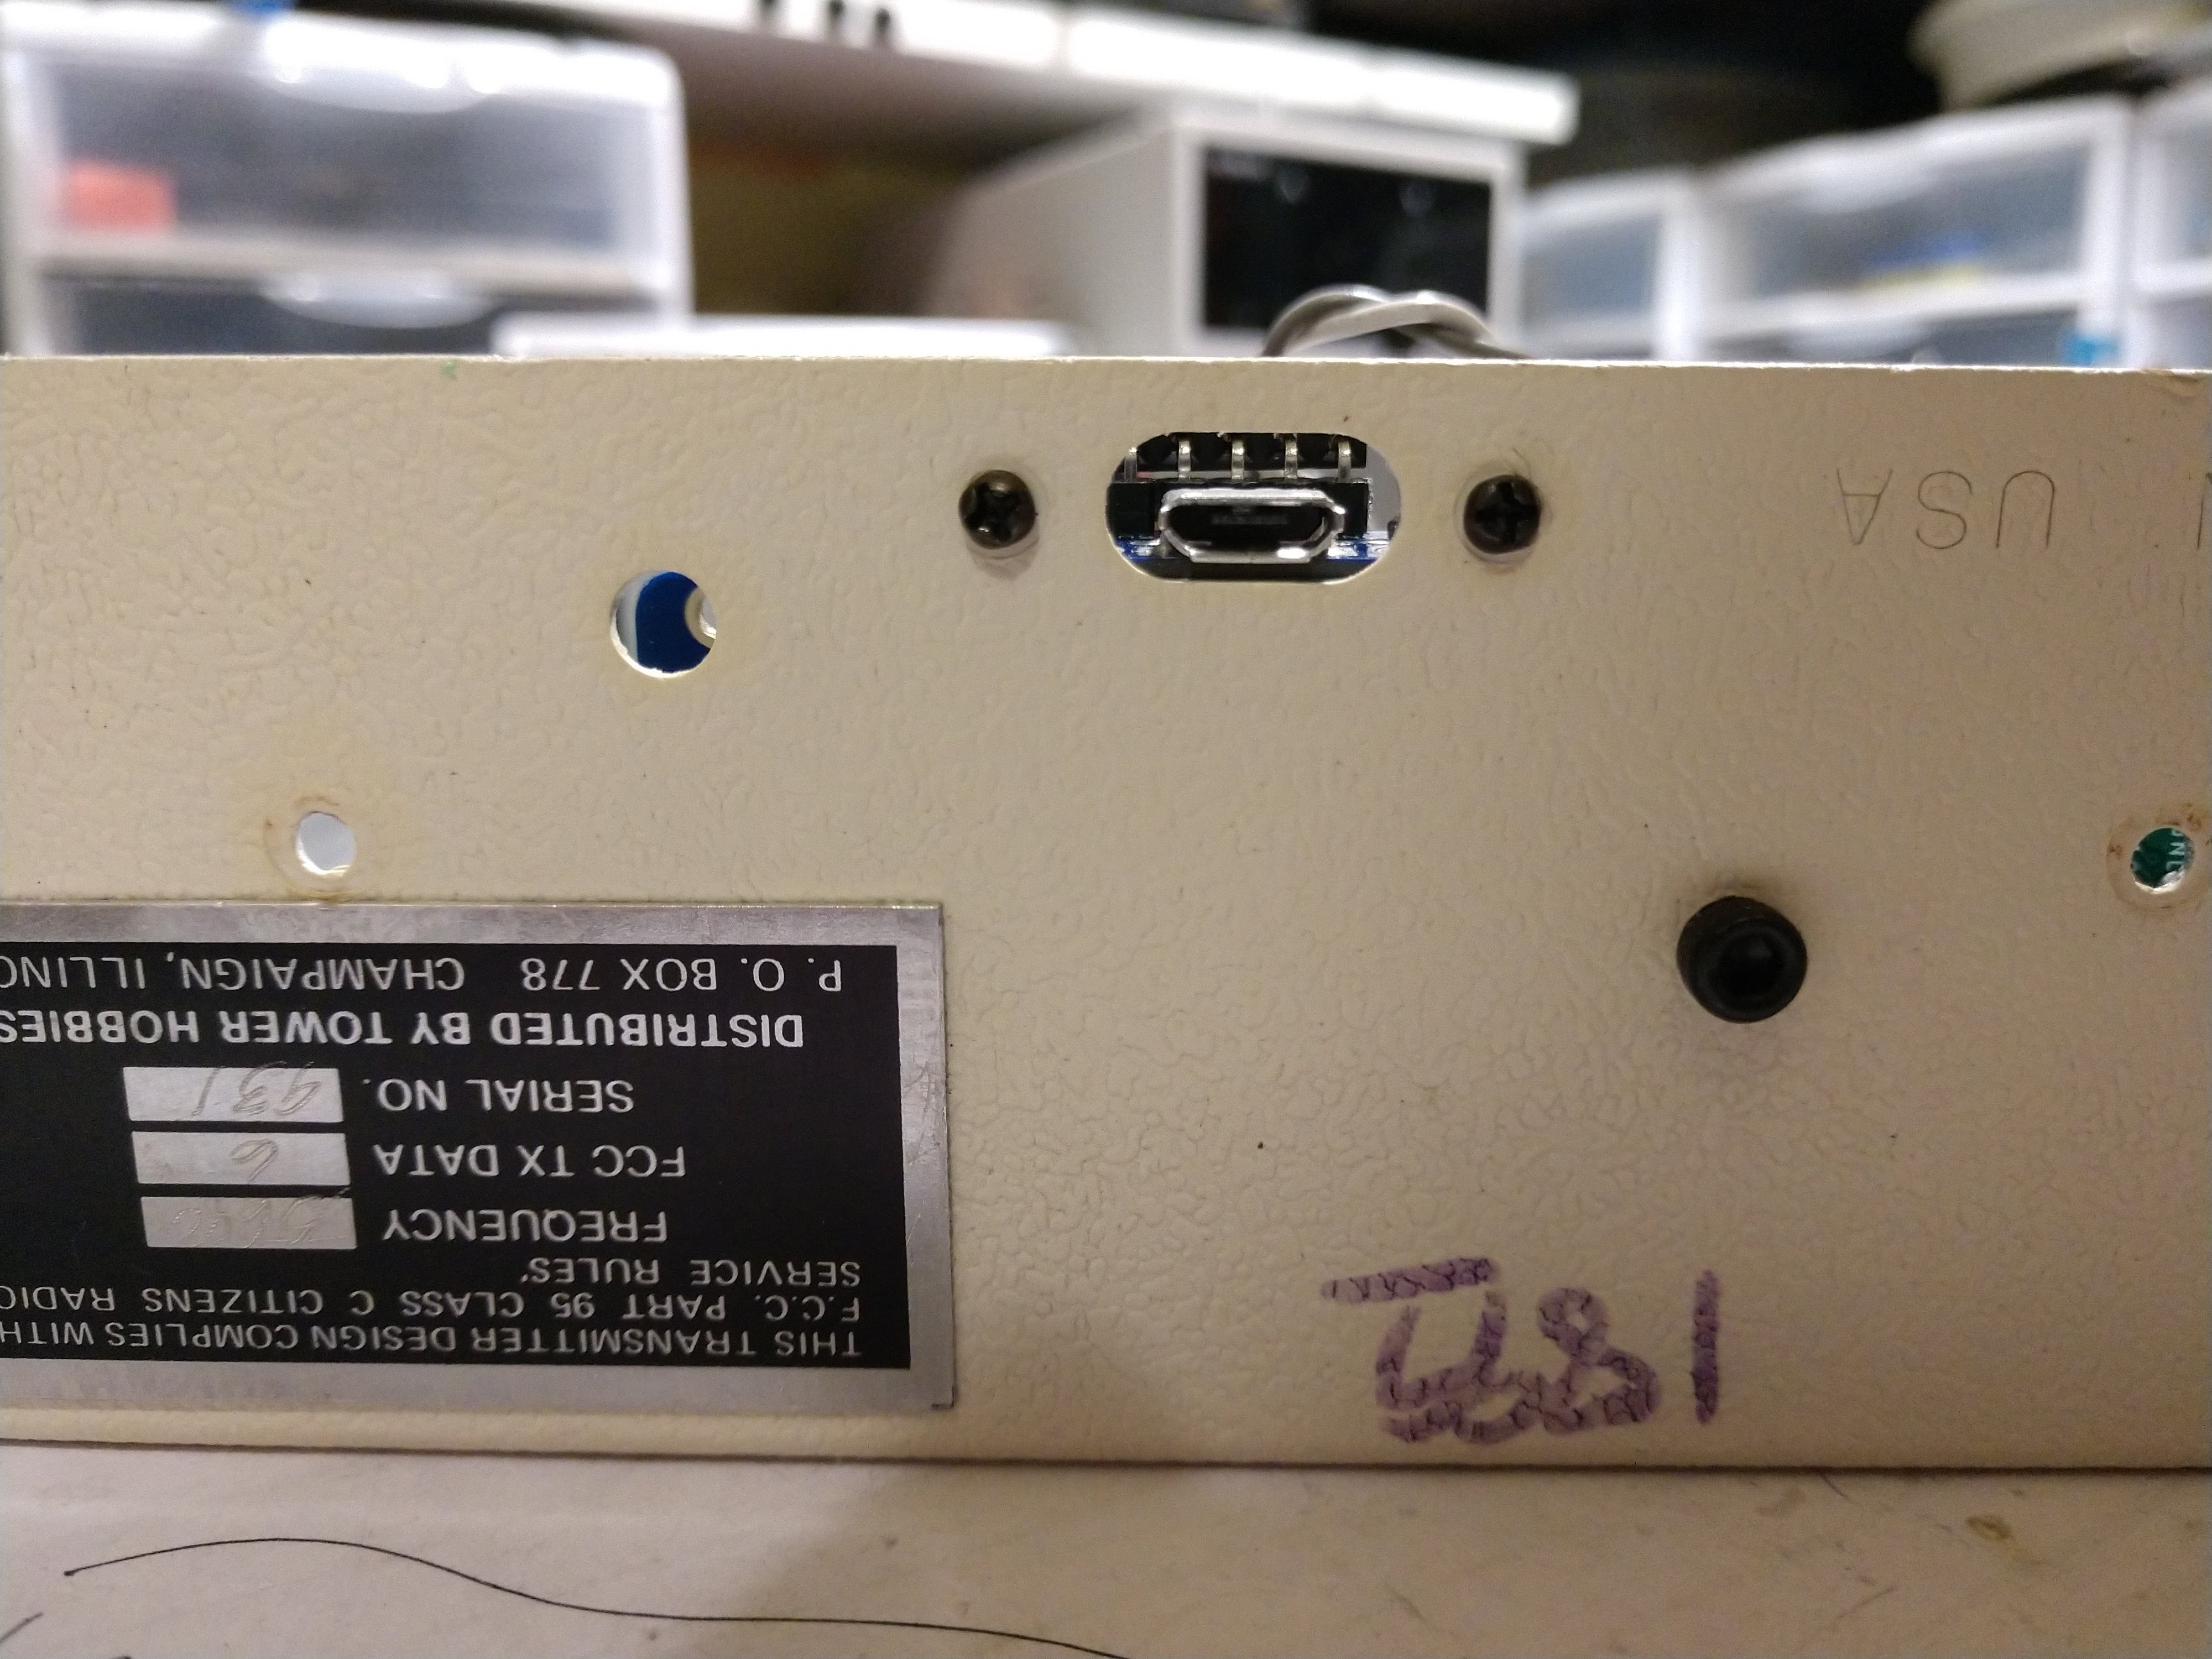
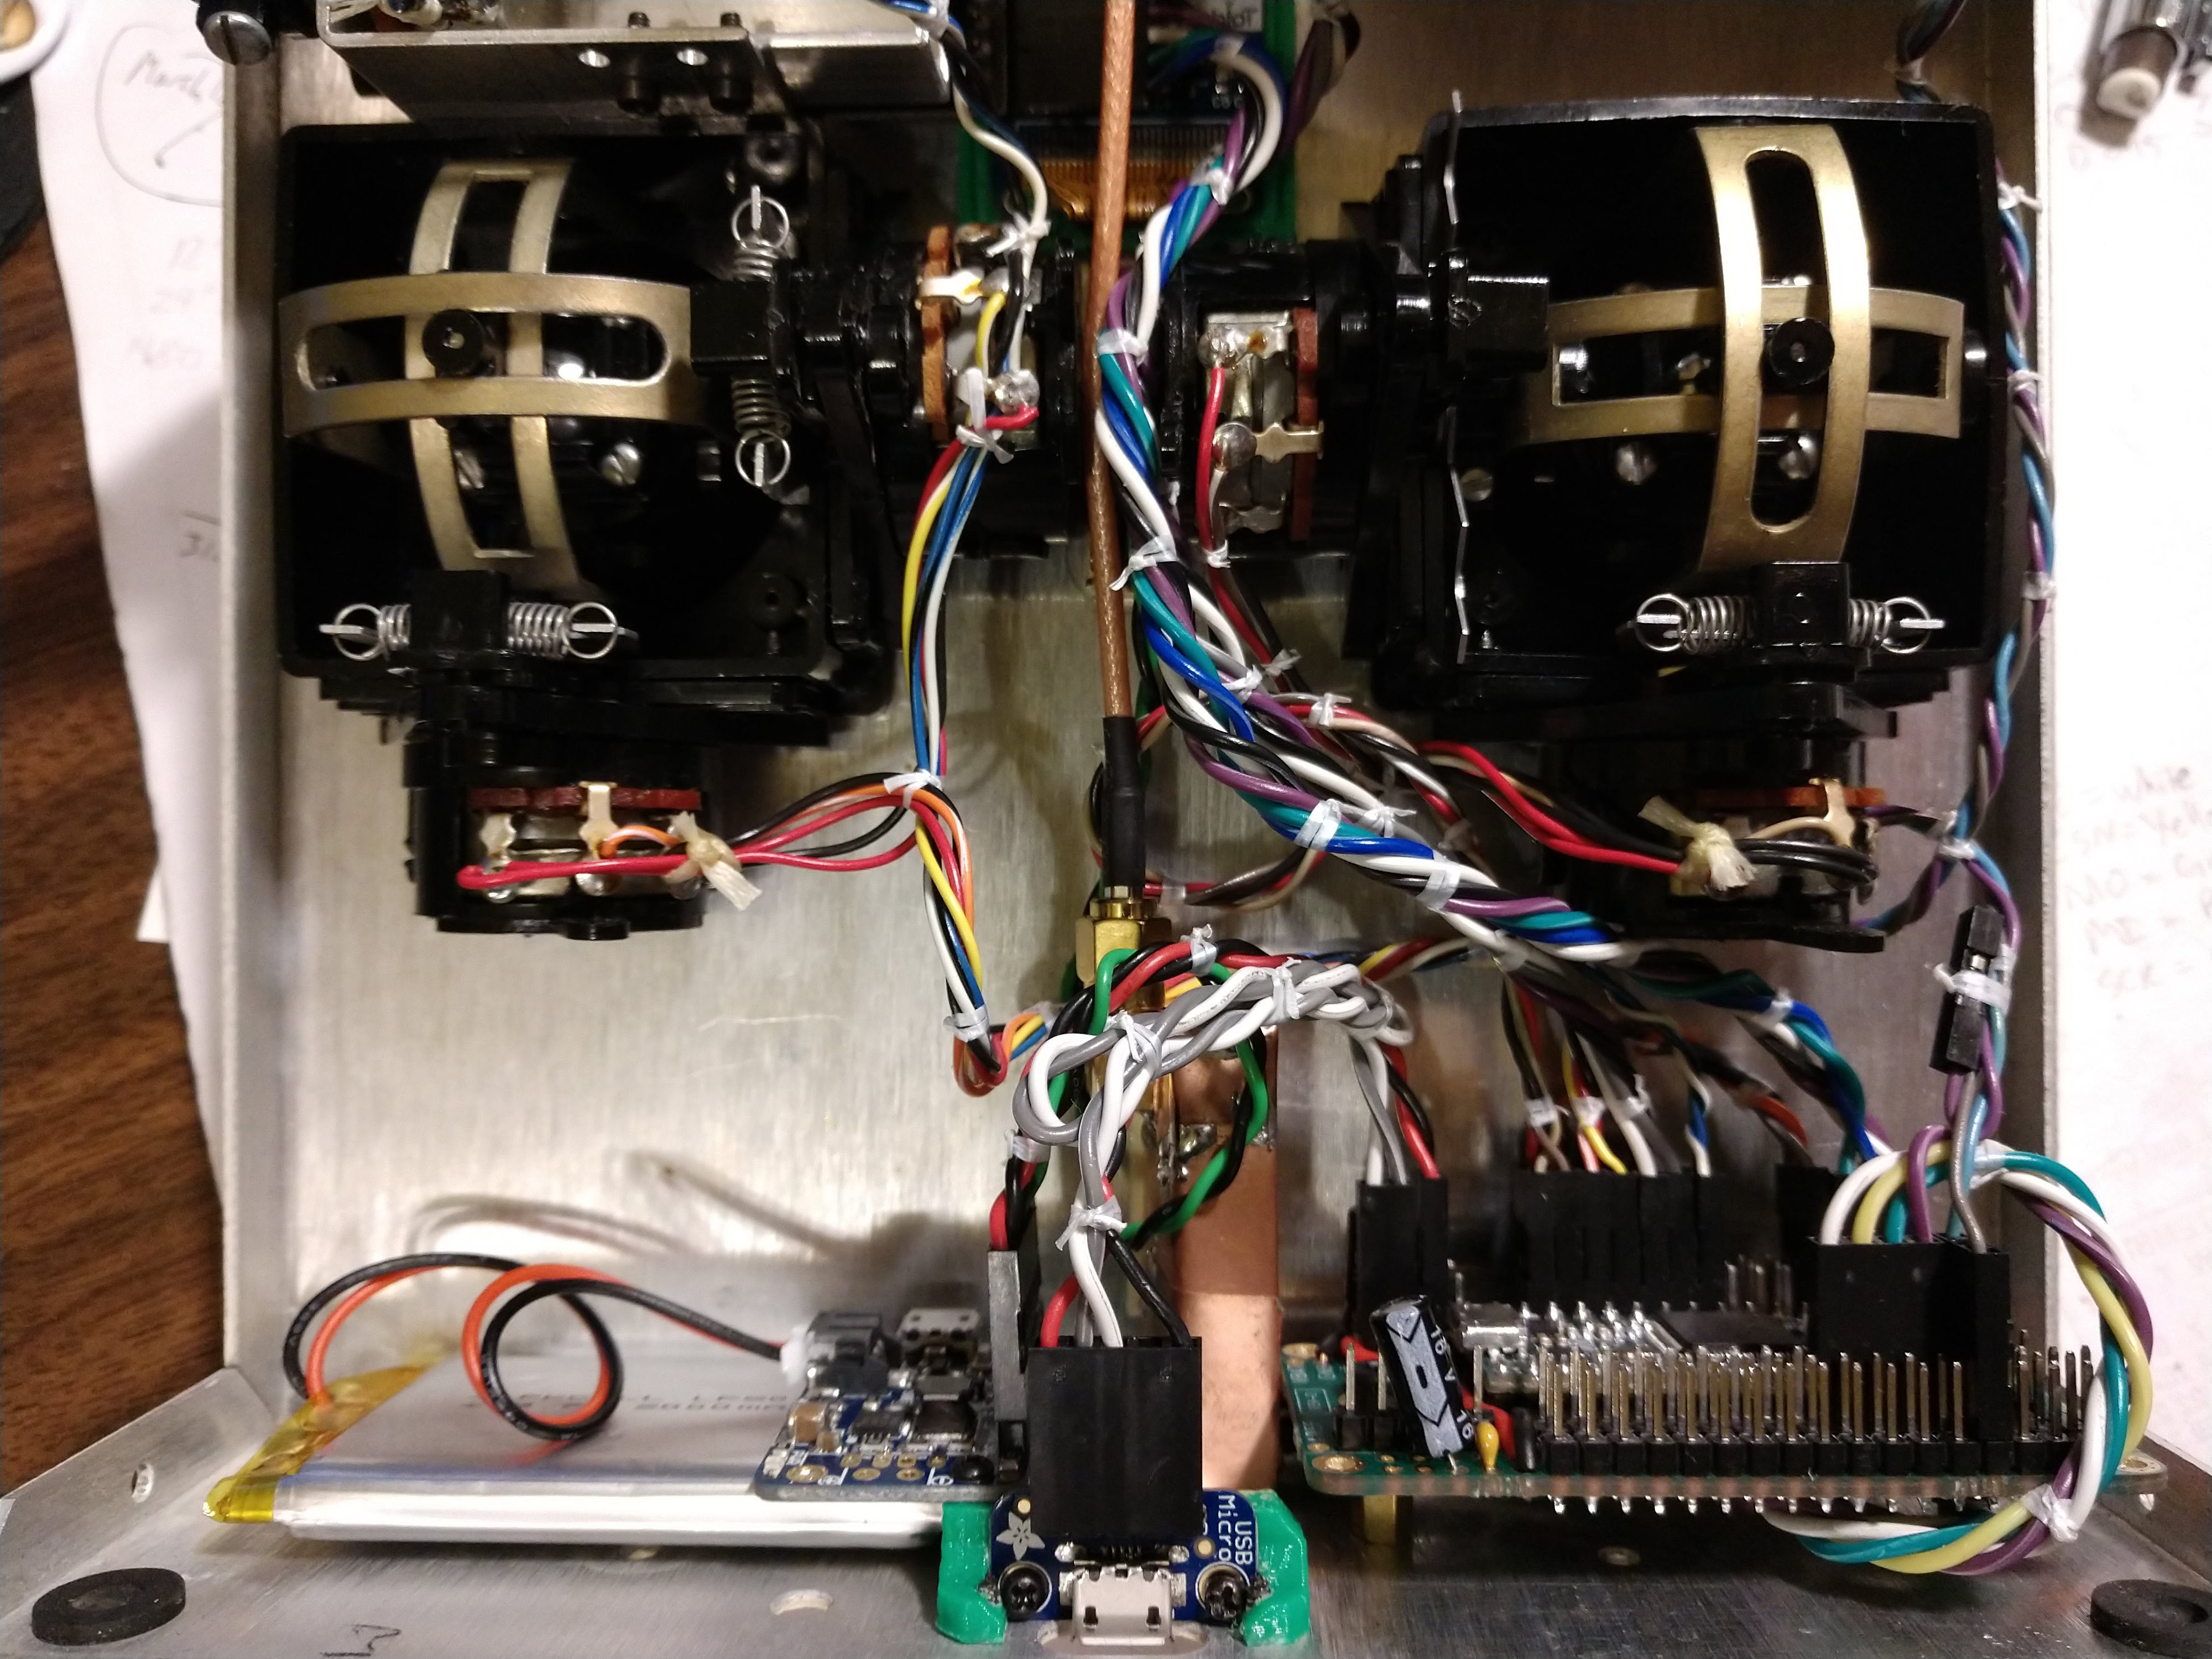
Better power
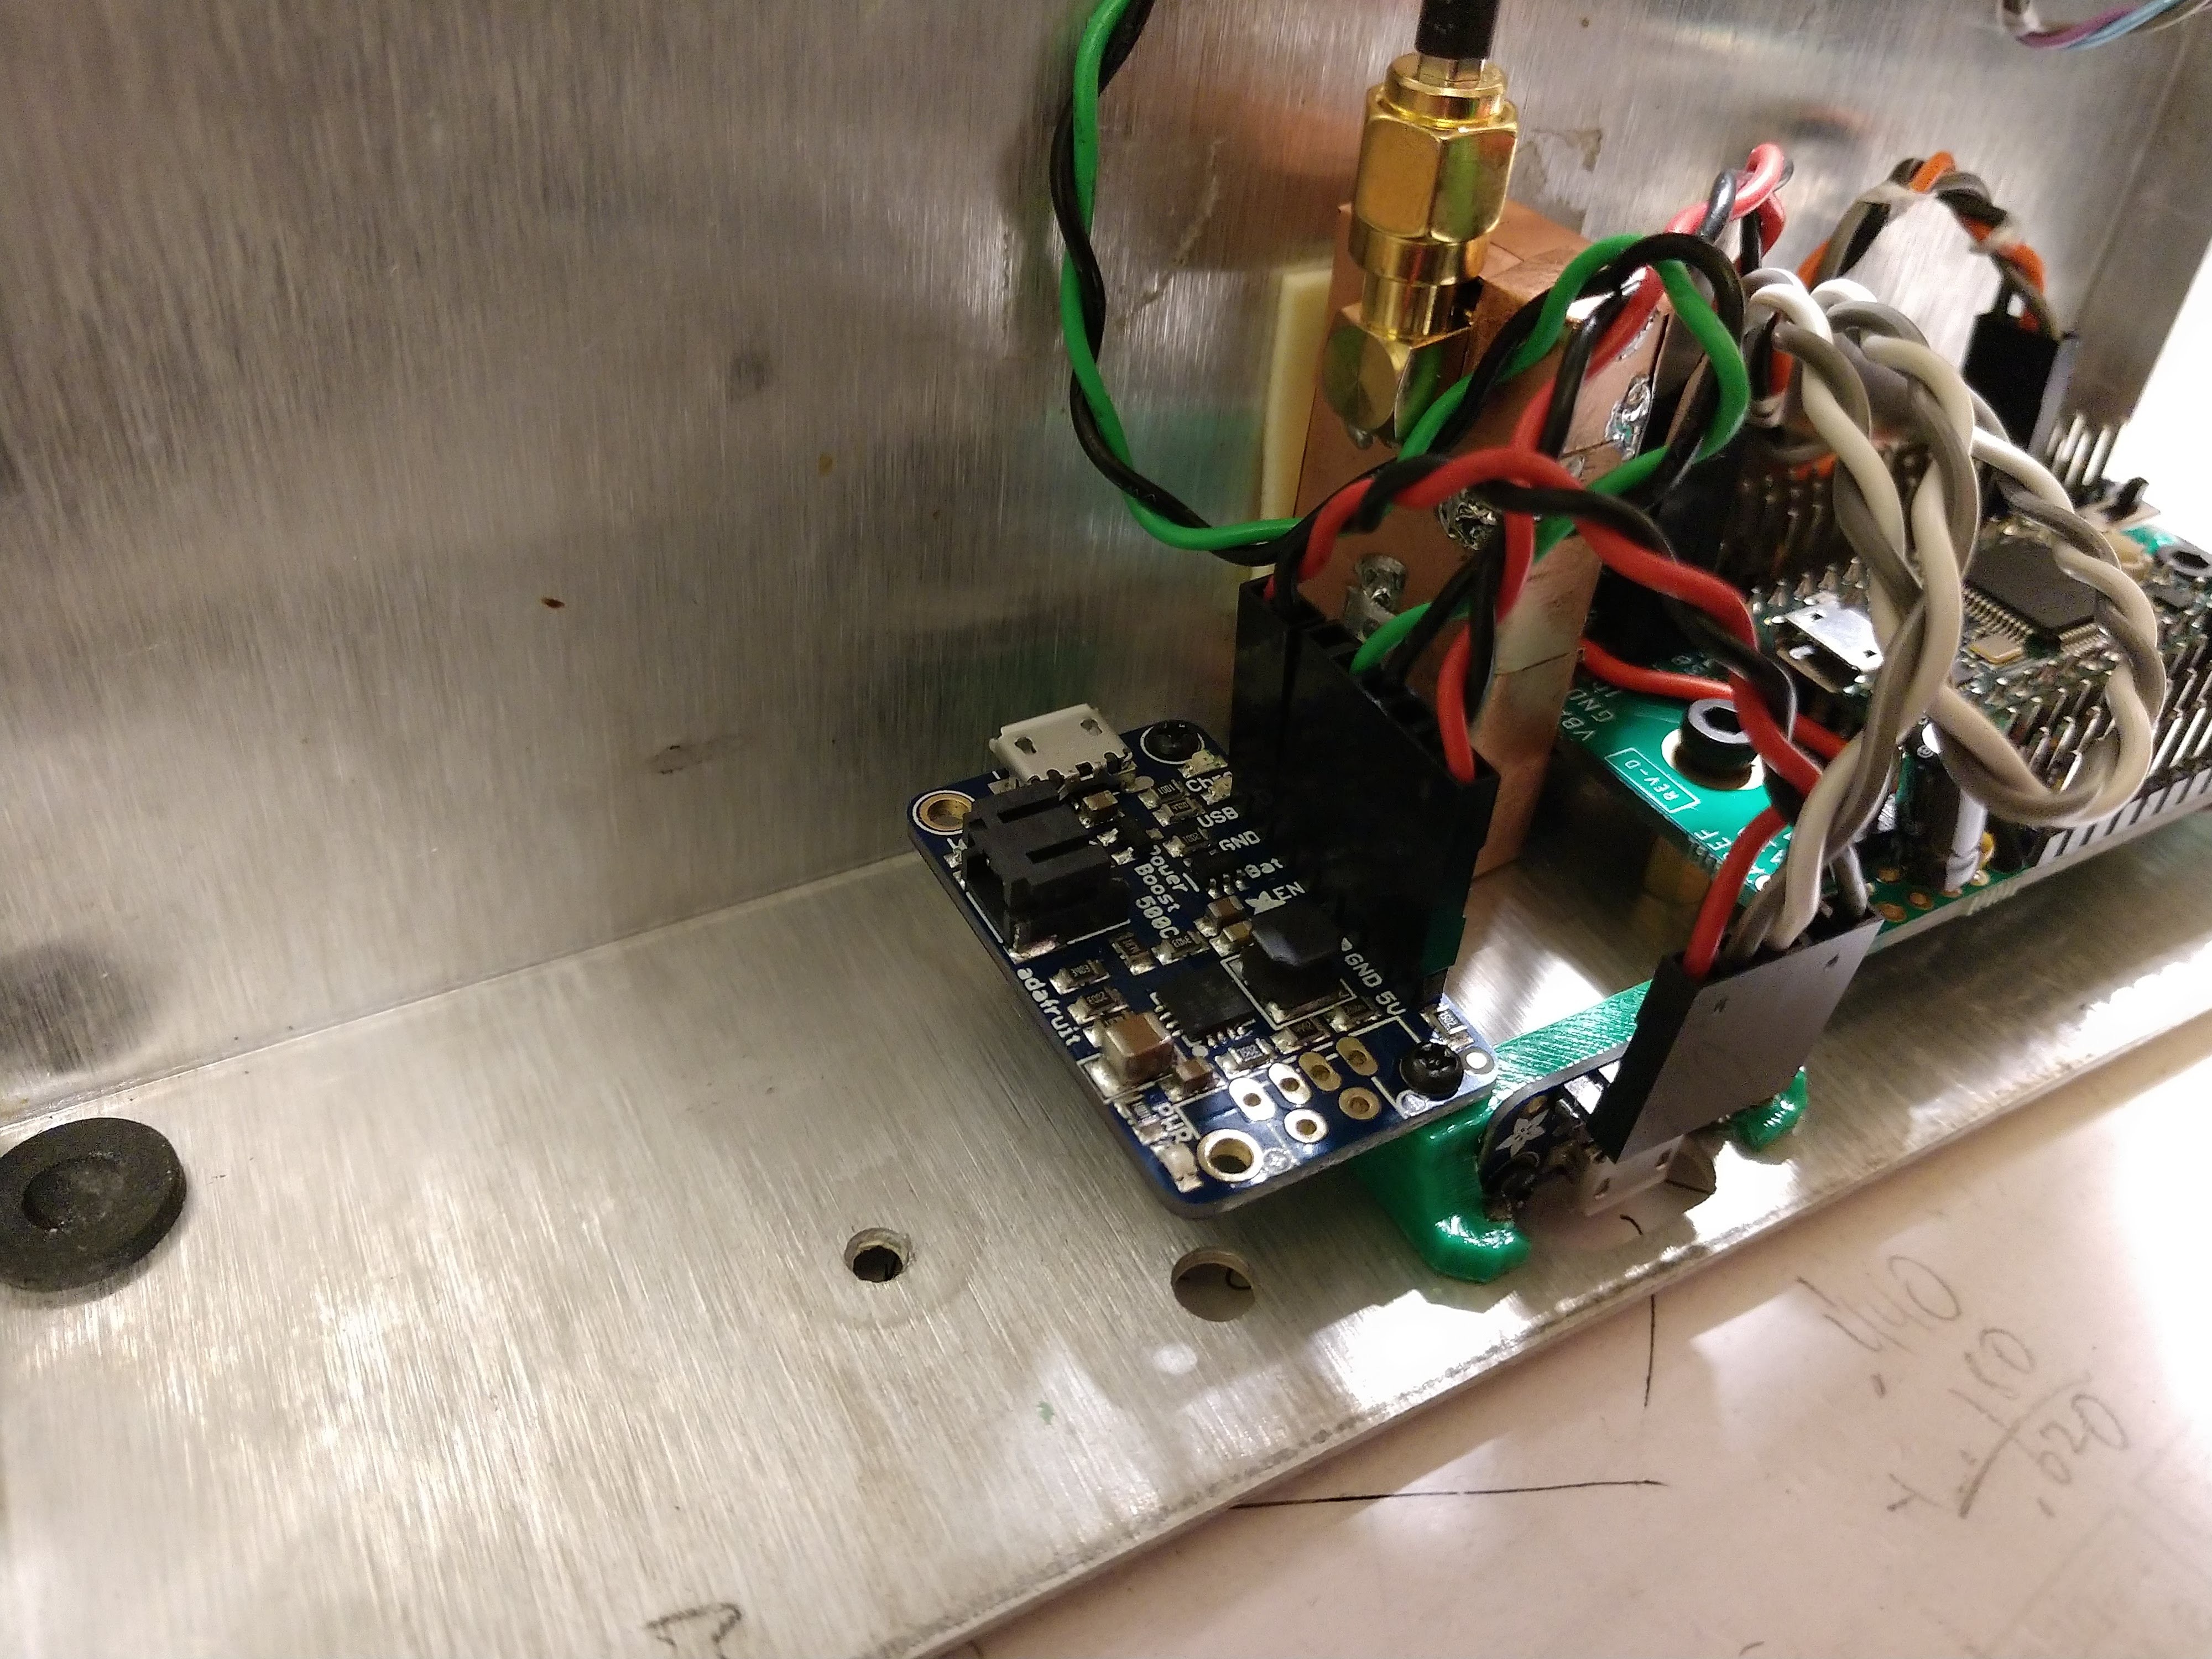
05/15/2018 at 08:42 • 0 commentsThe new power parts showed up yesterday (I love Amazon's delivering on Sunday). Putting it together was straightforward but it took me a while to end up with a 3D printed holder that worked as I wanted. I went with the Adafruit PowerBoost 500C because it can handle powering the project while the battery is charging. I used a separate USB Micro-B Breakout so I could run the D+/D- lines to the Teensy. That lets me charge the battery and/or program the Teensy from the same plug, which is accessible through the transmitter's original charge port.
![]()
Tx's power switch now connects the PowerBoost's ENable pin to ground to shut things off.
![]()
![]()
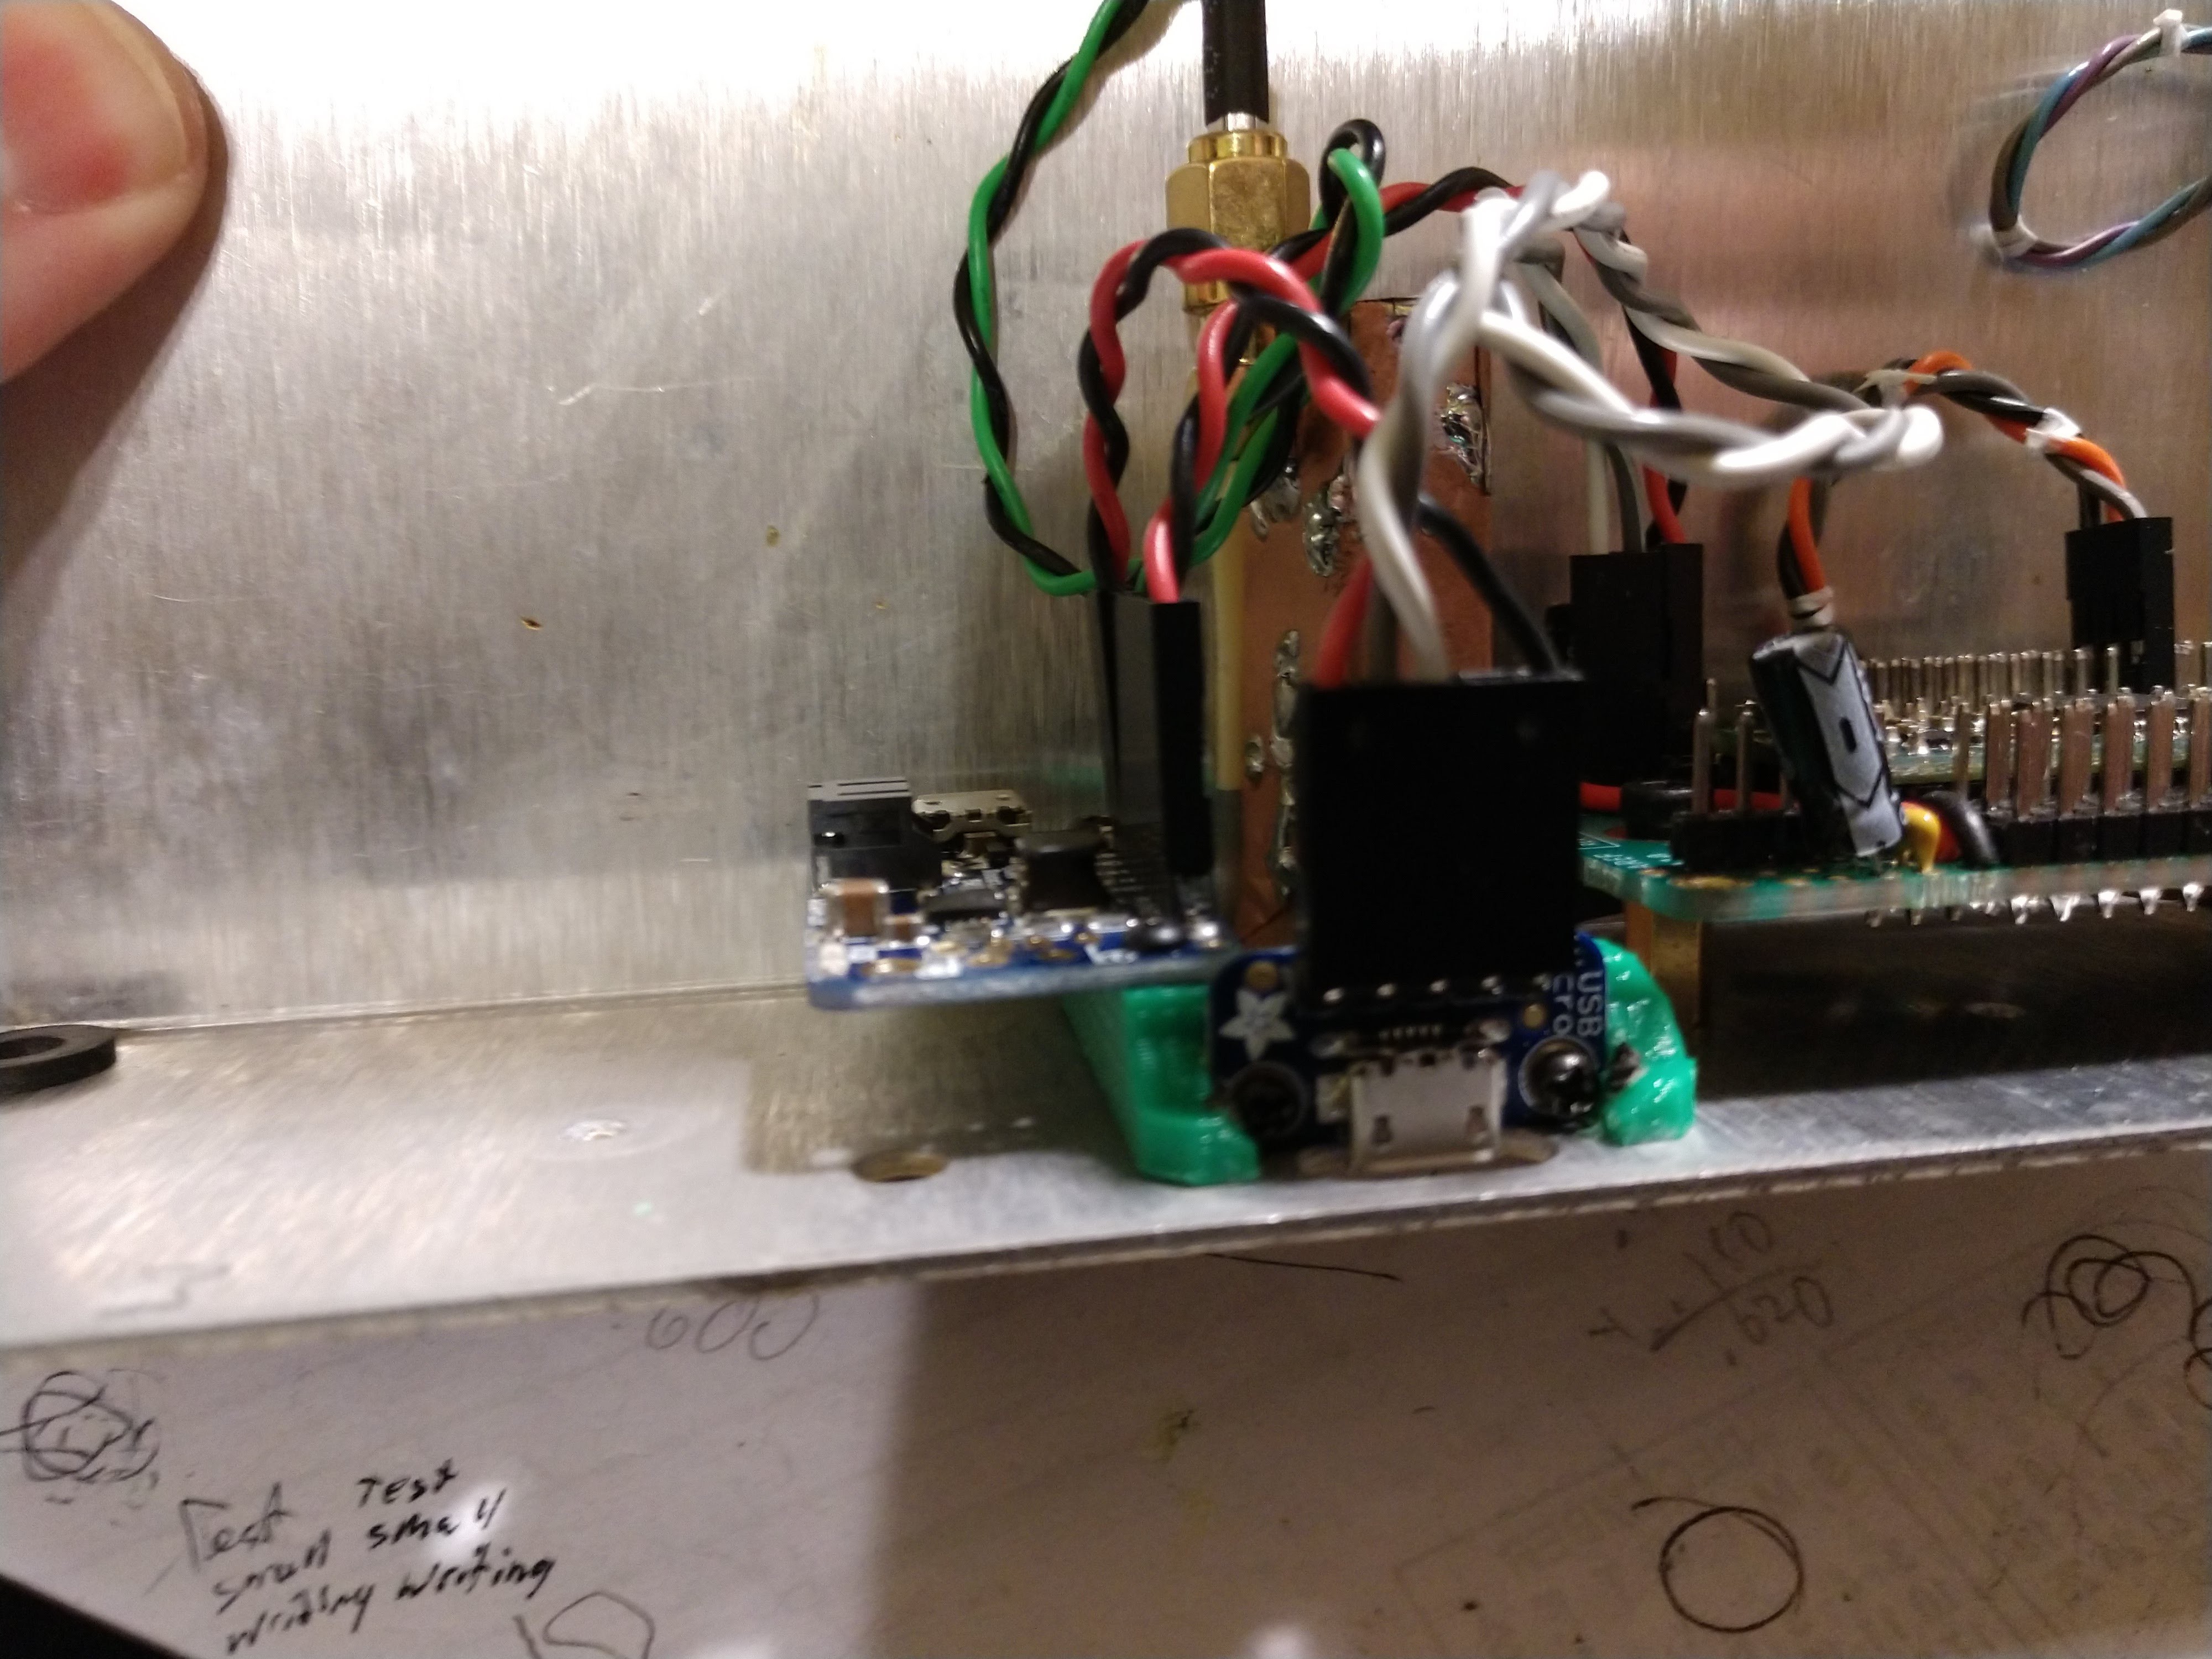
The itty bitty micro-b jack looks kinda silly in that big ol' hole
![]()
I have to properly shorten the D+/D- wires
I still need to make a short wire to connect the PowerBoost's Low Battery pin to a Teensy input. Or maybe I should just measure the battery voltage with an analog input and have a battery meter icon in the OLED. Guess I could connect both of them too. I may also experiment with a light pipe thing so the charging/done light can be seen at the connector.
-
Nothing to show...
05/12/2018 at 04:20 • 0 commentsI have nothing to show for the last couple days of "working" on this project, but at least that doesn't mean I've accomplished nothing.
One thing I've got pretty well worked out in my head is a different (better?) way of powering the transmitter. The little portable charger thing I'm currently using works, most of the time. If the NRF24L01+ isn't running the power brick just shuts off. I think the circuitry isn't pulling enough current for the brick to believe it's connected to something. So far it's not been an issue when the radio module is on but I'd hate for it to decide mid-flight that the transmitter isn't pulling enough juice. Also, as mentioned in part 6 of the destructions, I can't see how much (or little) charge is left when the case is closed up. Aand I would really like to be able to charge the transmitter without opening the case. Aaand it sure would be great to be able to program the Teensy without opening the case and unplugging the battery. So I think I've decided to go with something like this and a bog-standard lipo battery (kiddo had a 2000mAh one just sitting around). I'll grab a micro-usb breakout board and I should even be able to use the transmitter's original charger hole.
That was the easy part though. Now, I freely admit that the current code (rudRemoteCrazyOnly.ino) is mainly copy-pasted from what I had running a few years ago. And that was largely copy-pasted from other peoples' Crazyflie transmitter projects. There was something in there that didn't make a lot of sense to me: What was RADIO_CHANNEL doing in crtp.header? It turns out that it doesn't belong there at all, instead that part of the header is used to request a specific channel of certain ports (e.g. Logging). It doesn't cause problems so far because the Commander port doesn't have channels. That got me wondering what else I'd missed the last time I'd actually worked on rudRemote. So I've been slogging through documentation and source code, refreshing what I thought I knew about RF24, seeing how much I actually remembered about CRTP (answer: not much), and generally making a plan about how I want to proceed.
At the very least I can say that, as it sits, this project works for one of my goals. I have successfully flown my Crazyflie (much to my wife's dog's chagrin) with a 40 year old transmitter and I crashed ever so slightly less than when I fly it with my phone.
-
It begins. Began. Whatever...
05/07/2018 at 04:36 • 0 commentsThree years ago was shocked to learn that I had won a Crazyflie 2.0 for my entry in the 2015 Hackaday Prize. Pleasantly shocked, but shocked nonetheless. It turned out to be quite an entertaining little device, but I always had a difficult time with the controls. I just couldn't make my brain accept using my phone's touchscreen to command it and almost always ended up crashing. I already had a two-stick radio I'd bodged together out of a couple old R/C transmitter gimbals and a Sparkfun box. That used a NRF24L01+ to talk to my Wall-E bot, and was intended to be able to control multiple robots. I decided I'd re-program that to speak Crazyflie and have "normal" physical controls and maybe crash less.
![]()
old radio bits and the wall-e chassis
Right about that time I got a new job and went from being a stay-at-home dad to a work-at-home dad. Spending 40 hours a week in my office/lab-OR-a-tree for the job somehow made me want to spend less time in that room, and my projects stagnated. Time went on, weeks became months, I would periodically pull out the box o' parts and noodle around with case options and such. Nothing ever quite seemed to come together though and the parts all went back in the box under the bench.
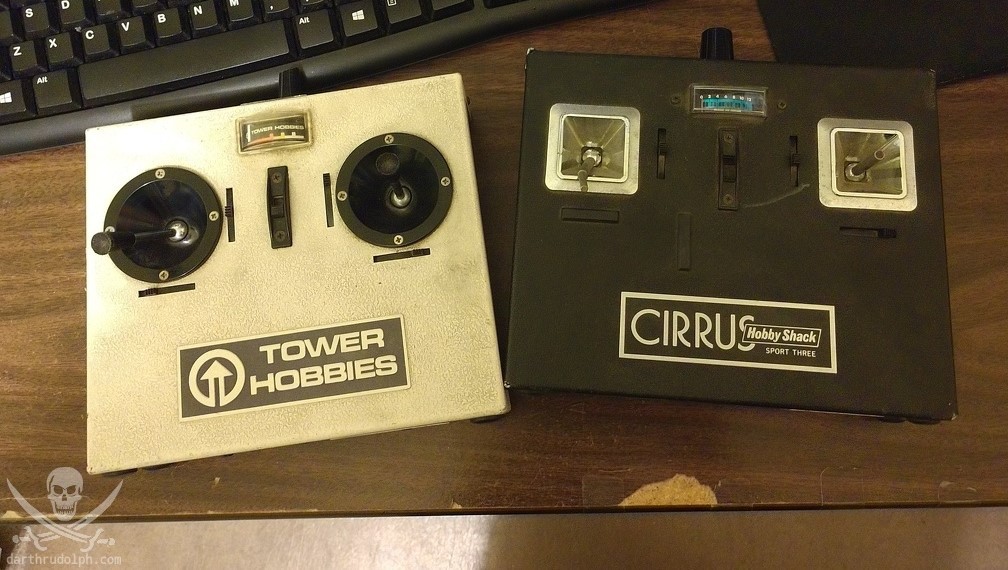
Then a few weeks ago I was thrift store shopping with kiddo and acquired these gorgeous things:
![]()
inside the tower hobbies one I found a handwriiten date of Sept. 10, 1978
This was the kick in the pants I needed to revisit my custom transmitter idea. So I dismembered them both, cleaned them to a fare-thee-well, and finally decided to use the Tower Hobbies transmitter to be the basis of the rudRemote project. And, at long last, be able to fly my Crazyflie with stick controls instead of a phone!
rudRemote
Customizable NRF24L01+ radio control for multiple vehicles (AKA making a 40 year old radio fly a quadcopter!)