 Roger
RogerI saw that RaspberryPi.org had an article on JPL Open Source Rover. In the comments section, there was a comment by Daniel Perron (who had also commented on this project page) mentioning Sawppy. I think Daniel should have a project page for his own Sawppy but I haven't seen one under his Hackaday.io account.
Which is a shame, because his rover is making good progress and his work totally deserves attention. So I'm going to draw attention to his build on my Sawppy page here.
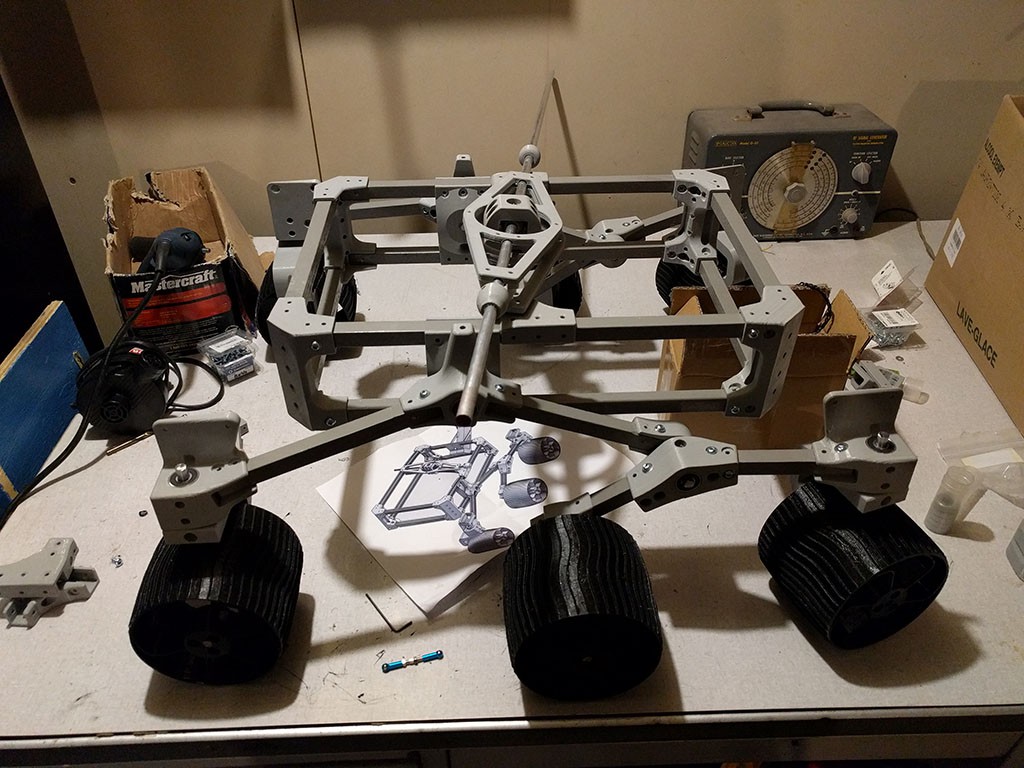
Here's a scaled-down copy of the image he linked from his RaspberryPi.org comment. From this picture I can see a few changes from my design. The biggest change is in the structural beams. Daniel is using something other than the Misumi 3-series 15mm extrusion that I used. I'm curious to see how well these beams work. Their uninterrupted square profile should make Daniel's Sawppy more rigid than mine, and more rigidity is always good.
And here's his YouTube clip showing his travel motor turning a wheel under control of his own servo control code.
I'm super excited to see another Sawppy taking form. Your rover looks great, Daniel! Great job and I look forward to seeing your future progress.
Discussions
Become a Hackaday.io Member
Create an account to leave a comment. Already have an account? Log In.
Wow I return from vacation and see my own rover on your pages. Weird!! but great.
I didn't do much this summer. it is summer and I was away and I visit some place great.
Misumi extrusion was quit hard to get in Canada and the time for shipping was too long. I decide to use wood instead.
I always had some spare wood and I cut it with my bench saw exactly at the right dimension and when I insert it into the plastic parts they fit very well. The rover looks quite solid even if it is wood frame.
Before my vacation I added my own ball join and I used a 3/8" aluminium rod
https://www.tinkercad.com/things/5MytacBa4Wb-bockle-rocker
This is the picture from my dropbox
https://dl.dropboxusercontent.com/s/s7jgxhfovhyoqsk/IMG_20180901_170044586.jpg
Vacation is done now I will be back on the rover. Next step. will be to add the 4 LX16-A to turn the wheel and test the rover.
Next step will be to add the RPI3B+ computer with DC/DC inverter. I'm thinking of using the Roomba battery pack since I do have two already and it will be simple to create an holder on the rover for it.
Are you sure? yes | no