 Involute
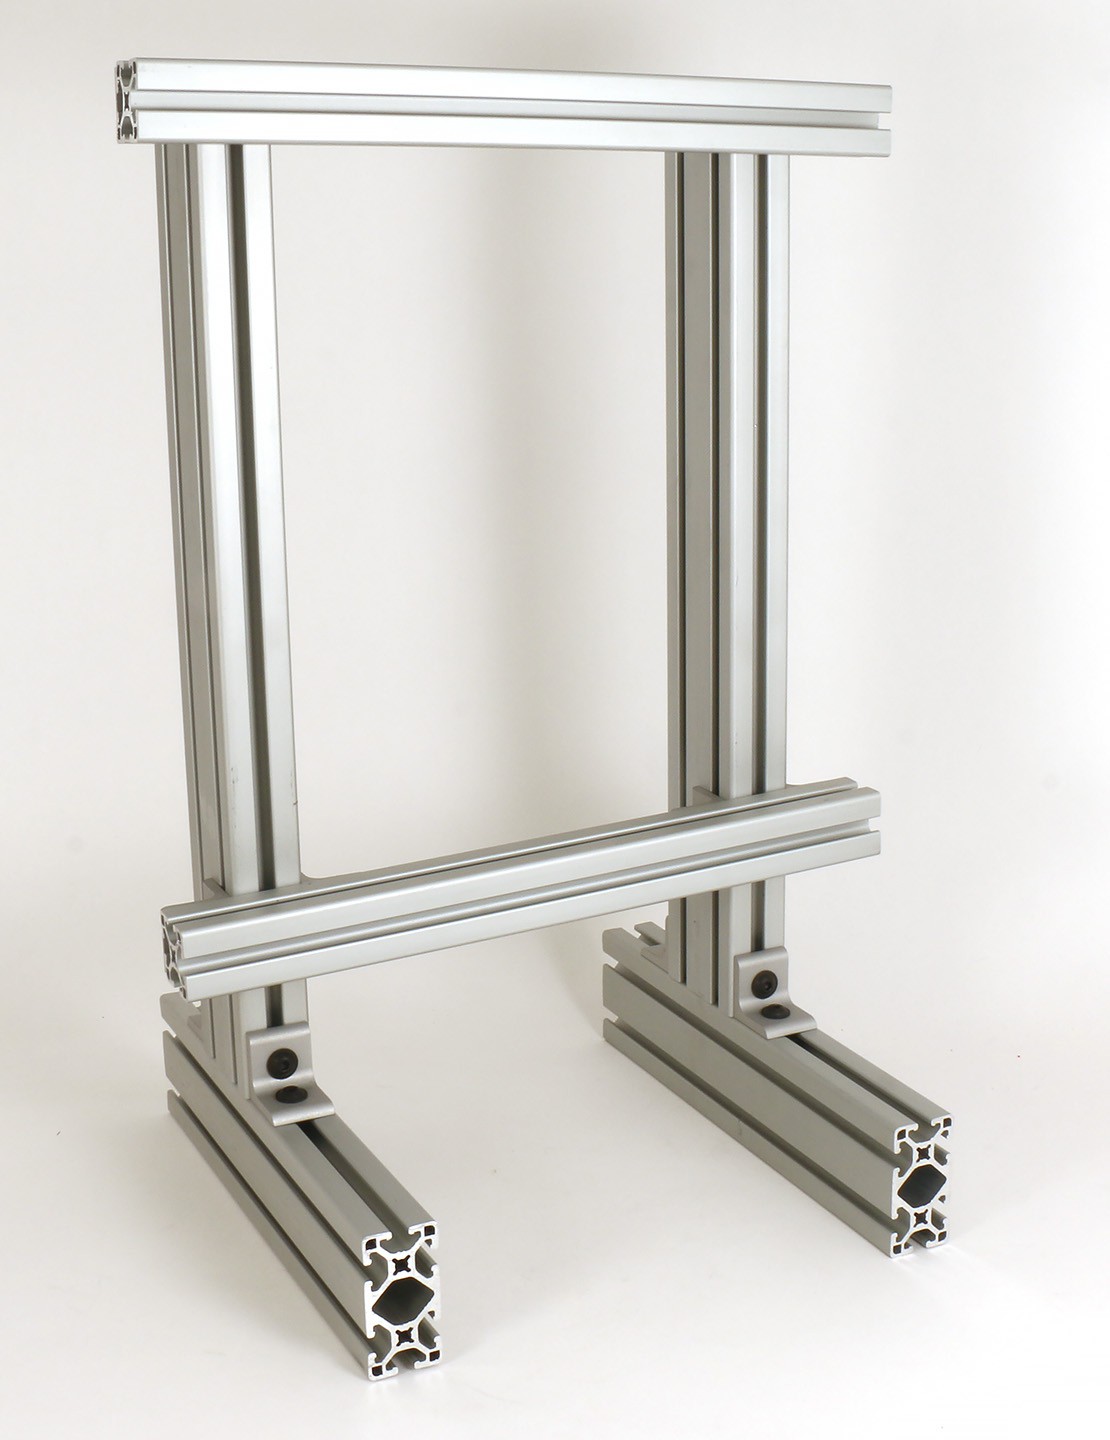
I've assembled the frame for the prototype:
I've also brought up enough of the controller board to drive the 16 relays with it:
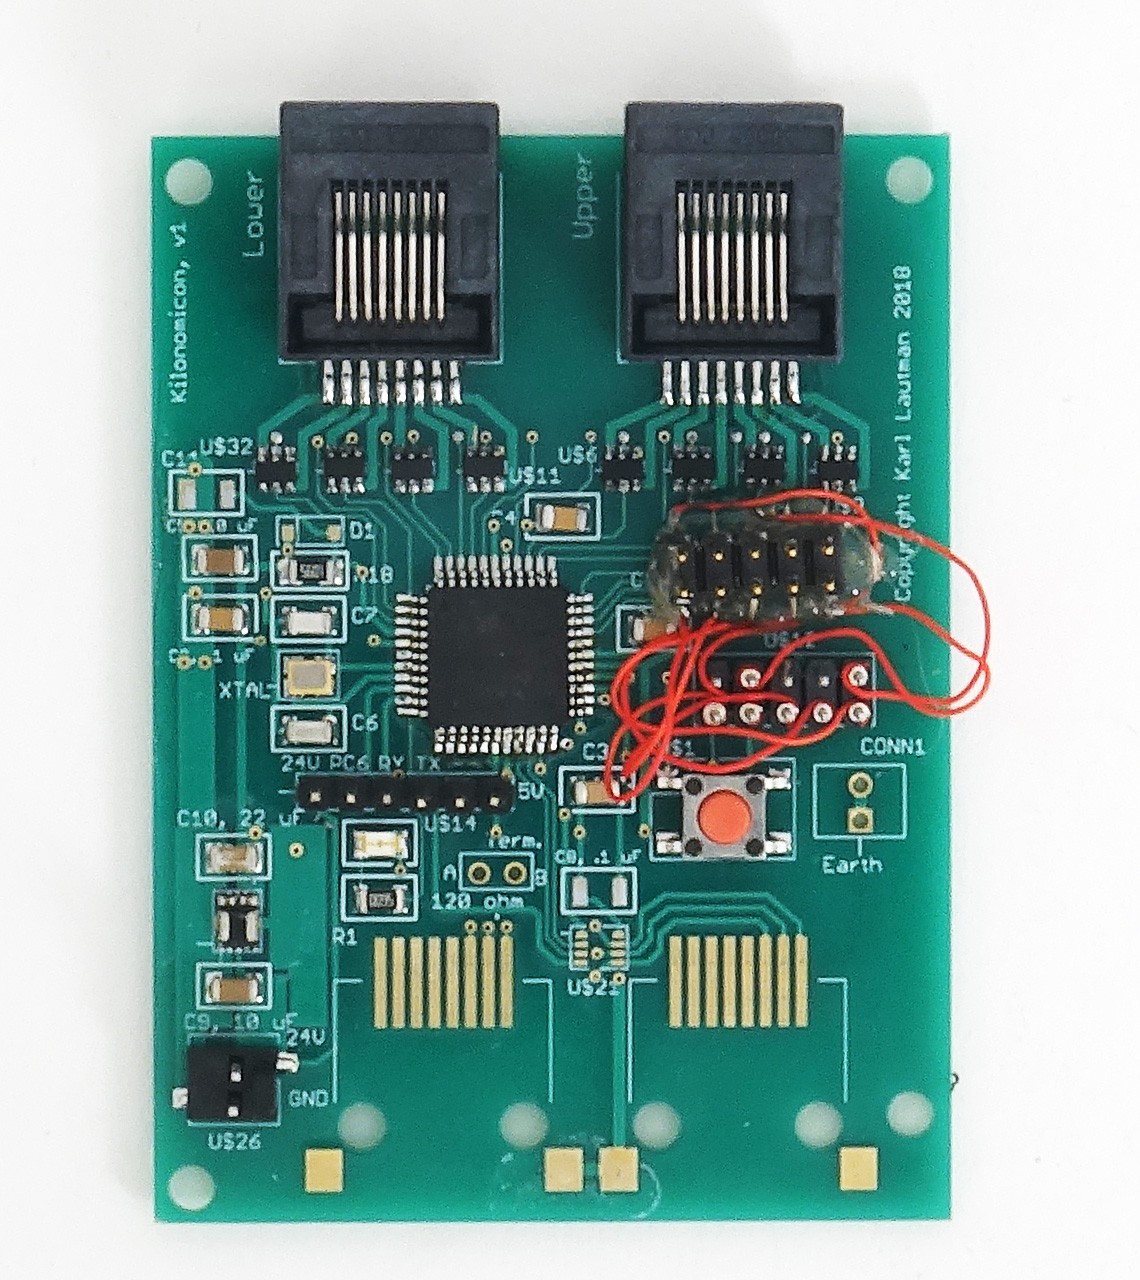
That mess of wires is to correct a footprint layout error I made when creating the 10-pin JTAG header in Eagle. It's a relatively easy (if unsightly) fix, as you can see, so not worth respinning the board over just yet. I'll wait until I decide on the replacement for the discontinued RS485 chip (that unpopulated 8-pin footprint between the two unpopulated RJ45 footprints) before doing that.
The astute observer will notice the MCU is a bit askew, especially compared to the previous pic of this board. That's because I borked it by accidentally shorting the two, leftmost pins of the test header immediately beneath it. Unfortunately, those are the 24V and PC6 (bit 6 on IO port C) pins. I removed the first chip with my hot air rework tool and installed the new one with a soldering iron. I was a little careless with the install. No shorts, though, and I was able to drive all the MOSFETs, as well as sense the pushbutton and drive the LED.
The next step is to prepare the panel to receive the relays. That involves drilling all these holes:
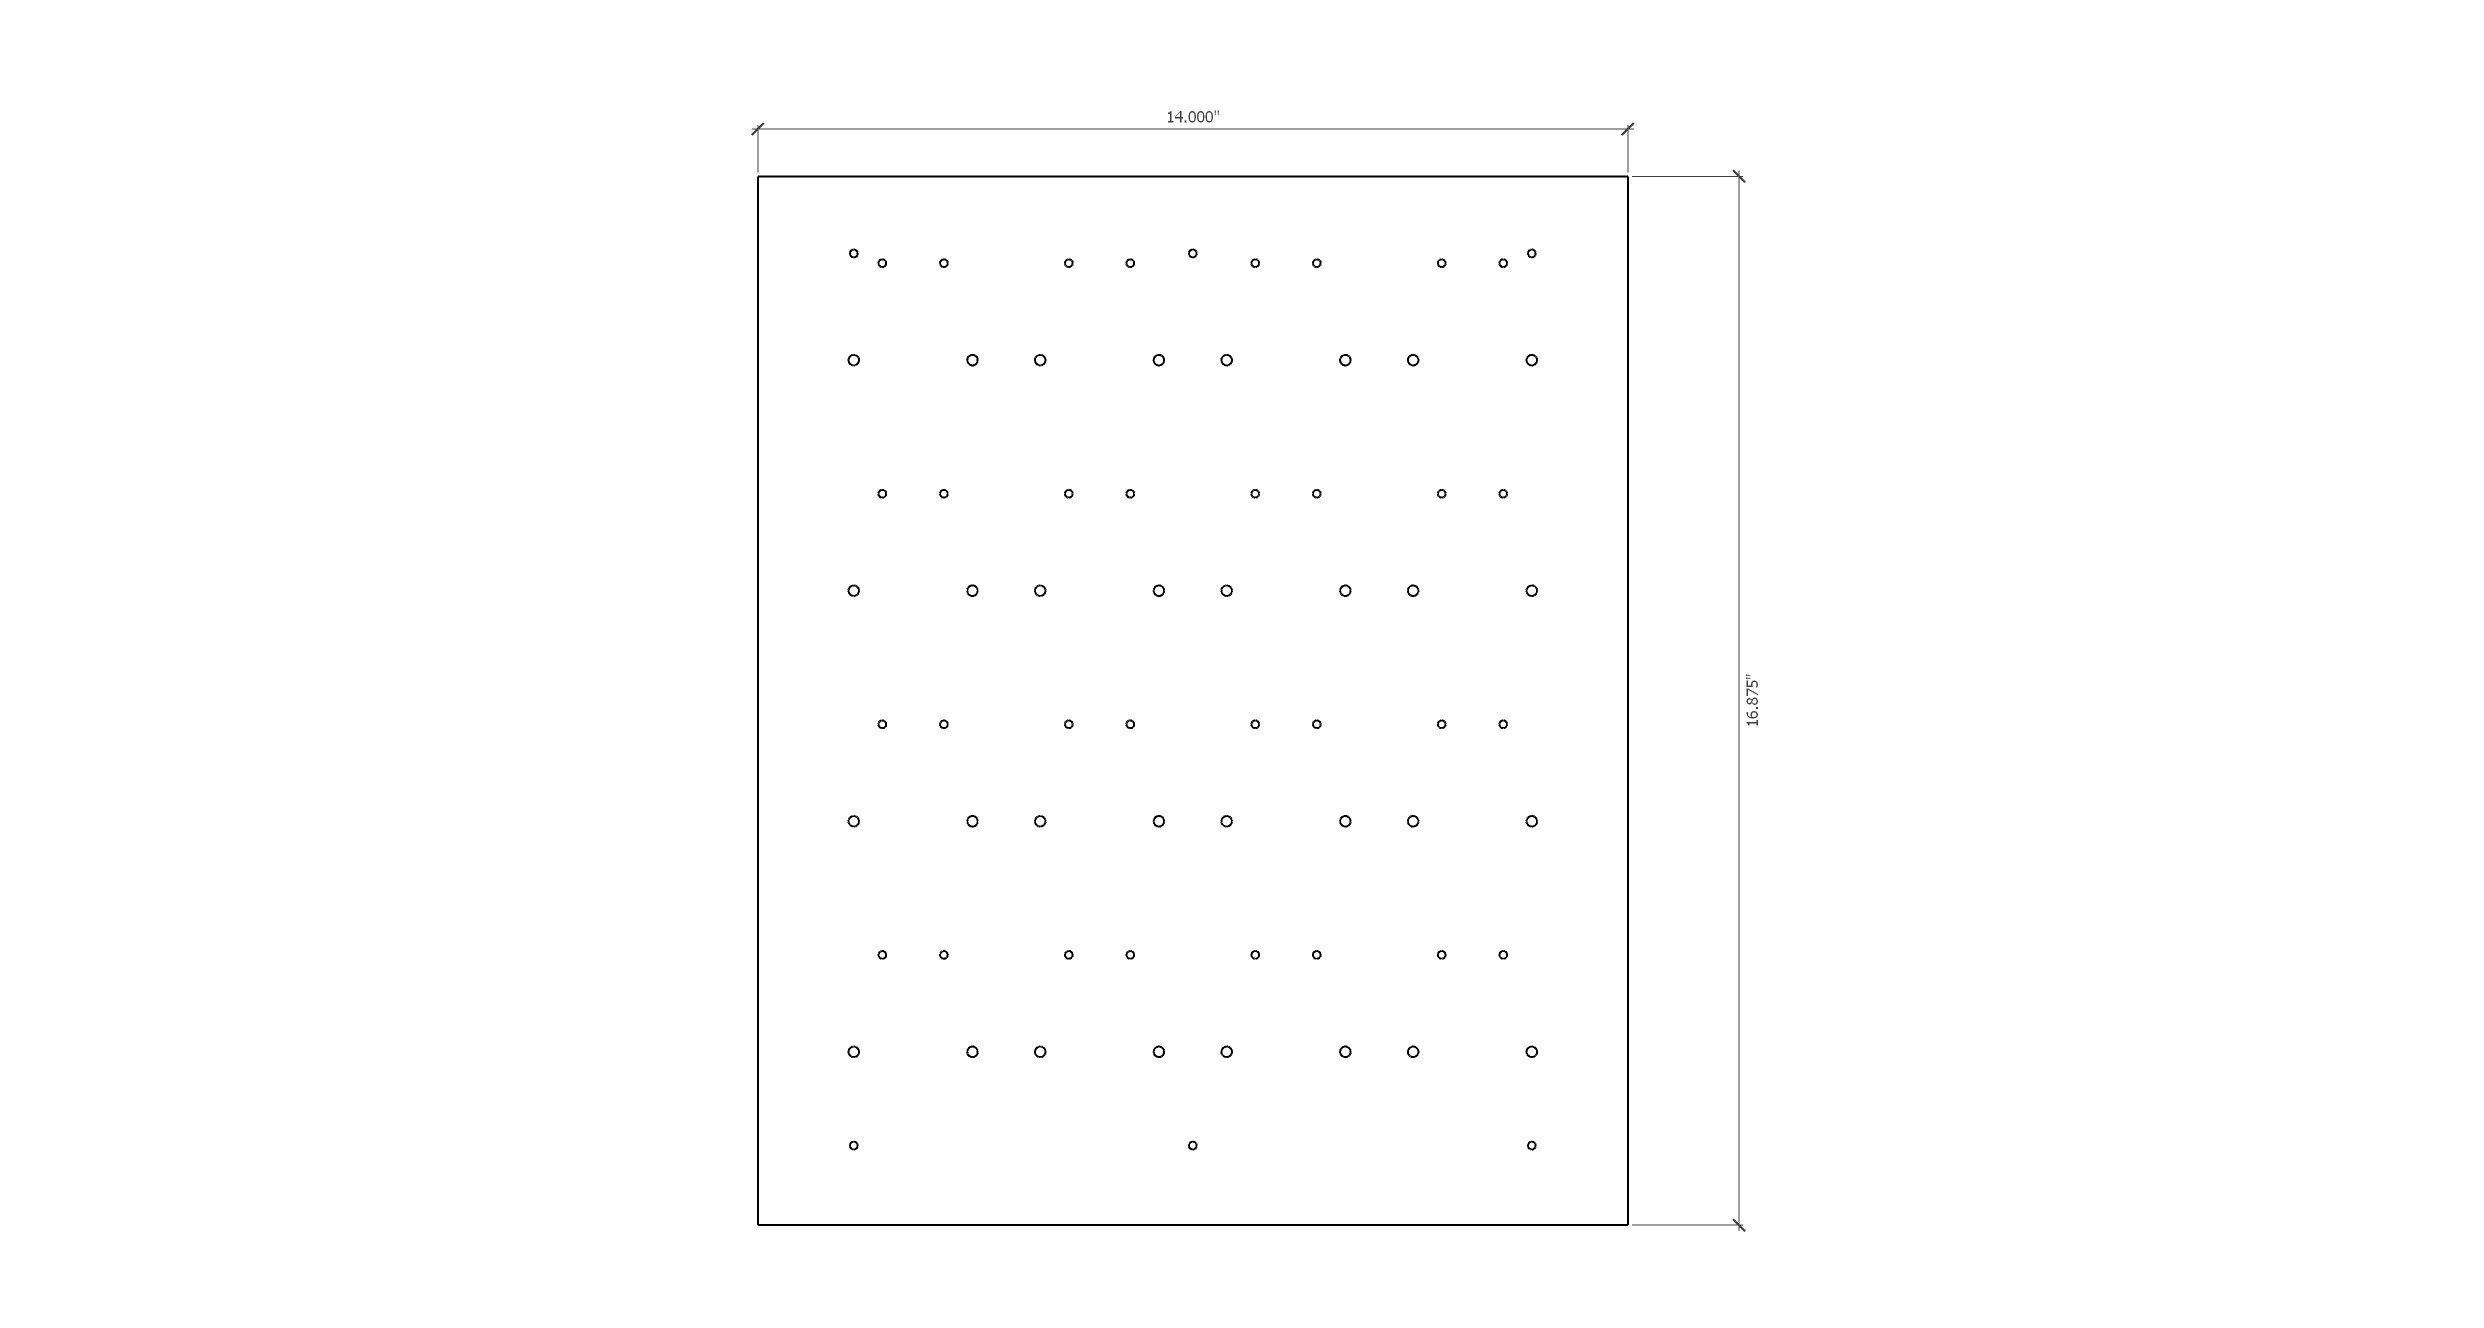
This is just slightly too big for my milling machine. I can send it out to be drilled for $40, or etch the holes in my laser cutter (which has an 18" x 24" bed), then use the etched depressions as guides for drilling on my drill press (the material is .5" HDPE, way too hard for my 40W laser to burn through). I'm leaning towards the former, both for convenience and as a test of the driller.
Discussions
Become a Hackaday.io Member
Create an account to leave a comment. Already have an account? Log In.