 Roddy "Rags" Read
Successful Bodging
I bought a nasty old geared hub e-bike motor on ebay. 36V and 36 Spoke. 36V because I have that battery, 36 spoke so I can easily tie 3 or 6 kite lines neatly to the rim.
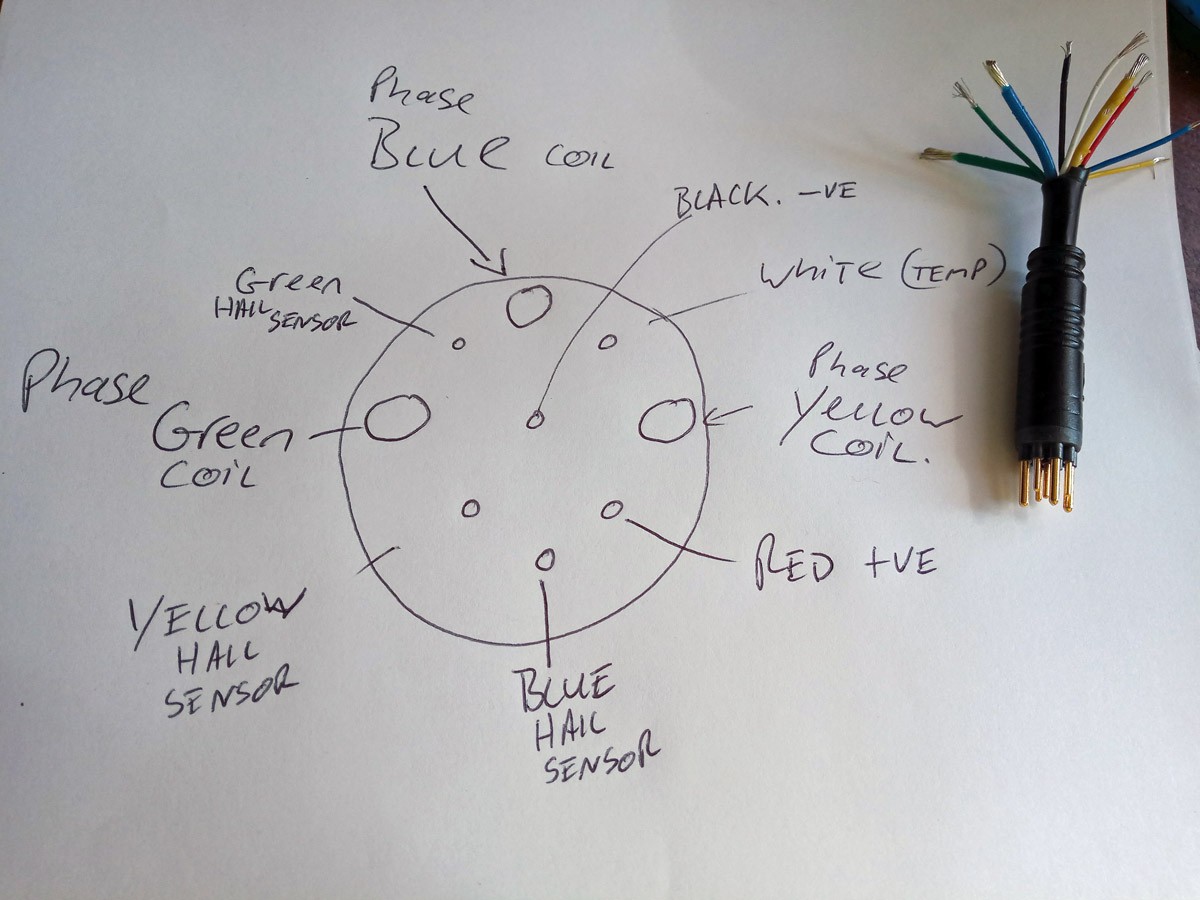
I chopped off the Julet plug, I couldn't find a wiring diagram online and I had no socket. So incase you do have a socket already... Don't bother here's a picture.
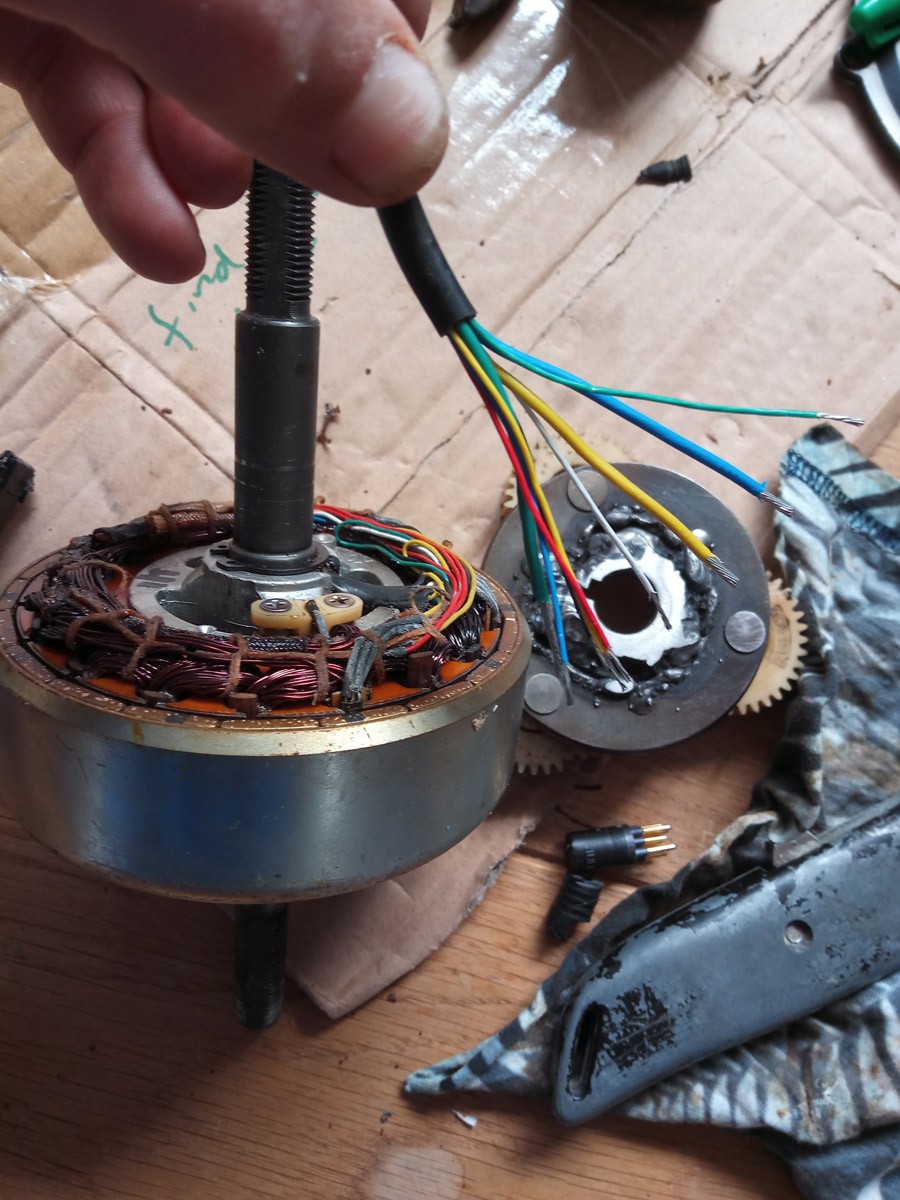
I opened up the motor, blew the ming out and removed the planetary gear to see how I could go about locking it off. As you can see in this photo, I was waaay too brutal with using an arc welder on the thin casing walls of the planetary gear freewheel... I melted the gears a little too. (use a TIG or other small welder)
With disregard for what went where, I hammered (a lot) the messy non-freewheel planetary hub back onto the shaft, and it broke a bit, but it wedged into the motor casing. The whole thing turned with terrible grinding sticking noises.
Until I connected it to a VESC 6 that is... When it started to sound sweet.
Because you need quality grinding techo sounds pic.twitter.com/P4tGTKa1sP
— Roderick Read (@rodread) June 12, 2018
VESC 6 is a phenomenal motor controller designed by Benjamin Vedder and sold by Trampa Boards. It's not cheap. ~£300 GBP. However it's super fast, It walks you through motor setups for Field Oriented Control, It gives you plenty of control interface and motor parameter options to play with. The VESC 4's are open source hardware too.
You can see in the twitter video, I added a thrust bearing (skf 51204) to the motor shaft, this holds the casing from being pulled forward by kite lines and destroying the normal motor housing bearings.
Now find a rusty 26" 36 spoke wheel your neighbor has left outside for ~3 years. Cut it to salvage the rim. I was lucky, my motor came with a set of spokes. I was unlucky, they didn't seem to fit. I made up a spoke pattern so that they did kinda fit and it worked - ish.
If you have to get spokes, using ebikes.ca calculator can help.
The motor and wobbly wheel need held to the ground to hold the kites. We also need the axle to point at the kites but not turn. I rivited a rough u shape section of mild steel to a set of bike handlebars. (keeping with the minimal transport theme.) The steel had a slotted hole cut to fit the flat sections of the shaft. Good enough to hold and generate.
Interested to see how long this survives. Expect work on a standard e-bike wheel and handlebar connector soon. pic.twitter.com/DYvXAjjWmN
— Roderick Read (@rodread) June 20, 2018
After a basic wheel truing (see Sheldon Brown for expertise) I attached the 36v Bike battery and VESC6 to the handlebars. I configured the VESC 6 using VESC Tool so the application used a 10kOhm pot connected into the ADC1 of the 8 pin JST connector for speed control. I also set very timid limits to the speed and the current in the VESC Tool software.
Time to tie a kite on pic.twitter.com/nJv2qRTKAH
— Roderick Read (@rodread) June 20, 2018
I readied a kite turbine I had lying about... (you likely have to make this bit) We'll cover that in a later project log entry. I also made an extension cable for the battery cause it was very heavy to hold. I fitted a windsurfing harness to the bar... for options. (You can actually run these turbines with the motor as a great big tensile prop...interesting games ahead.)
Complete #AirborneWindEnergy system <10kg ready for scout camp pic.twitter.com/W81LKJpntC
— Roderick Read (@rodread) June 22, 2018
I set off to join the scouts for a test. While camping in my van that night, I remembered to reprogram the Arduino mega 2560 R3 equivalent so the regen braking level was proportional to a smoothed factor of speed squared. (Just a best guess at how control should work after a fair bit of experimenting.)
Here's the Arduino code https://drive.google.com/open?id=1dzvCtNZvyhFYwfe4UEhqJFEYSt6T8y6g
For the test, I arranged to tie the top of the kite turbine to a pole (Tree) I wanted to make this as easy as possible for the scouts, so they can learn and feel safe with the kite. The wind had other ideas. It was WILD. However we all had fun with minimal breakage. It took a lot of strength to hold the handlebars against the wind so we also improvised an upwind mount (from a goal frame) to hold the generator set in tension against the wind.
Putting a kite turbine together is a bit like making a tent, I'm pretty sure the kids found it easy and even enjoyed connecting it up. You connect all the rods together as rings inside compressive sleeves. The rings are held together with lines down the outside of the turbine. (Figure 8 on a bight and larks head knots everywhere)
Lets see what happened...
#WesternIsles #Scout troupe doing a mast mount test of their first kite turbine prototype in strong winds last weekend. #eco #power #camping #OpenHardware pic.twitter.com/3Toe6RxyeN Roderick Read (@rodread) June 27, 2018
#Scouts doing a high wind kite turbine test today. Configured as a suspended #AirborneWindEnergy system. #portable #power pic.twitter.com/9rvoDytaGP Roderick Read (@rodread) June 23, 2018
#Scouts doing a high wind kite turbine test today. Configured as a suspended #AirborneWindEnergy system. #portable #power pic.twitter.com/9rvoDytaGP
— Roderick Read (@rodread) June 23, 2018
#WesternIsles #Scout troupe doing a mast mount test of their first kite turbine prototype in strong winds last weekend. #eco #power #camping #OpenHardware pic.twitter.com/3Toe6RxyeN
— Roderick Read (@rodread) June 27, 2018
Discussions
Become a Hackaday.io Member
Create an account to leave a comment. Already have an account? Log In.