 Austin Spivey
At Coolest Projects 2018, we showcased the Wia platform with a facial recognition ferris wheel - if you're smiling, the wheel turns, and if you're not smiling, it stops. Today we're going to talk about how we built this project, and maybe you'll be inspired to build something like it!
What we used
- Lego Ferris wheel kit
- Arduino MKR 1000
- L293D motor driver
- High torque DC motor
- Breadboard
- Raspberry Pi Zero W
- Raspberry Pi Camera Module (we used this one)
Getting Started
For those of you who don't have the time to build the entire ferris wheel, here are tutorials for getting started on Wia for each of the components we used in this project.
The Lego Ferris wheel
For the Ferris wheel itself, we decided to go with this Lego kit. It took about 7 hours or so to complete. This kit has an optional add-on motor, but we decided to create our own solution.
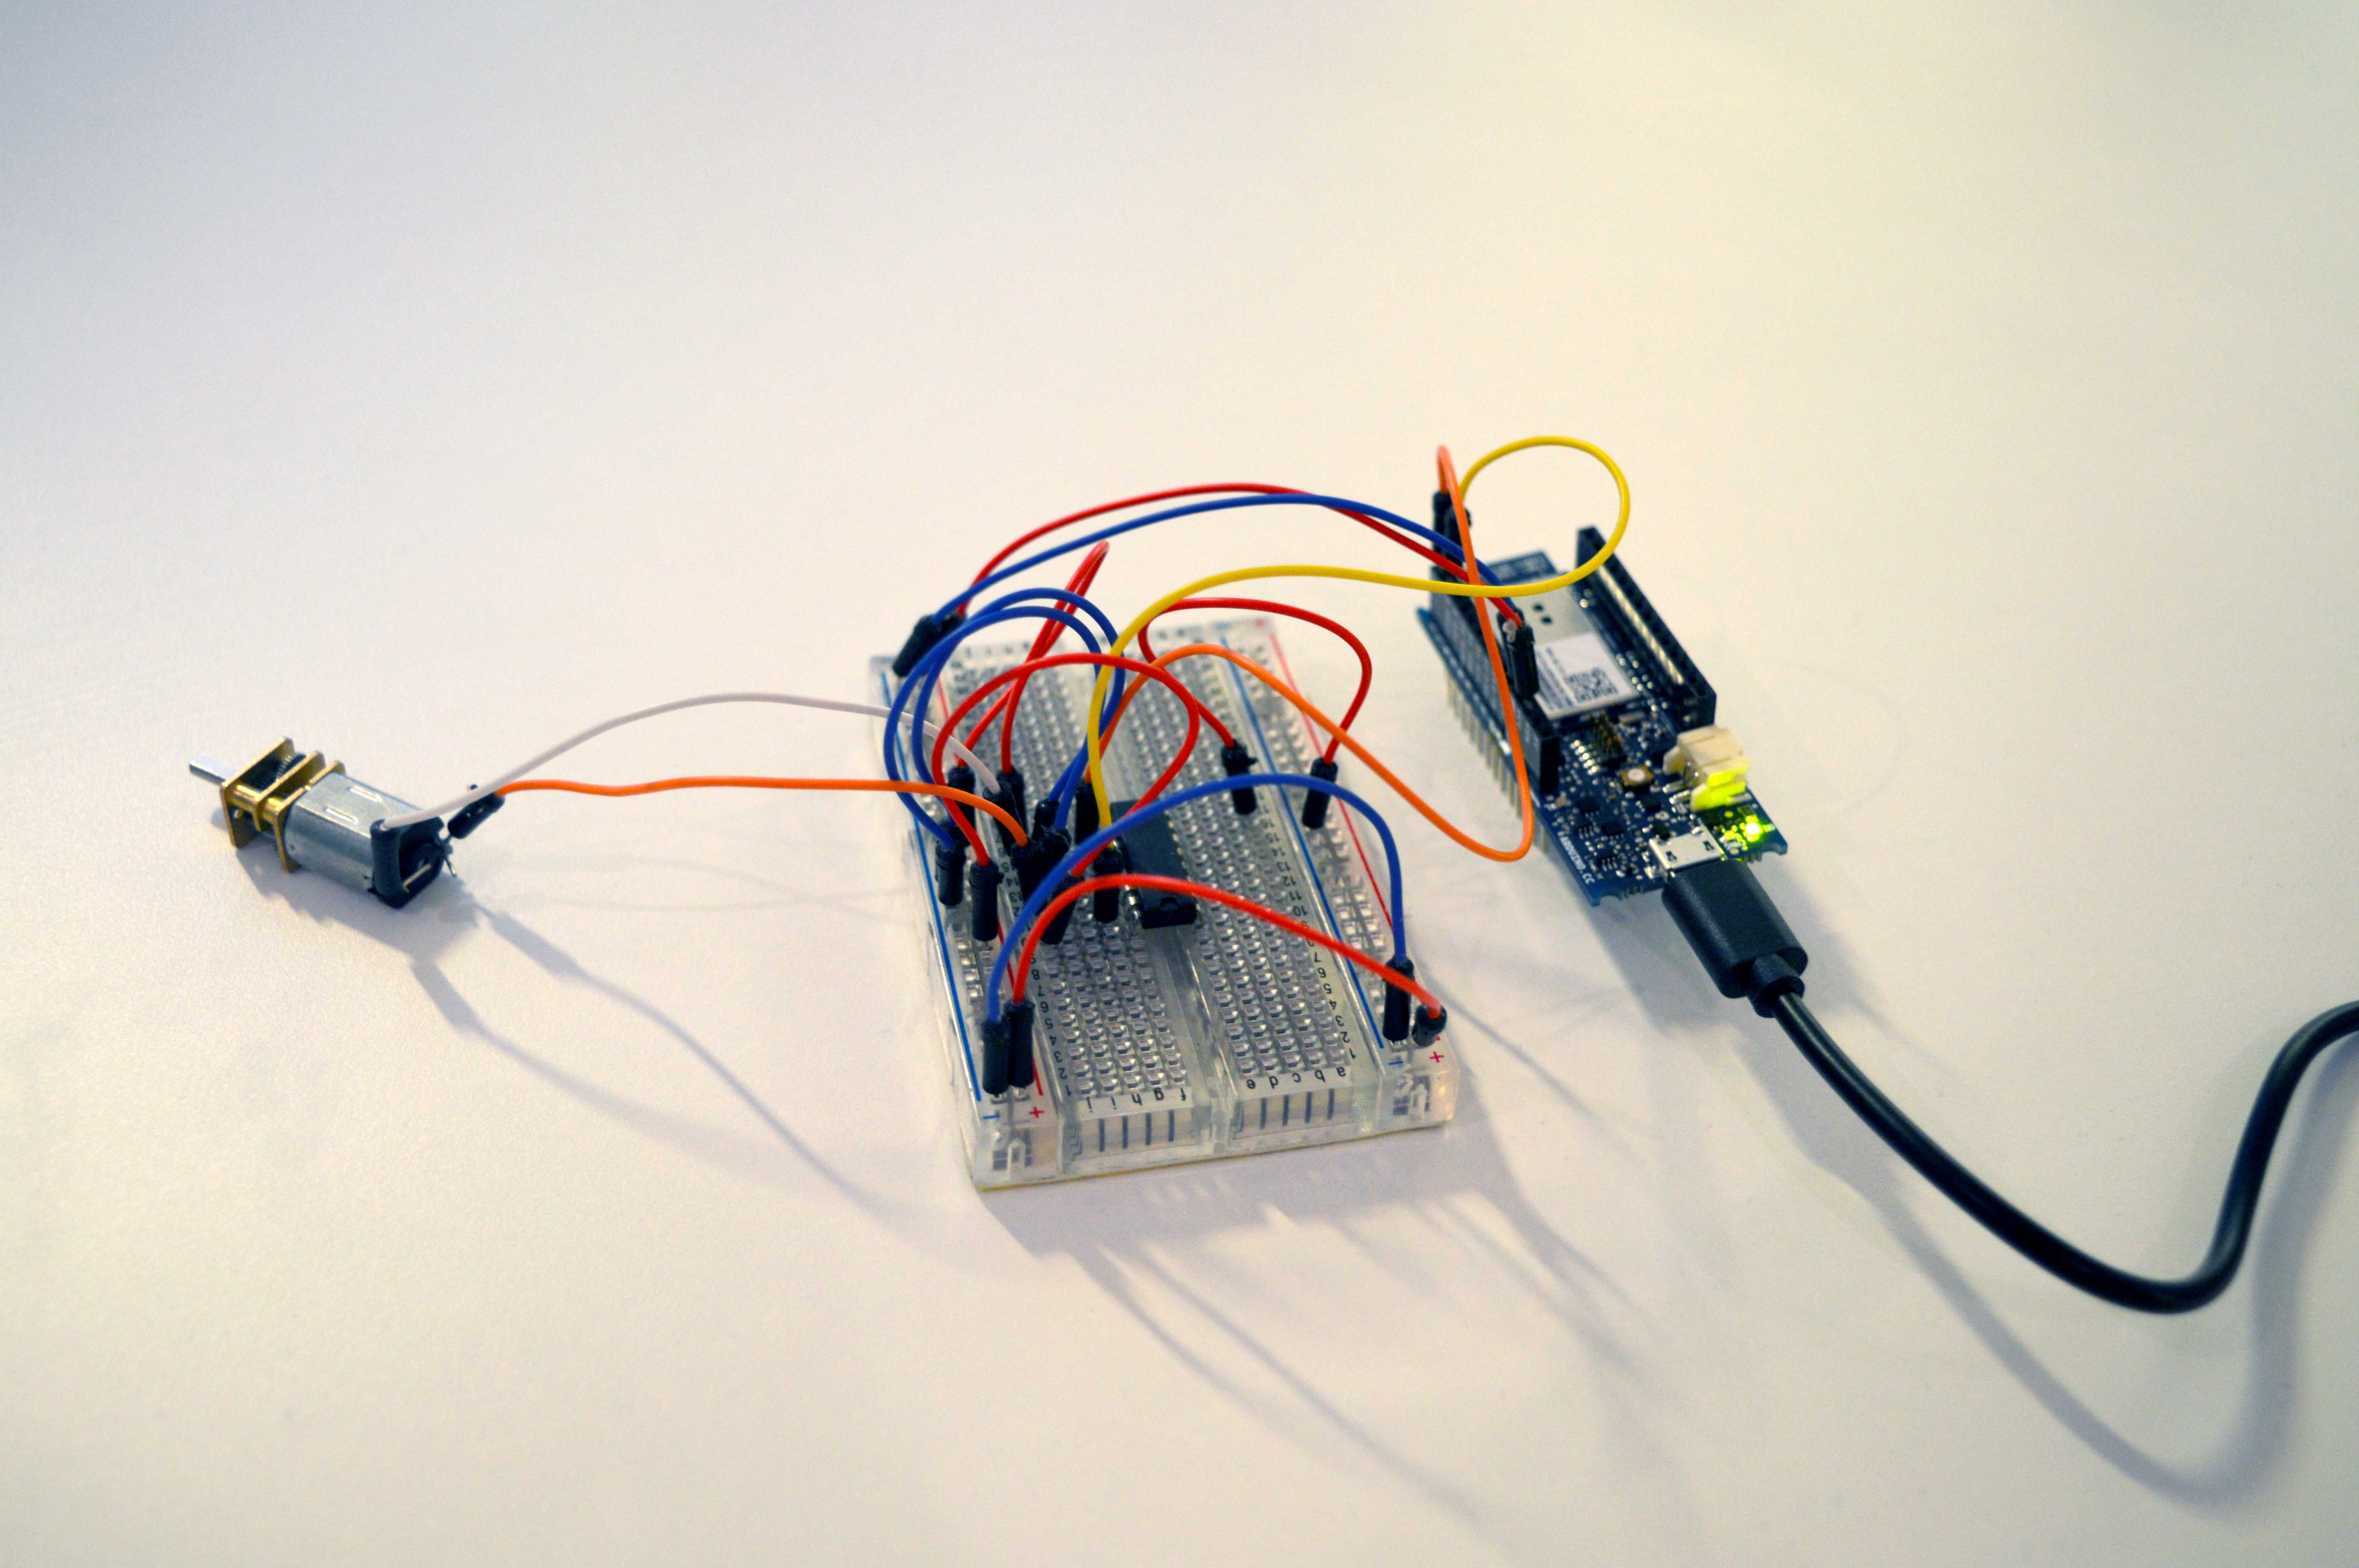
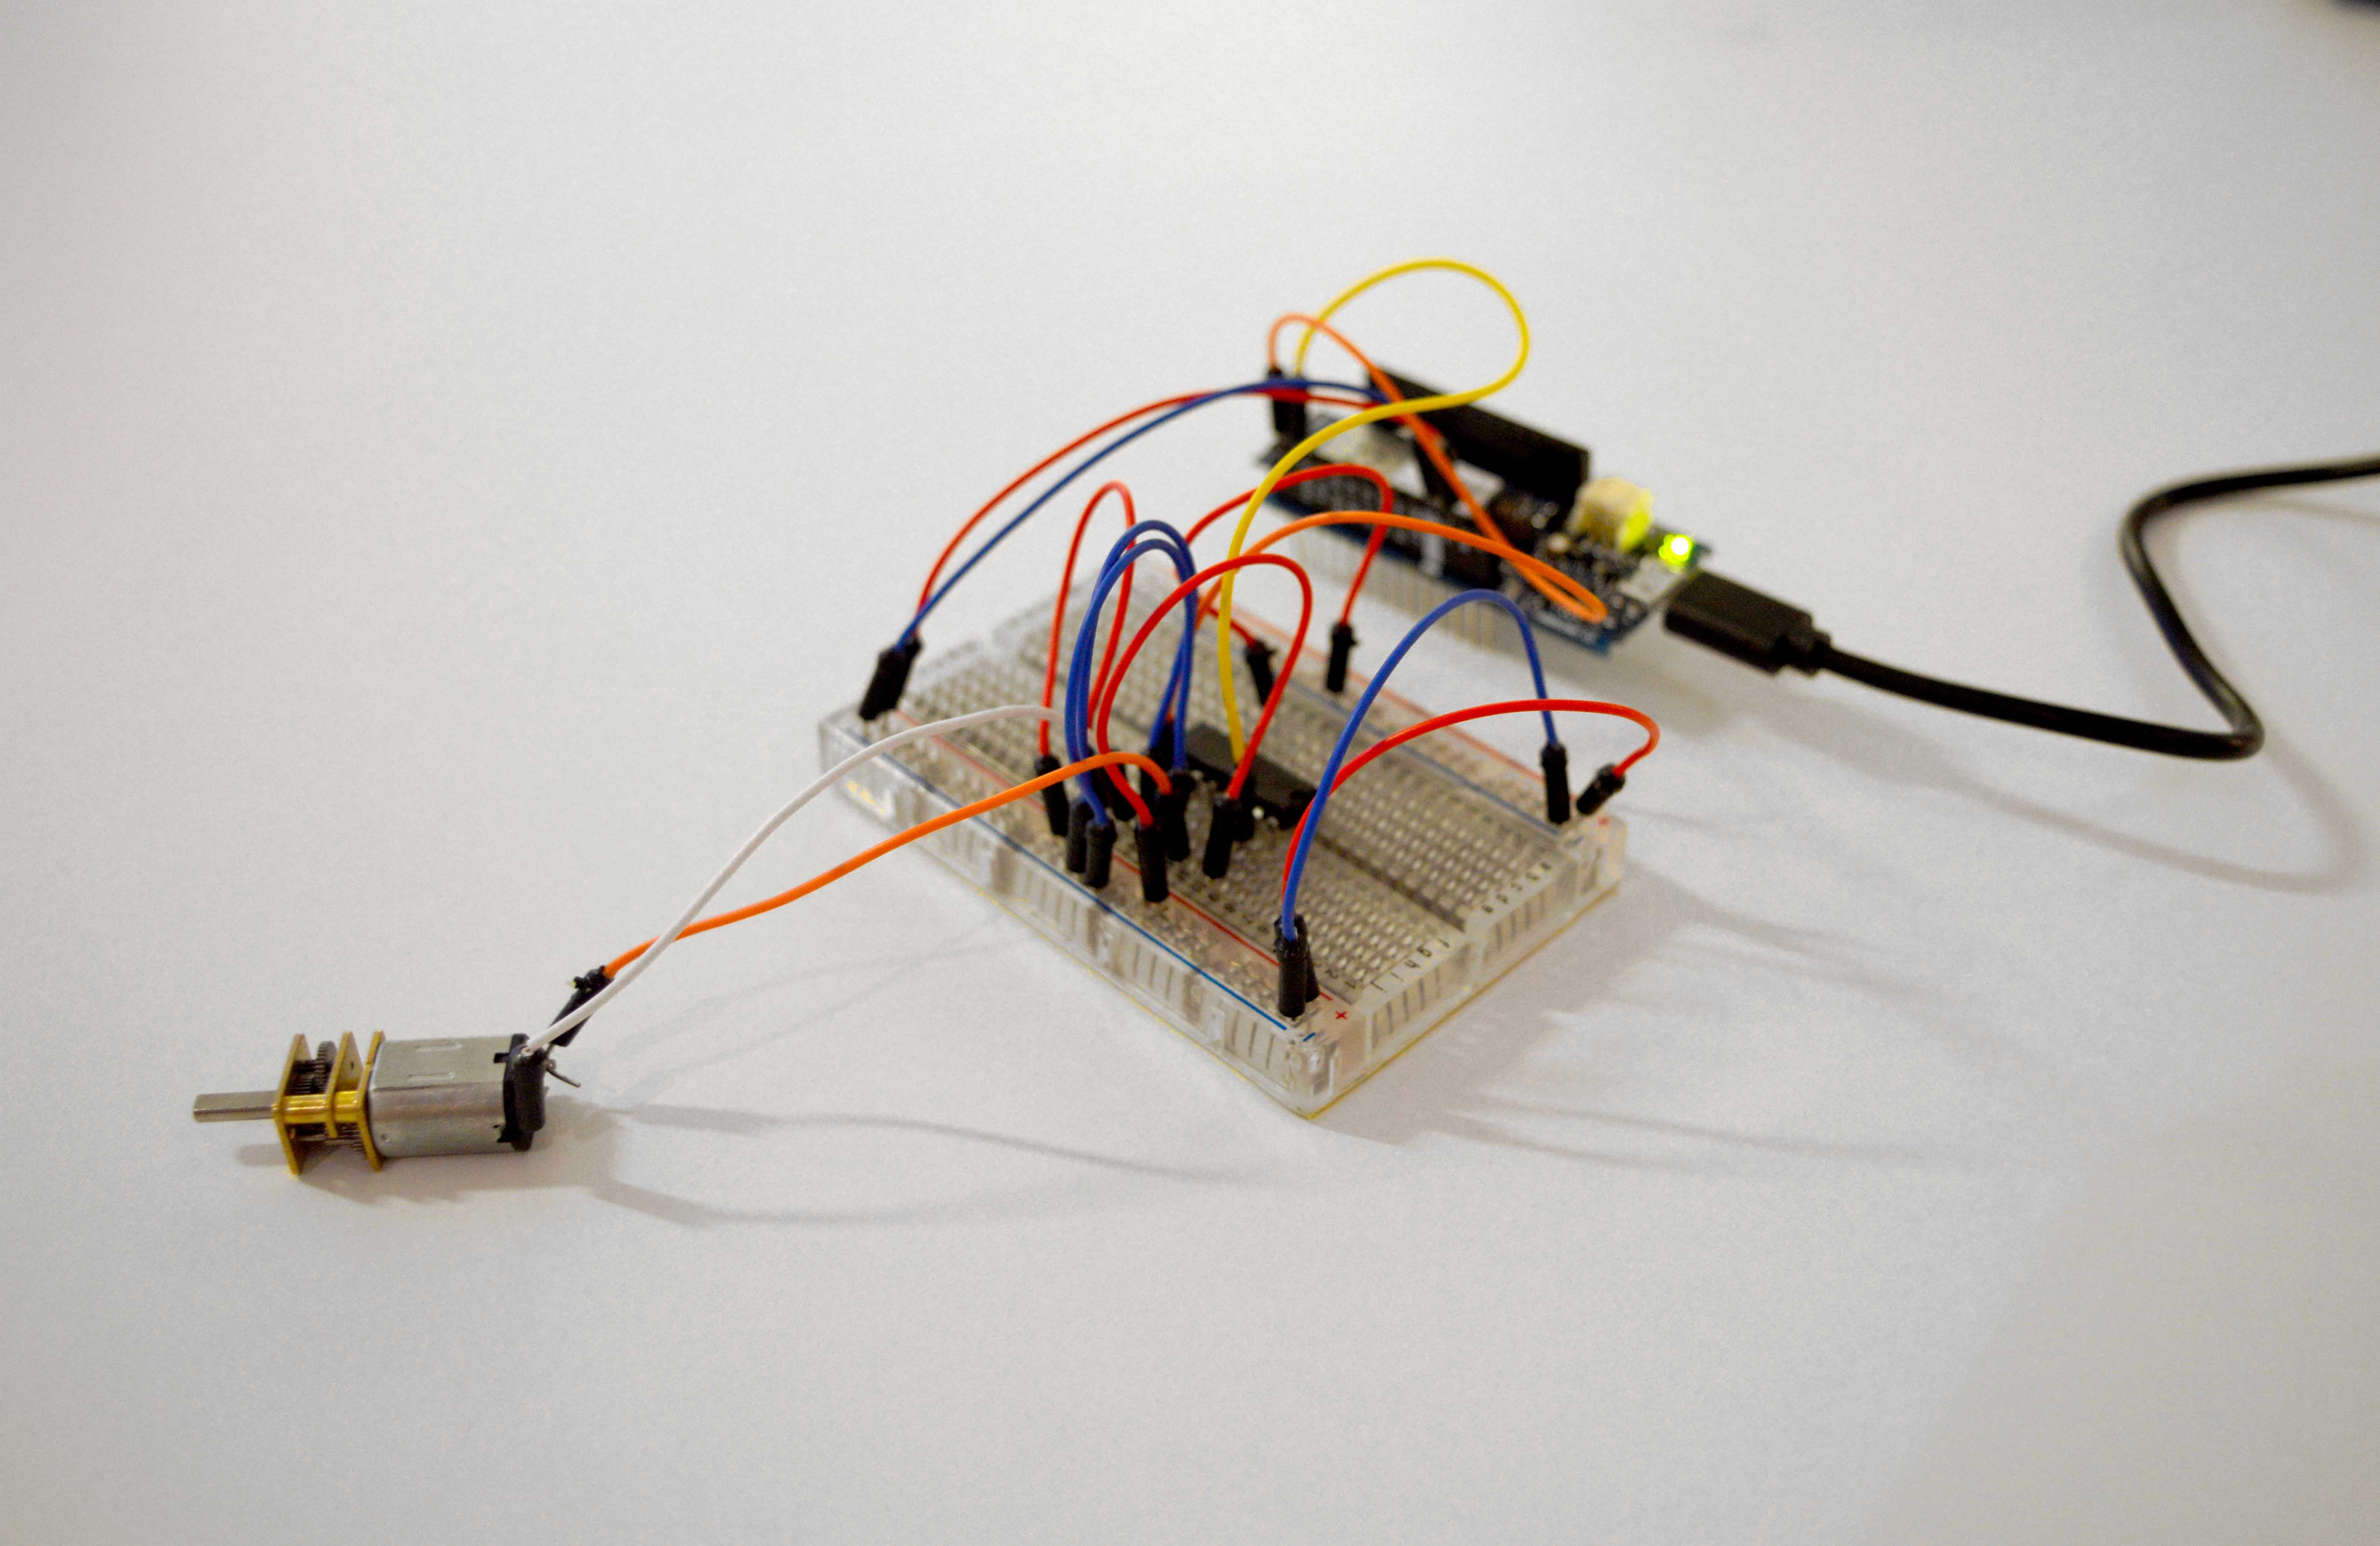
Driving the motor
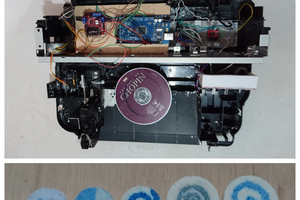
We used a high torque DC motor to turn the wheel, and the L293D motor driver to drive the motor. Click here to read in depth about how we set this up, along with a basic code snippet for making the motor turn. We'll build upon this code later in this article, when we add in MQTT functionality to listen for Commands.
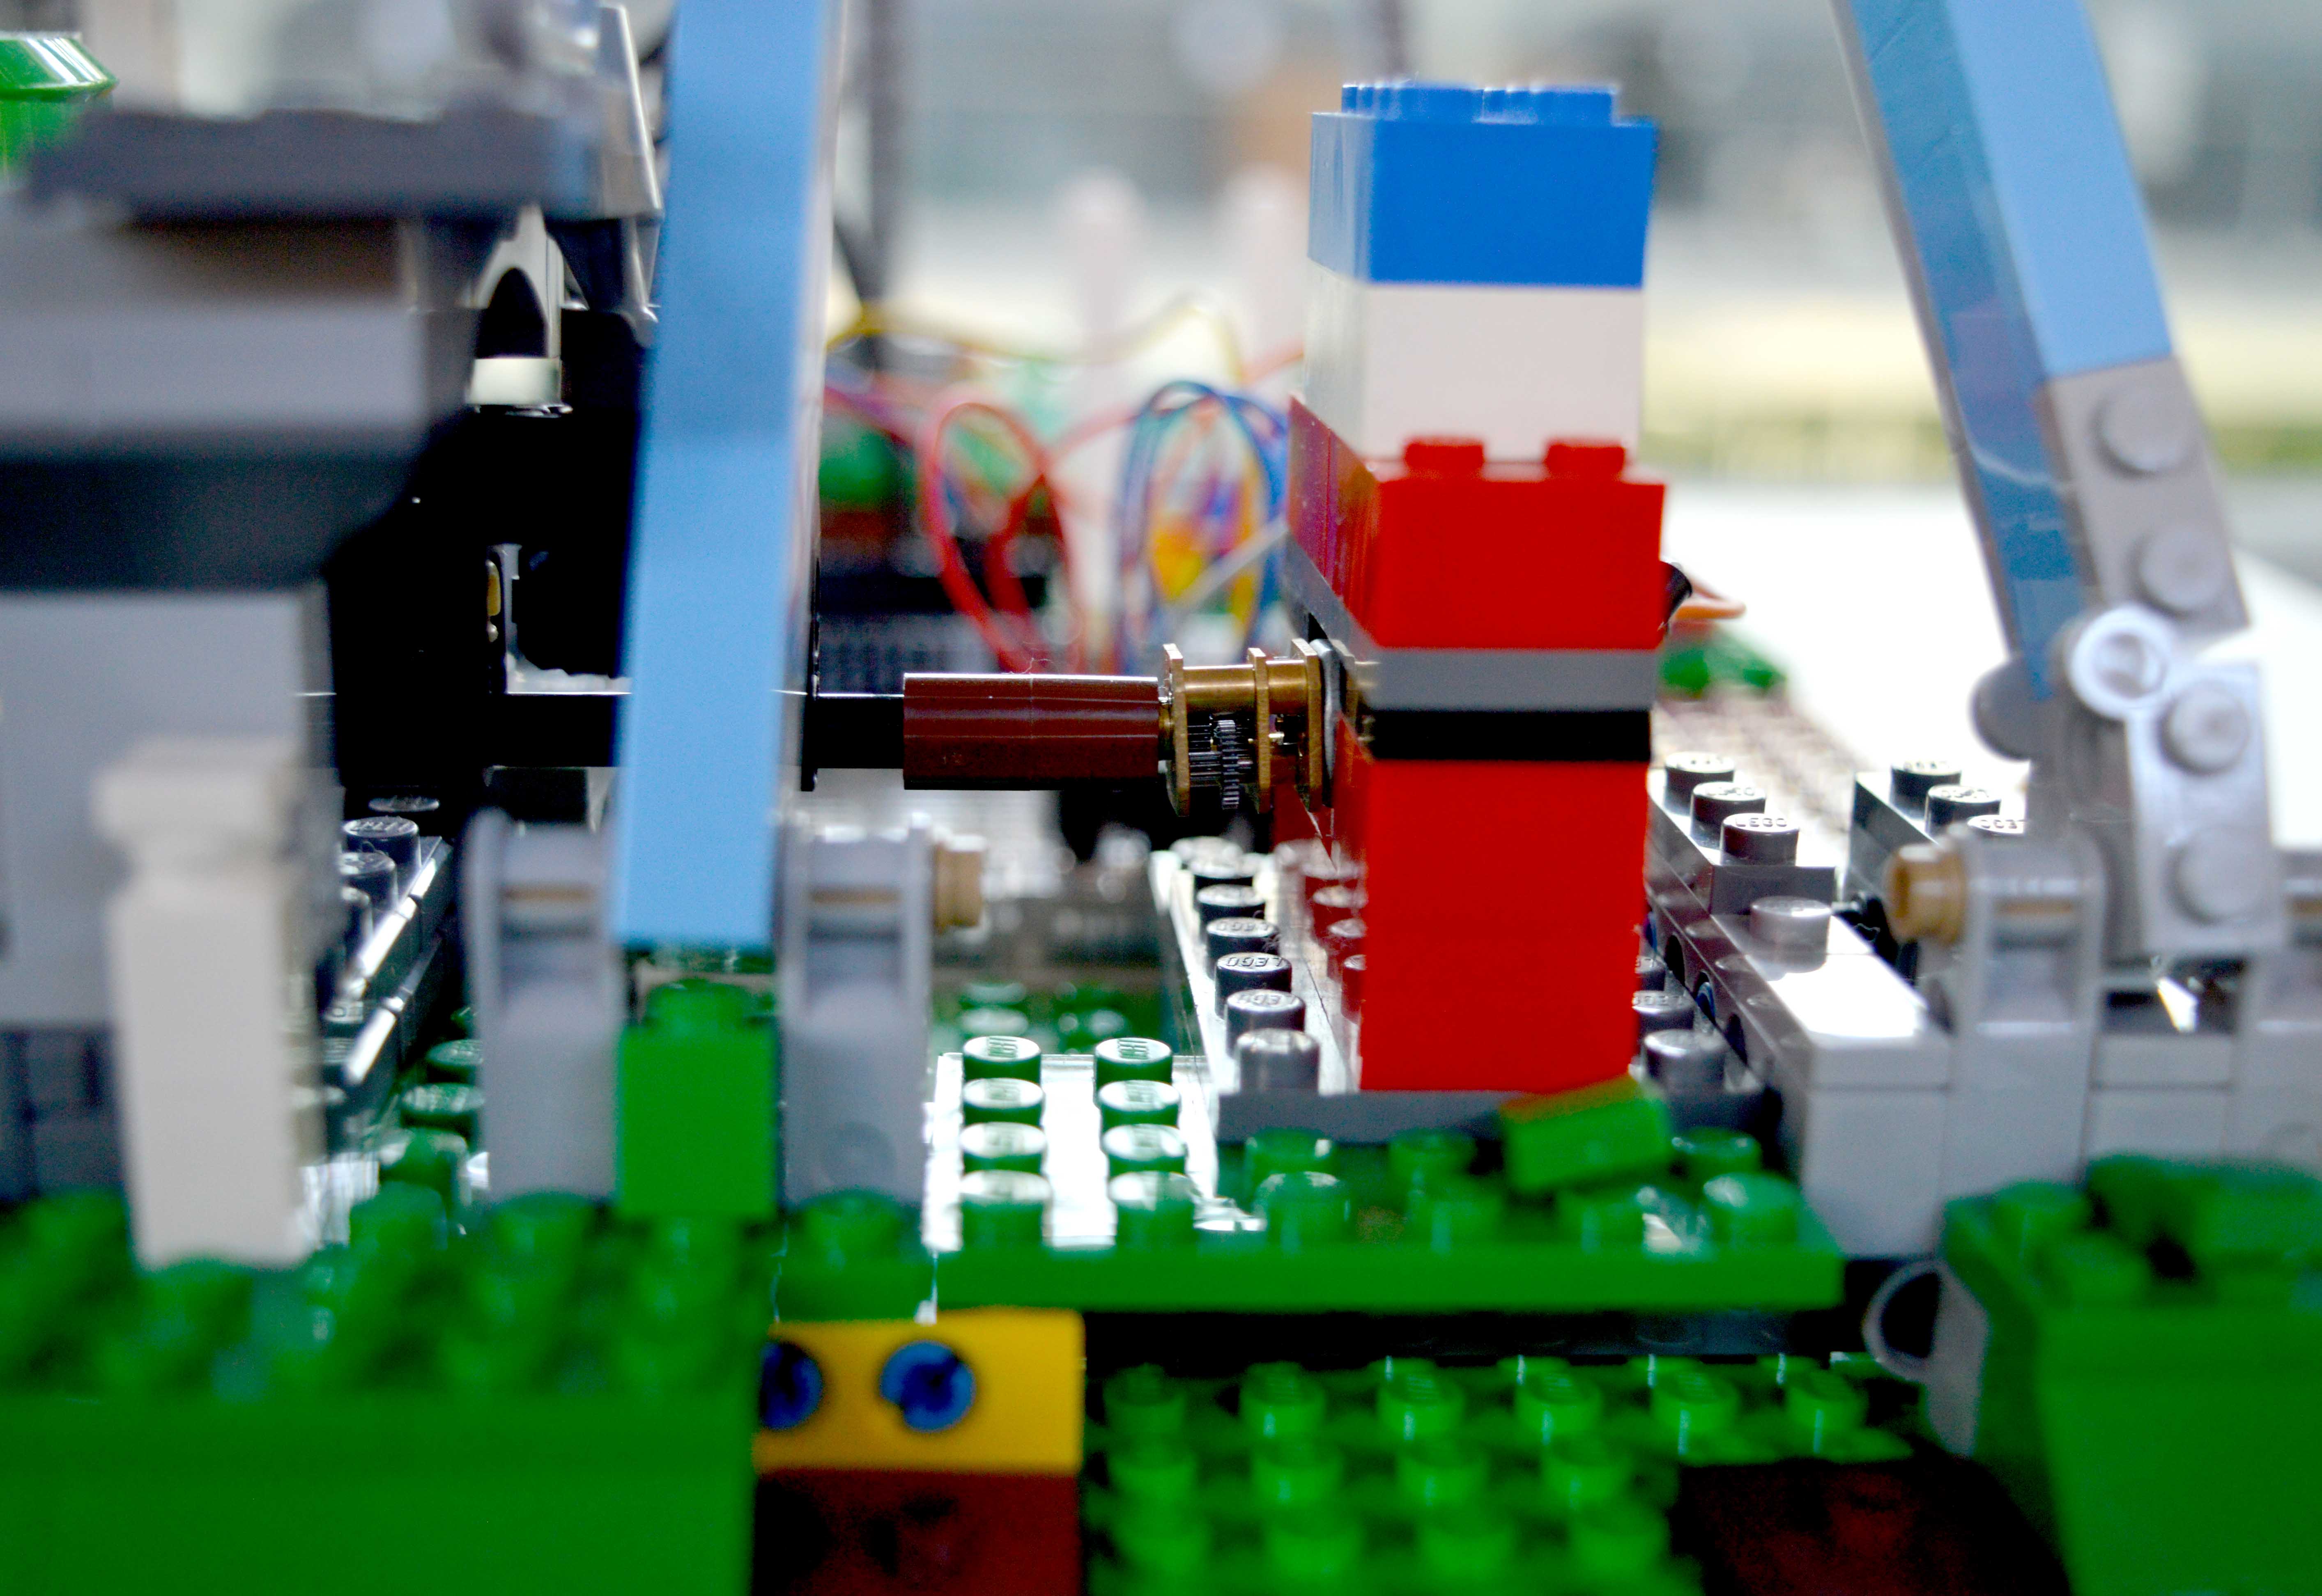
Attaching the motor to the wheel
The next step was to hook up the DC motor to the Ferris wheel mechanism and make it turn. This proved to be quite challenging, and required some dismantling of the lower part of the structure to make space for the components. We found that the motor's shaft fit almost perfectly into one of the Lego pieces, all we had to do was mount the motor in the correct place and make sure it wouldn't move around. So, we built a little Lego enclosure for the motor out of spare pieces, leaving space at the back for connecting the wires to the motor's terminals.
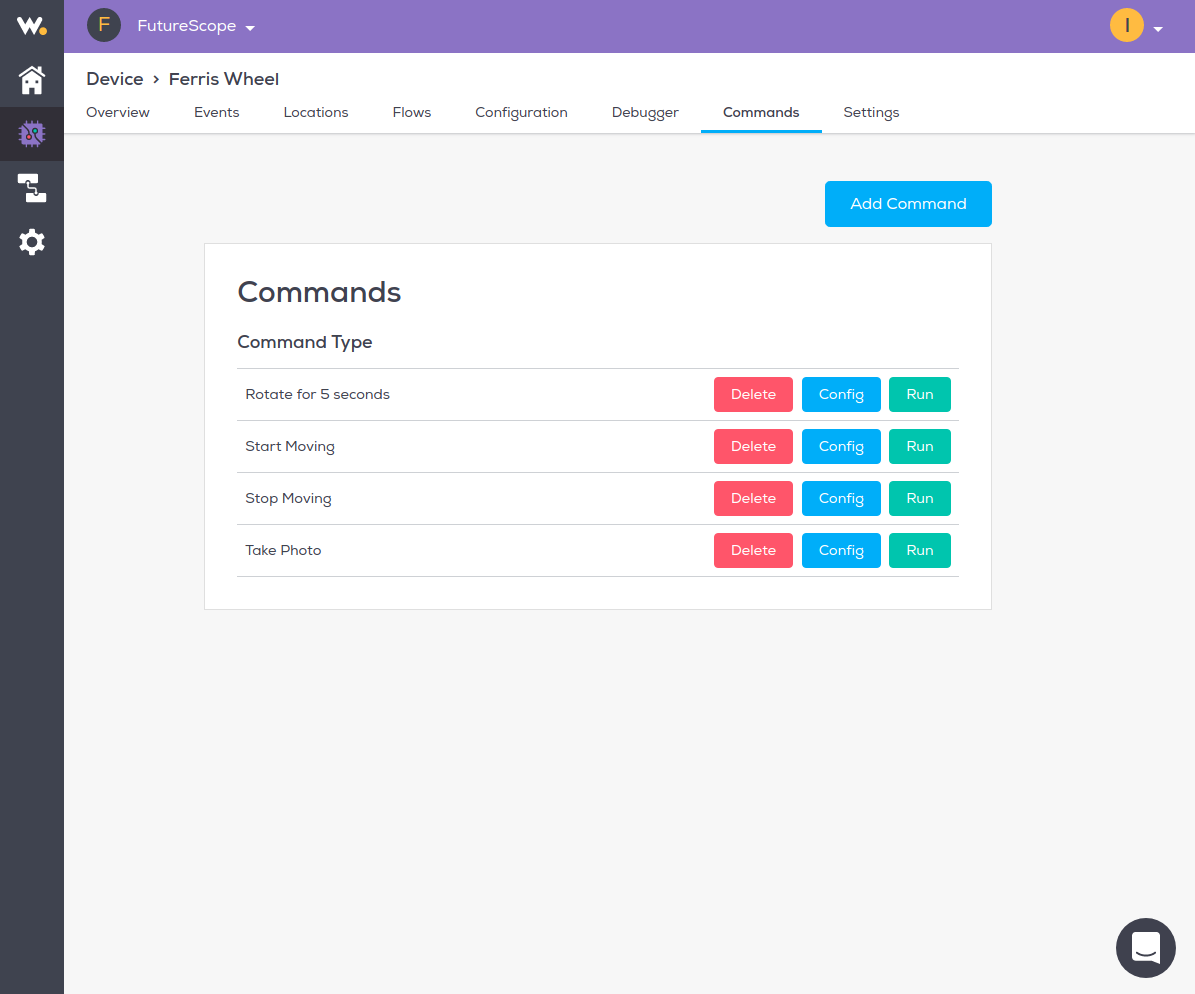
Listening for Commands
Next, we wanted to create some Commands for the Arduino to listen for, and rotate the motor accordingly. The first step was to create the Commands in the Wia dashboard. As you can see, we created some basic Commands for manually controlling the wheel, as well as a 'take photo' Command, which we'll get to later.
Next, we updated the Arduino code to use MQTT to listen for the Commands. Here's the code:
#include <WiFi101.h>
#include <MQTT.h>

const char WIFI_SSID[] = "wifi-ssid"; // WiFI ssid
const char WIFI_PASS[] = "wifi-password"; //WiFI password

// get this from the wia dashboard. it should start with `d_sk`
const char* device_secret_key = "device-secret-key";

//WiFiSSLClient ipCloudStack;
WiFiClient wifiClient;
MQTTClient mqttClient;

int status = WL_IDLE_STATUS;

// Wia Cloud MQTT params
char mqttCloudServer[]     = "api.wia.io";
int  mqttCloudPort         = 1883;
char mqttCloudUsername[]   = device_secret_key;
char mqttCloudPassword[]   = " ";

// Wia API parameters
char server[] = "api.wia.io";
const int mqttPort = 1883;  // Default MQTT port

const String deviceId = "device-id";   // starts with dev_, found in Wia Dashboard
const String commandName = "take-photo";  // Configured in Wia Dashboard

// Topics
String takePhotoCommandTopic = "devices/" + deviceId + "/commands/take-photo/run";
String rotateForFiveCommandTopic = "devices/" + deviceId + "/commands/rotate-for-5-seconds/run";
String startMovingCommandTopic = "devices/" + deviceId + "/commands/start-moving/run";
String stopMovingCommandTopic = "devices/" + deviceId + "/commands/stop-moving/run";

//L293D
const int motorPin1  = 7;
const int motorPin2  = 6;


void messageReceived(String &topic, String &payload) {
  Serial.println("incoming: " + topic + " - " + payload);
  if (topic.equals(rotateForFiveCommandTopic)) {
    Serial.println("Rotating for 5 seconds.....");
    // Start rotating
    digitalWrite(motorPin1, HIGH);
    digitalWrite(motorPin2, LOW);
    // wait 5 seconds for connection:
    delay(5000);
...
Read more »
 Guillermo Perez Guillen
 paweljarosz
 Norbert Heinz
 roboteurs