Close
0%
0%

Aquila 2.0 - MQTT-SN based IoT Platform

MQTT for low power devices

Similar projects worth following
Aquila 2.0 implements a MQTT-SN gateway, bridge and libraries for wireless nodes.

It allows the communication of low power devices using various types of RF (currently 915MHz rfm69 radio and 2.4 Ghz 802.15.4 Altair board) with standard MQTT networks without losing the low power nature of the devices and the features of a full MQTT implementation.

Characteristics of Aquila 2.0:

- Ideal for low power networks
- MQTT all the way via MQTT-SN
- Sleeping nodes support according to MQTT-SN spec
- Security by default (using radio encryption features when available)
- Easy and flexible implementation
- Interoperability between different wireless networks via MQTT

Aquila 2.0 consists of:

- Gateway MQTT-SN
- Bridge (Firmware)
- Wireless nodes (Firmware and MQTT-SN libraries)

Prologue

Two years ago I started working on Aquila, a Domotics and Internet of things platform aimed at easing prototyping, development and testing of ideas with connected devices.

At that time, the whole "Internet of things" idea was relatively new, new IoT platforms where appearing trying to become the default platform for that type of devices.

However, each one of those platforms was incompatible with the others, some being better for some things than others, being more or less useful depending on the application.

Aquila 1.0 was created integrating open technologies and standards like 802.15.4, aiming at being a viable alternative for developers. Aquila successfully reached its original objectives, however, integrating it with other technologies is not easy and could be not flexible enough for some applications.

The Internet of things matures

During that time, another technology was becoming popular in the IoT world: a protocol named MQTT, this is not a new technology, it was created by IBM in 1999, but it turned out to be ideal for IoT applications due to its simplicity and lightness.

MQTT is based on the Publish - Subscribe concepts; Clients are connected to a server called "Broker", and can publish in certain "Topics" or subscribe to them.

Example of the workings of MQTT, Source: http://www.hivemq.com/

For example, lets say that we have two clients, one is a temperature sensor that publishes on the topic "sensor1/temperature", and the other is a screen that subscribes to the same topic. When the sensor publishes that we are at 24ºC, the screen gets that value immediately and can, for example, display it.

MQTT doesn't define the lower network layers, like the frequency, modulation, packets, etc. Instead, it runs over TCP networks, this is good because it's easily implementable on any TCP/IP network and can be integrated on mobile applications and web services. Nevertheless, this makes it harder to implement in simpler sensor networks.

Now, there is a specification called MQTT-SN - MQTT for sensor networks -, this specification is very interesting because it allows us to integrate embedded devices with any MQTT network, without losing the advantages of that sensor network, like low power usage, and surpassing it's limitations, like the limited computation power of a microcontroller.

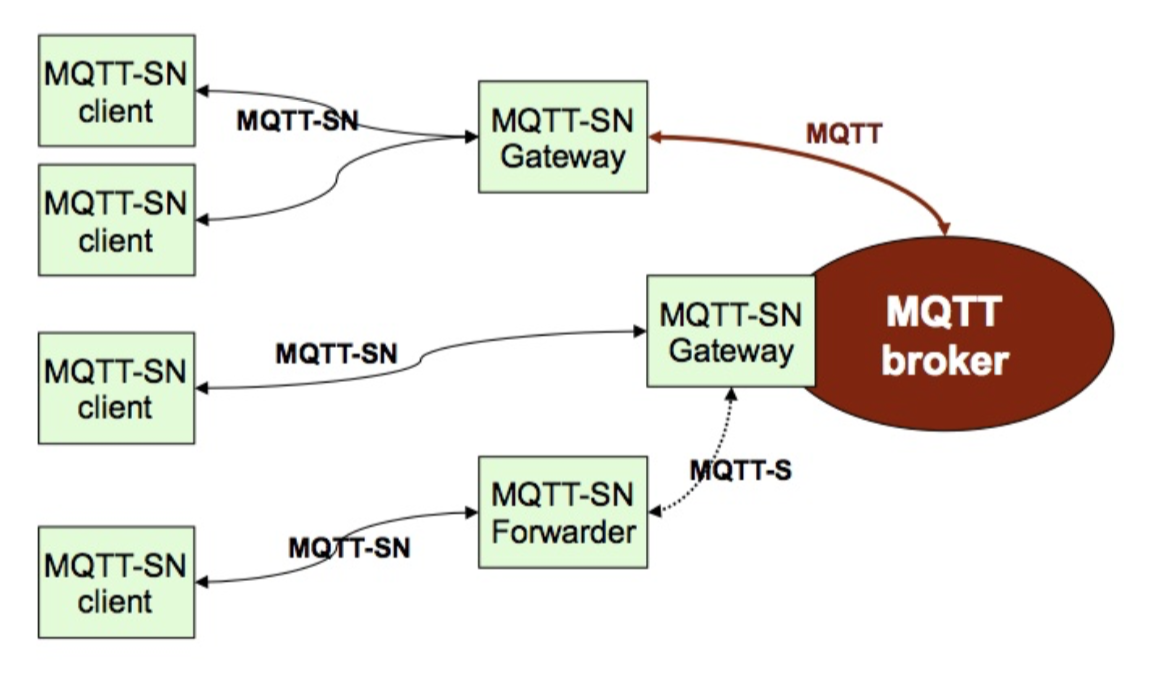
MQTT-SN Architecture, Source: MQTT-SN spec v1.2

MQTT-SN seemed to me as the solution for interoperability between sensor networks. Aquila 2.0 had to integrate it.

There are few implementations of this specification, and I couldn't find any complete open source one. That's why I decided to implement it for Aquila 2.0.


Aquila 2.0

Characteristics of Aquila 2.0:

- Ideal for low power networks
- MQTT all the way via MQTT-SN
- Sleeping nodes support according to MQTT-SN spec
- Security by default (using radio encryption features when available)
- Easy and flexible implementation
- Interoperability between different wireless networks via MQTT


Aquila 2.0 consists of:

- MQTT-SN Gateway
- Bridge (Firmware)
- Wireless nodes (Firmware and MQTT-SN libraries)

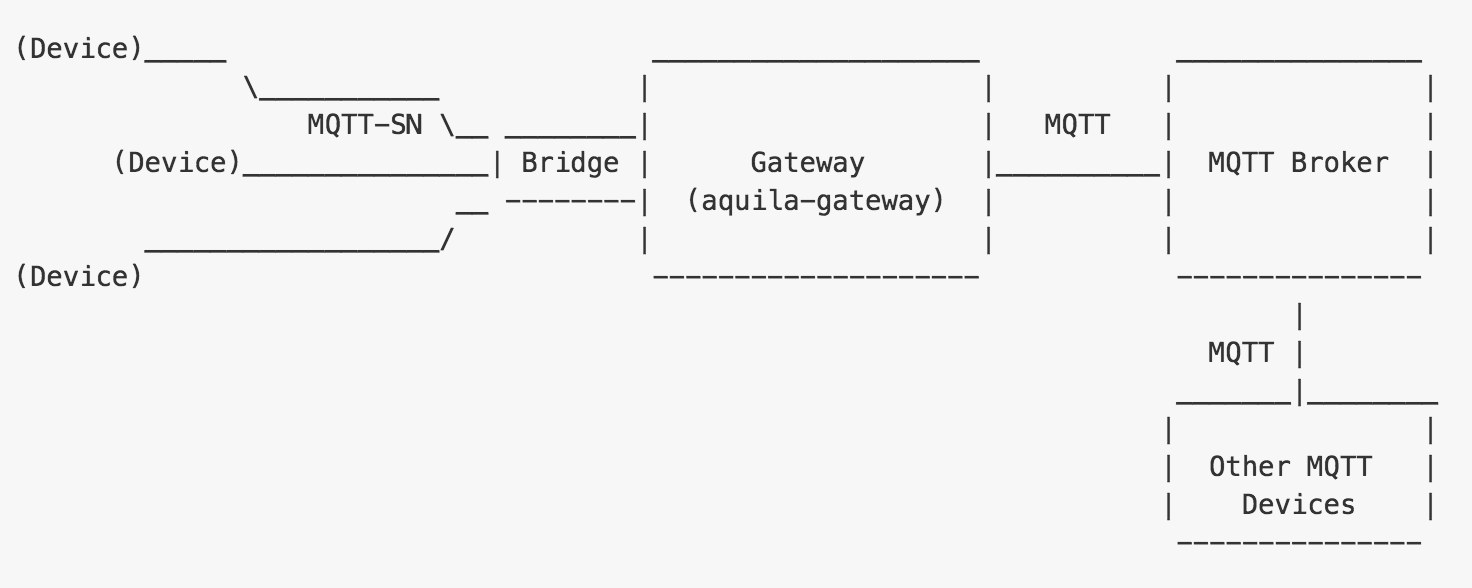
Aquila 2.0 Architecture

The nodes implement the MQTT-SN support in firmware and are connected wirelessly to the Bridge. The Bridge transmits every message to a PC (or micro-pc like Raspberry Pi) via serial communication or USB. The PC runs the Gateway, it is in charge of: 1. Managing the devices (pairing, addressing, buffering of messages for sleeping nodes, MQTT topics, and more) and 2. Translating messages from and to your favorite MQTT Broker (like Mosca or Mosquitto).

This implementation aims to be as hardware independent as posible, this makes possible porting it to different boards, microcontrollers and radio transceptors in a relatively easy way.

Right now we have two hardware implementations:
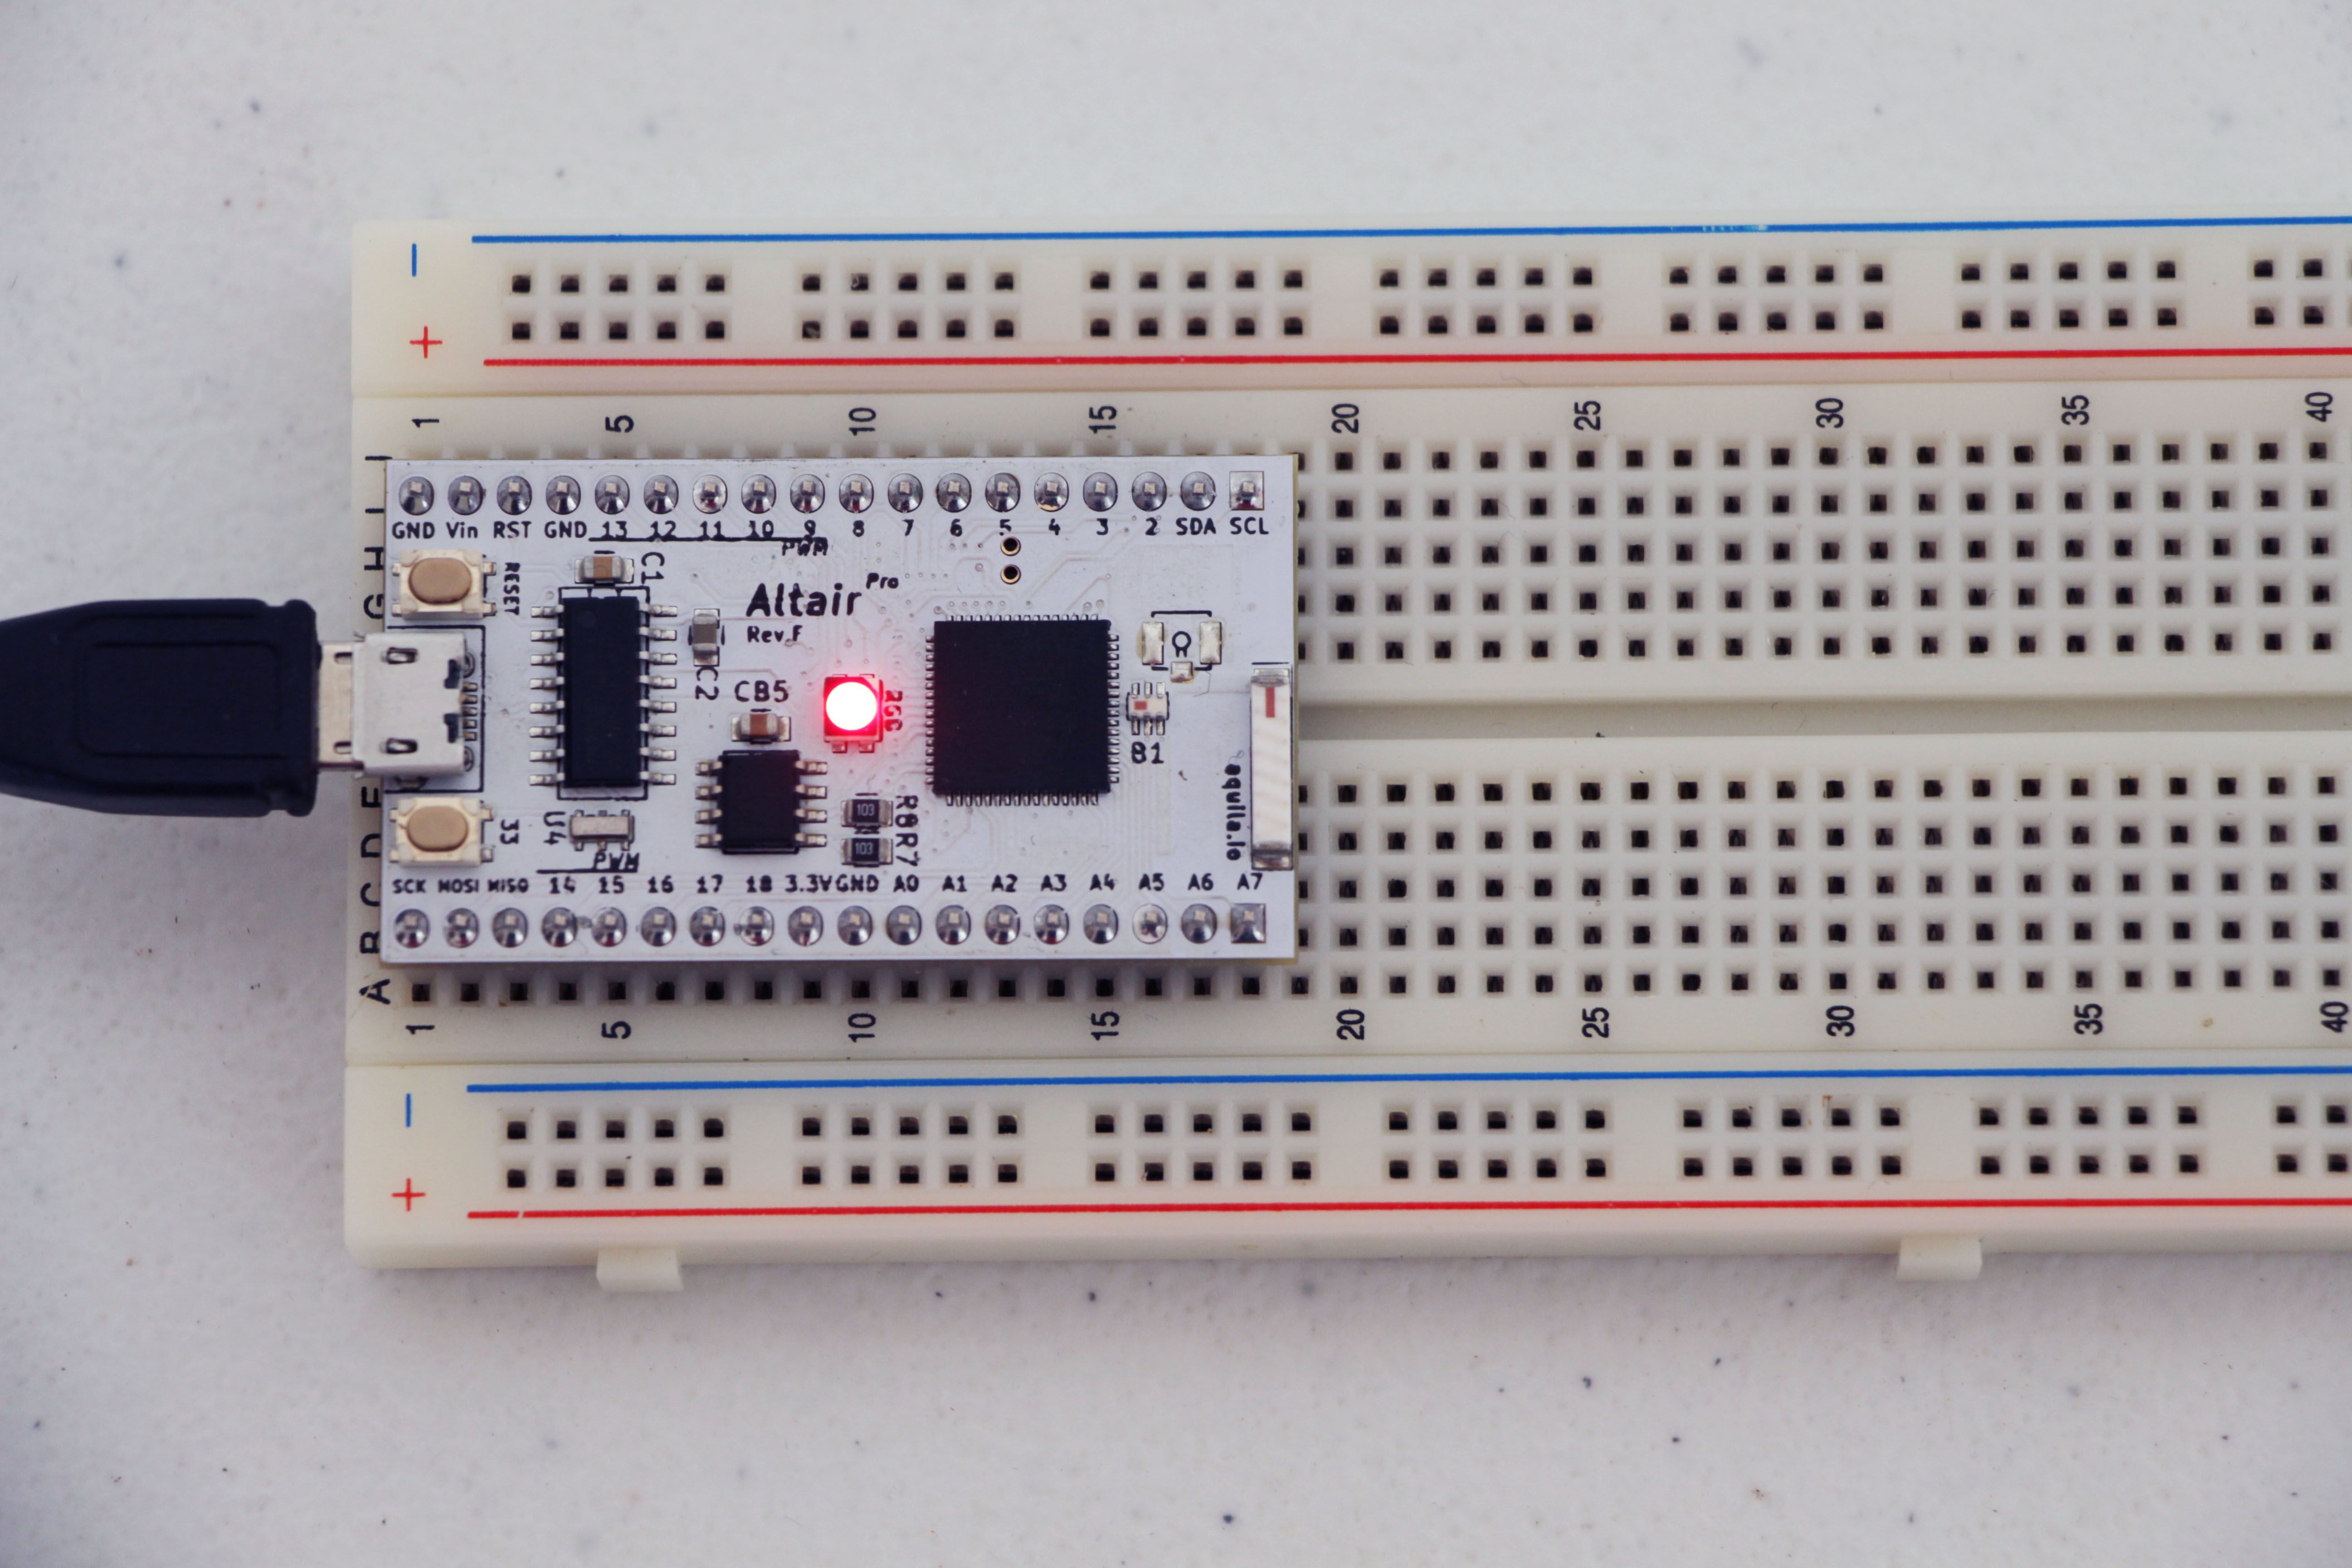
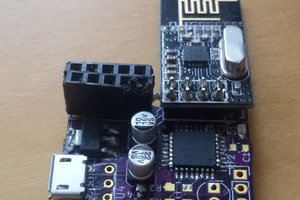
Altair Pro

  • Altair: The Aquila development board, Have you worked with Aquila 1.0 before? don't worry, update the firmware of your Altairs and they will be Aquila 2.0 compatible.
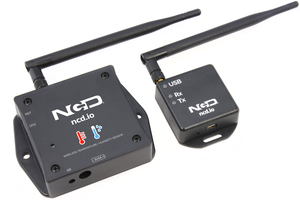
  • Arduino with rfm69: There is a cheap and pretty...
Read more »

  • Quick Update - February 12 2017

    Rodmg02/13/2017 at 01:35 0 comments

    aquila-gateway - Released version 0.6.0


    - Implemented removing devices from the monitor API.

    - Changed Monitor API: All "*/get" command topics are now "*/req" for consistency with responses ("*/res"). Old API is still supported but deprecated.

    - Minor bug fix: incorrect buffer function usage in Serial and TCP Transports.

    The first change is useful when managing devices from a custom app. Usage:

    Removing a device:

    1. subscribe to gw/devices/remove/res
    2. publish to gw/devices/remove/req a json with the address or id of the device to delete. Example: { "address": 23 } or { "id": 23 }.
    3. You should get a JSON response via the subscription to gw/devices/remove/res: { "success": true } (or false).

    More info in the docs: https://github.com/Rodmg/aquila-mqtt-sn-gateway/blob/master/doc/index.md

  • Getting started with Aquila 2.0

    Rodmg12/09/2016 at 06:11 0 comments

    Required parts:

    Two or more of the following:

    • 3.3V version of Arduino nano or compatible
    • RFM69W or RFM69CW 915Mhz transceiver (433 and 868 Mhz versions can be used with some modifications to the code)

    - OR -

    You could use a board that integrates the Atmega328 MCU and the RFM69 transceiver, like Moteino, however I currently don’t have one and haven’t tested it.

    Required skills:

    • Some experience with an UNIX-like command line (like Bash)
    • Some experience with Arduino programming
    • Some experience with computer networks
    • Git, JavaScript and node.js is a plus

    This tutorial will be divided in two parts:

    1. Embedded stuff: Setting up the hardware and the firmware, including the software tools needed for programming it.
    2. Software stuff: Setting up the software that runs on the PC/Server

    Embedded stuff:

    Preparing the hardware:

    If you are using a 3.3V Arduino nano and the RFM69 separately, connect them this way:

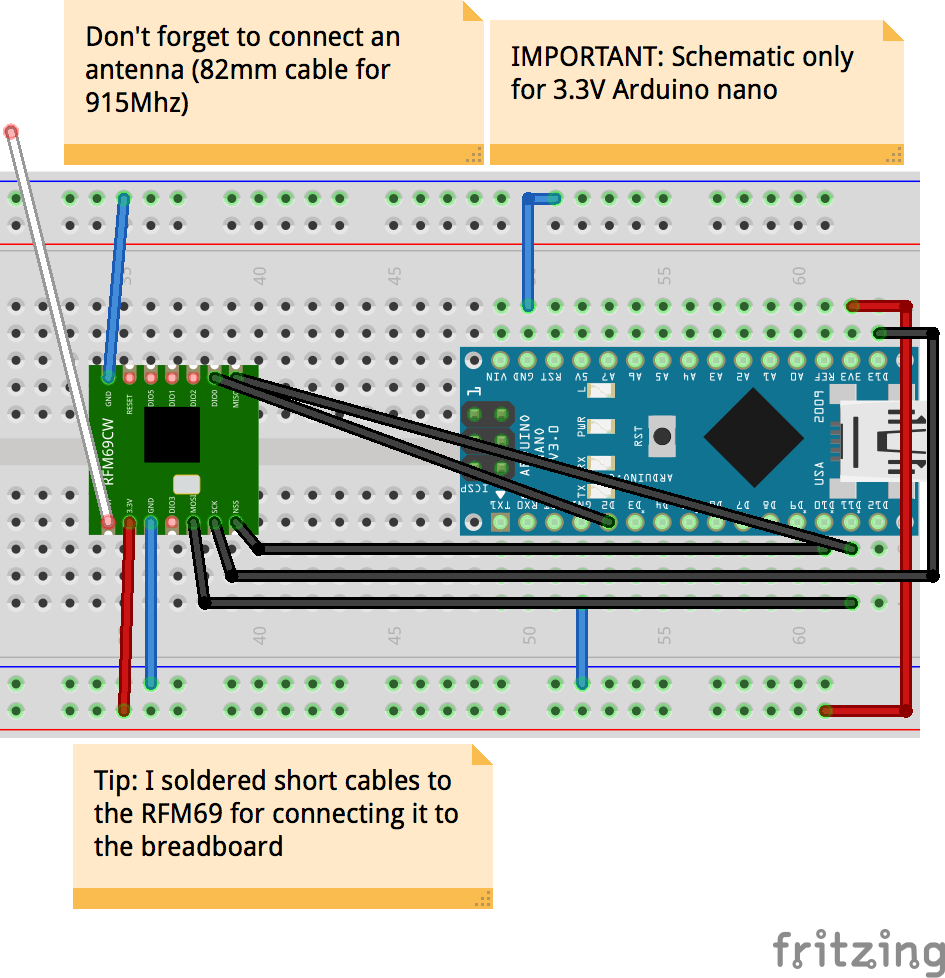
    If you have a standard 5v Arduino nano, you will need to use a level shifter and a 3.3V regulator for powering the RFM69, here are some good guides for doing that:
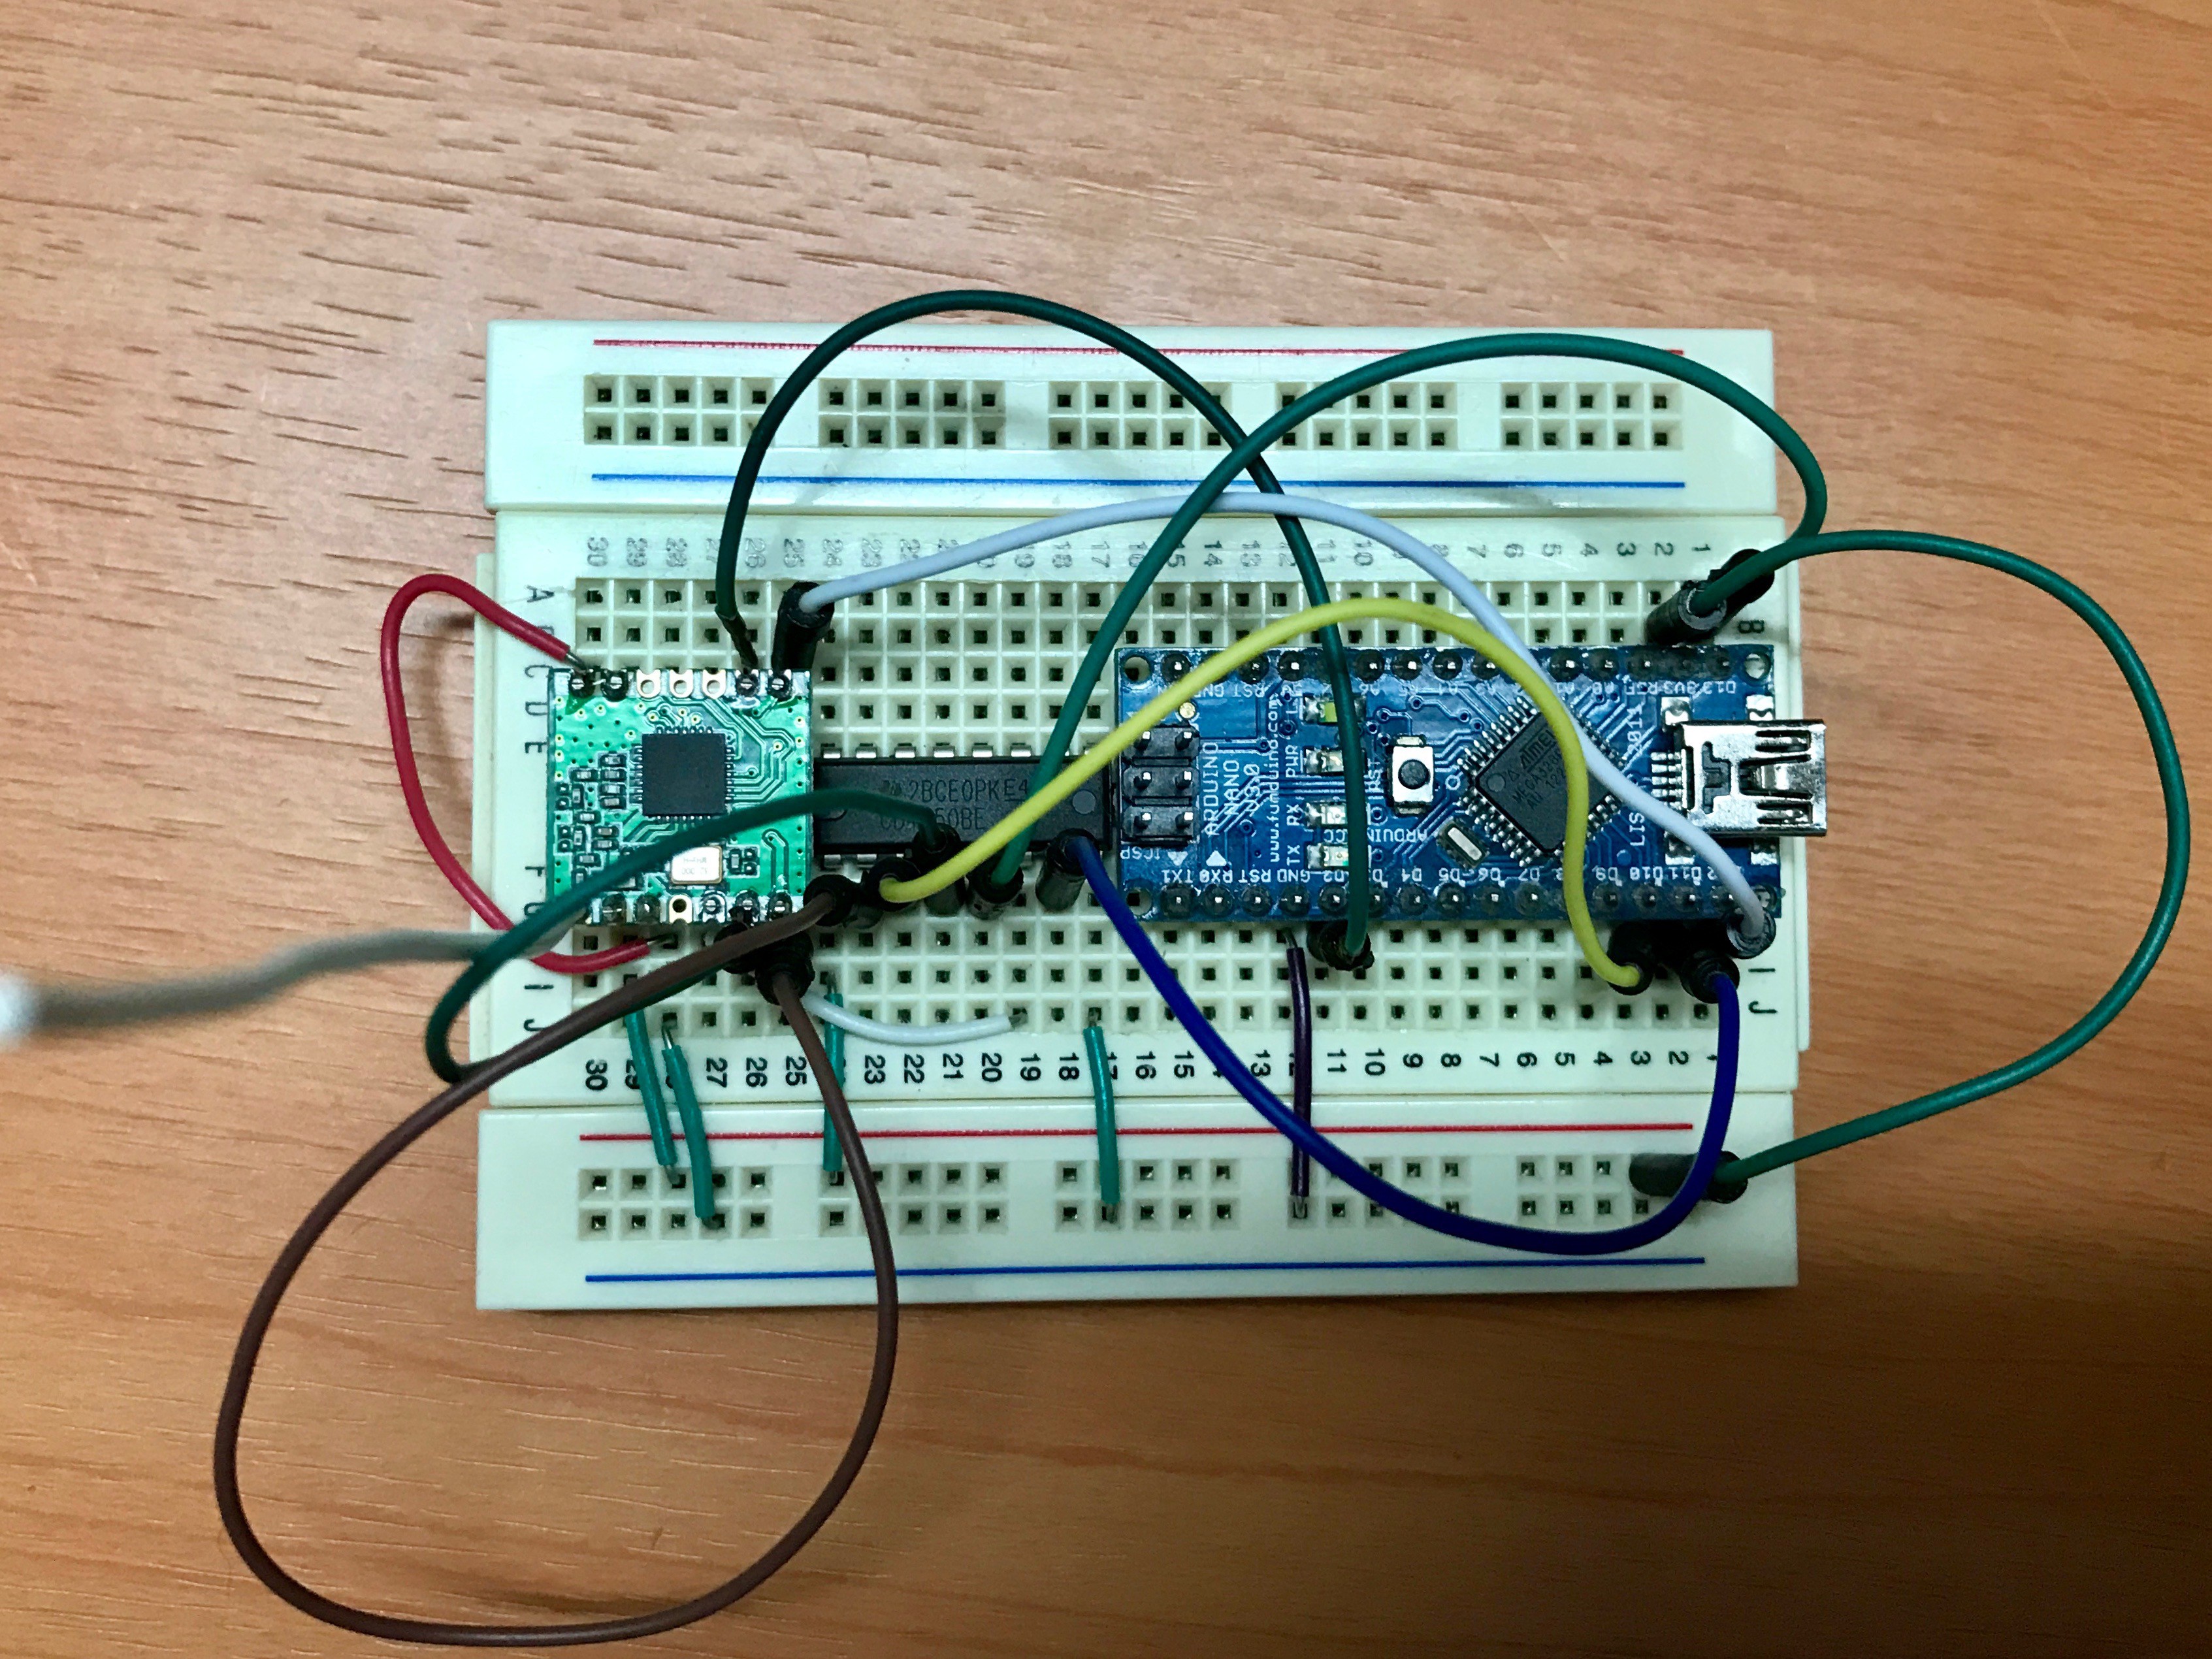
 https://learn.sparkfun.com/tutorials/rfm69hcw-hookup-guide#hardware-connections

    Example of connecting a 5V Arduino nano using a CD4050B Buffer as level shifter.


    Also please note that this diagram is for the RFM69CW, variants like the RFM69HCW have different pinouts, please adapt your connections according to the specific module you are using.

    Connect every Arduino/RFM69 pair you have like that. One of those will be the “Bridge” for interfacing with the PC, the others will be the clients.

    Now we should prepare and upload the Bridge firmware, for that do the following:

    1. Install PlatformIO IDE
    2. Download the Bridge firmware from: https://github.com/Rodmg/rfm-mqtt-sn-bridge (Clone or download > Download Zip)
    3. Uncompress the downloaded file and open the resulting folder with Atom (Installed with the PlatformIO IDE)
    4. Connect the Arduino that will be the bridge to the PC and upload the firmware from the PlatformIO IDE.

    Thats it, our bridge is ready. Disconnect it from the PC, we will set it aside for now.

    Now, let’s program one of the clients with an example code:

    1. Download the example client firmware from a terminal with git:
      1. git clone --recursive https://github.com/Rodmg/rfm-mqtt-sn-client-example.git 
    2. Open the resulting folder with Atom (Installed with the PlatformIO IDE)
    3. Connect the Arduino that will be the client to the PC and upload the firmware from the PlatformIO IDE.

    Now our client is ready. The example firmware includes all the required libraries for driving the RFM69 transceiver, along with the MQTT-SN library. The example code is in src/main.ino, we will explain what it does in detail in a future post, but for now all we need to know is what it does:

    When the Arduino is powered on, it first tries to establish an MQTT-SN session with the Bridge, assigning itself a fixed address (ADDR, 23 in the example), when it succeeds, it subscribes itself to the topic “client/subscribe” and registers the topic "client/publish” (the topic where it will publish). It also registers a last-will topic, “lastwill”.

    After that, it starts a loop that publishes a “Hello world” message every 5 second to the “client/publish” topic.

    Also, when a publication to the topic “client/subscribe” is done, the received publication is printed via the serial port.

    Now let’s prepare the software that will let us try this functionality.

    Software stuff:

    We need to install a MQTT broker (mosca), the aquila-gateway for connecting the MQTT-SN network to the broker via the hardware Bridge, and a tool for easily developing and debugging the communication (node-red and node-red-dashboard).

    Before doing anything you need to have the following installed:

    1. node.js v6.X.X (https://nodejs.org/en/) (if you are on macOS or Linux, I recommend using nvm for installing and managing node versions (https://github.com/creationix/nvm))
    2. a UNIX-like console (If you are on macOS...
    Read more »

  • Quick Update - November 13 2016

    Rodmg11/14/2016 at 00:17 0 comments

    aquila-gateway - Released version 0.5.0

    - Fixed issues with sleeping devices getting lost.

    - Added command line option for specifying path of the device database file.

    - Added command line option for specifying the Gateway monitor topics prefix.

    The last two changes are useful when running multiple gateway instances on the same machine, so that they don't interfere with each other.

  • Quick Update - October 23 2016

    Rodmg10/23/2016 at 23:11 0 comments

    In the past weeks I have been actively testing and updating the project, here are the changes so far:

    aquila-gateway - Launched version 0.4.2:

    - Now you can install it directly from npm as a global package and use it as a command line program. Instructions are on the README of the github repo.

    - Implemented experimental TCP Transport: Instead of connecting the Bridge directly via Serial, you can connect it remotely via a TCP transport. For example, connecting the Bridge to a ESP8266 and then to the Gateway via WiFi.

    - Framing error fixes: The serial communication between the Bridge and the Gateway uses a protocol called SLIP, it has an start and end character for delimiting packets. Sometimes, when starting the Gateway, the Bridge could be in the middle of receiving a packet from a device and the Gateway would get an incomplete packet, this would cause a "Framing error". Ideally, it should only lose that packet and continue normally, but due the way the node-slip library was implemented, it would cause all the following packets to be also erroneous, a "frame error train".

    I added the validation for that special case to the node-slip library in a fork and used it in aquila-gateway, now it works as expected.

    - Other minor bug fixes.

    Embedded MQTT-SN library - MQTTClient:

    - Fixed a bug: When connecting with "last will" enabled, it would always return a success even when it failed.

    - Updated examples, changed default PAN address to 1, the default in aquila-gateway.

View all 4 project logs

Enjoy this project?

Share

Discussions

Similar Projects

Does this project spark your interest?

Become a member to follow this project and never miss any updates