 siddharth.c
I used the PrimusX board as the base of my project.
I used this because of its inbuilt wi-fi connectivity module , basic drone sensors , motor drivers and capability of using a high discharge single cell Lipo battery. The board also had is own API and SDK for developer support to alter its functions.
I used Fusion 360 to design a flat pack assemble-able rover. I printed prototypes till the tolerances were met.
I then tested and chose 4 metal geared motors that run a low voltage of 3.7 volts to give 800 rpm.
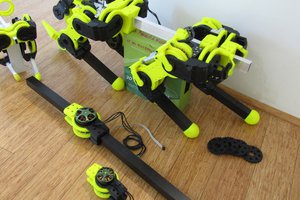
I mounted the motors on this 3D printed mount and fastened with a zip tie .
I also created a modular mount for an FPV ( first person view ) camera for other applications and a fun perspective.
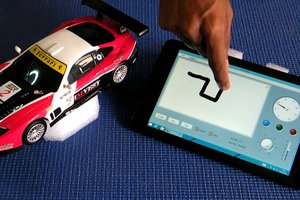
I then used the simple API and SDK to make the sensors capable of sensing the error displacement and give correctional values to the motor to self stabilise. With 4 high torque metal geared motors all running at a no load 800 rpm gives the rover immense speed , pickup and self stability features. I took some help in creating a self correcting algorithm and the results were great.
I used some grippy tyres to run the rover , finally creating an extremely cool rover.
To open drone experimentation to the world, Drona Aviation is crowdfunding for PlutoX on Indiegogo. Support them and help them bring it to life: https://igg.me/at/flyplutox/tinkerers![]()
 Paul Gould
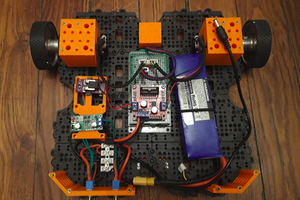
 matop
matop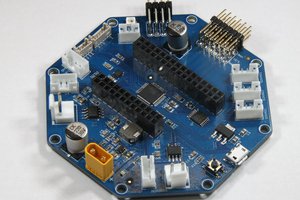
1.hola me podrias compartir el cad para utilizarlo de ejemplo