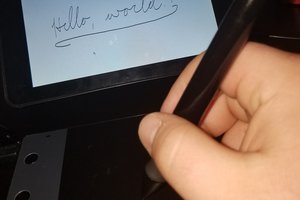
Doctor the raster image
The raster image can be anything, but you will need to convert it to a line drawing to follow the steps I am outlining here. I use GIMP for this. It’s a free cross platform general use graphics editor that has a similar function to others. It has a lot of good filters that are useful for this. How to use it is beyond the scope of this HOWTO, but it’s well worth it to learn it. There is lots of information out on the web. You can download it from here: https://www.gimp.org/downloads/
At the minimum, you will want to resize the image and most likely you will want to rotate it to fit your machine. You can also efficiently do cleanup and other tasks using GIMP.
Convert the raster image to a DXF file
Use the program WinTopo. This is a windows-only program but it’s free and it seems to work pretty well. It can be downloaded from this link: http://wintopo.com/download.htm I use the free version for this HOWTO.
-
Open wintopo and open the raster image.
-
Go to Image→Thinning Methods. I usually use the Stentiford method.
-
Go to Vector → Vector Extraction. I usually use the “Nodes at intersections” method.
-
Go to File → Save Vector. Save the file with a suitable name and in a suitable location.
Note that you may need to work with the settings a little to get something the you find usable. It’s also useful to do any cleanup on the image before you export the DXF.
Convert the DXF file to the g-code
Use the program dxf2gcode. This is a Python program, so you need to have Python installed first. You can get it any number of different places. I usually use this one: https://www.python.org/download/releases/2.7/ Note that I am using version 2.7, not version 3.x. I don’t know if 3.x works here. YMMV. You can get the dxf2gcode program here: https://sourceforge.net/projects/dxf2gcode/ Under Windows, this should be all you need.
-
Open dxf2gcode and load the DXF file.
-
Go to Export → Optimize and export shapes. The program will need to think for a while on a DXF of any size. When it is done, it will present the dialog for saving the g-code image.
Check the output for size and for accuracy
This is an optional step, but very useful. I use Camotics for this. Camotics is a free cross-platform application that can be downloaded from here: https://camotics.org/download.html Just open the g-code and take a look. Rotate the image. Note the size to make sure it fits on the media, etc.
 chucktilbury
 Dylan Turner
 Michael D'Argenio
 Dejan Stankovic
 Saptak Bhoumik