Close
0%
0%

Musical Prosthetics

Interactive wearable sculptures which translate the wearers body movements into sound.

Public Chat
Similar projects worth following
Musical Prosthetics are a new form of interactive media for enhancing non-verbal communication. Newly created musical instruments are attached to the human body in exoskeletal formations, wired with sensors that create sounds triggered by body movement. Every wearable sculpture can be designed to convey a different human emotion.

Three Musical Prosthetics express the primary colors of human emotion; sad, mad, and glad. The sad prosthetic, made from sewn leather, slumps over the shoulders, turning inward. The mad prosthetic is made from bronze prisms protruding outward in sharp, edgy points. The happy prosthetic has sculpted wood petals; light, joyous, and playful. As performers interact with each other, their music creates a window into the non-verbal world.

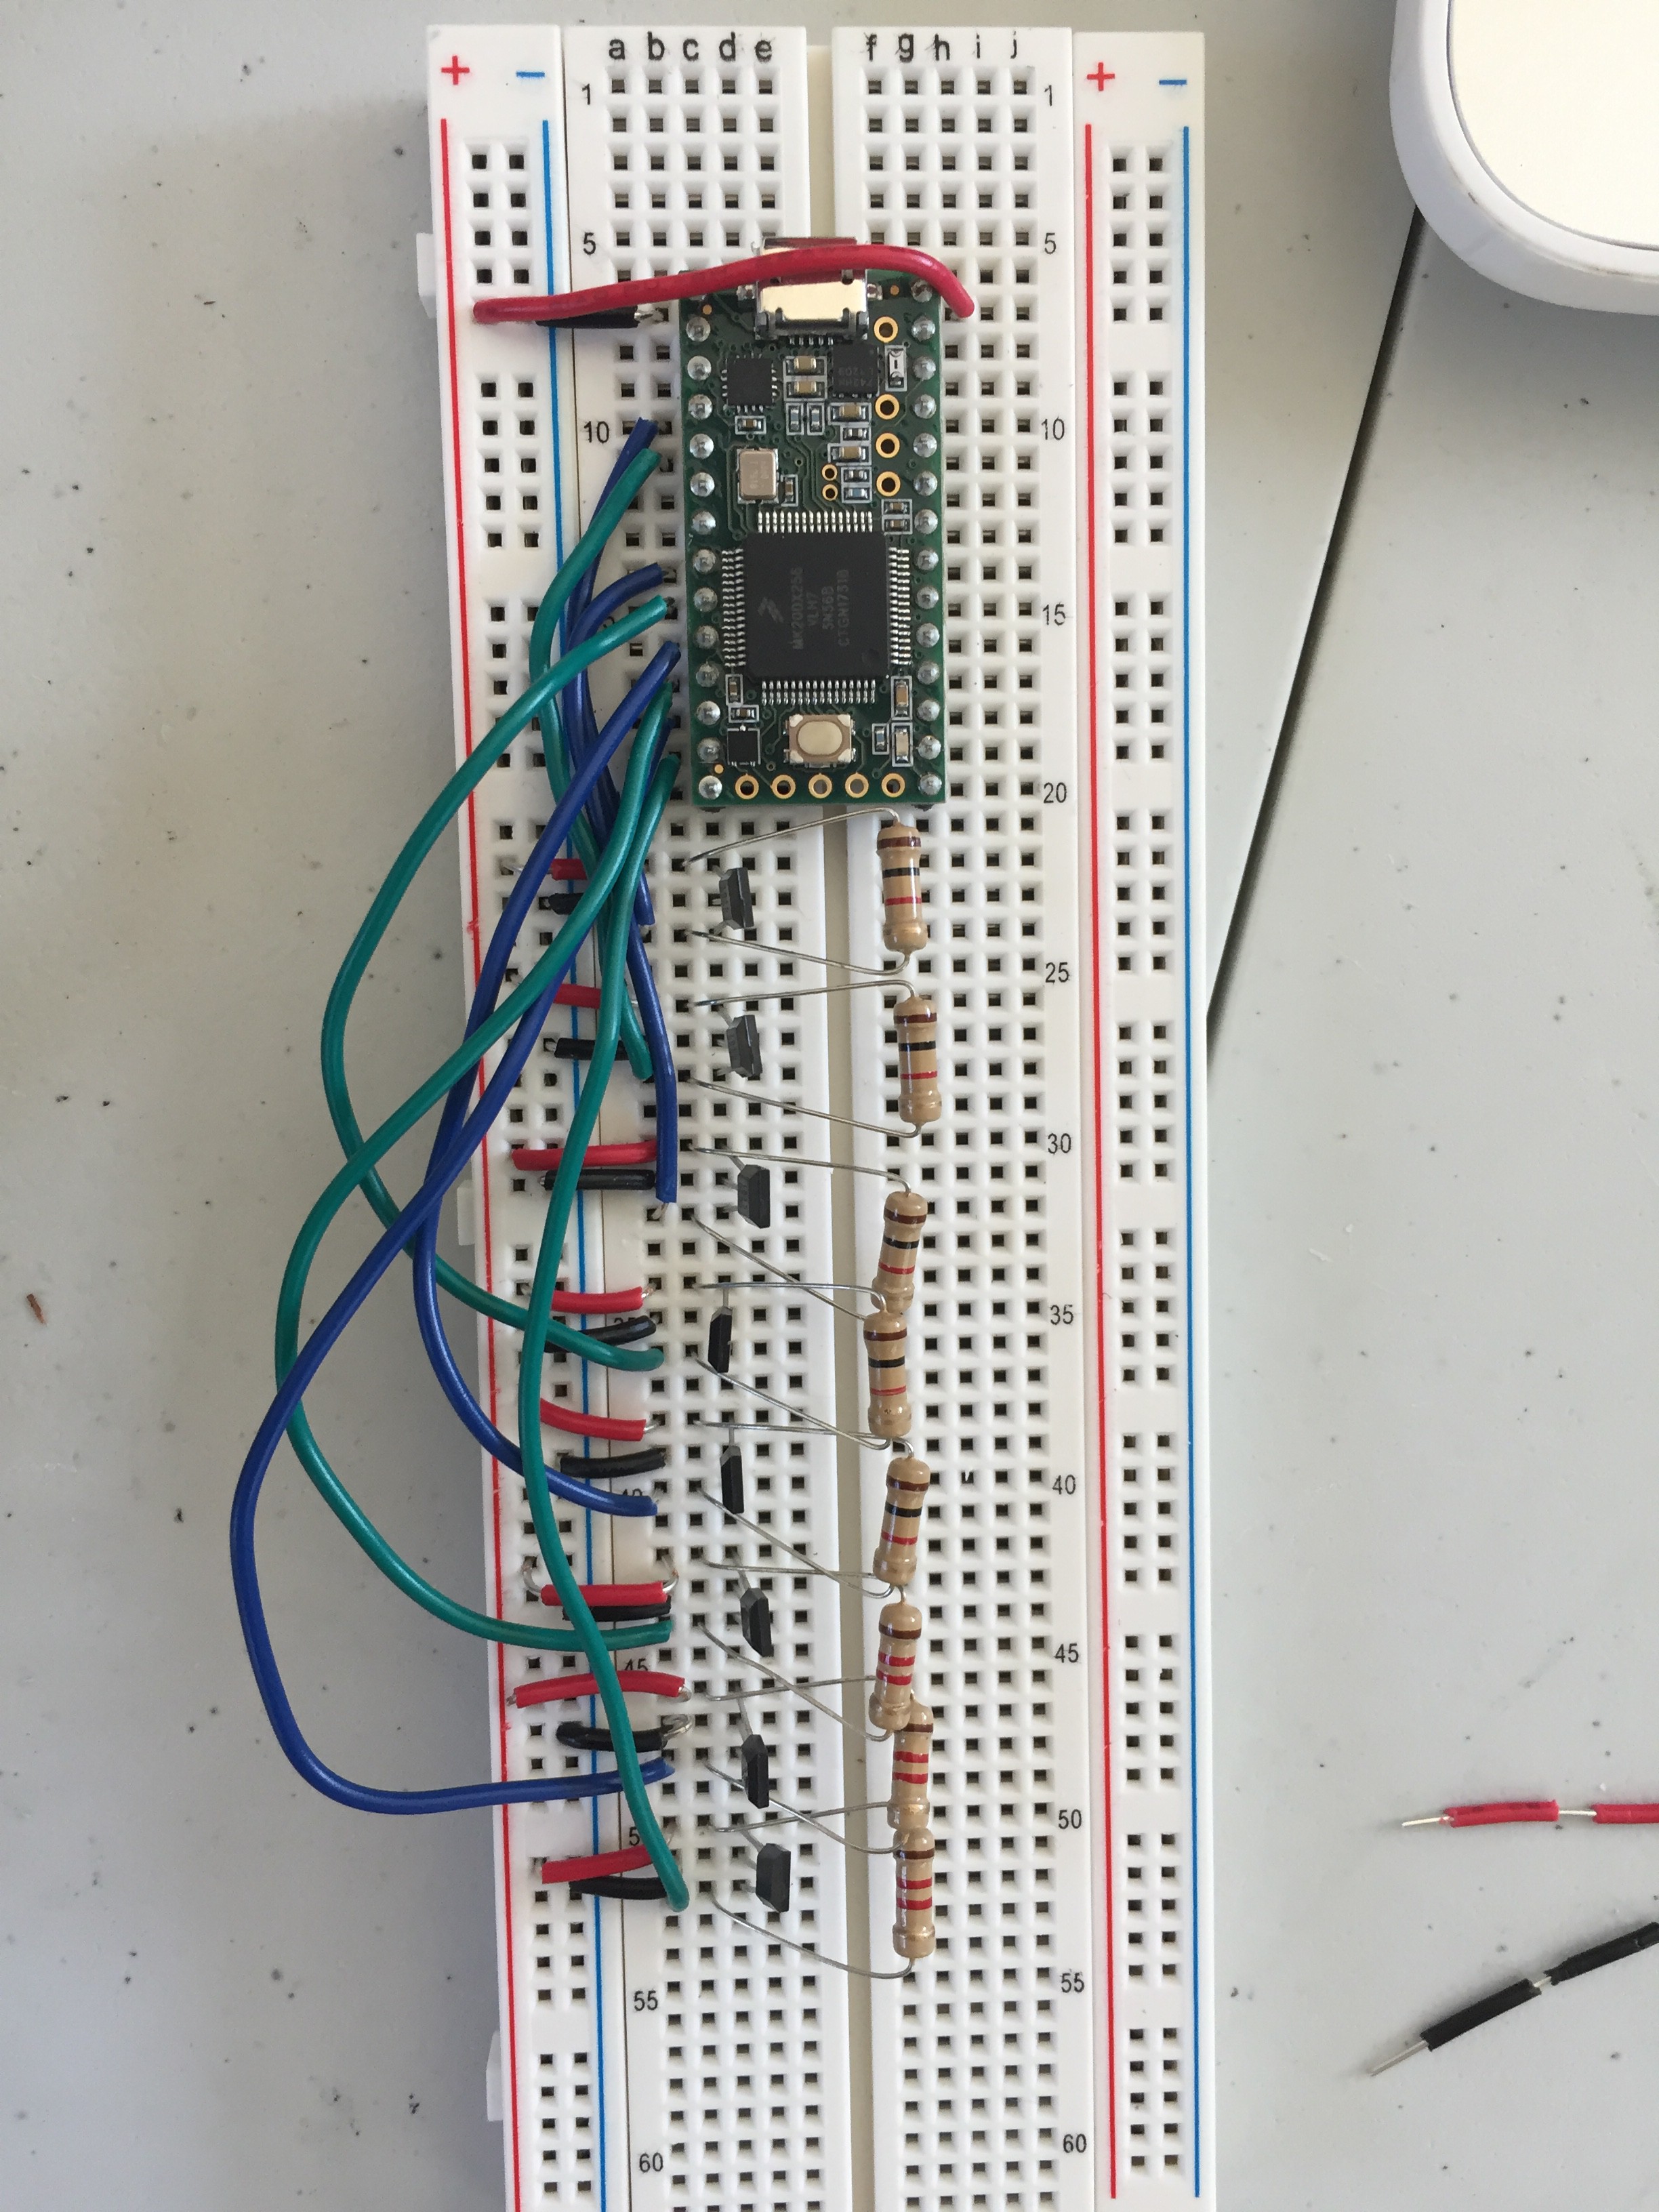
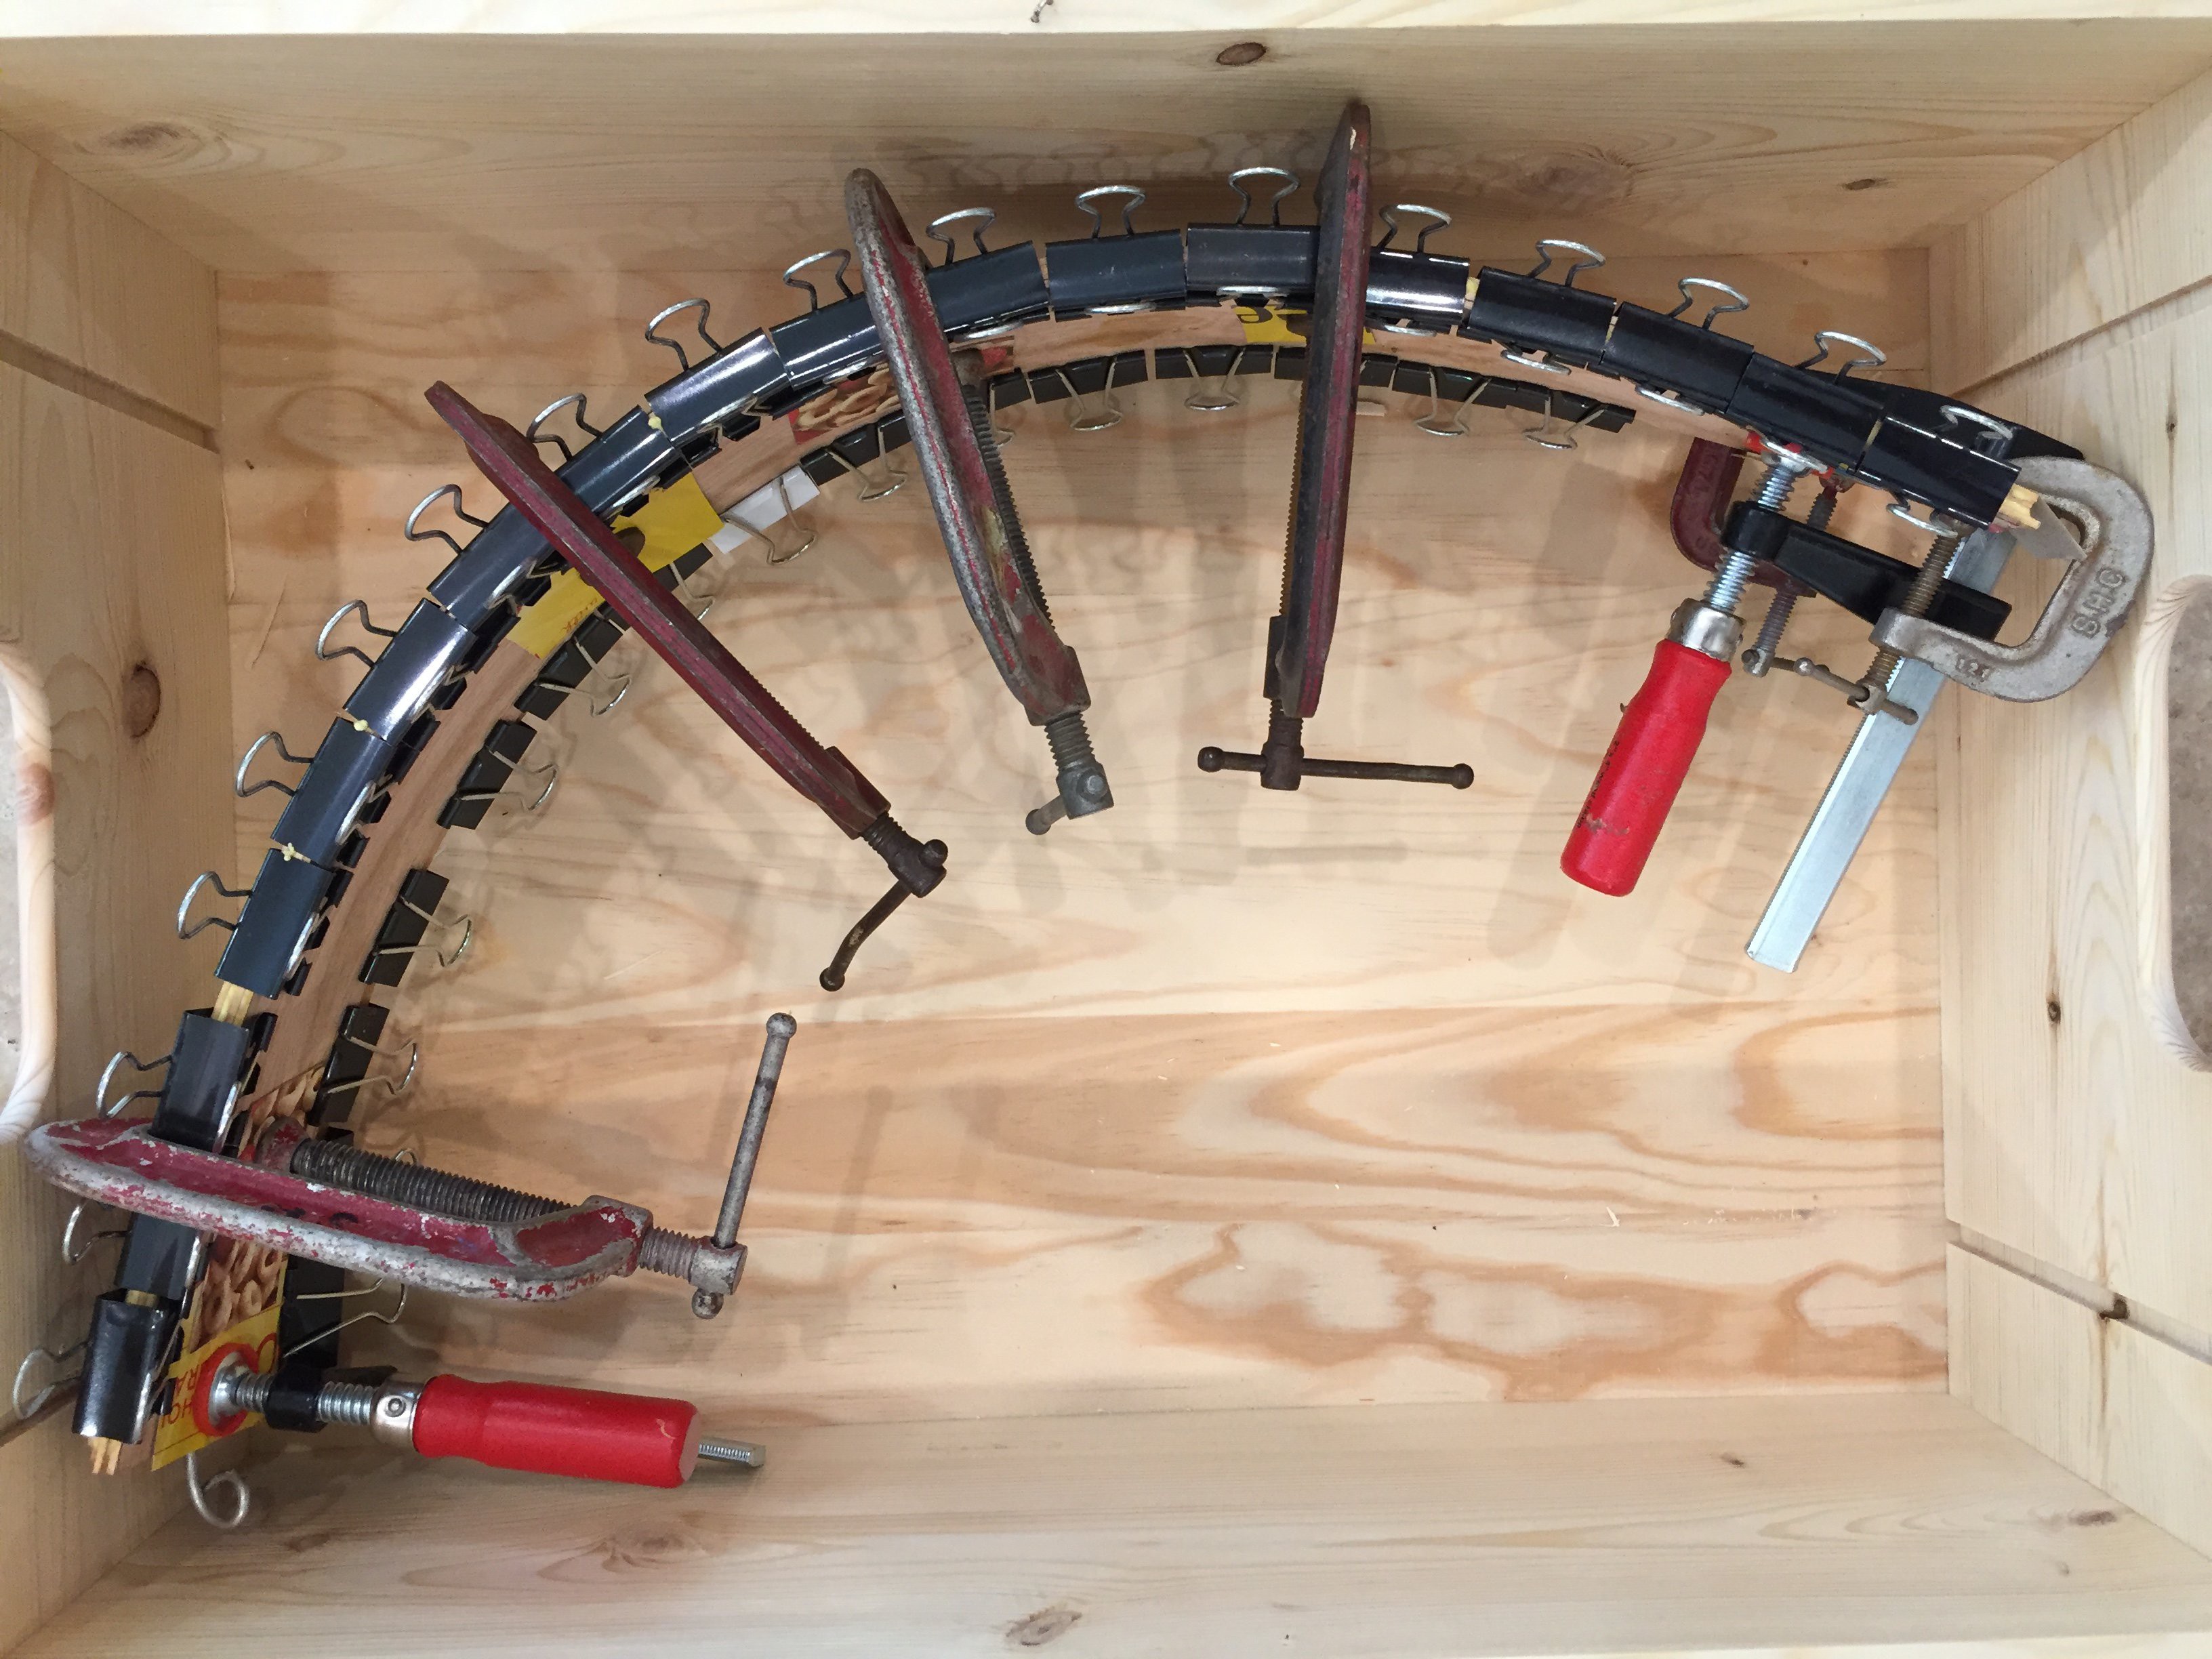
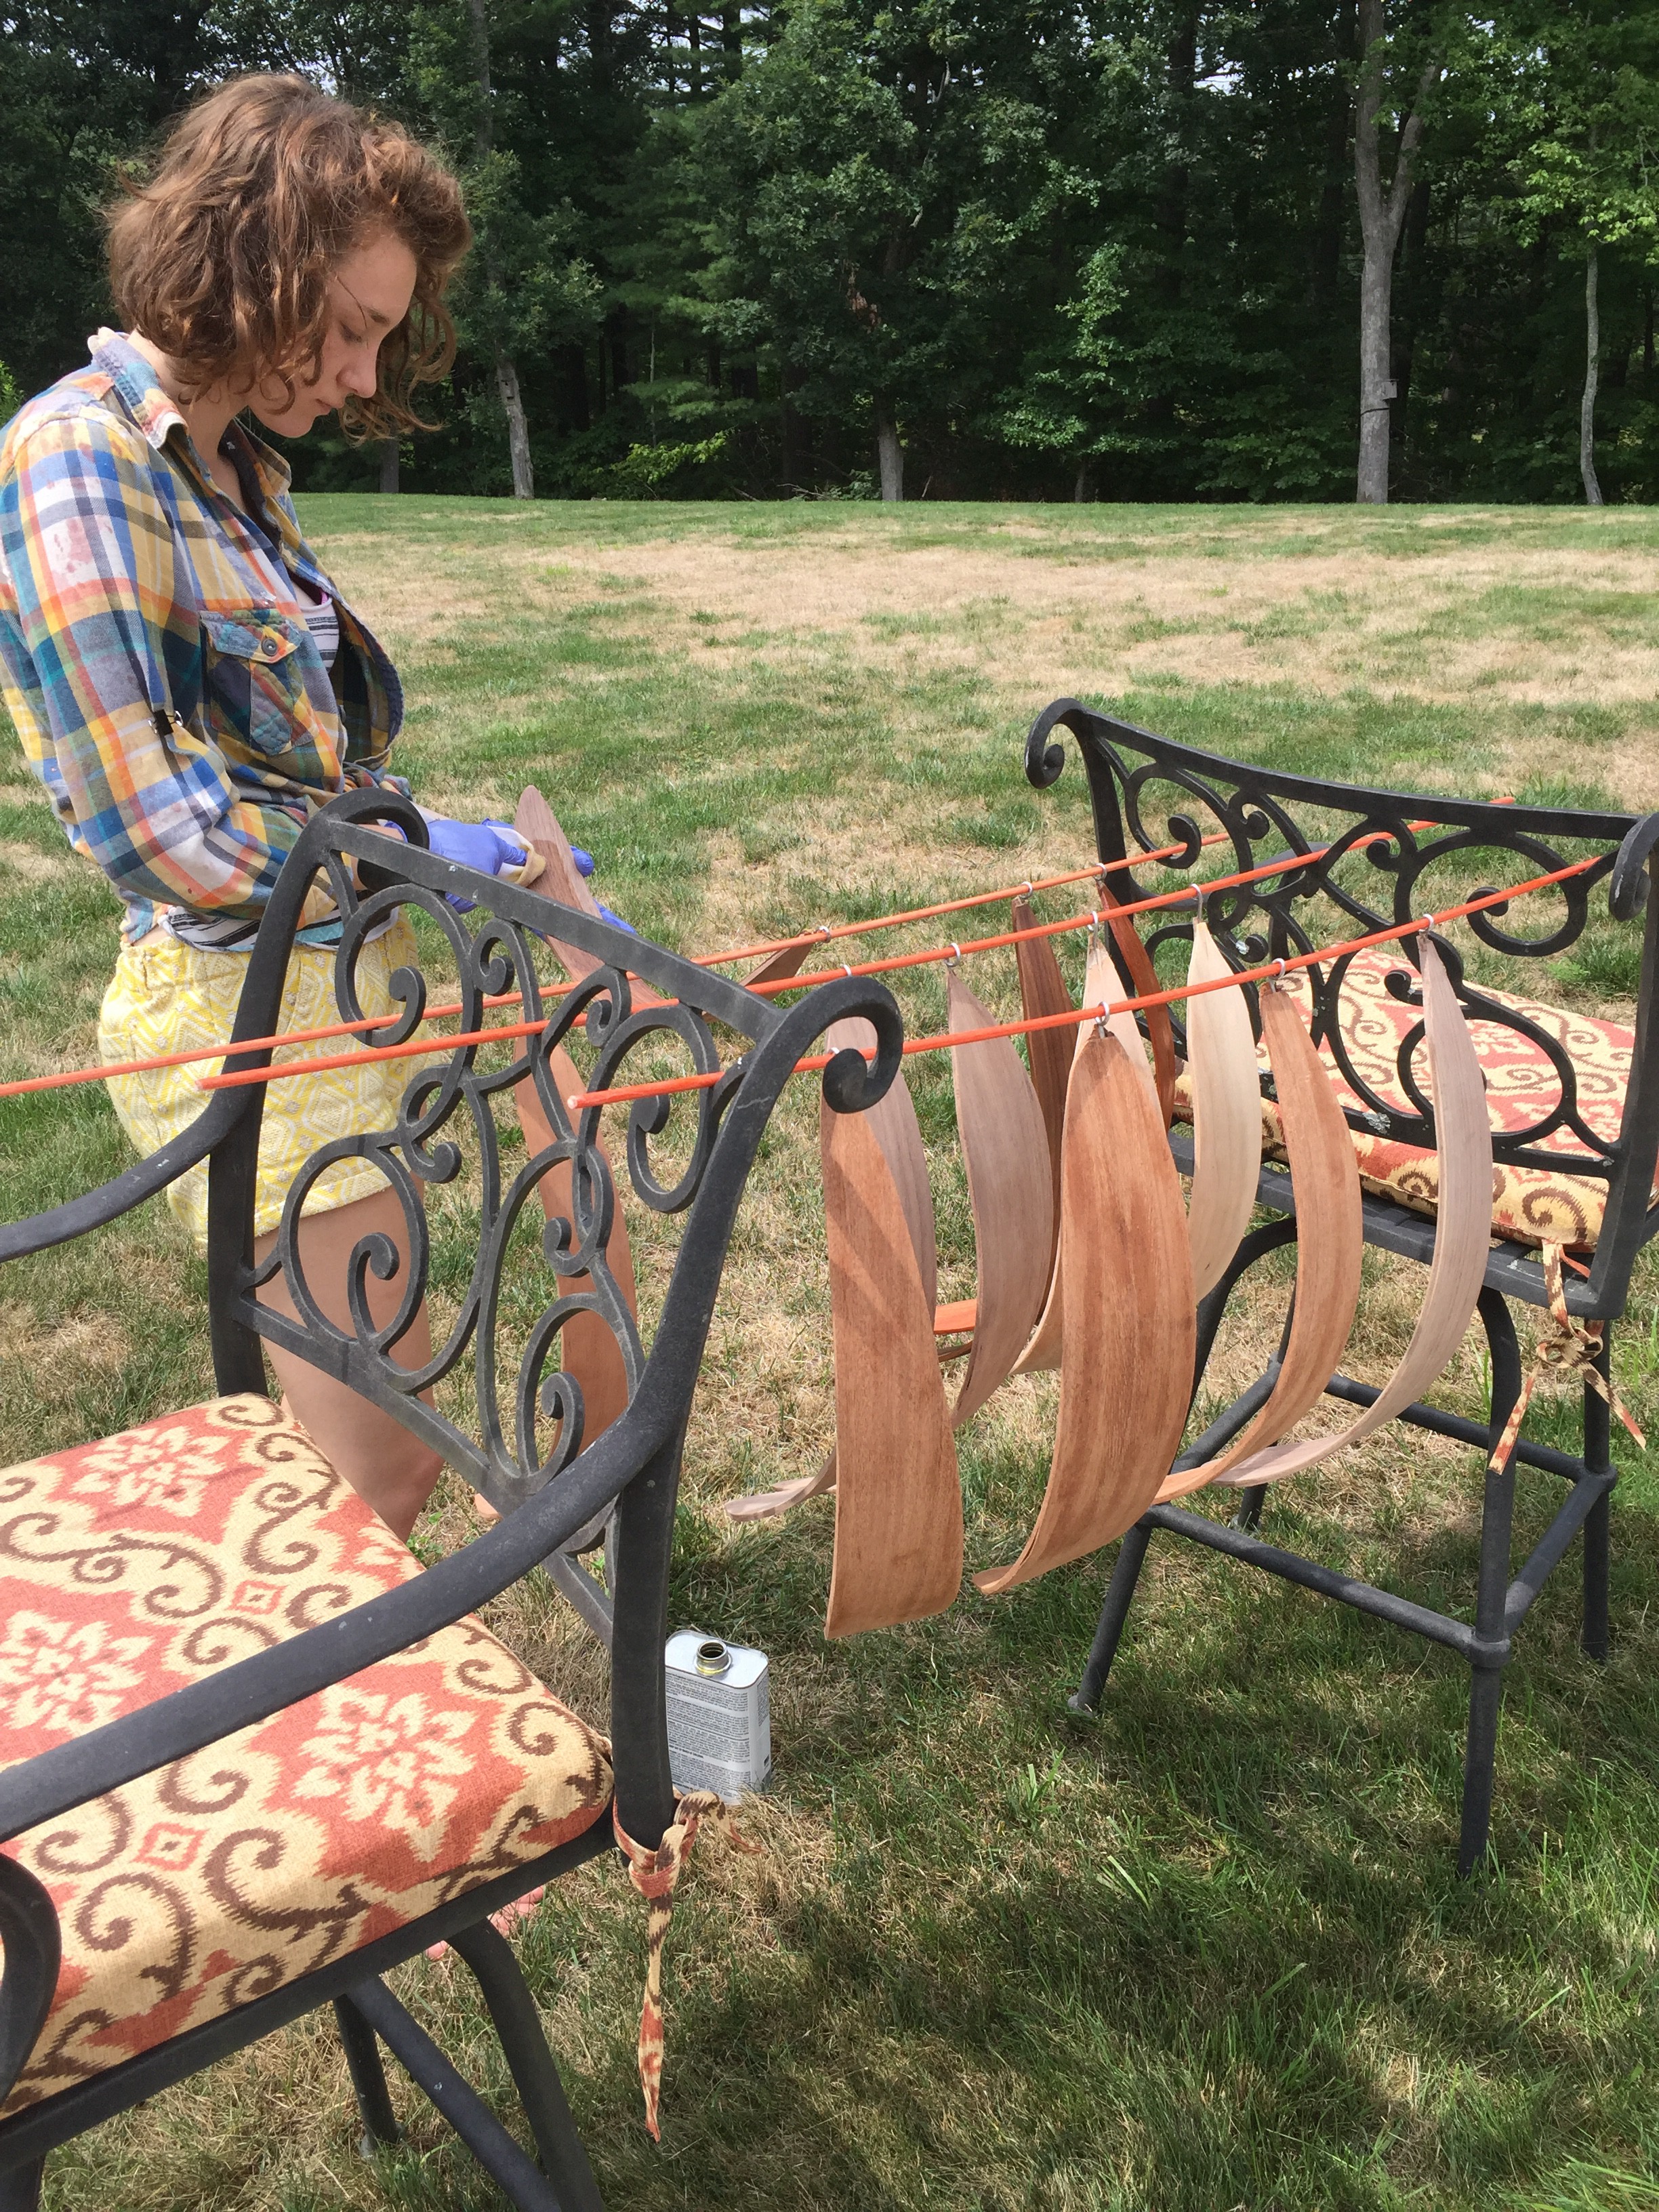
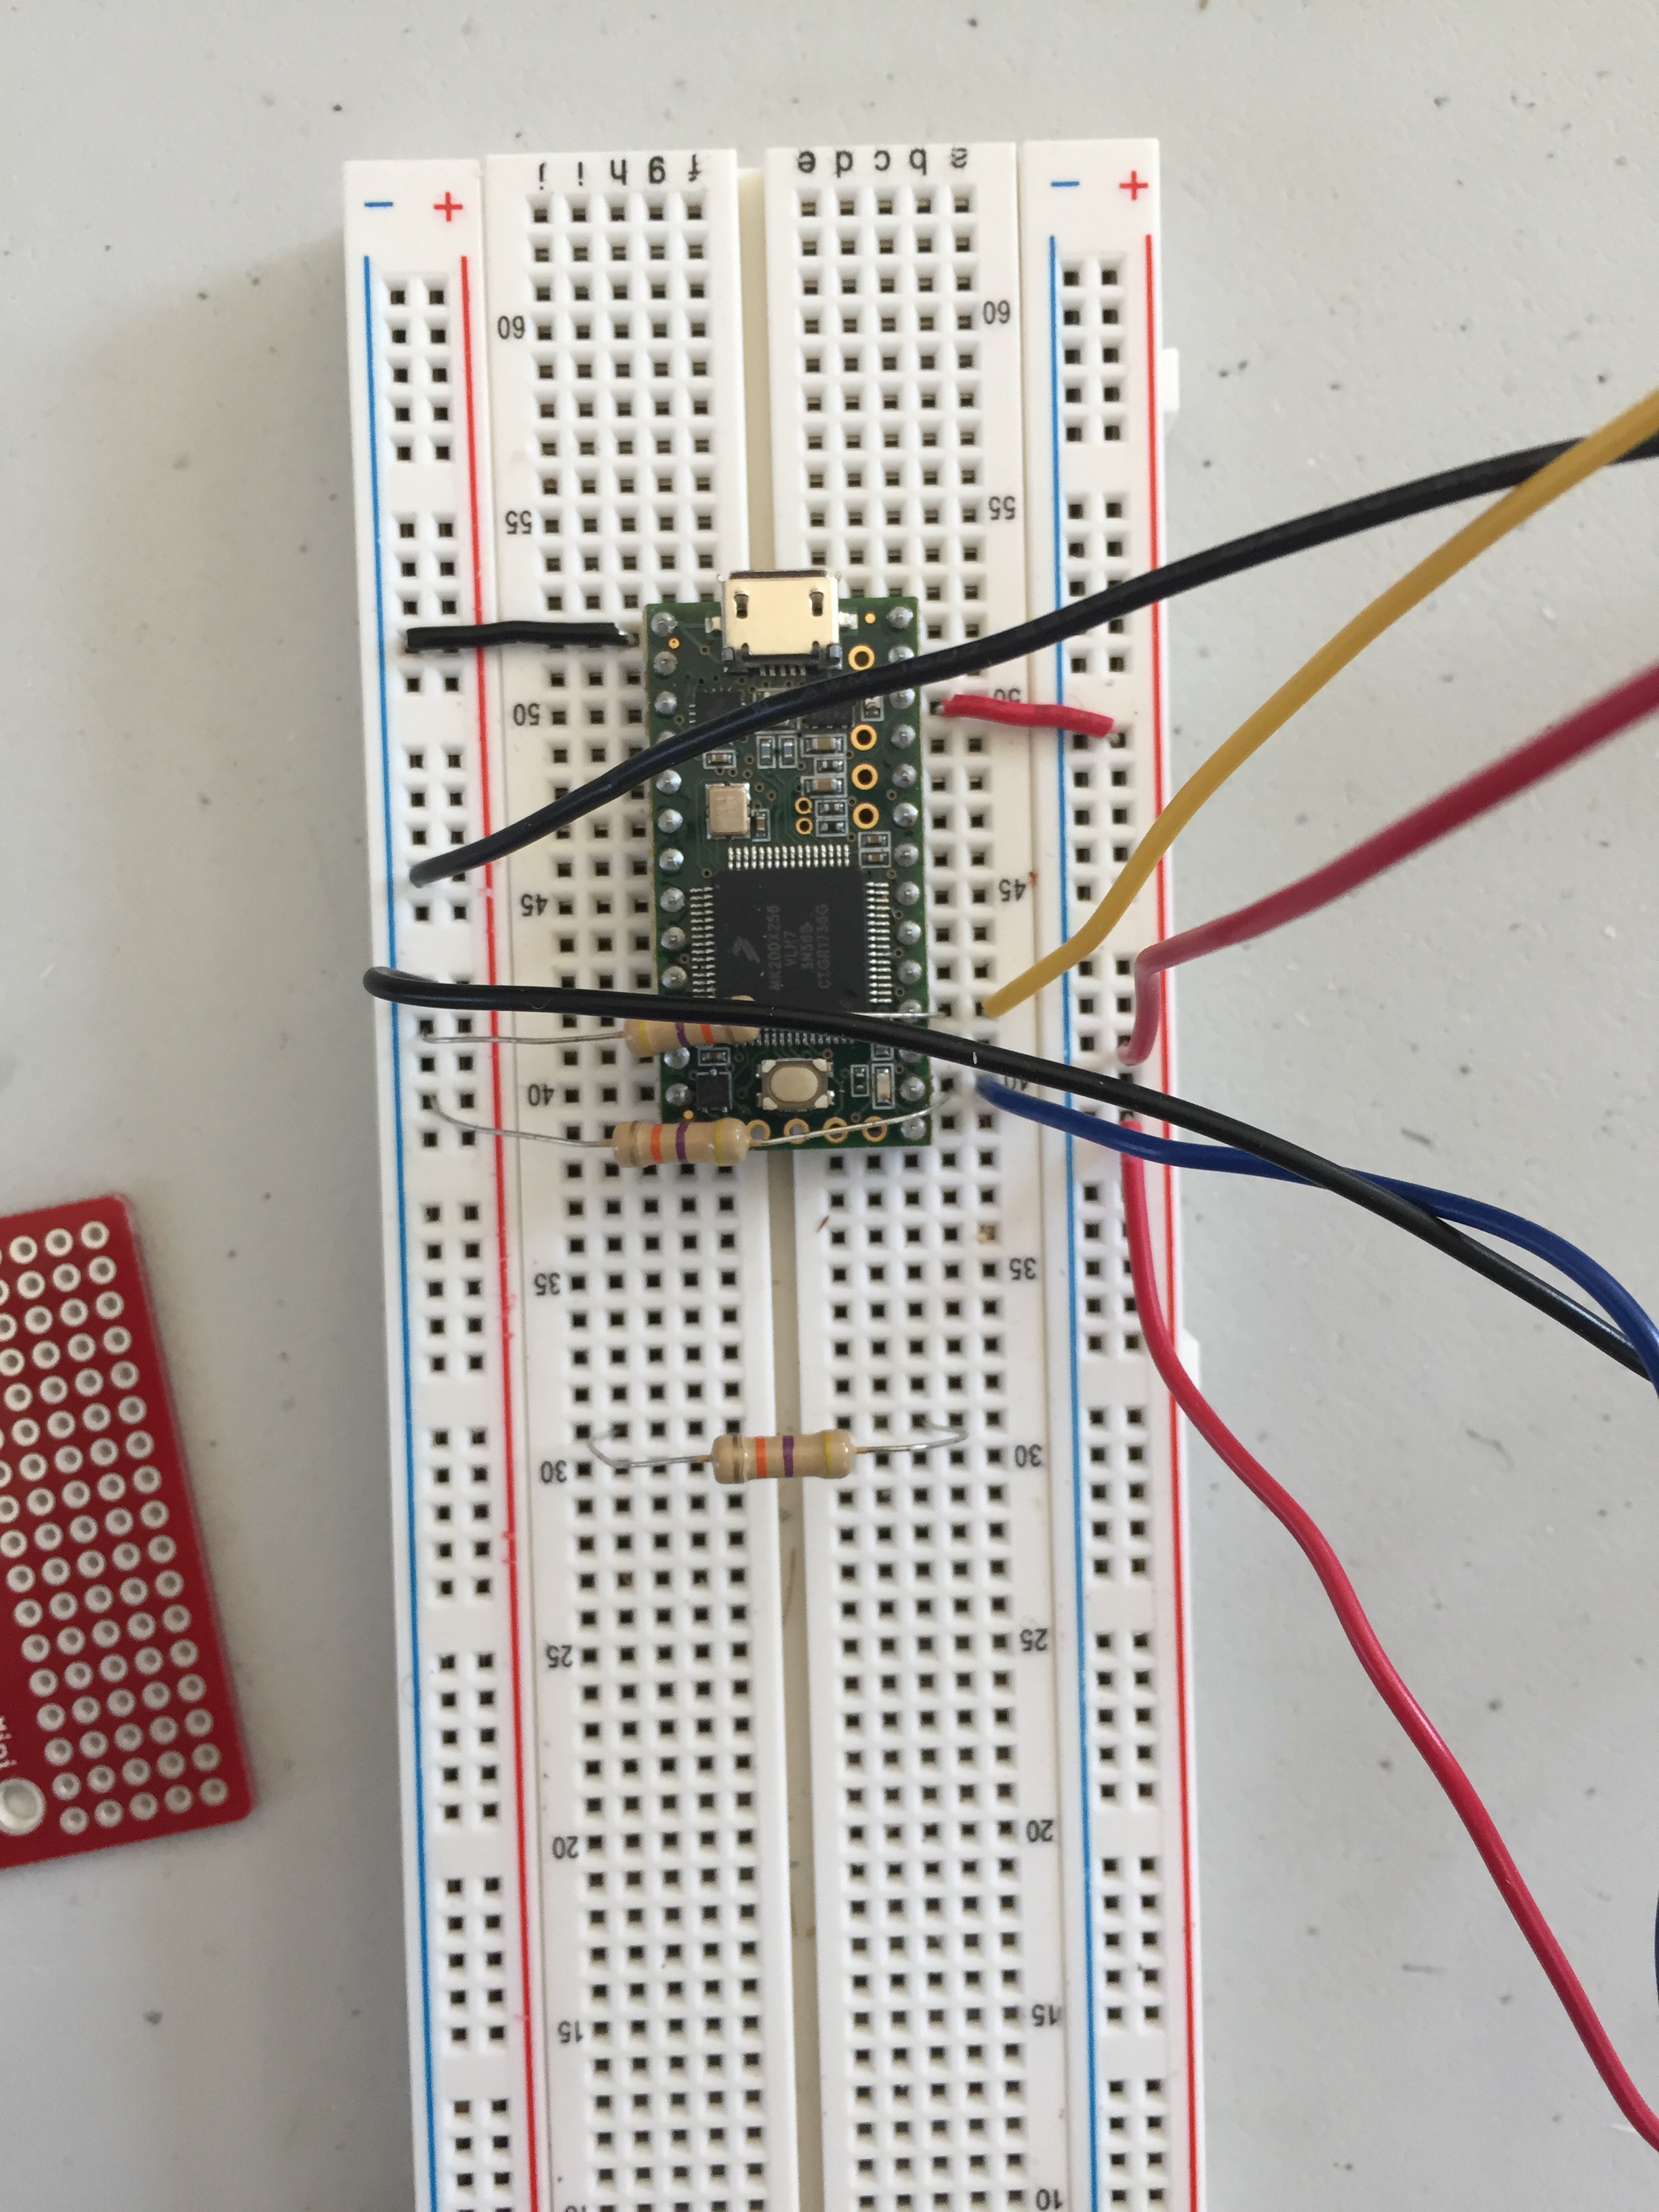
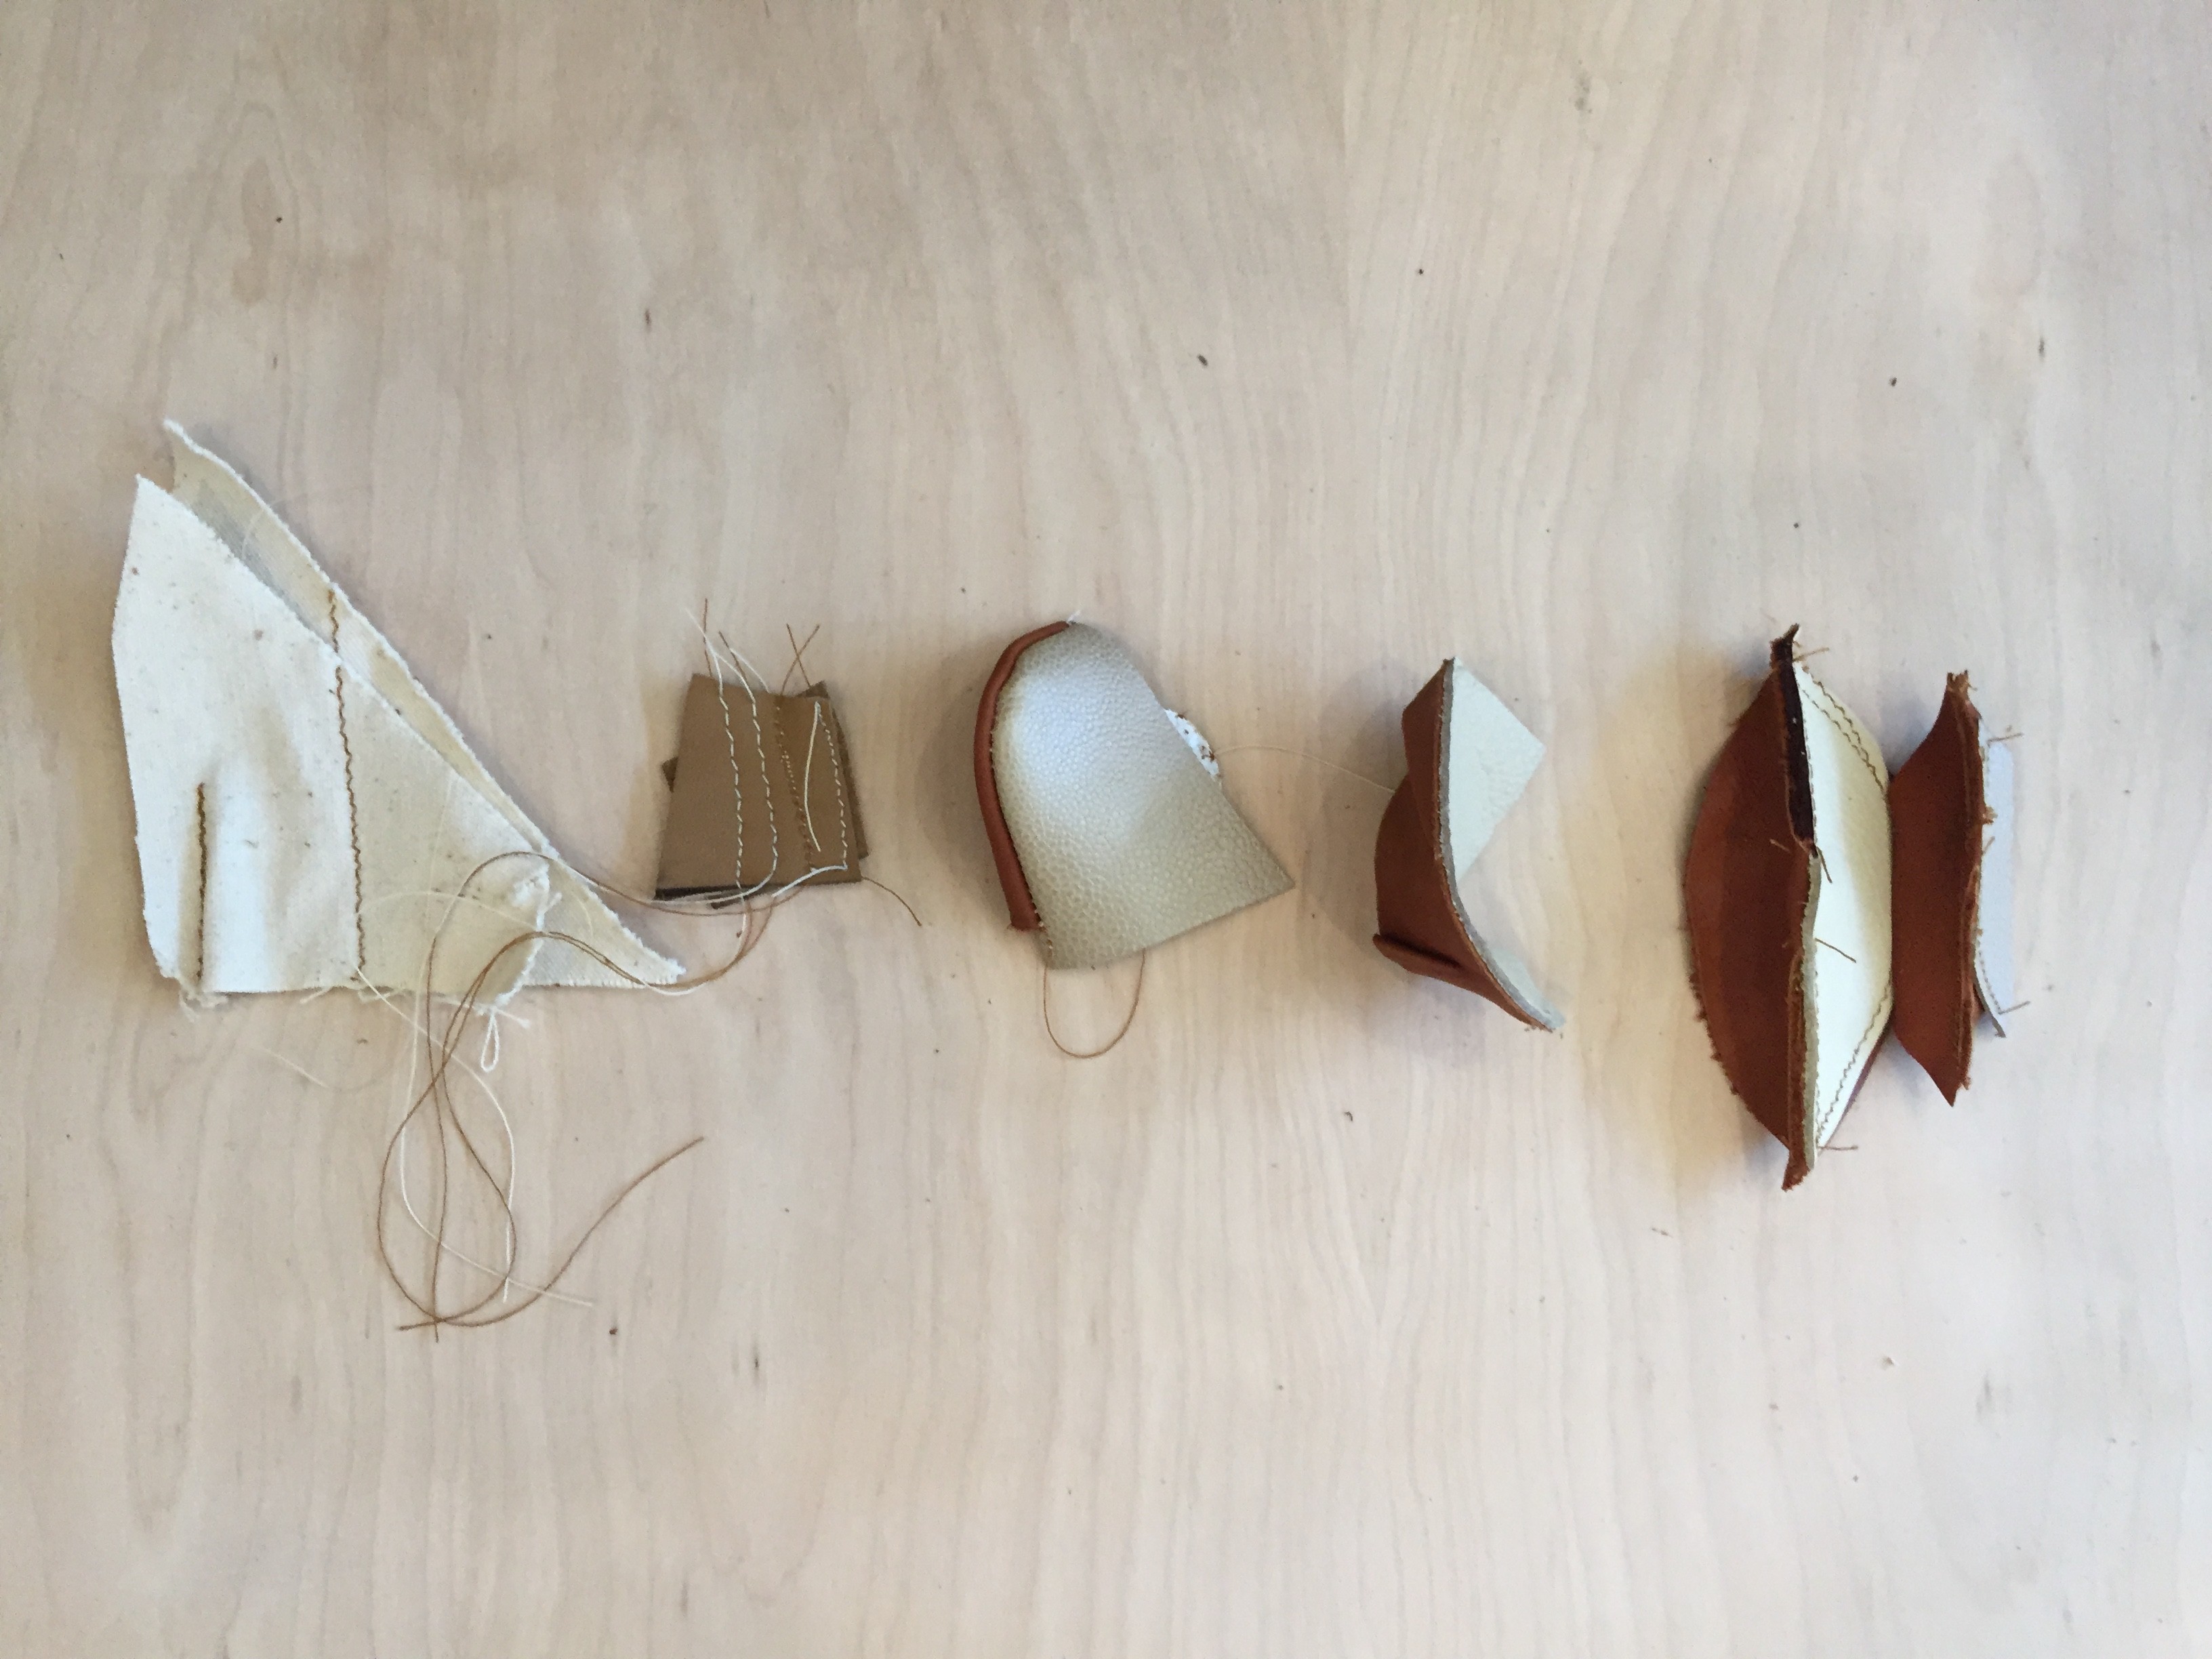
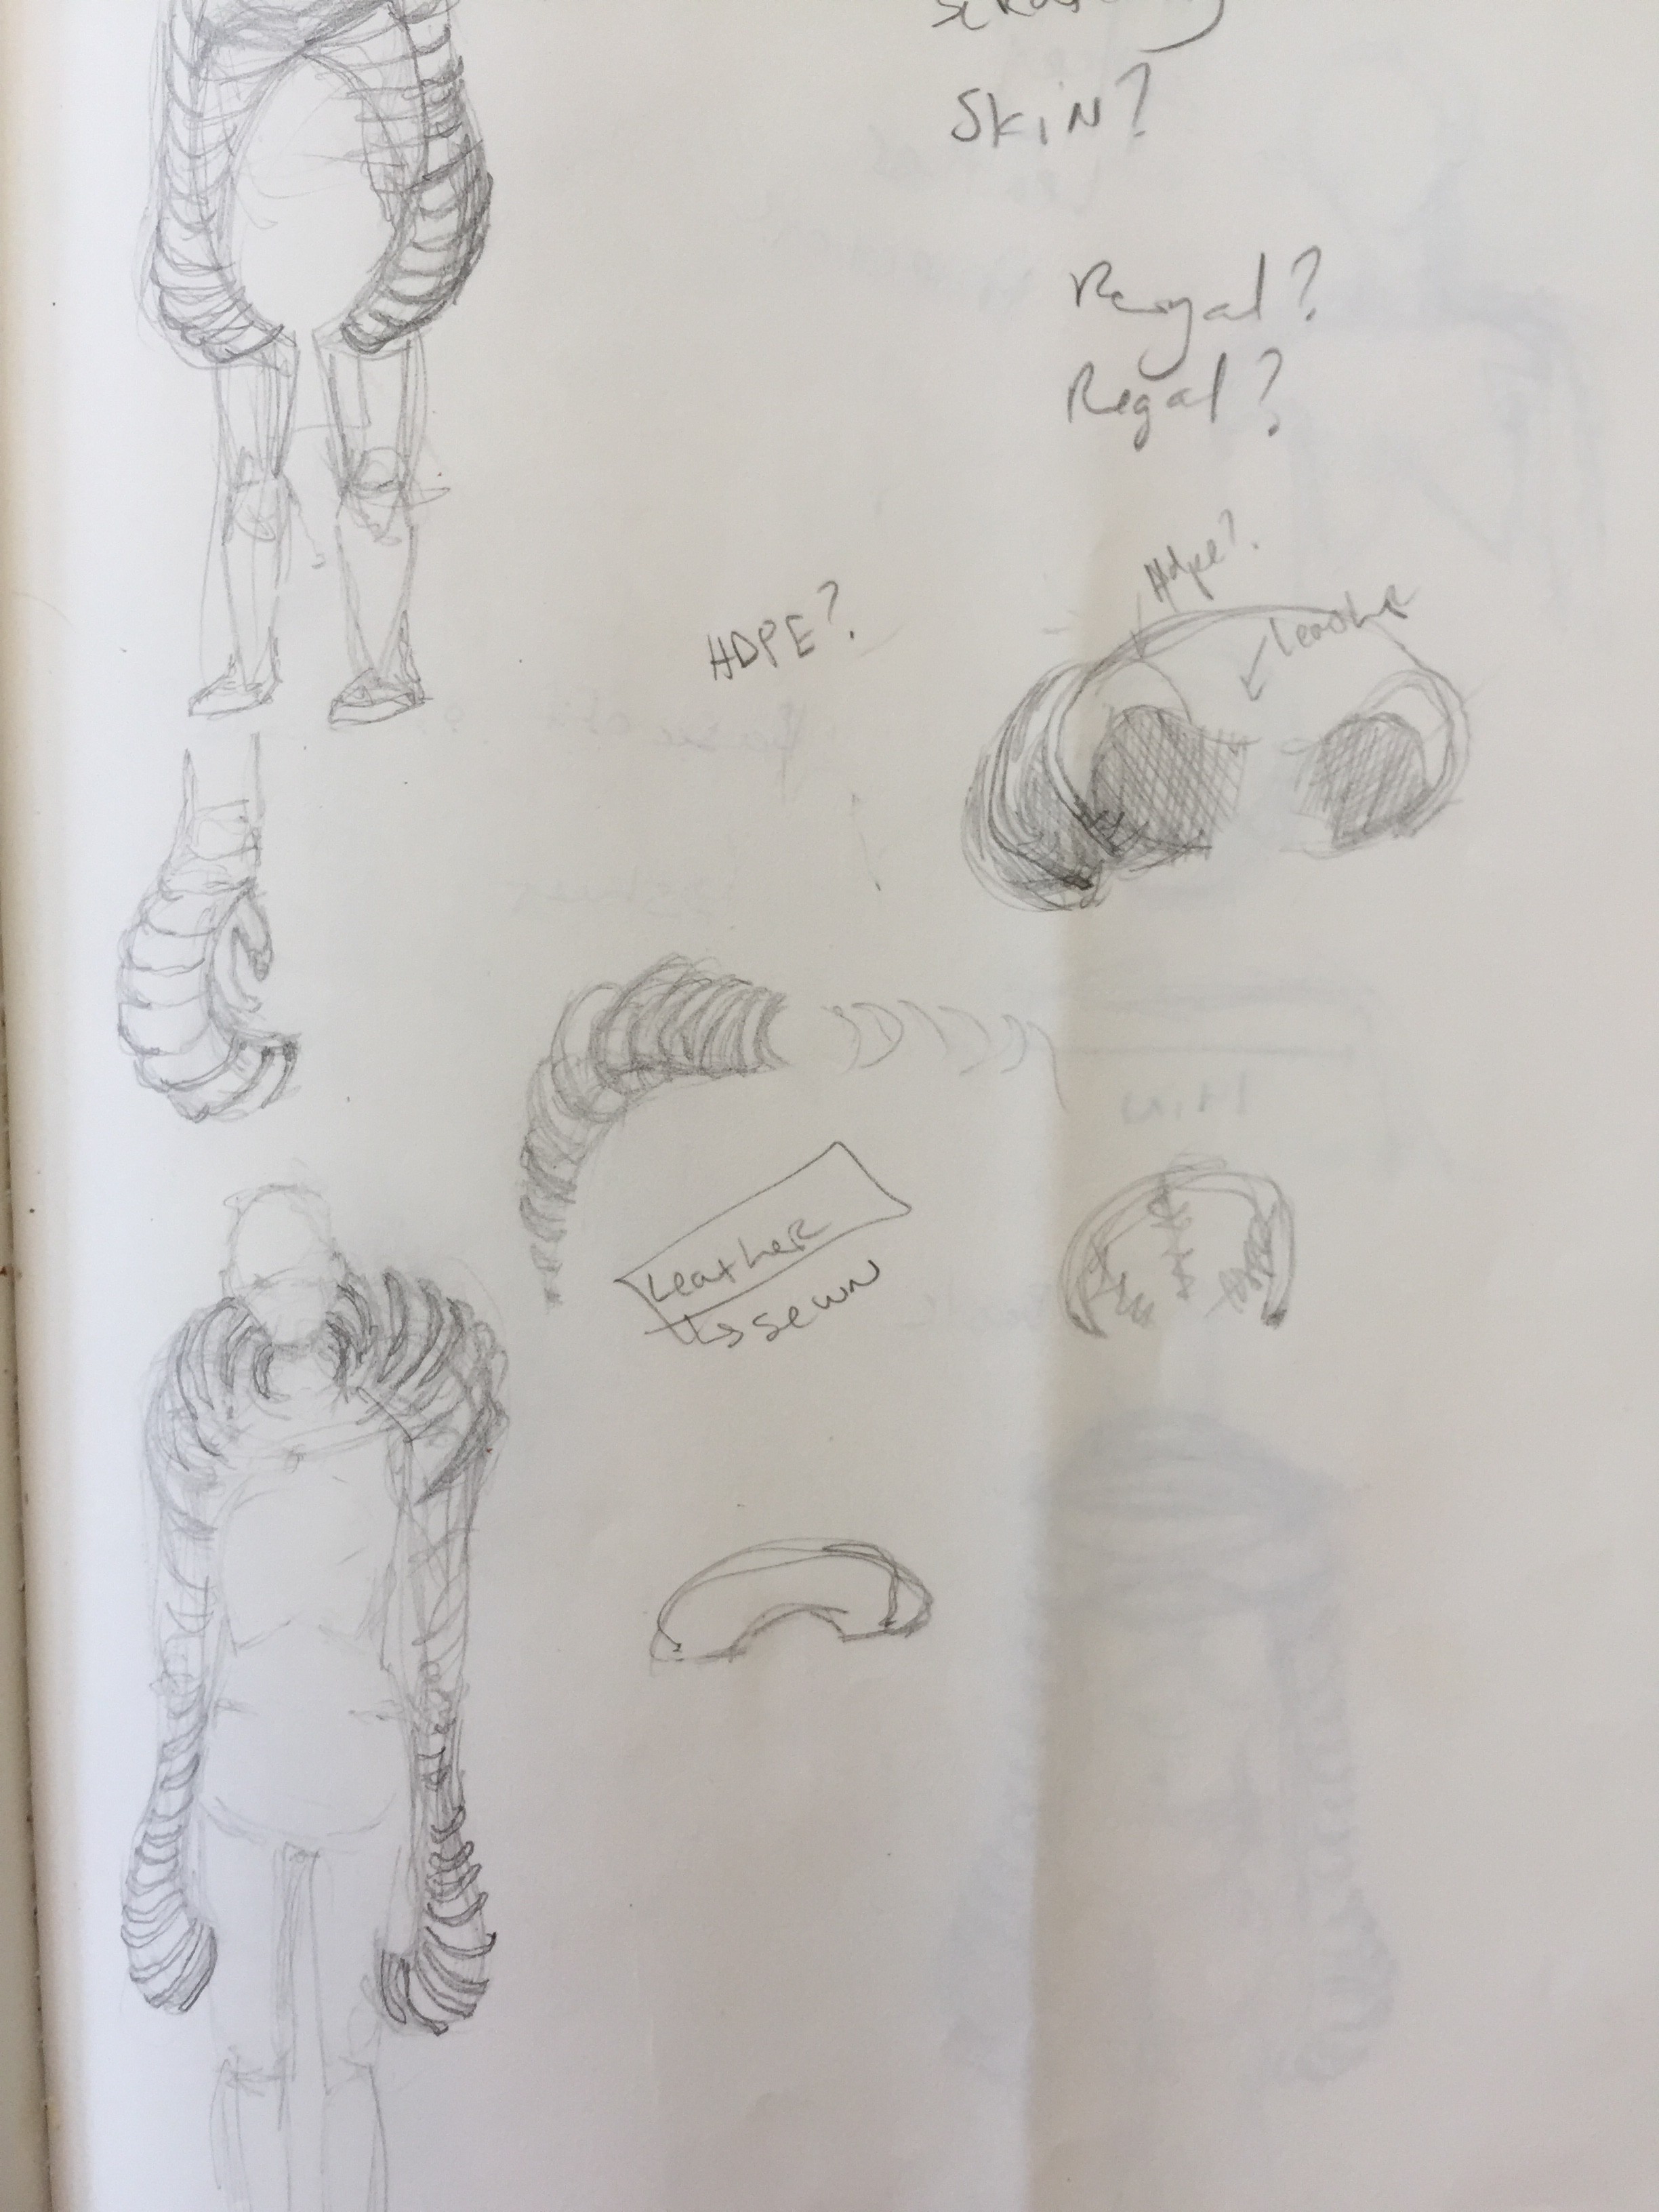
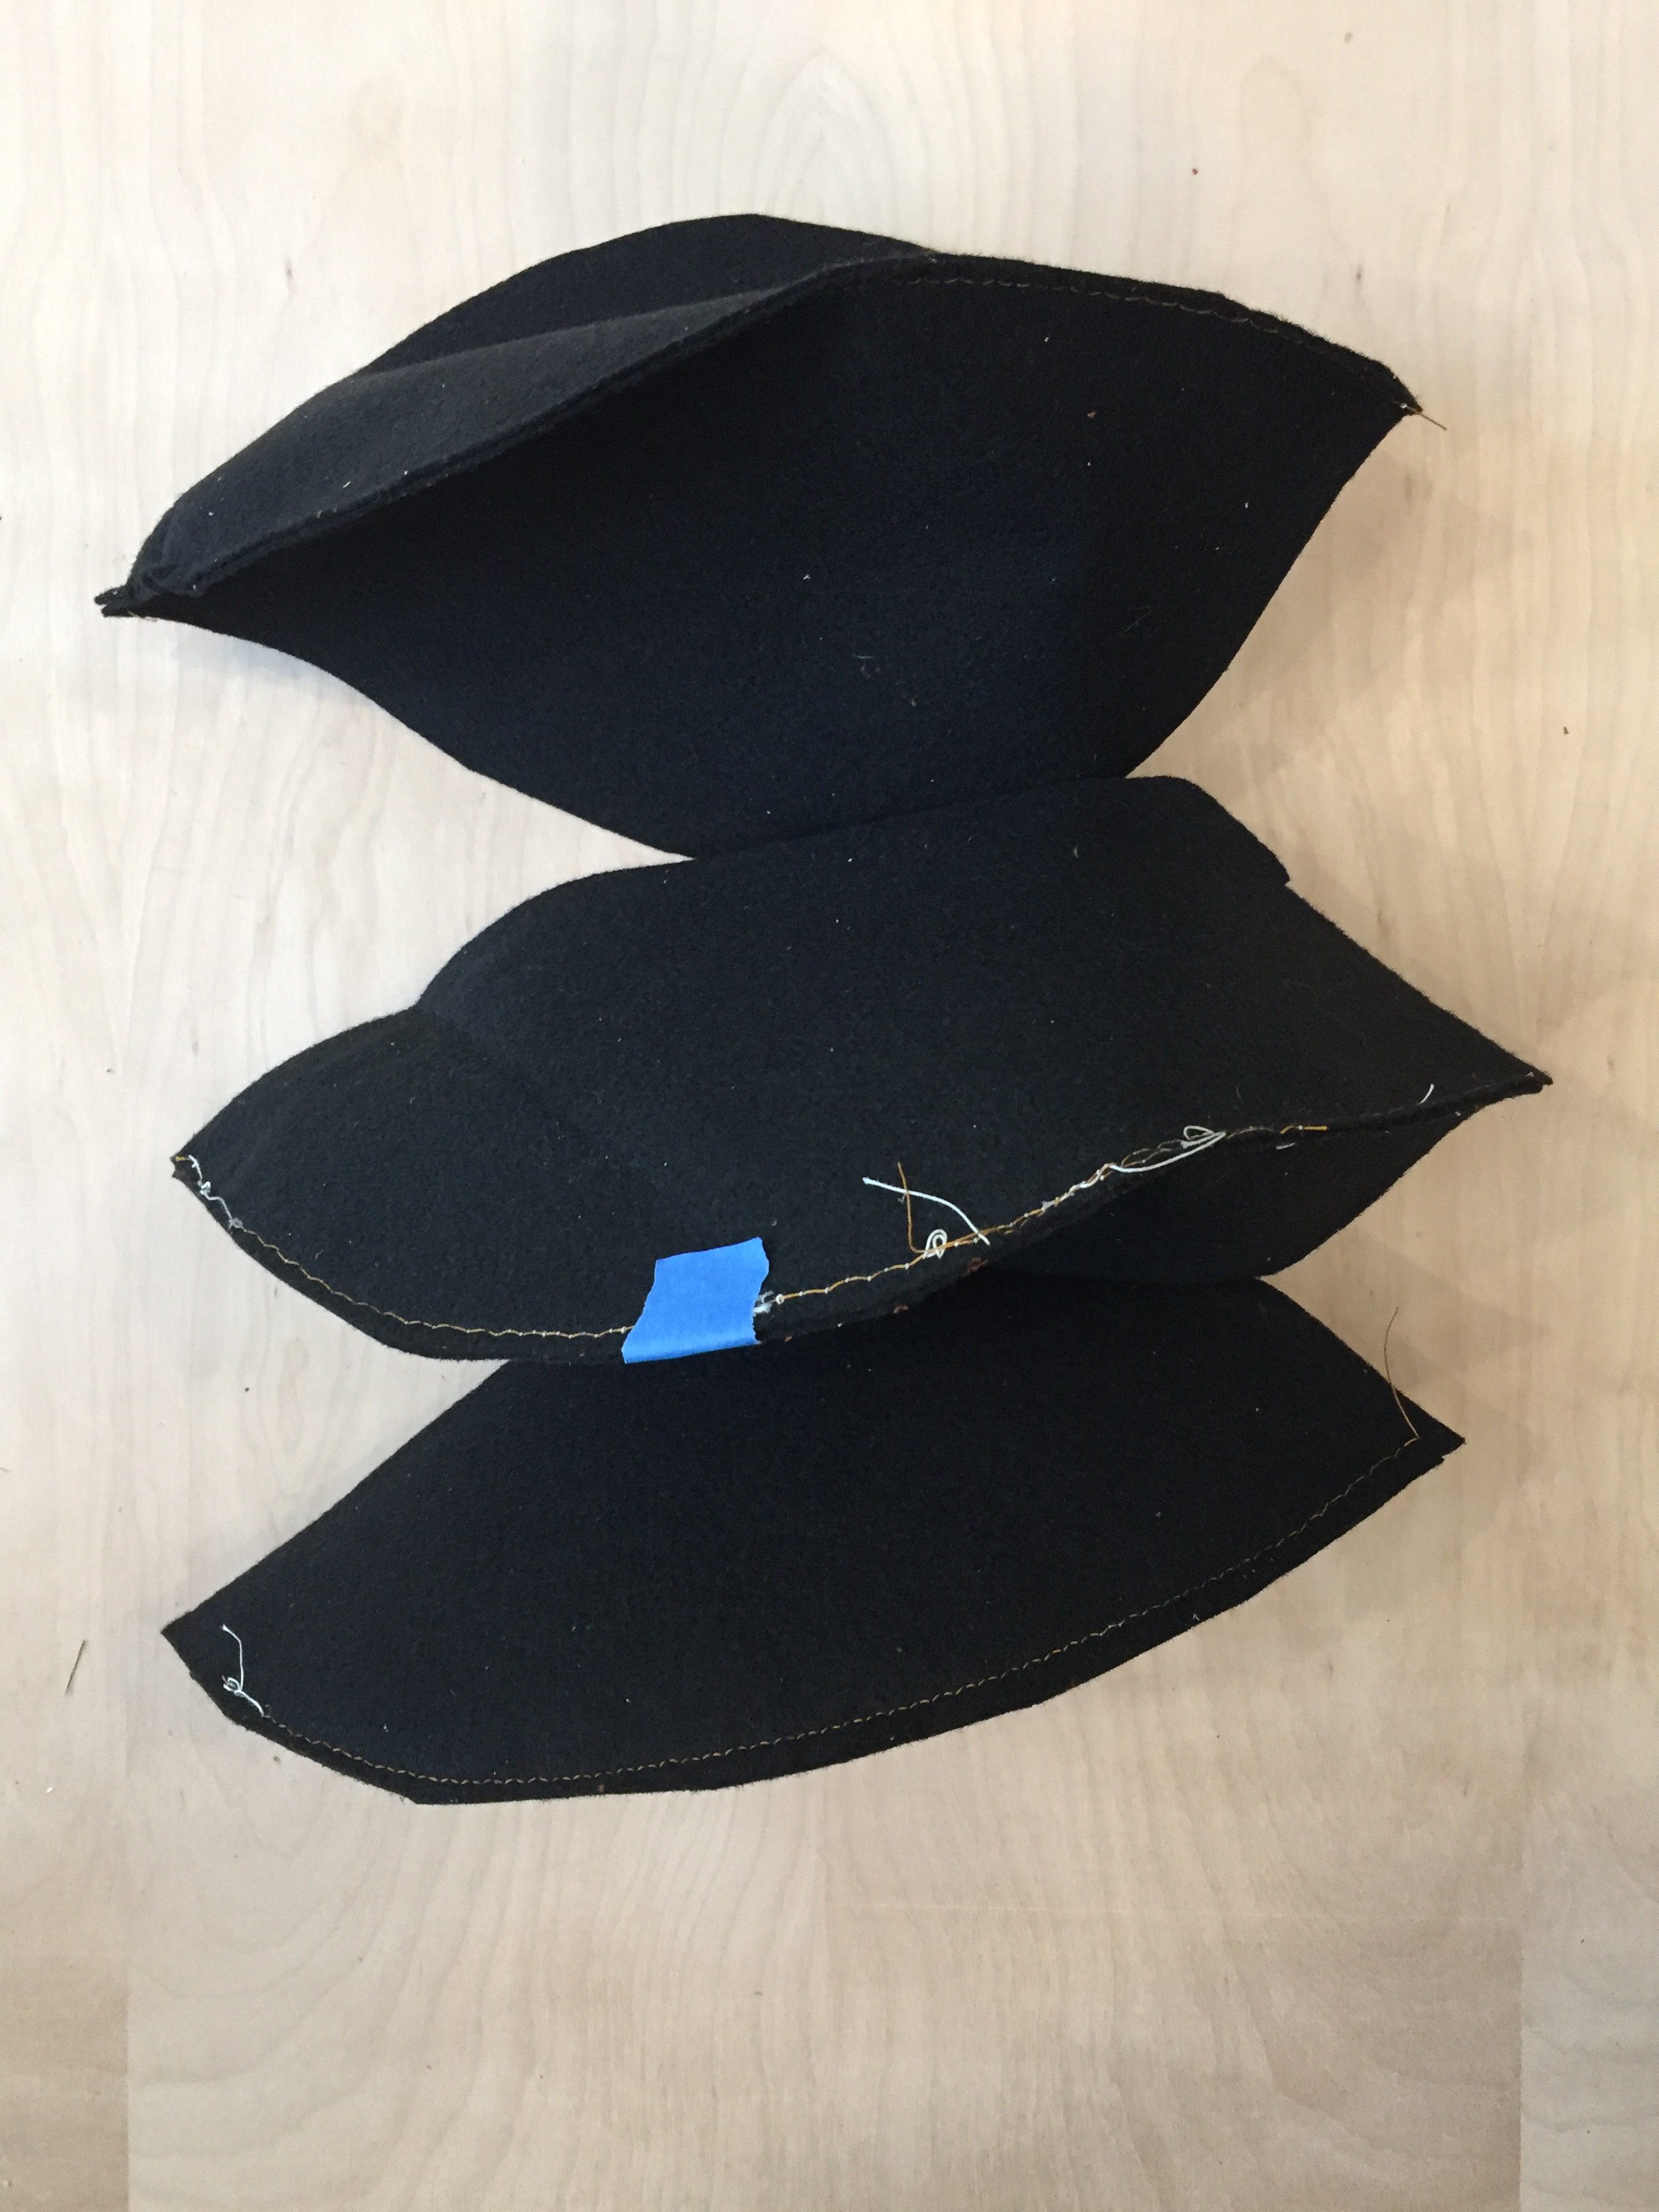
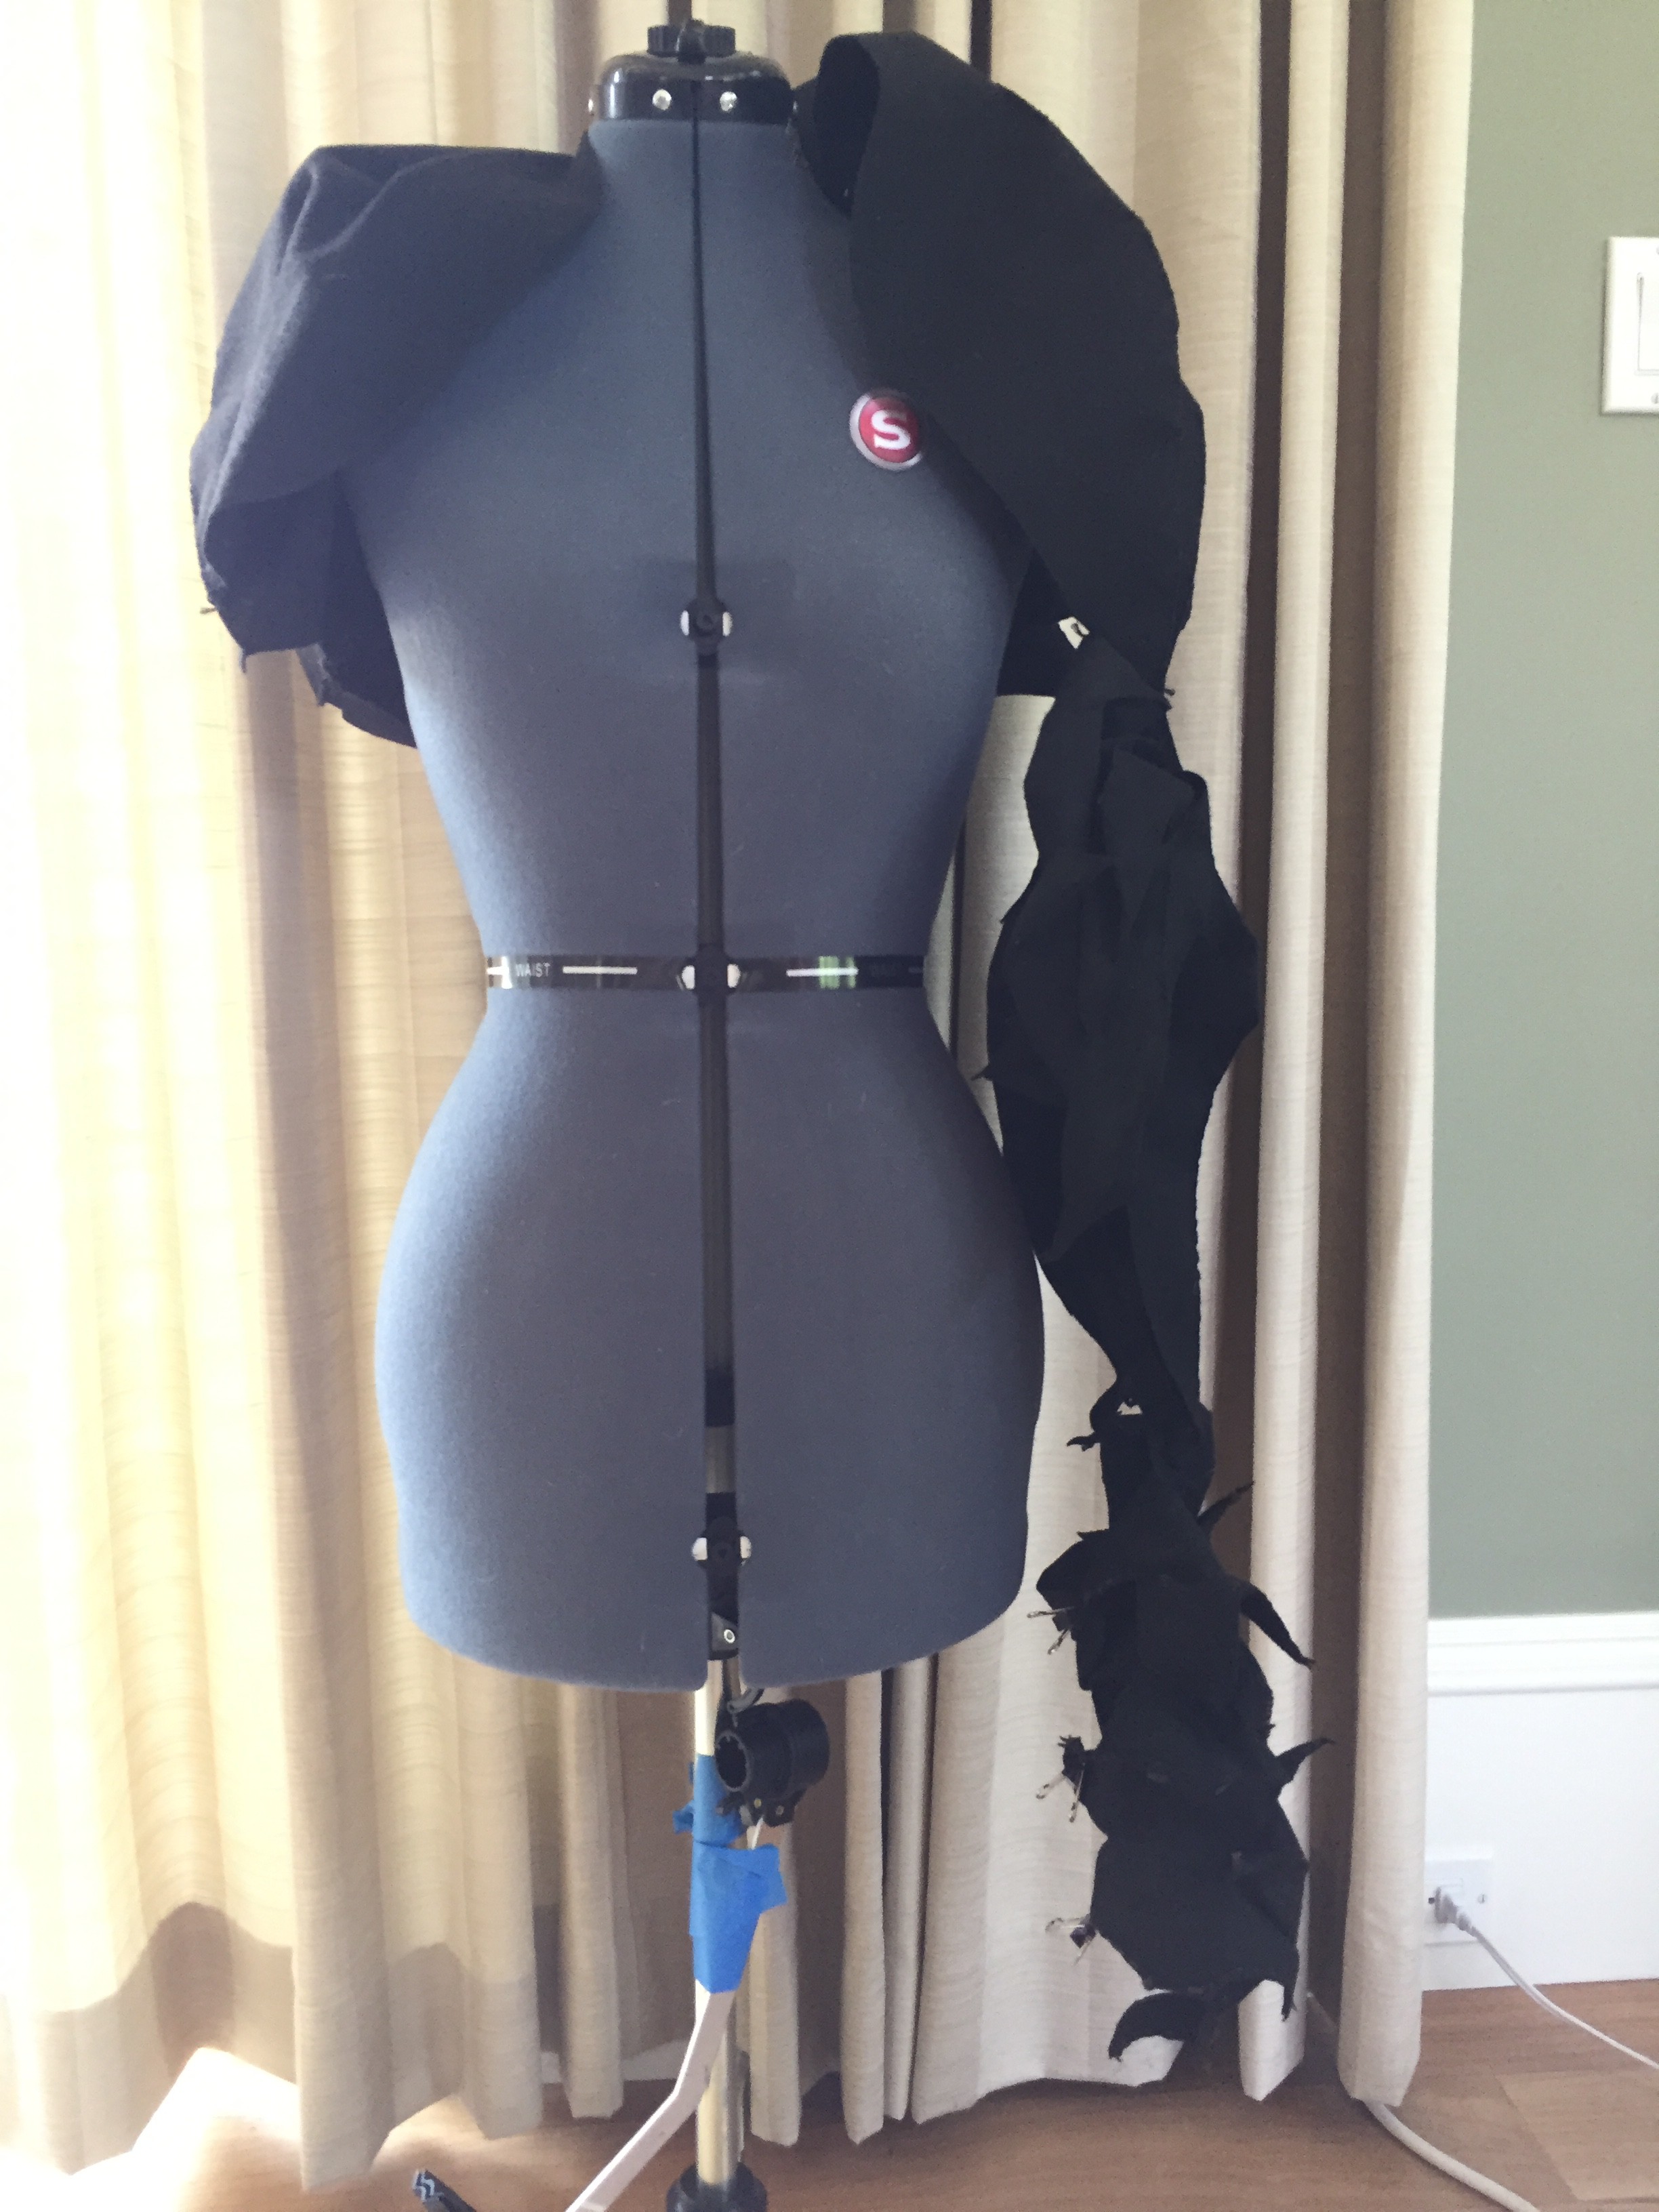
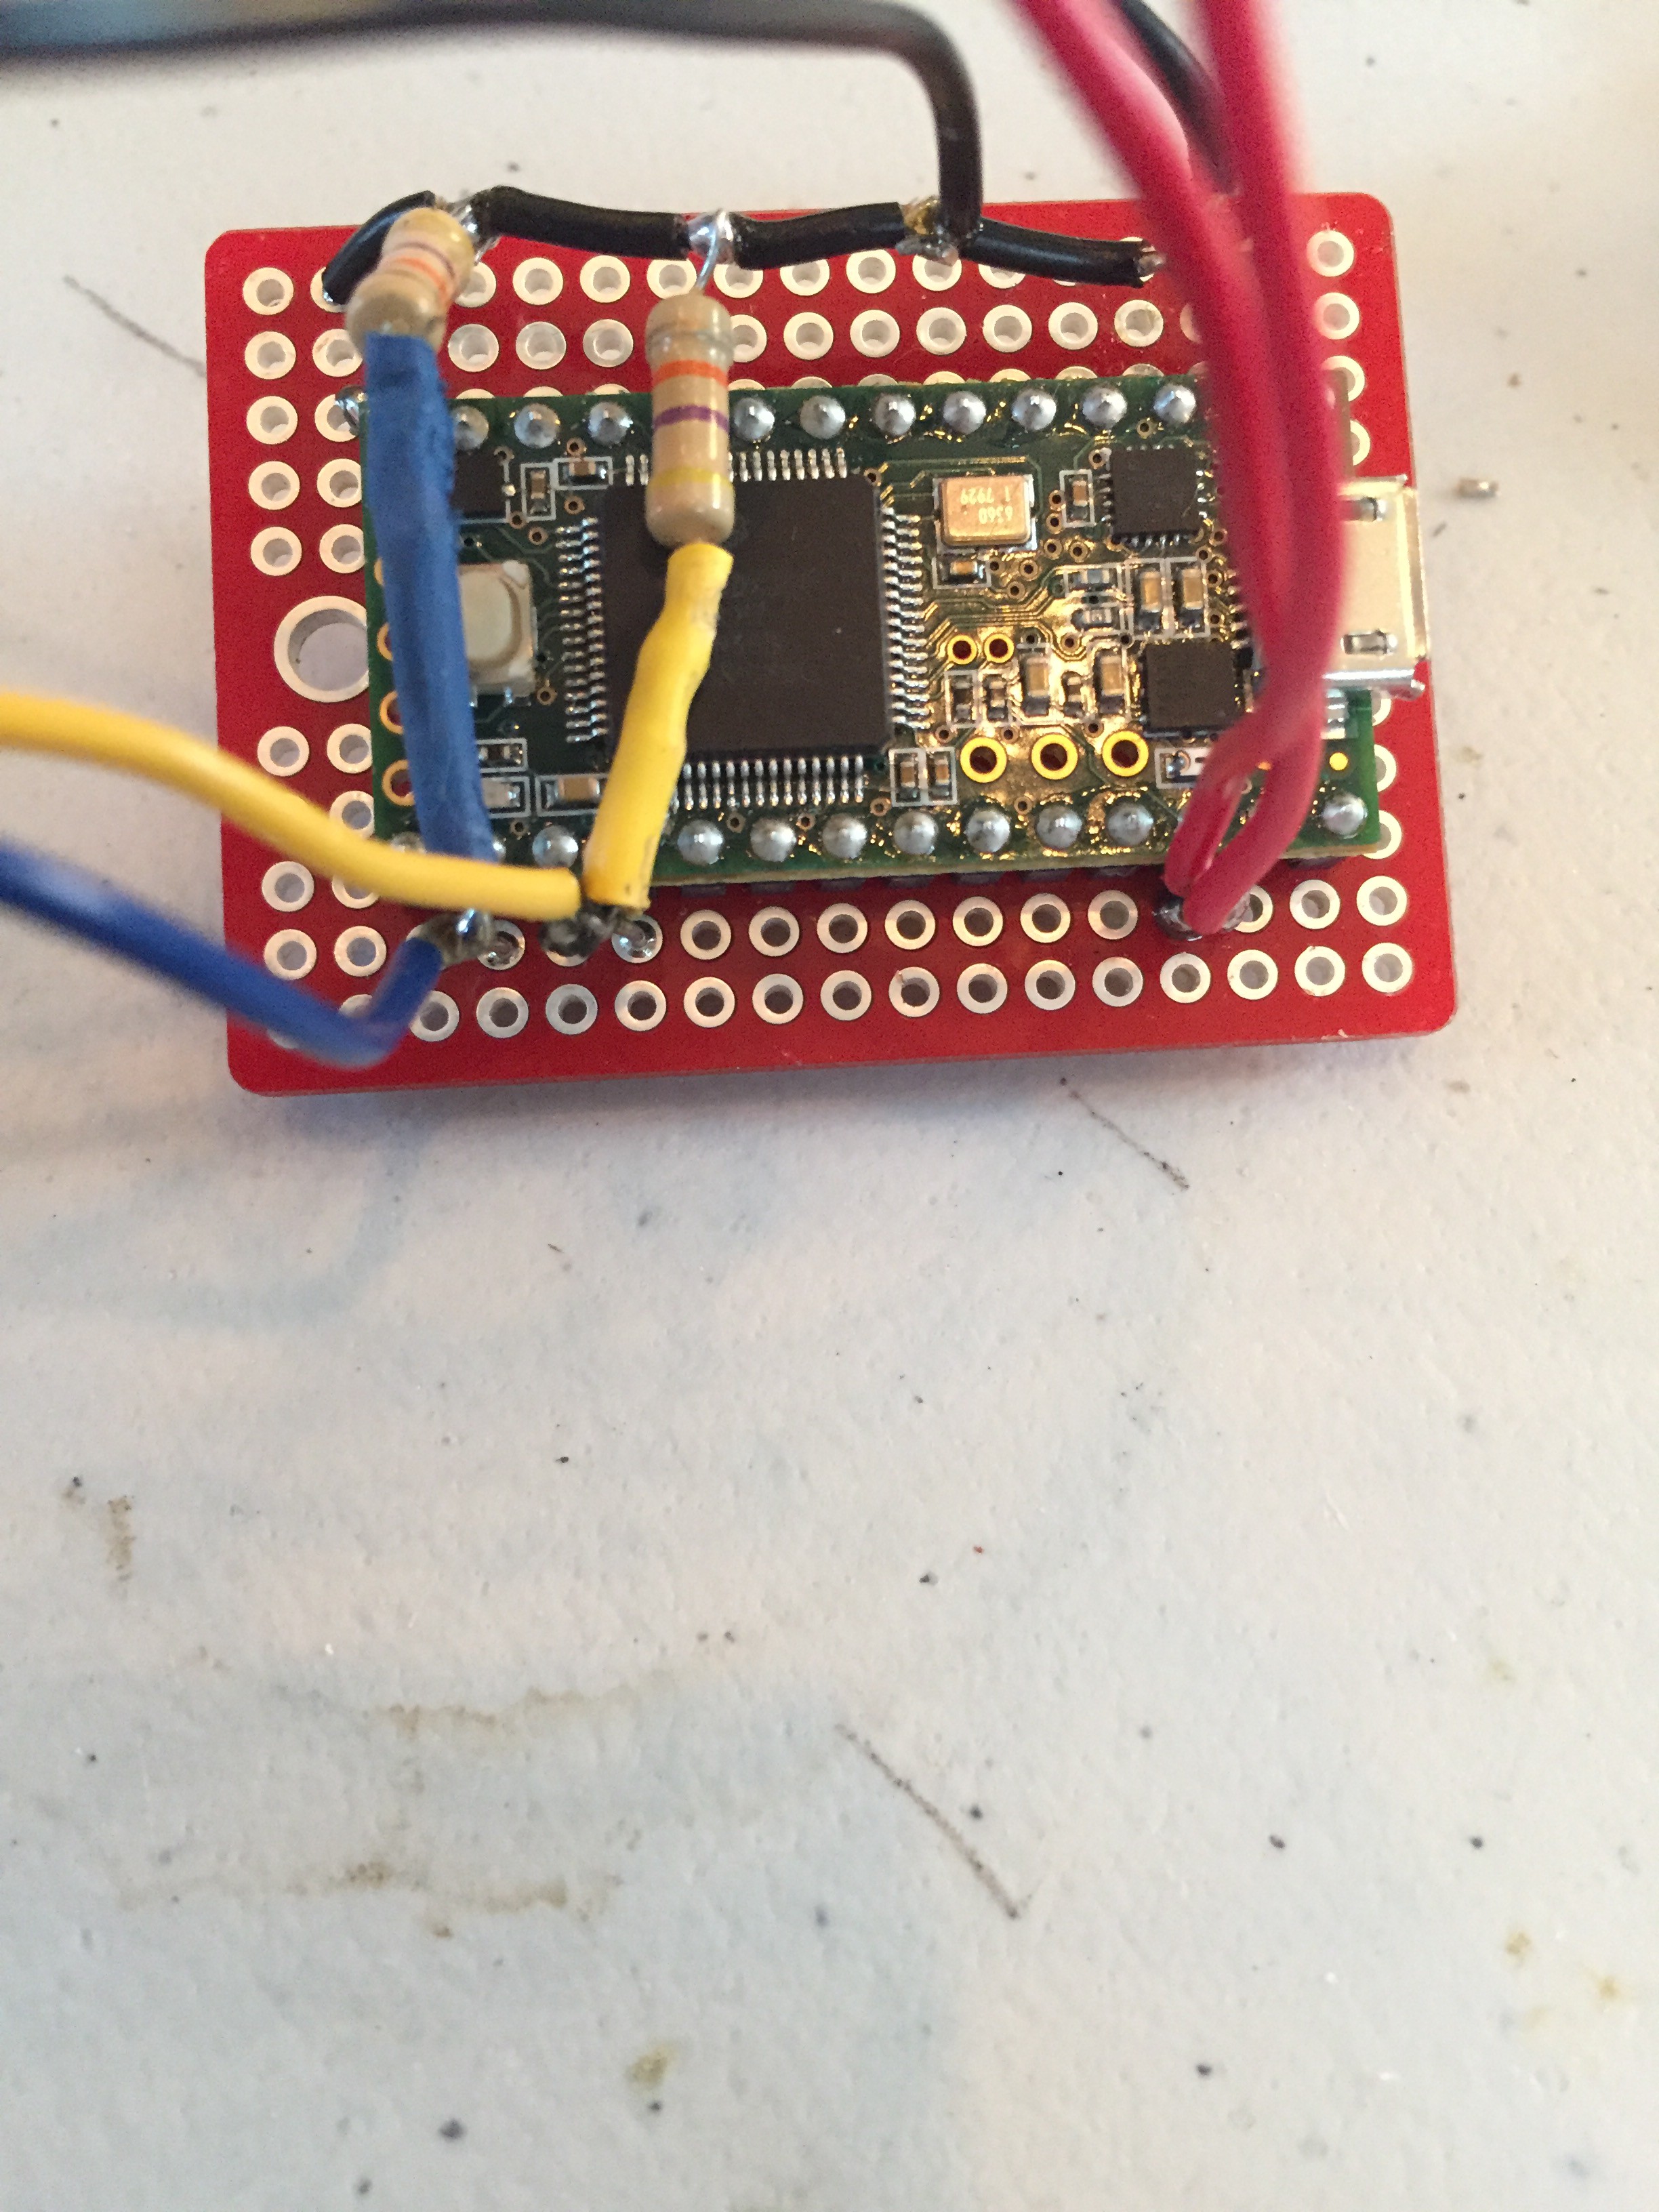
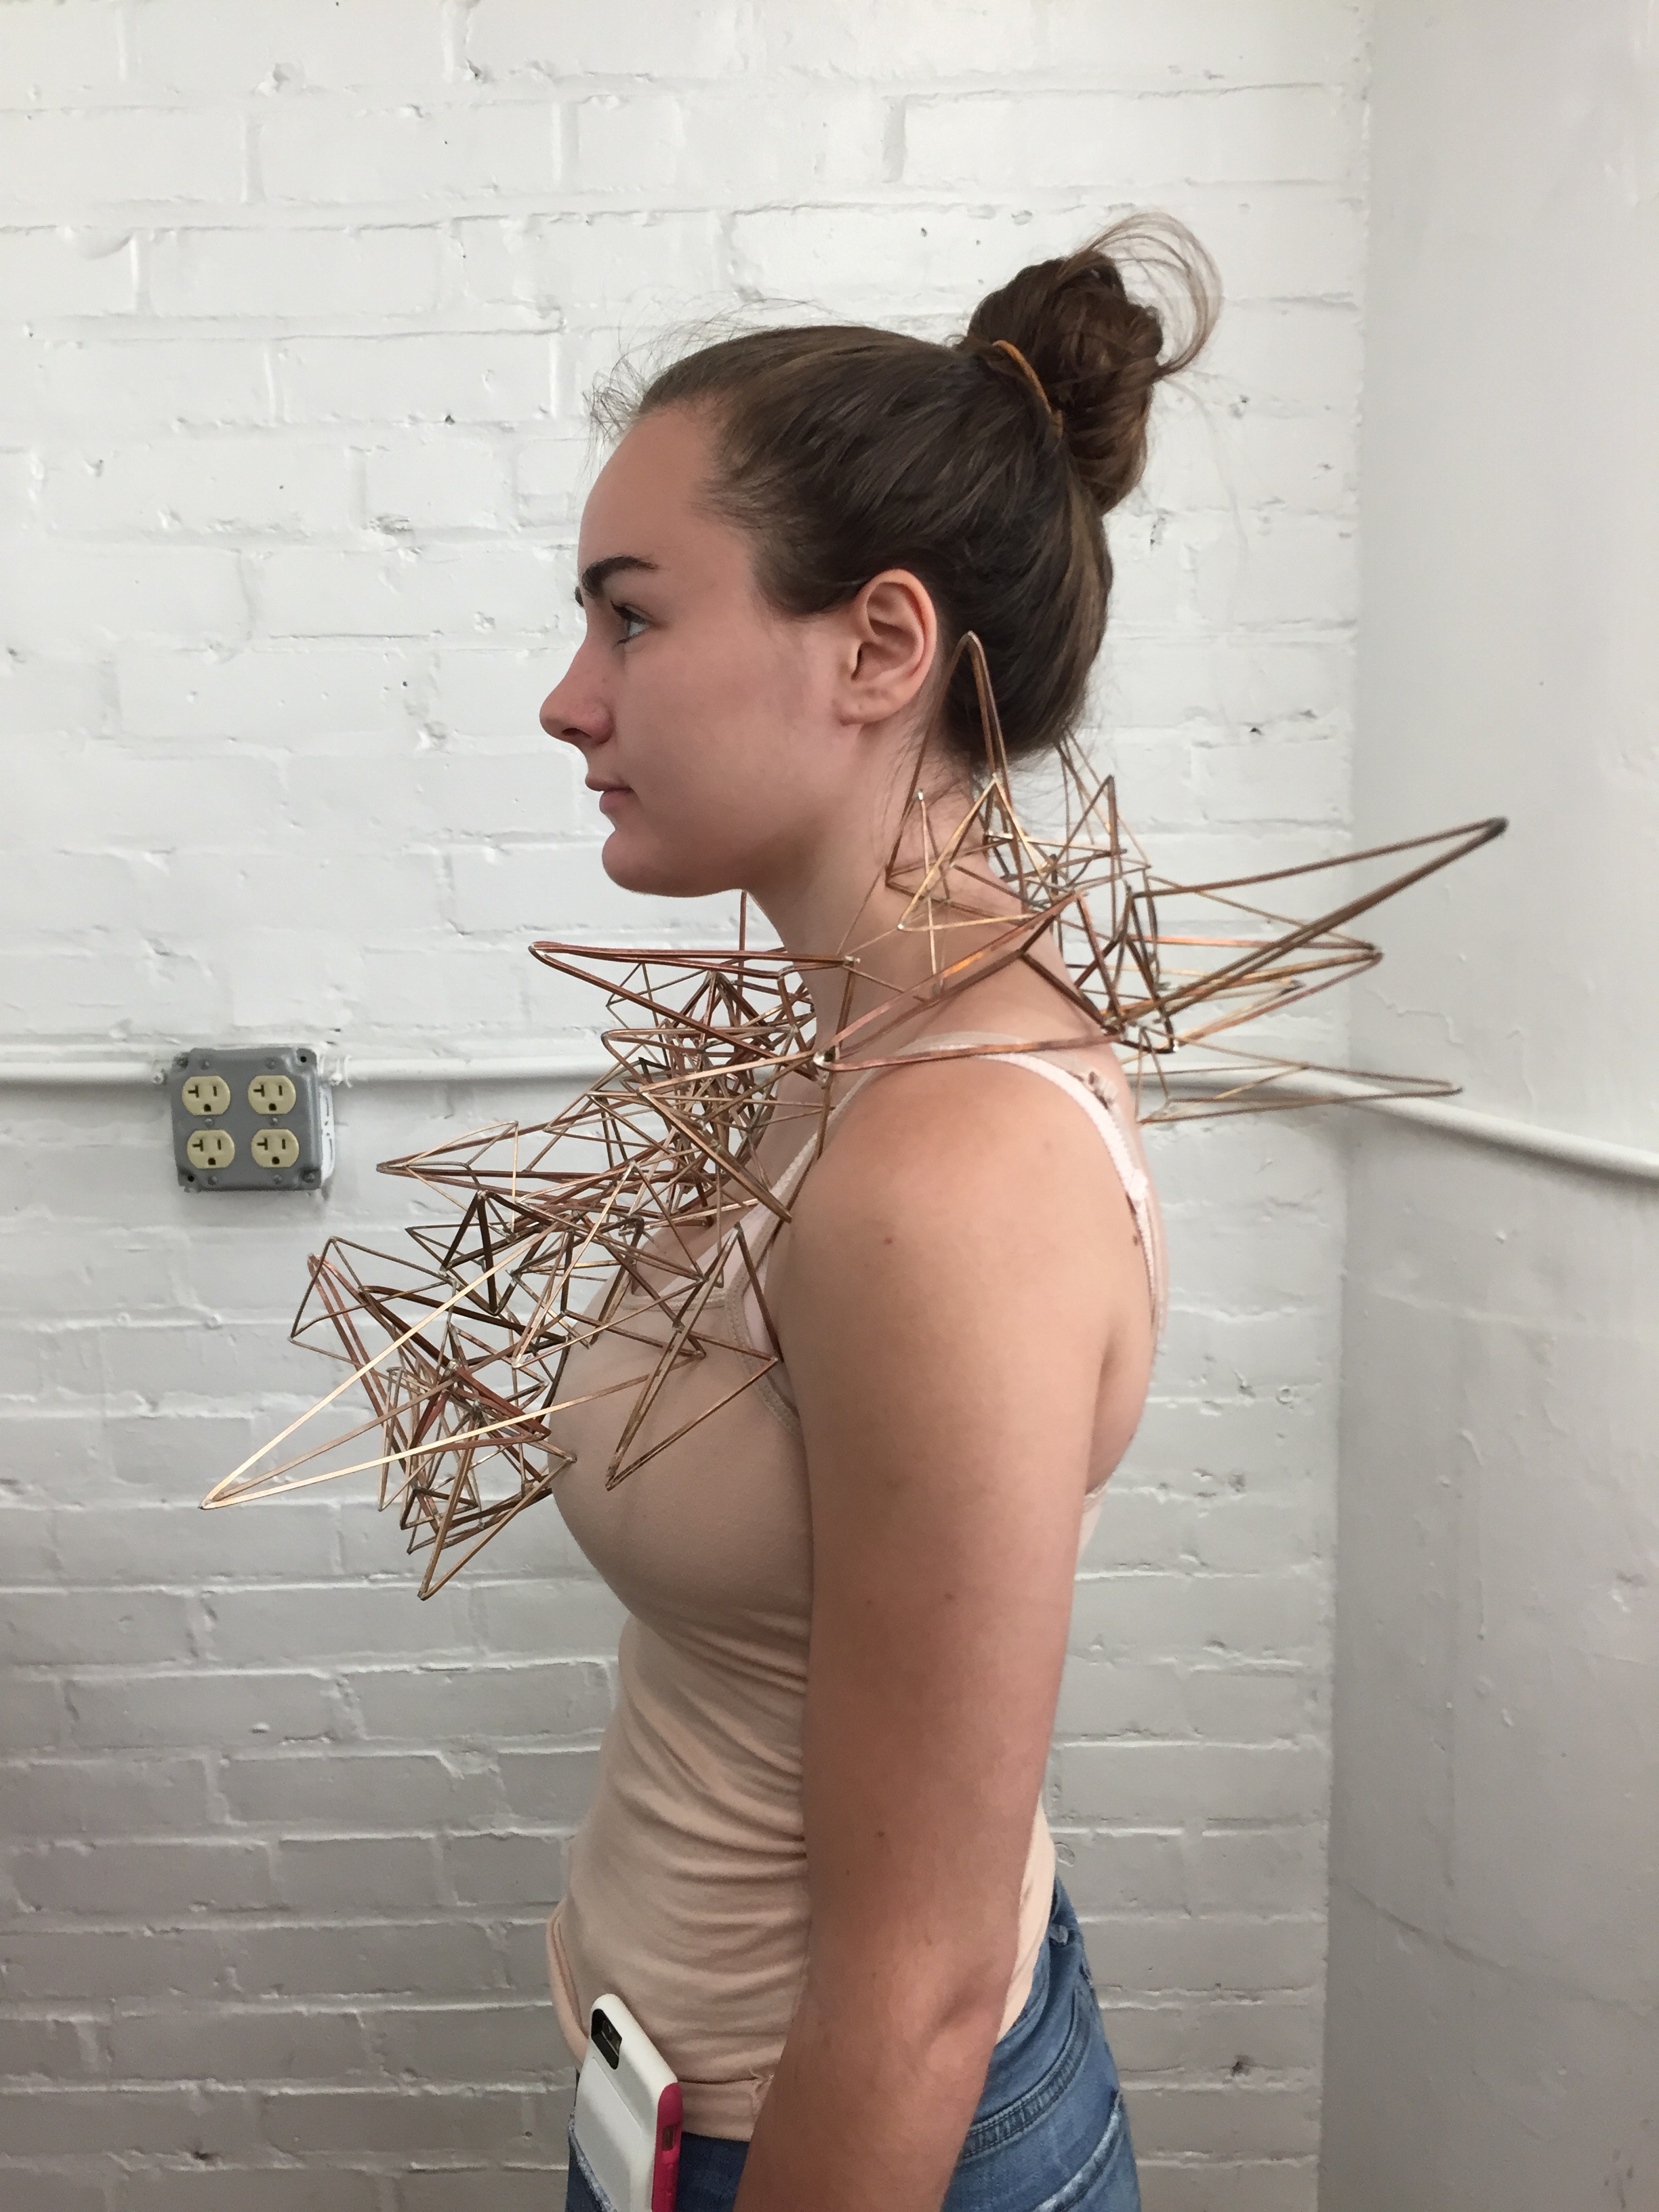
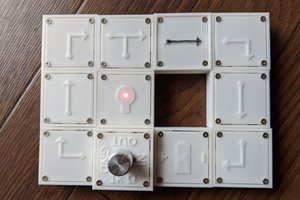
Three Musical Prosthetics  exaggerate specific human emotions. The materials used in this set of three prosthetics is leather, bronze, and wood- each chosen and designed to correlate with the emotions sad, mad, and glad. The prosthetics are connected to an Arduino sensor that is matched with the body movements associated with that desired emotion. The sensor is placed somewhere on the prosthetic as it is attached to the wearer’s body. The sensor picks up the specific movements from the wearer, and sends the information to a Teensy Arduino. From the Teensy, the information goes into Max MSP where the information is then translated from numbers and data into real-time music and sound.

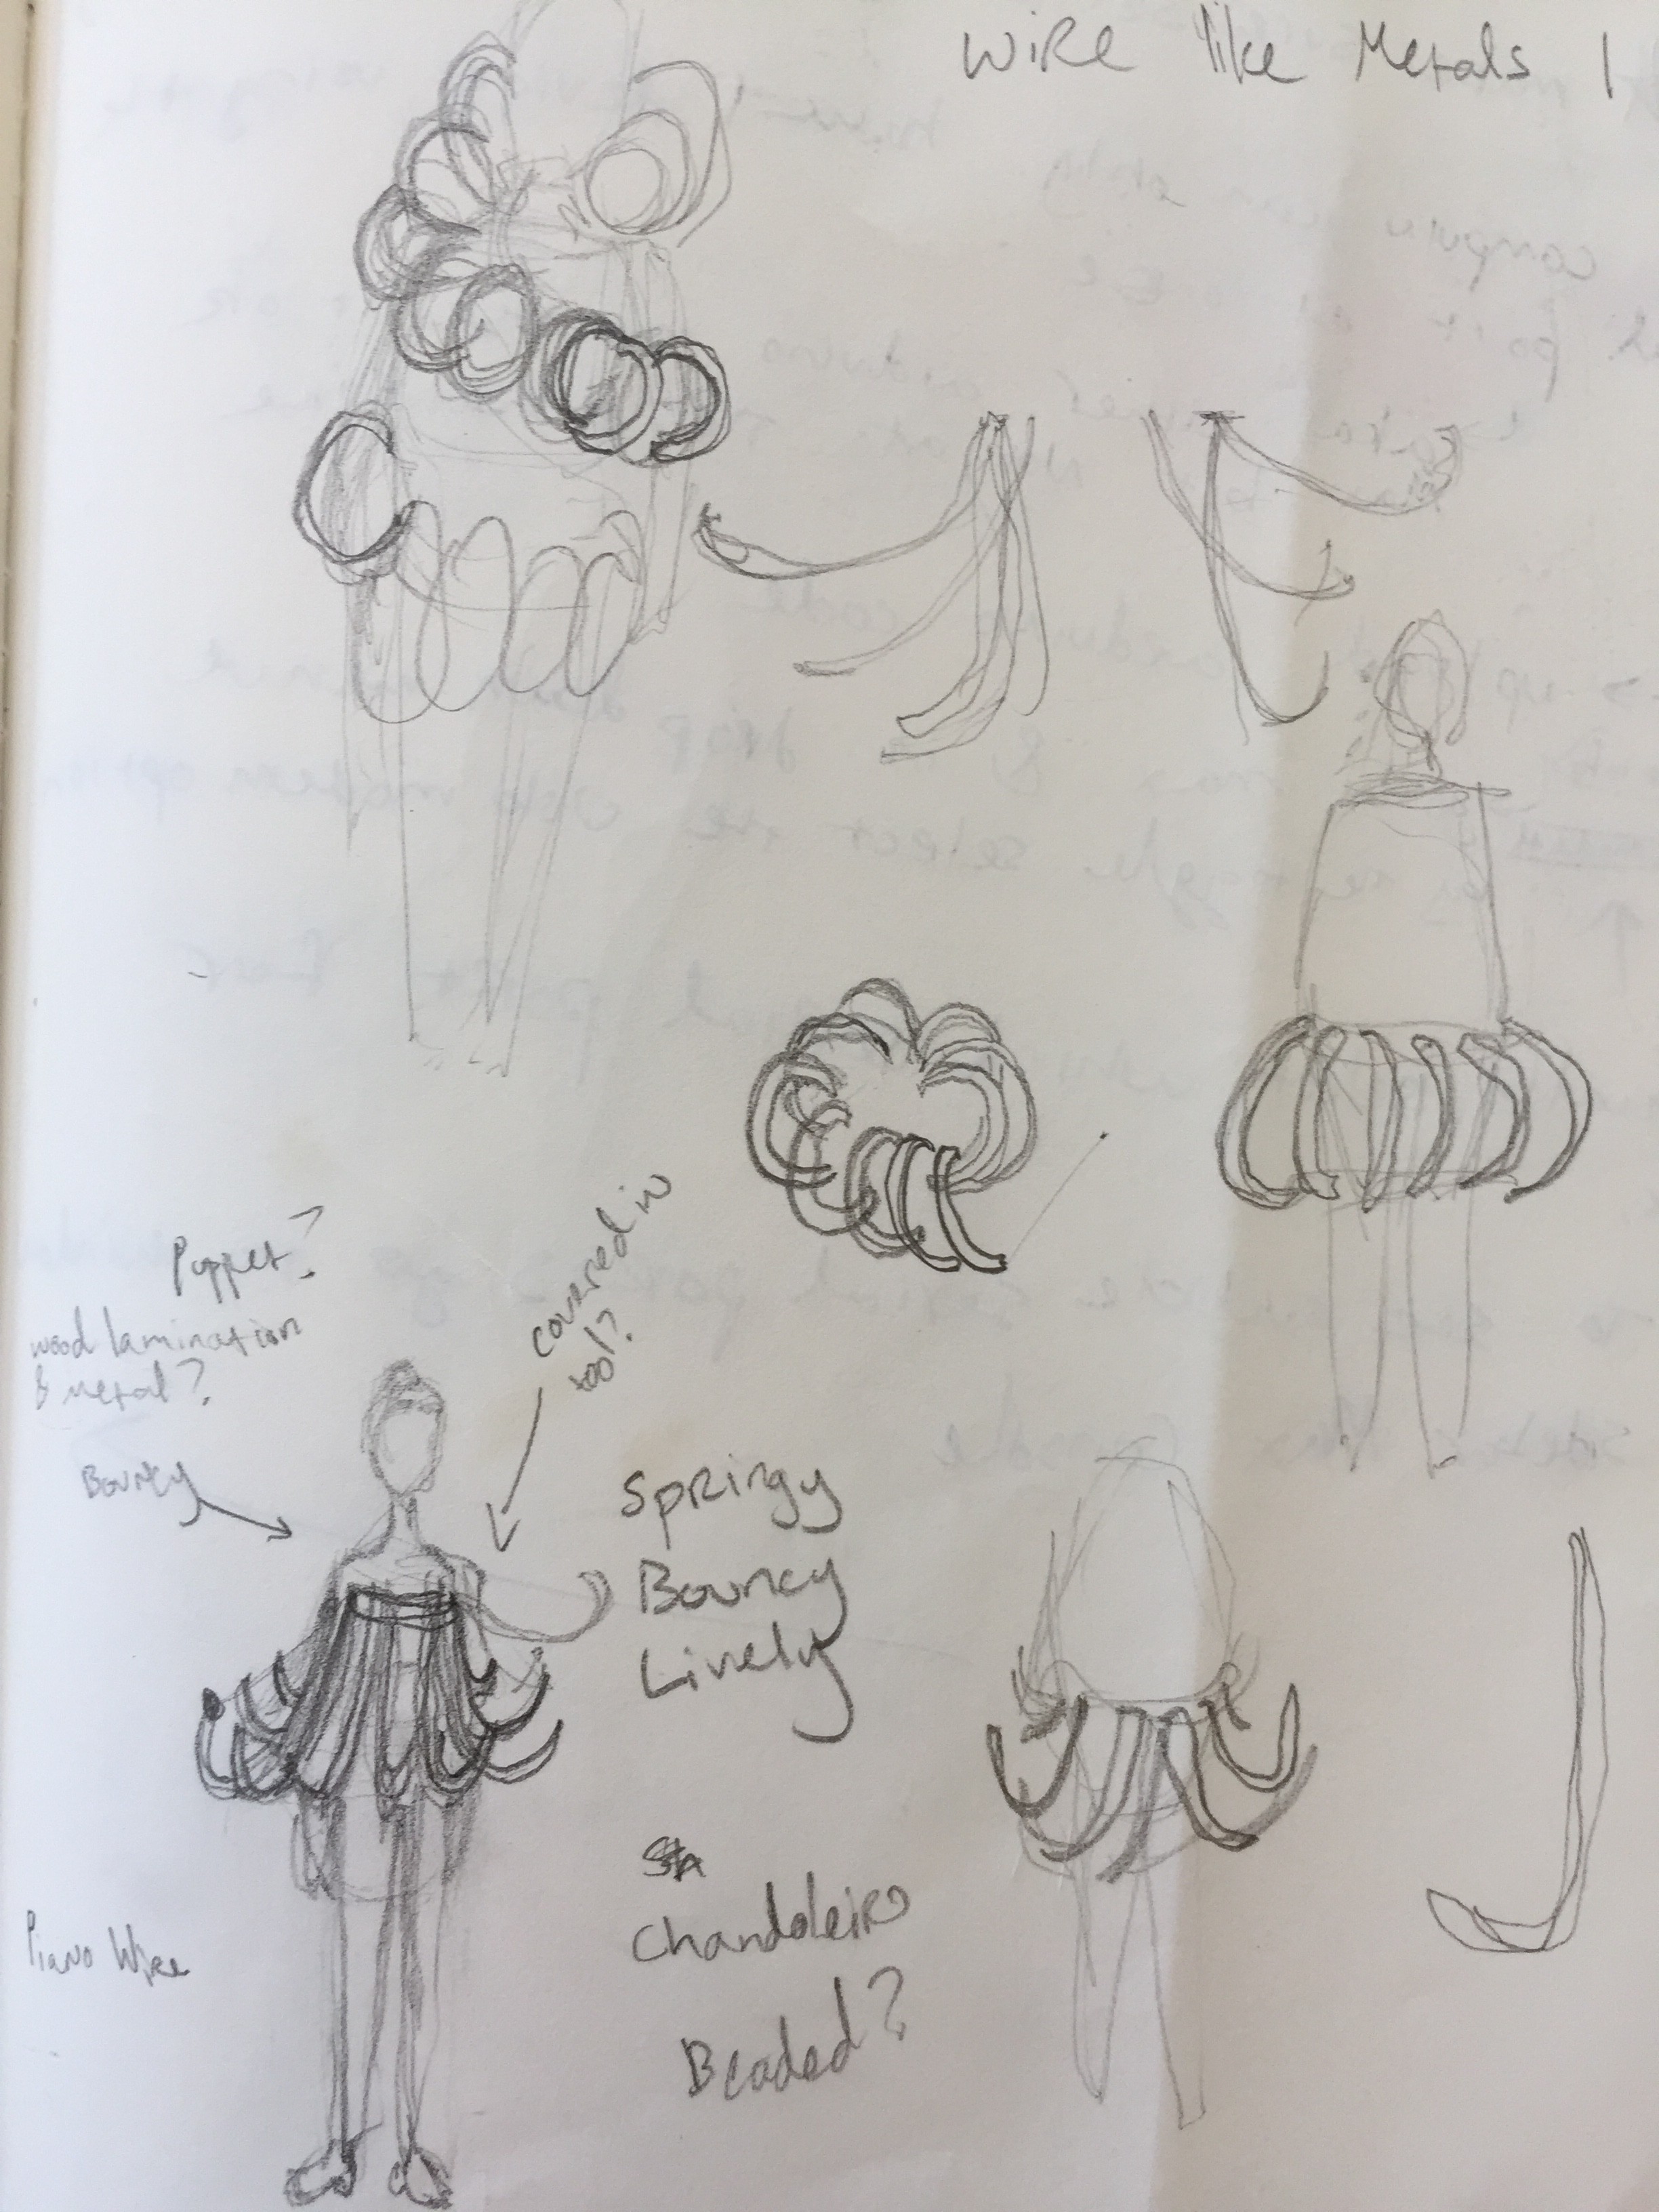
In live performance these prosthetics command awareness. They are magical and fantastical, each with its own personality, yet cohesive as a group. Viewers and performers get drawn into  the visual and aural connection, triggering an awareness and mindfulness, strengthening an understanding of the non-verbal world. Musical Prosthetics encourage larger conversations about our movements, our experiences within our bodies, and how it feels to express this wonder to others. 

Arduino To Max Potentiometer .maxpat

This max patch creates the sound for the worry prosthetic.

maxpat - 74.40 kB - 08/28/2018 at 18:11

Download

Arduino to Max Hull Sensor.maxpat

This max patch creates the sound for the happy prosthetic.

maxpat - 78.85 kB - 08/28/2018 at 18:10

Download

Arduino To Max Flexiforce.maxpat

This max patch creates the sound for the angry prosthetic.

maxpat - 82.97 kB - 08/28/2018 at 18:10

Download

Arduino-Max_kw.ino

Upload this to the Teensy Arduino to start serial communication from Teensy to Max MSP. This code allows the Teensy to send the data to Max. This needs to be done before trying to open the other Max patches.

ino - 3.19 kB - 08/28/2018 at 18:10

Download

  • 1 × 16 Gauge Bronze Square Wire For Angry Prosthetic
  • 1 × 12 Gauge Bronze Square Wire For Angry Prosthetic
  • 1 × Wooden Beads For Happy Prosthetic
  • 8 × Hall Effect Sensor Non Latching For Happy Prosthetic
  • 1 × 10 Gauge Copper Square Wire For Angry Prosthetic

View all 12 components

  • Musical Prosthetics In Action

    Kate Reed08/28/2018 at 18:07 1 comment

    Once I had all the prosthetics in order, I started to test them out and make music with them. I learned so much as I was trying to use them- about myself and the prosthetics. First, I started with the worry prosthetic, which worked pretty much how I expected it to. I ended up using my hip bones a lot with that prosthetic to really activate the sensor. I found it very easy to be expressive with the worry prosthetic and to convey complete musical ideas.

    Next, I tried the happy prosthetic, and this one worked completely differently than how I was expecting. Of note, I learned that this prosthetic needs bigger magnets for the sensors and I may explore stabilizing the underwire more. Currently, this prosthetic has a mind of its own, and it was very difficult to trigger sounds when I wanted them to. I found big hip motions to be the most successful for this prosthetic, as well as playful arm motions lifting the petals up and dropping them.

    Lastly, I tried the angry prosthetic. This prosthetic, as previously pondered, did hurt a bit to wear. The prisms are so pointy that even with a turtleneck on I still felt my skin getting poked and irritated. In the future I may want to create a leather bodice to go under this prosthetic to protect the skin a bit more. Making music with this prosthetic also went a little differently than I expected. I ended up lining the Flexiforce sensors right on my collarbone to get a hard surface to push off of. I got my best sounds from pushing the prisms into the sensors with my hands and shoulders in the way another prosthetic might interact with me, and less sounds from an individual shoulder shrug. 

    Having two prosthetics “talk” with each other was really fun. I only did one video take of this so had to choose which two prosthetics to use. I ended up going with worry and angry- giving the worry prosthetic to my partner, as I now have more skill at how not to pierce myself to death with the sharp points of the angry prosthetic. It was fun to play the prosthetics off of each other!

    I also tried performing with a violinist, and that was also fun. String instruments are the closest to the human voice in terms of musical possibility, so it seemed like a great match for my first improvisation session. I can envision all kinds of musical collaborations ahead!

    My mind is racing with possible tweaks for these three prosthetics, as well as completely new prosthetic designs in the works. This was a very inspiring project for me and a chance for me to combine several of my skill areas; music, art, design, and technology. Overall, I am very pleased and proud with how these first three prosthetics turned out. 

  • Happy Prosthetic Electronics

    Kate Reed08/28/2018 at 16:35 0 comments

    For the happy prosthetic, I am inspired by the motion of a hoola-hoop. Each of the petals will bounce as the wearer moves as if playing with a hoola-hoop. I will capture this movement with a Hall Effect Sensor, which is a magnet sensor. This digital sensor can sense and react to magnetic fields and will change when a magnet is near it. I decided to go with the non-latching hull sensor instead of the latching hull sensor, because the non-latching reacts to just the presence of a magnetic field, as opposed to being influenced by the north or south end of a magnetic field.

    My vision for the sensors is that there will be a magnet on each of the petals, and a hull sensor somewhere on the wearer, either directly on their body, or on a second ring holding the sensors. The petals will rest on the body and when the petals move because the wearer is moving, the hull sensors will trigger a pre-recorded sound, such as bells ringing or the sound of a thumb piano. This prosthetic is different than the other prosthetics in that it works much more like a piano. Each petal has one sound activated by moving that particular petal.

  • Happy Prosthetic Finishing Touches

    Kate Reed08/28/2018 at 16:33 0 comments

    Once I had the petals made it was time to start experimenting with how to use them. I started to string them on some spare wire I had just to see how much space I would need between each petal, and how they acted, and I was very pleased. It turns out I only need eight petals for this prosthetic, but it never hurts to have a few extra laying around. I need spacers to space out and secure each petal along the steel wire. I picked up some really nice wooden beads at Michael’s Arts and Crafts and started experimenting with various formations of both wooden and metal beads separating the petals on the steel wire. 

    For the petals to function, they needed to be spaced out quite a bit. I ended up feeling like the prosthetic felt a little naked. I went back to the fabric store and bought two types of tulle and added that to the prosthetic to see if that would solve my wonderings. The prosthetic feels much more covered now, and maybe too covered. I’m still thinking and taking in the visual. The tulle might stay, or it might go… 

  • Happy Prosthetic Laminating Wood

    Kate Reed08/28/2018 at 16:32 0 comments

    Now that I have a vision for success, it is time to figure out how to make this prosthetic function. I envision this prosthetic being made out of steel wire with a circular base wire at the top which everything will hang from. I want to explore laminating wood to make the petal arms. I don’t have the best set up to make molds for wood lamination, so I am experimenting with laminating wood around a steel wire to create the curved form. I did a quick test gluing some ash veneer that I had laying around to some steel wire, and saw that this method will, in fact, work. With all of this information in mind, I went to Woodcraft, in Walpole, MA, to talk with some of the woodworkers there to confirm that what I was doing was, in their opinion, doable. They said that while my method was out of the ordinary, it would work. Feeling confident, I stocked up on more wood veneer to use for lamination. I ended up buying cherry, walnut, and mahogany, and went home excited to start the next step.

    For each petal, I bent the central piece of 2-foot long thick steel wire to my desired angle and looped one end. This was not easy as the wire was extremely stiff. Then, I began cutting the 1/16 inch wood veneer so I could glue together four layers around each steel wire.  The veneer that I had bought had four pieces per pack, and I found that I could split each piece in two and still have enough wood to work with for each petal.

    Once I had everything prepared, I began the lamination process. First things first, I added layers of wood glue in between each individual piece of wood. Once that was glued, I added in the steel wire before I put in the top piece of wood. Once I put the top piece of wood in with the wire it became a two-person job and a clamping nightmare to curve the wood to the wire form while holding it in place to clamp. The wire was already curved into its shape, and did not want to straighten out to a straight line, which was good, but it meant the wood had to curve on both sides to conform to the wire. After enlisting help for each petal, it was a stressful 10 minutes fitting everything together. It was a lot of loosening and tightening clamps over and over again trying to get the wood bent just right. I used wood clamps, binder clips and clothespins to secure the entire edge of each petal. Once the wood was clamped and clipped up, I found some wood crates in the basement that happened to be the perfect size, and put the petals in the crates to dry. This way if they expanded as they were drying, which they did a bit, they wouldn’t ultimately lose the petal shape that I wanted.

    I continued this process of making petals for six days, making two petals a day, and leaving them to dry overnight. I discovered that it matters which direction the loop is going for the wire, and I definitely preferred it looping back from the petal, so I was more careful to make sure that happened going forward. I also learned that the more I planned out the exact size of the wood the better, as it made the gluing and bending process go smoother. 

    After I had all the petals made, it was time for me to reshape them all and clean them up. I ended up using a coping saw rigged like a jeweler’s saw to reshape each petal, and clean up the edges. Once I had the general shape, I used a hand plane to individually plane all the edges to be nice and smooth. After that I went through and sanded each petal up to 100 grit. Between all 12 petals I ended up sanding for four hours straight, which did not feel good on my hands, especially after all the sawing and hand planing work. Once I had the petals made, I then finished them all outside with raw linseed oil. This really brought out the color of the wood.

  • Happy Prosthetic Starting Off

    Kate Reed08/28/2018 at 16:25 0 comments

    As I started in with my idea for a happy prosthetic, I knew that I already had a few constraints, the first being that the happy prosthetic needs to somehow tie the other two prosthetics together, uniting them both visually and conceptually. I also know that I don’t want to use the same movements and body parts for this prosthetic as I have the other prosthetics. With this in mind, I started to brainstorm different ideas for the happy prosthetic.

    I started by thinking of things that make me happy, and had images from childhood; running on playgrounds playing games, hopscotch, hoola-hoops. I thought of joyful movements, like the happy dance football players do after scoring a touch-down, or the immediacy of our reactive and silly motion we get when our ice cream drips on a hot summer day or we miss catching a ball and go wildly chasing after it. I also thought of light-hearted sounds; thumb pianos, bells, sounds that make me smile.

    I began thinking about materials and balancing those materials throughout the prosthetics as a unit. I already have one prosthetic made out of bronze, and I have one prosthetic made out of leather, and it seems like the next reasonable medium to explore could be wood.

    I took all these thoughts and slept on them for a few days really thinking and pondering this prosthetic and came up with a prosthetic that looks almost as a chandelier. This design has a center hoop with different arms hanging off of it pointing outwards, which bounce when moved. This way the prosthetic can be played just by the body moving and jumping, but also by the wearer being more deliberate, lifting up certain arms and moving them. This way the prosthetic works both as an attachment which feeds off of body movement as well as an attachment that can be puppeteered by the wearer. 

  • Worry Prosthetic Electronics

    Kate Reed08/28/2018 at 16:23 0 comments

    Once I felt like I had the body of the prosthetic built, it was time to start experimenting with the sound component of the design. I originally thought that the prosthetic would have two SoftPot Membrane Potentiometers on each of the hands, and be played by rubbing the hands together. The more I thought about how this set up would work, the more I realized that it was not an ideal set up for the electronics and visually note the best way to show the sound of worry.

    I rethought the electronics, and settled upon still using SoftPot Membrane Potentiometers, to use in different places. I bought four 7-inch potentiometers and decided they would lay along the inside of the arms. This way the prosthetic would still be played by worried movements, rubbing the hands and the arms, but it would be more interactive of the whole body and not just the hands.

  • Worry Prosthetic Sewing Leather

    Kate Reed08/28/2018 at 16:22 0 comments

    At this point I felt like I was ready to start experimenting with real leather. I knew that felt and leather wouldn’t act the same, so I could only expect so much of my prototype to work with actual leather materials. Nevertheless, I felt like I was ready for the next step and I headed down to the fabric store to try and buy some leather. I was looking all over the store for leather and couldn’t find it anywhere because I was looking where all the rolls of fabric were. What I was not expecting is that leather is bought by the pelt, which in retrospect seems obvious, so instead of being in rolls like regular fabric, it was hanging from hooks at the ends of the aisles. A bit gross. I went through the pelts, trying to find the best bang for my buck and ended up with a beautiful burnt sienna leather color. There is definitely going to be enough of for my entire project. I would say I bought a whole couch’s worth of that single leather. Next, I headed over to the scrap bin and tried and find some different color variations of leather to mix in with my project. I found a few larges bunches of various white leathers, so I started to mix and match. Once I bought all that leather, I felt like I could visualize my project in a whole new way.

    I brought the leather home and started to experiment with it. One pleasant surprise was learning that I can sew leather on a sewing machine. I had thought I was going to need to hand sew everything, but it turns out I just needed to buy leather sewing needles for the sewing machine. Leather is much stiffer than the felt, and really does what it wants to do. I realized my design was going to change massively from my felt prototype, so I went back and figured out how to make it work with the leather. I cannot fold the leather in the same way that I can fold the felt. I did some sewing prototyping of how to connect two pieces of leather, looking at not only at what physically works, but also what looks best. 

    I decided to sew two pieces of leather back to back and then trim the seam afterwards. This gives the leather a really clean and intentional look. I then decided to just go for it, and try my best to recreate the felt prototype, knowing that it wouldn’t be exactly the same. I started to create the leather in pieces. Sewing the leather was very hard. While the sewing machine saved my hands from the pain of hand sewing, it was not stress-free. I went through 15 leather sewing needles throughout the project. Every now and then the leather would just be too much for the sewing machine, and things would get clogged and break. But eventually, after many, many hours, I had my prosthetic looking good.

    For the most part the prosthetic built itself up from the hands to the back. I did have a few design variations on the back that requires some more felt prototyping until I finally came up with a design that I liked. The final back design connects the arms with two flaps that speak to the idea of a hunch back but also the idea of wings and being set free. Once I had all of the parts made, I started to sew the parts together, which was very stressful. Each part consisted of 7-9 pieces of already sewn leather, so It felt like I was sewing together giant stacks of leather. It was very difficult to stay focused, and not lose track of where I was in the project with the sewing machine. After I had done everything I could do with the sewing machine, I completed some loose ends with a little hand sewing. I ended up purchasing some leather hand-sewing needles, which made a huge difference! These needles have a little blade on the side of them and they go right through the leather. I still needed some pliers to pull the needle through, but for the most part they went through pretty easily.

    Once I had the leather parts of the prosthetic done, I put it on a human, and saw how it fit a real human form. I realized that the sleeves were going to need some elastic to keep them on the wearer’s arms, so it...

    Read more »

  • Worry Prosthetic Starting Off

    Kate Reed08/28/2018 at 16:19 0 comments

    Confident that my first prosthetic is in a good place, I’ve started thinking about my second prosthetic. I know I want this prosthetic to represent worry, anxiety, and sadness.  I started thinking about how worry and emotional burden present in our everyday lives. My mind sees hands rubbing together, muscle tension, and the vision of being weighed down. When I am worried, I am very fixated on a worry, and unable to pull myself away. I started exploring different ways I might represent these emotions visually.

    I thought about the idea of being weighed down by having something hang off of your body and showing muscle tension by creating something that elevates the shoulders. Emotional incapacity is like wearing boxing gloves so I thought about covering the hands and using layers and layers of leather like wrinkled and overworked skin. I started to sketch these ideas out until I came up with a sketch that I liked, then started to do some prototyping in felt.

    I am very interested in creating volume off of the body for this piece and interested in sewing fabric in a way that it can stand up alone on its own. I started experimenting with the felt, shaping and overlapping it in various ways and sewing it together. I experimented with creating a three-dimensional form with as little sewing as possible, knowing that ultimately I want the final version in leather, and it is not going to be as easy to sew leather. I came up with a basic modular piece I could use for most of the prosthetic, and started pinning it to the dress form to try and visualize and contextualize my sketches. I went back and forth between my sketches and my sewing machine working all the kinks out until I had a felt prototype that I liked. At this point I started to think about color and experimented with colored pencils to explore some options. 

  • Angry Prosthetic Electronics

    Kate Reed08/28/2018 at 16:07 0 comments

    Once I had the design aspect of this piece done, it was time to start thinking about the musical aspect and creating sound.  After seeing how the chains looked on the body and interacted with the body, I decided the best way to play this instrument would be with pressure sensors. This way the prism corners would push into the sensors as the person moves their shoulders in an irritated manner, or from another person pushing them in confrontation, and the prosthetic will create sound. I did a lot of research as to which sensors to use, and I decided on the Tescan Flexi Force one-pound sensor. I ordered them and hooked them up to my Arduino and they worked great.

    I have some experience with Max MSP, and more experience with Arduino, but I wasn’t sure ultimately how to merge the two together in order to create something that reports back real time data into music. I asked a software mentor, Kristina Warren, about what the best way to go about this was and she suggested I use a Teensy Arduino, because they work best with Max MSP. She also gave me a starter match patch that I based my final software patch off of. I ended up finding and using some code which was filtered from Daniel Jolliffe and Thomas Ouellet Fredericks, and this code allows the Teensy to send its values into Max. I then used the Max patch Kristina had gotten me set up with to try and read the values from the Teensy. I had a lot of trouble being able to access the Teensy data in Max. 

    I spent hours and hours trying to trouble shoot and simply could not find the Teensy serial port in Max. I could read the data just fine on the Teensy, but I couldn’t get it to transfer over to Max. After a lot of frustration, deep breaths, and internet searching, I found a really helpful website which helped me understand the inner workings of what I was looking at. (http://little-scale.blogspot.com/2016/11/notes-on-teensy-arduino-max-and-usb.html)

    After reading through this blog post, I felt like I understood the electronics on a whole new level. I went through the Arduino code piece by piece, deleting all that wasn’t necessary and adding in what I was missing. I then went through the Max patch and did the same thing, simplifying everything, making sure I understood exactly what was going on. After doing this I felt great. I could see all of my Teensy data in Max, and understood all the software on an entirely new level. I solved my serial port problem, and now  just needed to manually select the serial port in order to get the data to flow from Teensy to Max, which was no big deal. Now that I have the data flowing into Max, I still need to take that data and turn it into music.

    My only concern with this prosthetic so far is that it will hurt the wearer. The prisms are very sharp and if the wearer is pushing their shoulders around and shrugging them, it might hurt a little bit. I have decided that if that becomes an issue, I will make a leather base for this prosthetic that protect the wearer’s skin. 

  • Angry Prosthetic Finishing Building

    Kate Reed08/28/2018 at 16:06 0 comments

    Once I had run out of wire and had a box full of prisms, I panicked, because I realized that I had not thought through how I would attach the prisms to each other and to the body. I went back to my same jeweler mentors and talked through my problem. They suggested that I first turn the prisms into little clumps of prisms, by filing and making a lap joint in the metal. The lap joint created much more surface area for the two pieces of metal to connect, which made the whole apparatus more stable. While this solved my problem, it also meant that I would have to do more filing, which by this point I was getting quite sick of. Nevertheless, I persevered. The only challenge with the lap joints was being sure to file into the thicker gauge metal so I wouldn’t make the structure too fragile.

    Once I had little clumps of prisms, each with about 3-5 prisms, I started to think about how they would fall on the body and decided to make them into a chain. Each loop of the chain was about five inches long. I started to hook and solder the triangles together until I had three long strands of triangles. I got my friends to model for me, and I started to lay the chains around them. I realized that putting the chains on was not the easiest feat, as they were huge in size, and pretty spiky. I also realized that the chains could interlock with themselves thus securing themselves to the body. I was pleasantly surprised with how this worked out, because I hadn’t worked out how the chains would lock and clasp together yet. This is also nice because it means that each time the chains are worn they can be worn differently and can conform to the wearer.

    I am very pleased with how the prisms turned out. In thinking about ways to make it easily replicable and more useful for larger musical prosthetic events, an alternative would be to 3d print or laser-cut the prisms. I created a STL file of a triangle prism with thoughts of using this for larger groups of people and in a more interactive workshop setting instead of the bronze prisms. 

View all 12 project logs

  • 1
    Musical Prosthetics- Build Your Own

    There are limitless possibilities for creating your own musical prosthetics. Choose an emotion you want to exaggerate. Envision how that would look on the human body. Explore sensors and software that would best amplify that emotion with sound. My process and instructions for three prosthetics are well documented through component lists, downloadable files and my log posts. Copy mine, or better yet, make your own!

View all instructions

Enjoy this project?

Share

Discussions

fortdocx wrote 01/08/2022 at 17:34 point

These are looking so classy and amazing design of musical prosthetics program. I want to apply the same for womens heel sandals  store page.

  Are you sure? yes | no

Similar Projects

Does this project spark your interest?

Become a member to follow this project and never miss any updates