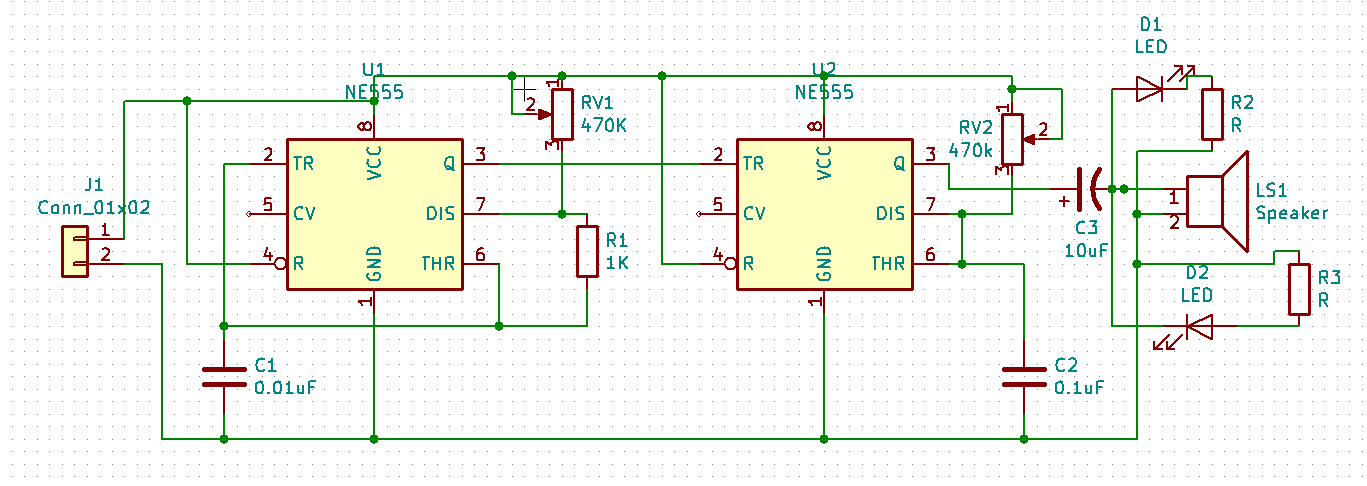
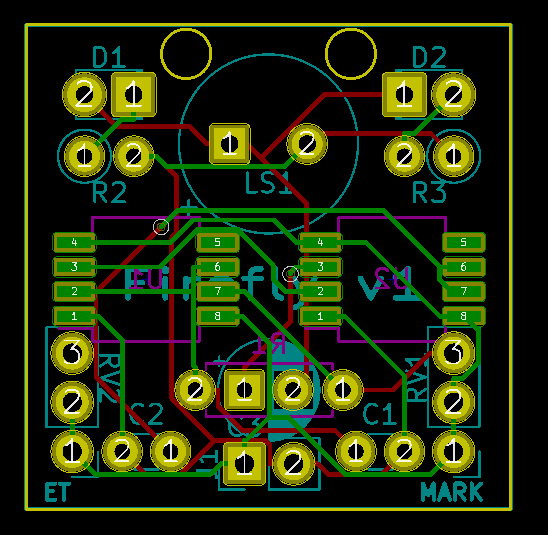
• Breadboarding

    Anas Raza Khan09/03/2018 at 10:50 0 comments

    Before finalizing the PCB I wanted to test the circuit on breadboard and so I did. Instead of variable resistors I used LDR in the breadboard circuit. 

    Breadboard circuit
    Here's the video of how it sounded:

  • Getting Started on KiCAD

    Anas Raza Khan09/03/2018 at 09:13 0 comments

    For designing a square inch PCB, I was considering the two PCB designing softwares: Eagle and KiCAD. I chose KiCAD because it is free, also my goal was to learn KiCAD, not just to design a PCB. Initially all my components were THT, but had to replace the 555 timer ICs to the surface mounted ones eventually because of  small PCB size.

    Schematic

    I used a 2 pin connector for power and two 3 pin connectors for potentiometers, so we can connect other sensors, such as LDR, in place of the variable resistors.

    Front

    Front

    Noticed the two holes above the buzzer? Those are to mount the PCB on something easily (for example, a toy)

    Bottom
    Bottom

    On KiCAD, it is so easy to manage the layers and view. KiCAD even has a 3D viewer which Eagle does not have.

    Front and Bottom View

    A PCB this small and this simple can be easily manually routed, however when we get to much bigger and much more complicated PCBs, autorouting is the best and the safest option. BUT KiCAD does not have any stand-alone autorouter, however we can use several external auto-routers to route any PCB. I used FreeRouting available at FreeRouting.org. Here are the steps involved.

    1) Download the FreeRouting jar file

    2) Generate and read netlist

    3) Export Specctra DSN file in Pcbnew

    4) Open the DSN file in FreeRouting

    5) Autoroute!

    6) Import the saved autorouted specctra session file in Pcbnew

    ...and you are done. Easy.


    This is how the PCB looks in 3D viewer, thanks to KiCAD.
    TopBottomIf you have any questions regarding KiCAD or this project, feel free to ask.