 HyperIon
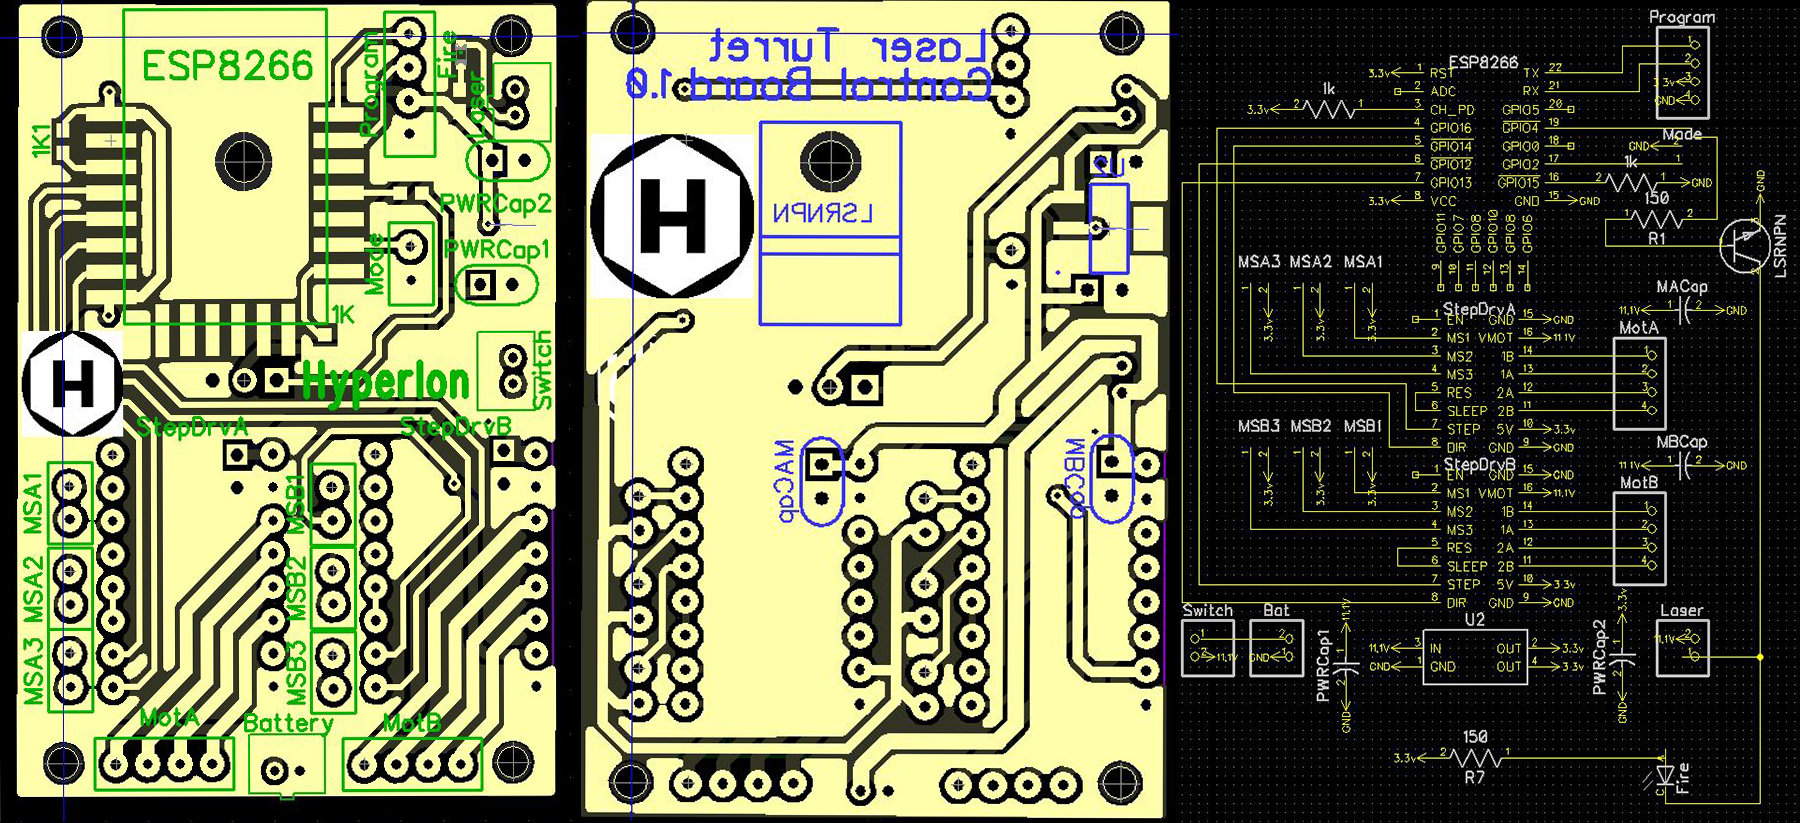
As of last night I finished the PCB design and sent it to allPCB to get manufactured. It should arrive 6 days from now on next Thursday. This is an incredibly simple PCB/circuit and would be great for anyone just getting into this stuff to try and make.
MCU:
The best way I could think of to coordinate a set of wireless turrets to work together in sequence would be to have them connect to a single wireless network where they all talk to the same server. My, and many others, defacto choice when you need wifi connection on a small and cheap board is an esp8266 12e. This board is small, cheap, and has just enough pins to control the rest of the systems. It and its cousin are the foundations of most of my IOT projects.
Stepper Control:
For stepper control I chose the A4988 stepper motor driver boards. Not much to say about them. They are solid for their price, which is why they have become such a strong standard in the 3D printer industry. The step size selection pins are connected to a set of jumpers, so they can be set after I assemble and test the design
Laser Control:
The module itself already handles all the current limiting for me, so all I have to do is get it roughly 12v power. I do that with a basic NPN transistor grounding a powered 2 pin JST connector. I also have an LED in parallel with this jst connector, which will illuminate whenever the laser would be powered, even if its not plugged in. This was I can test without the laser being enabled.
Let me know if you guys have any questions!
Discussions
Become a Hackaday.io Member
Create an account to leave a comment. Already have an account? Log In.