Close
0%
0%

Wireless BLE Kinesis Advantage Keyboard (USB Host)

Drill and hack that $300 keyboard because wires shouldn't exist in 2018.

Similar projects worth following
We're turning a USB keyboard into a bluetooth BLE one using a USB host module, bluetooth BLE module (actually an SOC), battery, power step-up converter, and an on/off button with an LED to show battery status.

Kinesis keyboards are power hungry! All put together this consumes around 50-60 mA, that's only about 35 hours on a 3,000 mAh battery. If this is an issue for you, I'm working on a version with a custom keyboard firmware (won't need a USB host module), custom PCB (will be more expensive) and that should increase battery life from days to months.

I've since made a new version using a custom controller that consumes a lot less power.


A little about the project...

This was my first or second Arduino project and I'm not even a coder professionally but I'm posting this project here because what was supposed to be a 3 day $100 project turned into a 1 month $700 rabbit hole (with no end in sight). So I'm hoping this will help anyone with similar ambitions to turn their keyboard wireless. It's not as hard as they say!

Many Thanks to:

Adafruit - This project would never have worked without their well written API's, guides and support in the forums.

Daniel Nugent - His WASD BLE project inspired me to try this with the Kinesis.  The Kinesis (unlike the WASD) doesn't fall-back to PS2 however, and the bluetooth module (and API) we'll be using is different .

Dastardly Labs - His youtube video shows you how to put together a USB host on an Arduino Pro Mini. I found the latency too high on the USB host module and Arduino Pro Mini but putting it together teaches you how an Arduino works and you can log out the HID keyboard reports to see what's sent over for each key if you wanted to.

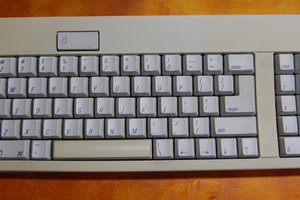
Kinesis Advantage Only?

The parts were chosen and built so that they fit inside a Kinesis but any generic USB (not PS2) keyboard should work.

Do I need to be an Electrical Engineer to do this?

You don't need to know much about hardware but it helps to remember a little high school electronics to know what's going on. Google Ohm's law.

Some stuff I tried that didn't work

- Read bits straight off the keyboard as if it was PS2.

- Flash HC05 with RN42 firmware (found out there are 2 versions of HC05 and only 1 is flash-able). Seriously it's not worth the trouble, just get a newer chip that can act as a HID Keyboard already and BLE.

- Connect a Bluefruit LE UART Friend (Bluetooth module only) to the Arduino Pro Mini with USB host shield attached. I still don't know why this didn't work but I gave up because the Pro Mini  was unreliable in registering key presses anyway.

- Use a duinofun mini usb host with an SAMD21 Mini Dev Breakout (Sparkfun). Don't know why I thought this would work. FYI desoldering is not as easy as you think.

  • 1 × Adafruit Feather nRF52 Bluefruit LE Microcontroller and bluetooth all on one chip! This will work with other microcontrollers and other bluetooth modules but saving power consumption is way easier on the NRF52.
  • 1 × Hobbytronics USB Host Mini V2 - Keyboard Software Installed You can use other USB Host modules but my code was written for this module's API.
  • 5 × Solid Core 22AWG Wires To wire everything up on the proto board. Could just use one color if you wanted to.
  • 1 × Breadboard (optional) to try everything out before you start soldering.
  • 20 × Jumper Wires (optional) for testing

View all 17 components

  • 1
    Basic bluetooth keyboard

    Parts you'll need to connect to make the keyboard bluetooth. This doesn't include the power button's LED.

    1.  Solder male headers onto each module
    2. Connect the pins as follows:
      • Power Boost 5v -> USB Host 5v
      • Power Boost GND -> USB Host 0v
      • USB Host TX -> nRF52 RX
      • USB Host RX -> nRF52 TX
      • Power Boost Bat -> nRF52 Bat
      • Power Boost GND -> nRF52 GND
      • Power Boost GND -> On/Off Button 'C' 
      • Power Boost EN -> On/Off Button 'NC'
    3. Connect any size LiPo battery with JST-PH connector to the Power Boost 500.

    We need the Power Boost to convert the 3.7v from the battery into 5v because that's what USB devices require.

  • 2
    Setup Arduino IDE

    Before you can start uploading your own code (firmware) to the nRF52, you'll need to setup the Arduino IDE.

    Adafruit has already written a pretty comprehensive guide so I'm not going to repeat it here.

    Make sure you complete this step and uploading an example code like Blink works before you move on to the next step!

  • 3
    Upload code to your nRF52 Feather
    1. Clone or download my repo off github
    2. Open the file NRF52Keyboard/NRF52keyboard.ino
    3. Try compile in Arduino IDE (check mark)
    4. Hit upload with the nRF52 Feather connected

View all 10 instructions

Enjoy this project?

Share

Discussions

Similar Projects

Does this project spark your interest?

Become a member to follow this project and never miss any updates