 Zack Moss
Introduction
From personal use of this machine, it was found that running several cycles of hot water through the machine before pulling a shot drastically improved the taste of the espresso. Therefore, this investigation was designed to measure the variation of water temperature from cycle-to-cycle. Also, it was suspected, from the price of the machine, that it had a cheap and simple control system for regulating water temperature throughout the cycle. Thus, water temperature variation throughout a single cycle was also a variable of interest to be measured.
Setup
To measure the water temperature, it was decided to measure just before the water reached the grouphead as this was the most accessible location that would give a good representation of the temperature of the water hitting the coffee.
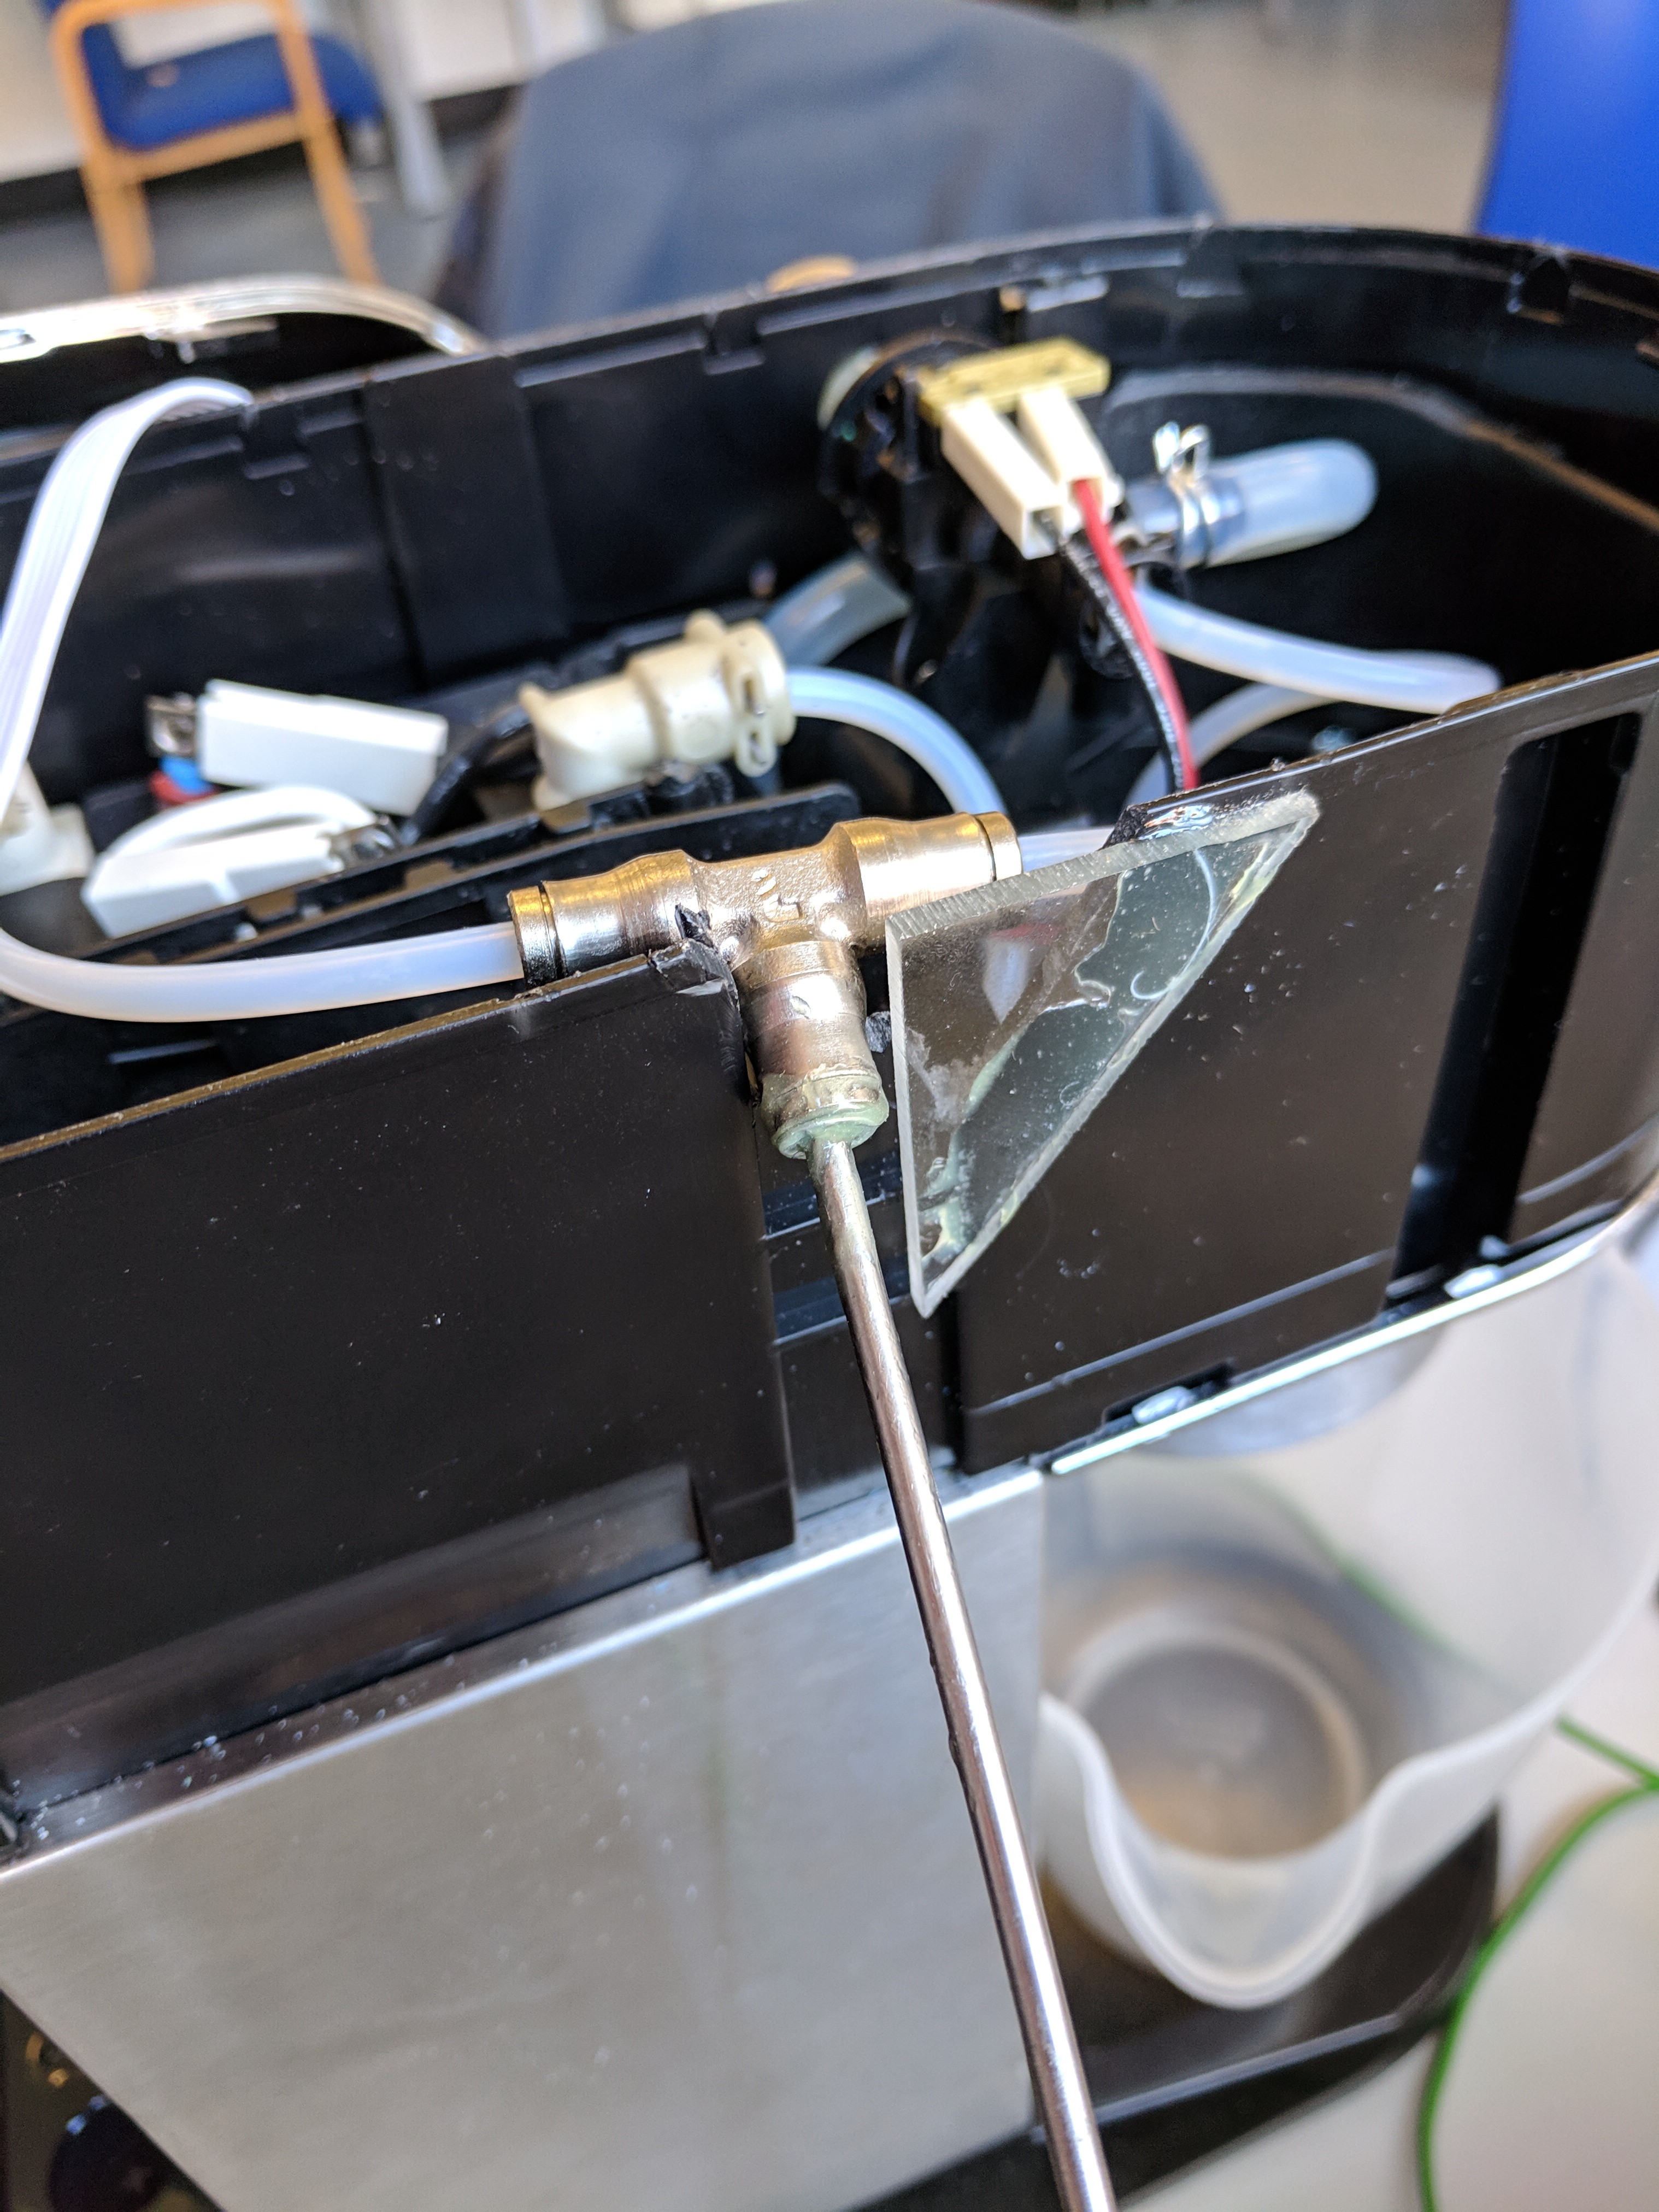
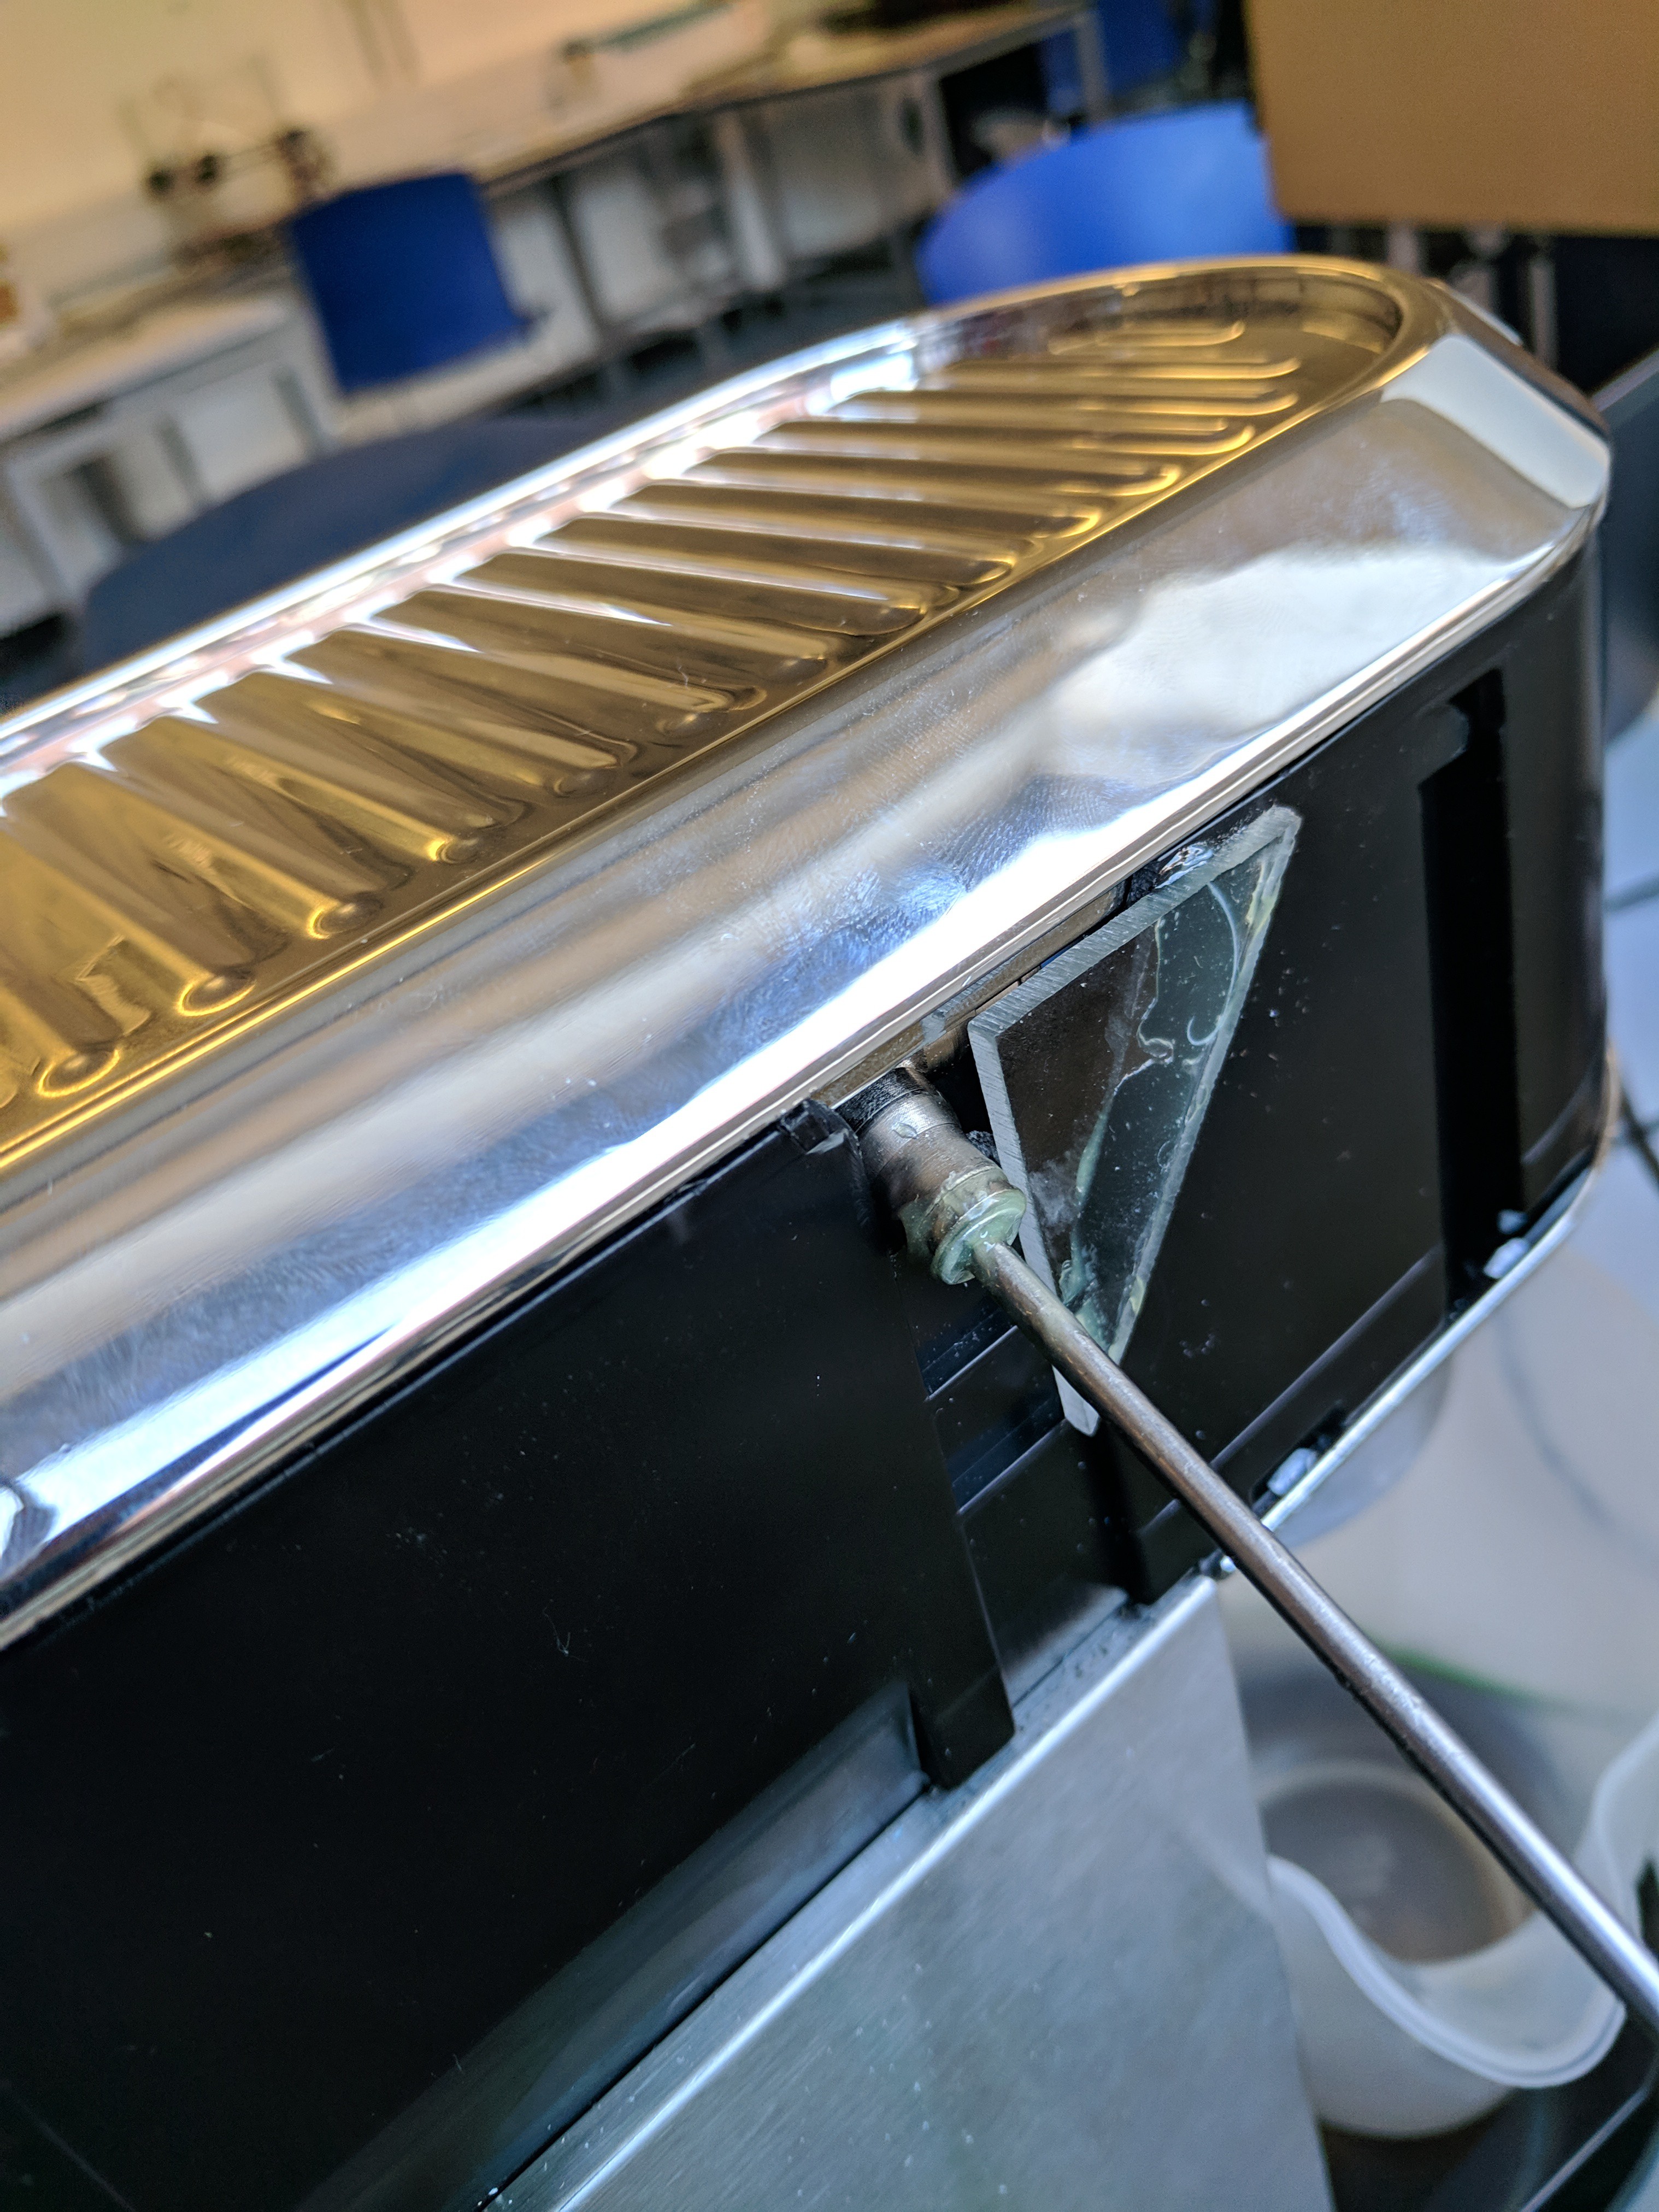
The tube carrying the water was cut, so that a push tee fit valve could be inserted. As the tube’s outer diameter was 4mm, an equal 4mm tee valve was used (https://uk.rs-online.com/web/p/products/4454467/?grossPrice=Y&cm_mmc=UK-PLA-DS3A-_-google-_-PLA_UK_EN_Pneumatics_And_Hydraulics_And_Power_Transmission-_-Pneumatic_Adaptors_And_Fittings_And_Couplings-_-PRODUCT_GROUP&matchtype=&pla-190320696483&s_kwcid=AL!7457!3!88057055403!!!g!190320696483!&gclid=EAIaIQobChMIpdTElffR3gIVxrTtCh2-mgg-EAQYBSABEgJZgfD_BwE&gclsrc=aw.ds). This tee valve was chosen as it could handle the pressures and temperatures of the operating conditions.
To measure temperature, a sensor was used, which contained a k-type thermocouple. As the sensor diameter was too small for the tee valve, Araldite was used to glue the sensor into the valve and fill any space. The tip of the sensor was placed into the path that the water would take, whilst ensuring that the tip nor the glue blocked this path (show schematic and image of it completed).
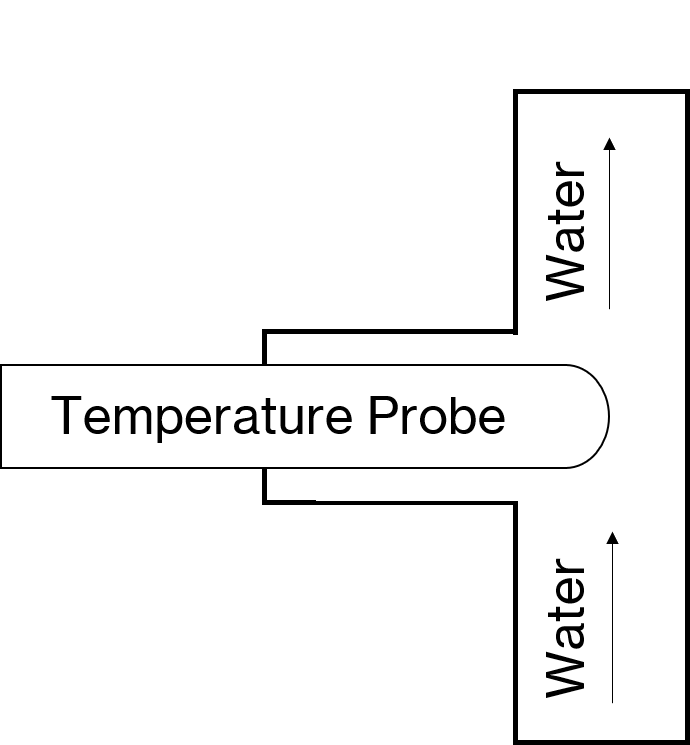
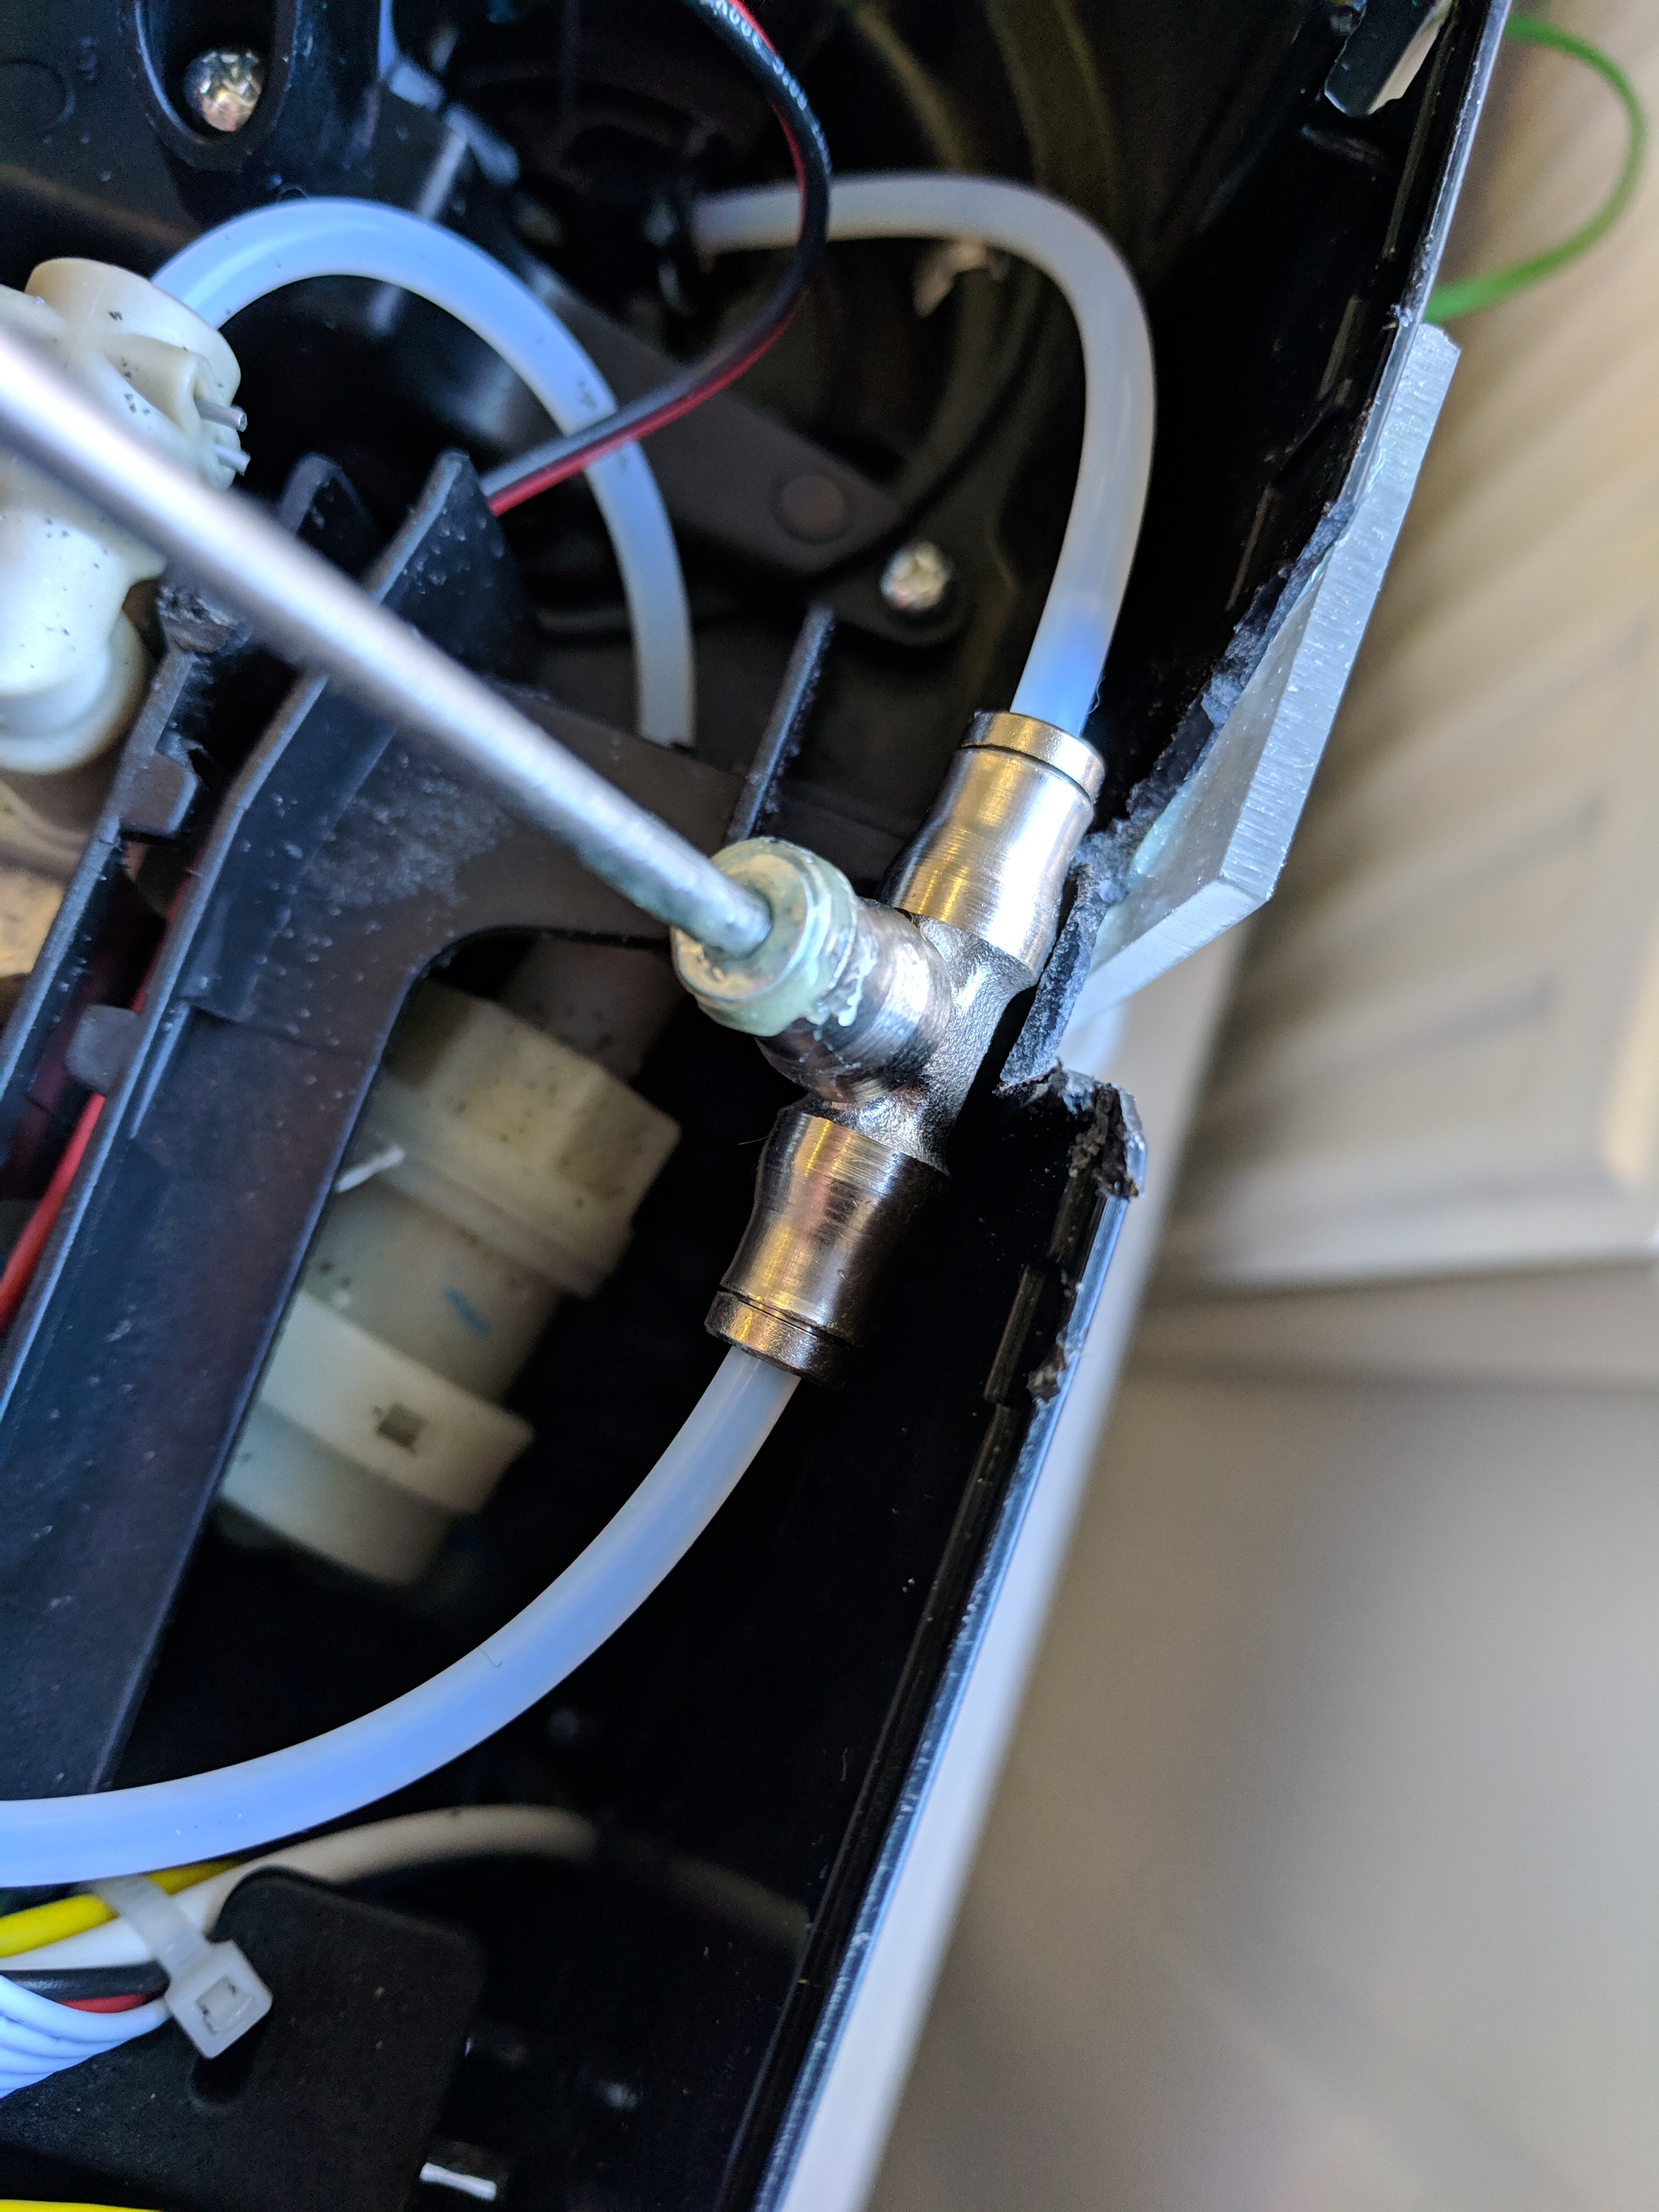
A hole was then cut into the side of the machine so that the sensor could poke out, where it was hooked up to a DAQ (cDAQ-9171), which was plugged into a laptop. The instructions to setup the sensor to LabVIEW were found here.
Experiments
Experiment one
Firstly, the machine was run from cold, allowing approximately 30s between cycles (roughly the time to change the portafilter), running double shots each time.
Experiment two
Next, the machine was run with each cycle back-to-back, from cold, running the next cycle as soon as possible.
Experiment three
Then, once again cycles were ran with 30s between each, but after preheating the machine with two back-to-back cycles.
Whilst conducting these experiments, some other variables were measured, such as volume flow rate and the time that the pump was running.
Results
Experiment one
The first graph shows the sensor run at cold conditions, to demonstrate the natural temperature variation. The following nine graphs show the nine runs ran sequentially.
The data shows that the temperature stability does not seem to vary much from cycle to cycle. However, it is noticeable that the temperature is not stable during a cycle, the temperature consistently rises until it reaches a peak and then drops. Also, the temperature begins to drop before the pump stops running. This sort of temperature distribution suggests that the heater is simply being turned on for a set amount of time, or until it reaches a certain temperature, before turning off.
Red dashed lines indicated the pre-infusion pumping cycle, green dashed lines indicate the main pumping cycle.

Experiment two
This experiment shows that when cycles were ran back-to-back, the same cycle temperature instability was present. However, much higher peak temperatures were reached. This would suggest that it is not simply a maximum temperature that causes the heater to turn off, else the maximum temperature would not vary the amount it did between experiments one and two.

Experiment three
This experiment shows the temperature variation of a cycle 30s after the machine had been pre-heated by running 2 cycles of double espresso through it. The results show that the maximum temperature reached during the espresso making cycle here was higher than any of the cycles in experiment one. This may be one of the reasons that espresso tasted better when pre-heating was used.
Conclusion
From personal use, it was found that pre-heating with at least 2 cycles of double espresso resulted in much better tasting espresso. From the data it can be seen that pre-heating allows temperatures to be reached that cannot be reached otherwise, which could be one reason for the taste improvement. Another reason could be that by pre-heating the machine, components such as the grouphead can warm up, leading to greater temperature stability during the espresso making cycle.
Therefore, during design of a new espresso machine a pre-heat cycle option should be included. Also, to further improve temperature stability, and thus flavour, a more advanced temperature control method should be used (such as PID control).
Discussions
Become a Hackaday.io Member
Create an account to leave a comment. Already have an account? Log In.
Hi Zack,
Thanks for sharing your test result! I am also using EC685 and still trying my best to pull good espresso from this machine.
Would like to clarify with you, are these results based on the medium temperature setting on this machine? or under the high temperature setting?
Are you sure? yes | no