 phase2682
CQ_user_program.c is the modified c file for the project with the corresponding CQ_user_program.h header file.
Variable wpm sets the speed of the Morse Code in words per minute. It is suggested to use 20 wpm for training purposes. That gets your ear prepared to eventually 'hear' code at faster speeds.
CW_pitch sets the pitch for the Morse Code tone using the script described in the badge description.
Functions are then defined to produce the correct duration of dits (dot) and dahs (dashes), and character and word spacings. The call_sign function should be modified with your call sign or name.
User prompts to enter the program are defined.
Later in the program the Banner is set with its content and speed, these may be changed.
The sending of the Morse Code and Morse Code practice are enabled at the bottom of the scroll at y > 19. In this section the Morse code for the banner is generated, the call_sign function is used for the call sign. In the Morse code practice section you can change the timing for key presses and result screen printout.
To program the badge first setup the toolchain for the badge as described in https://hackaday.io/project/161859-2018-hackaday-superconference-badge/log/154555-guide-for-programming-in-c . Next you need to substitute the new c and h files. First save the two new files in the badge-supercon 18 'src' folder. This folder is hidden deeply in MPLABXProjects folder, mine was in .../2018-Supercon-Badge/firmware/badge-supercon 18.X/src.
Open up the badge-supercon 18 project in MPLABX . In the 'Projects' window right click on 'Header Files' and choose 'Add Existing File' to add CQ_user_program.h then right click on user_program.h and choose 'Remove From Project'. Likewise do the same in 'Source Files' to add CQ_user_program.c and remove user_program.c
Build the project by clicking on the hammer symbol or f11, the project should build successfully.
Make any changes that you may want and test by building and resolving any errors that come up.
Now hook your PICkit 3 or 4 to the badge. I connected directly to the SAO header but be sure to have the triangle over the RES pin as shown in the photograph. The leftmost pin on the PICkit 3 socket will not be connected. Double or triple check the connection. And make sure the batteries are installed because the badge PIC microcontroller (the target) needs its own power.
Now you are ready to flash the badge by selecting 'Make and Program Device' which is just to the right of the 'Build' hammer. The flashing will take a bit, when it is done the badge will be reset and ready for Morse Code fun!

 R. D. Poor
 agp.cooper
 Degen
Degen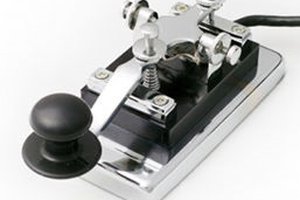
 Jerew
Jerew
Yay! Thanks for posting up about this one. I really enjoyed seeing this during the badge hacking ceremonies and am glad to get a better look at it.