0%
0%
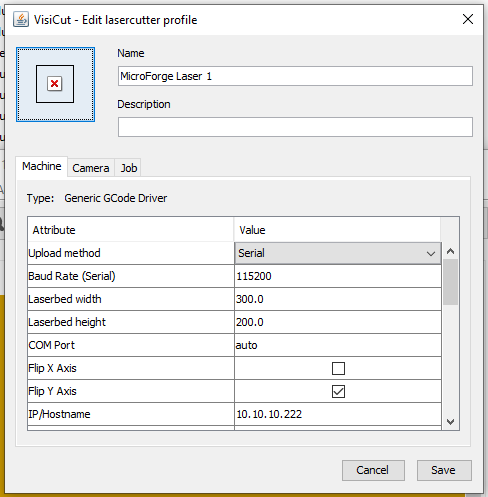
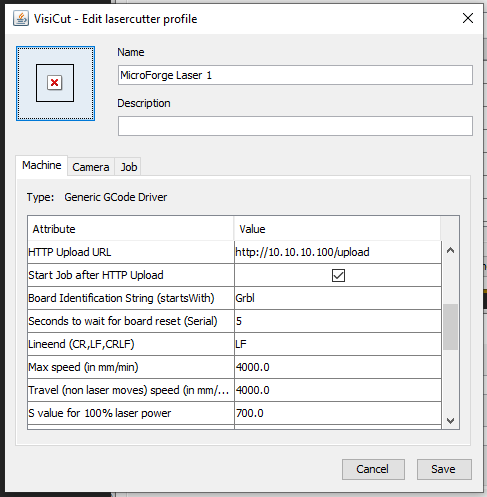
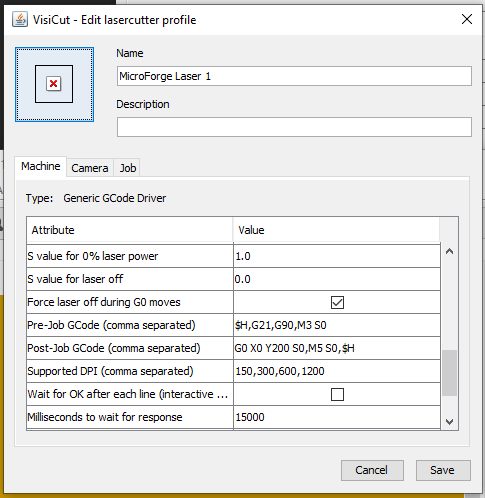
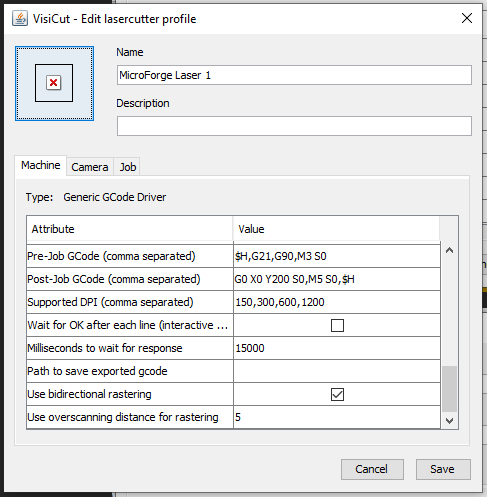
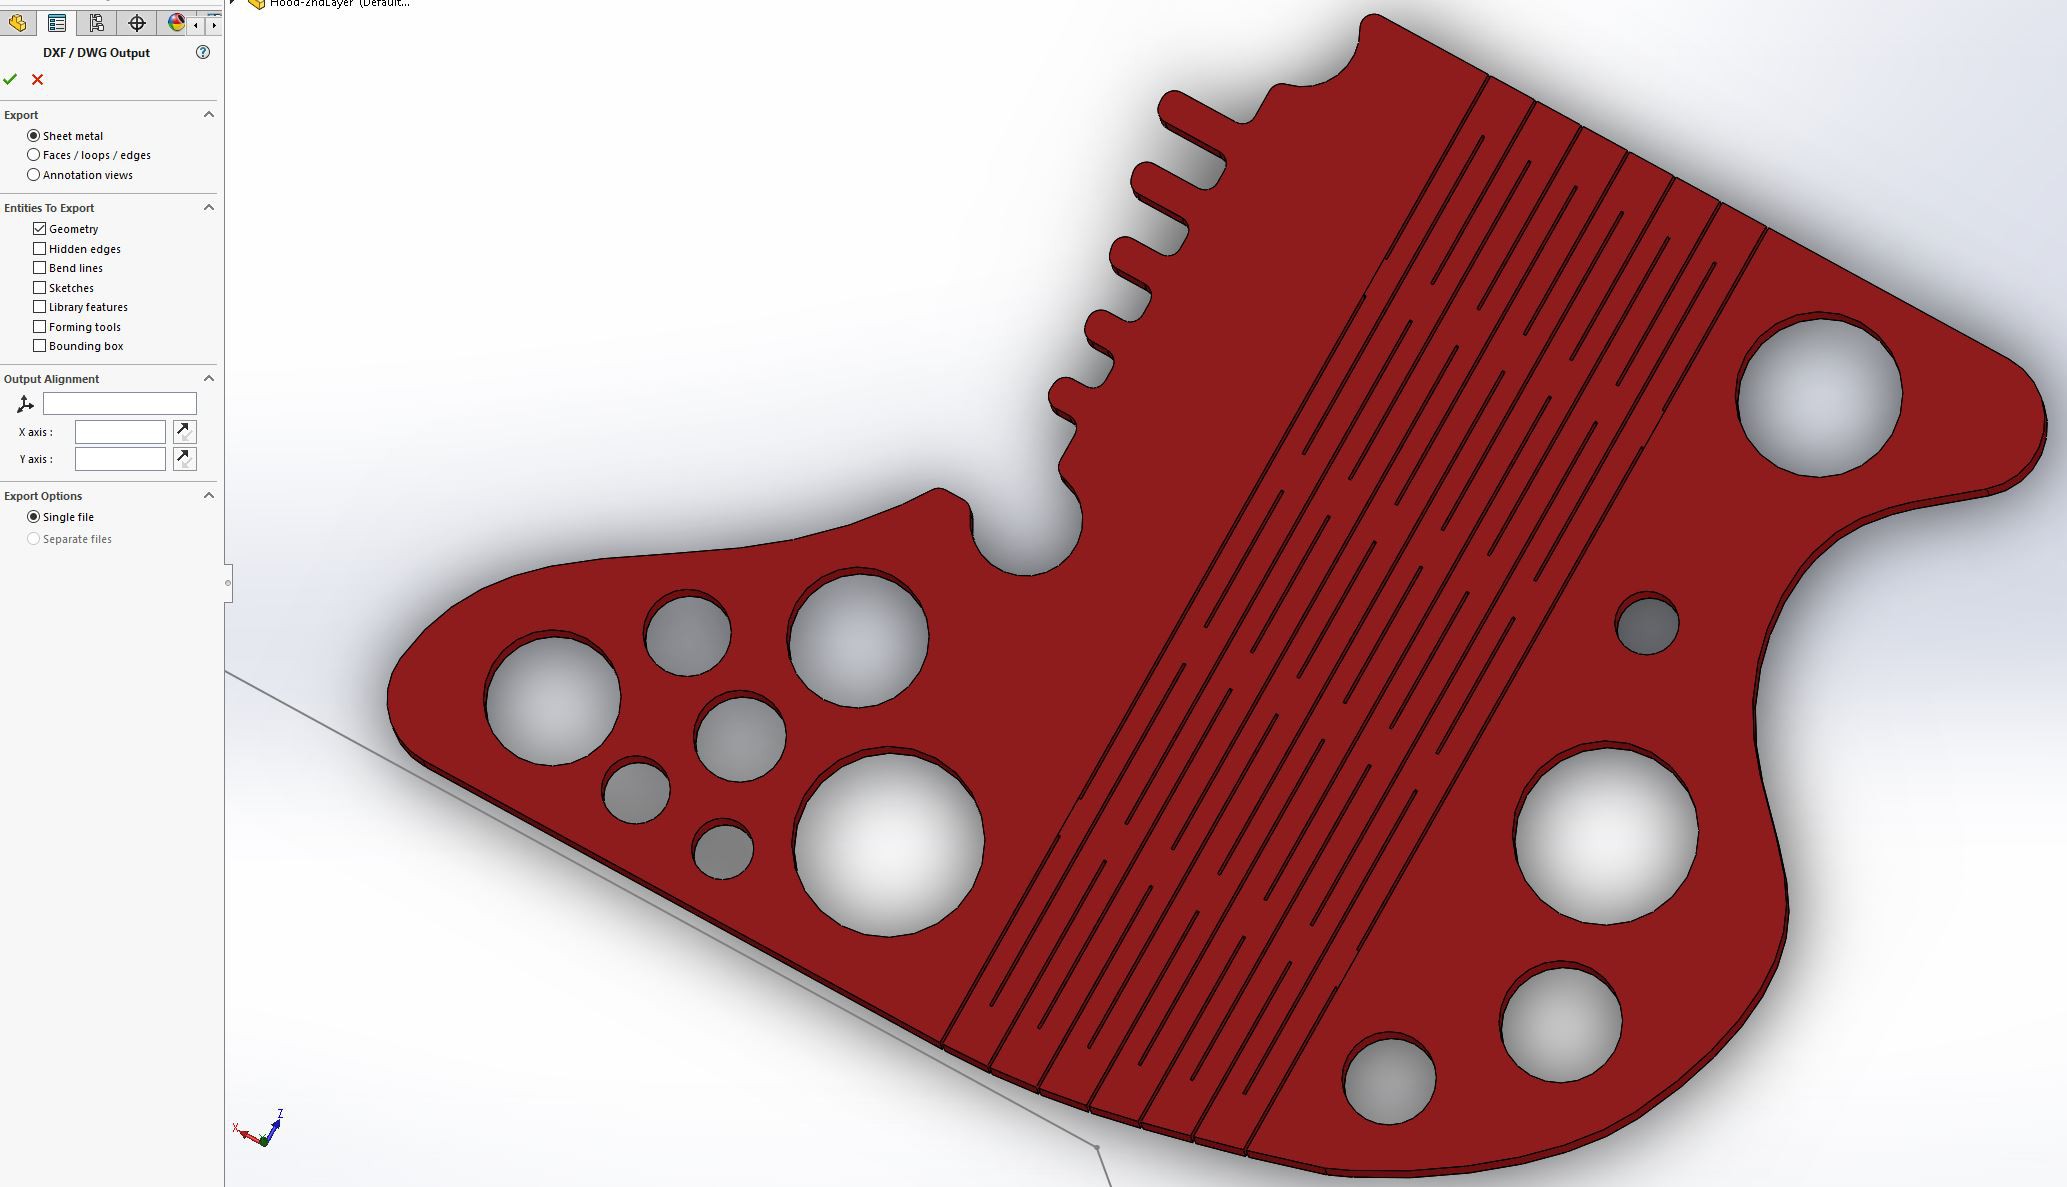
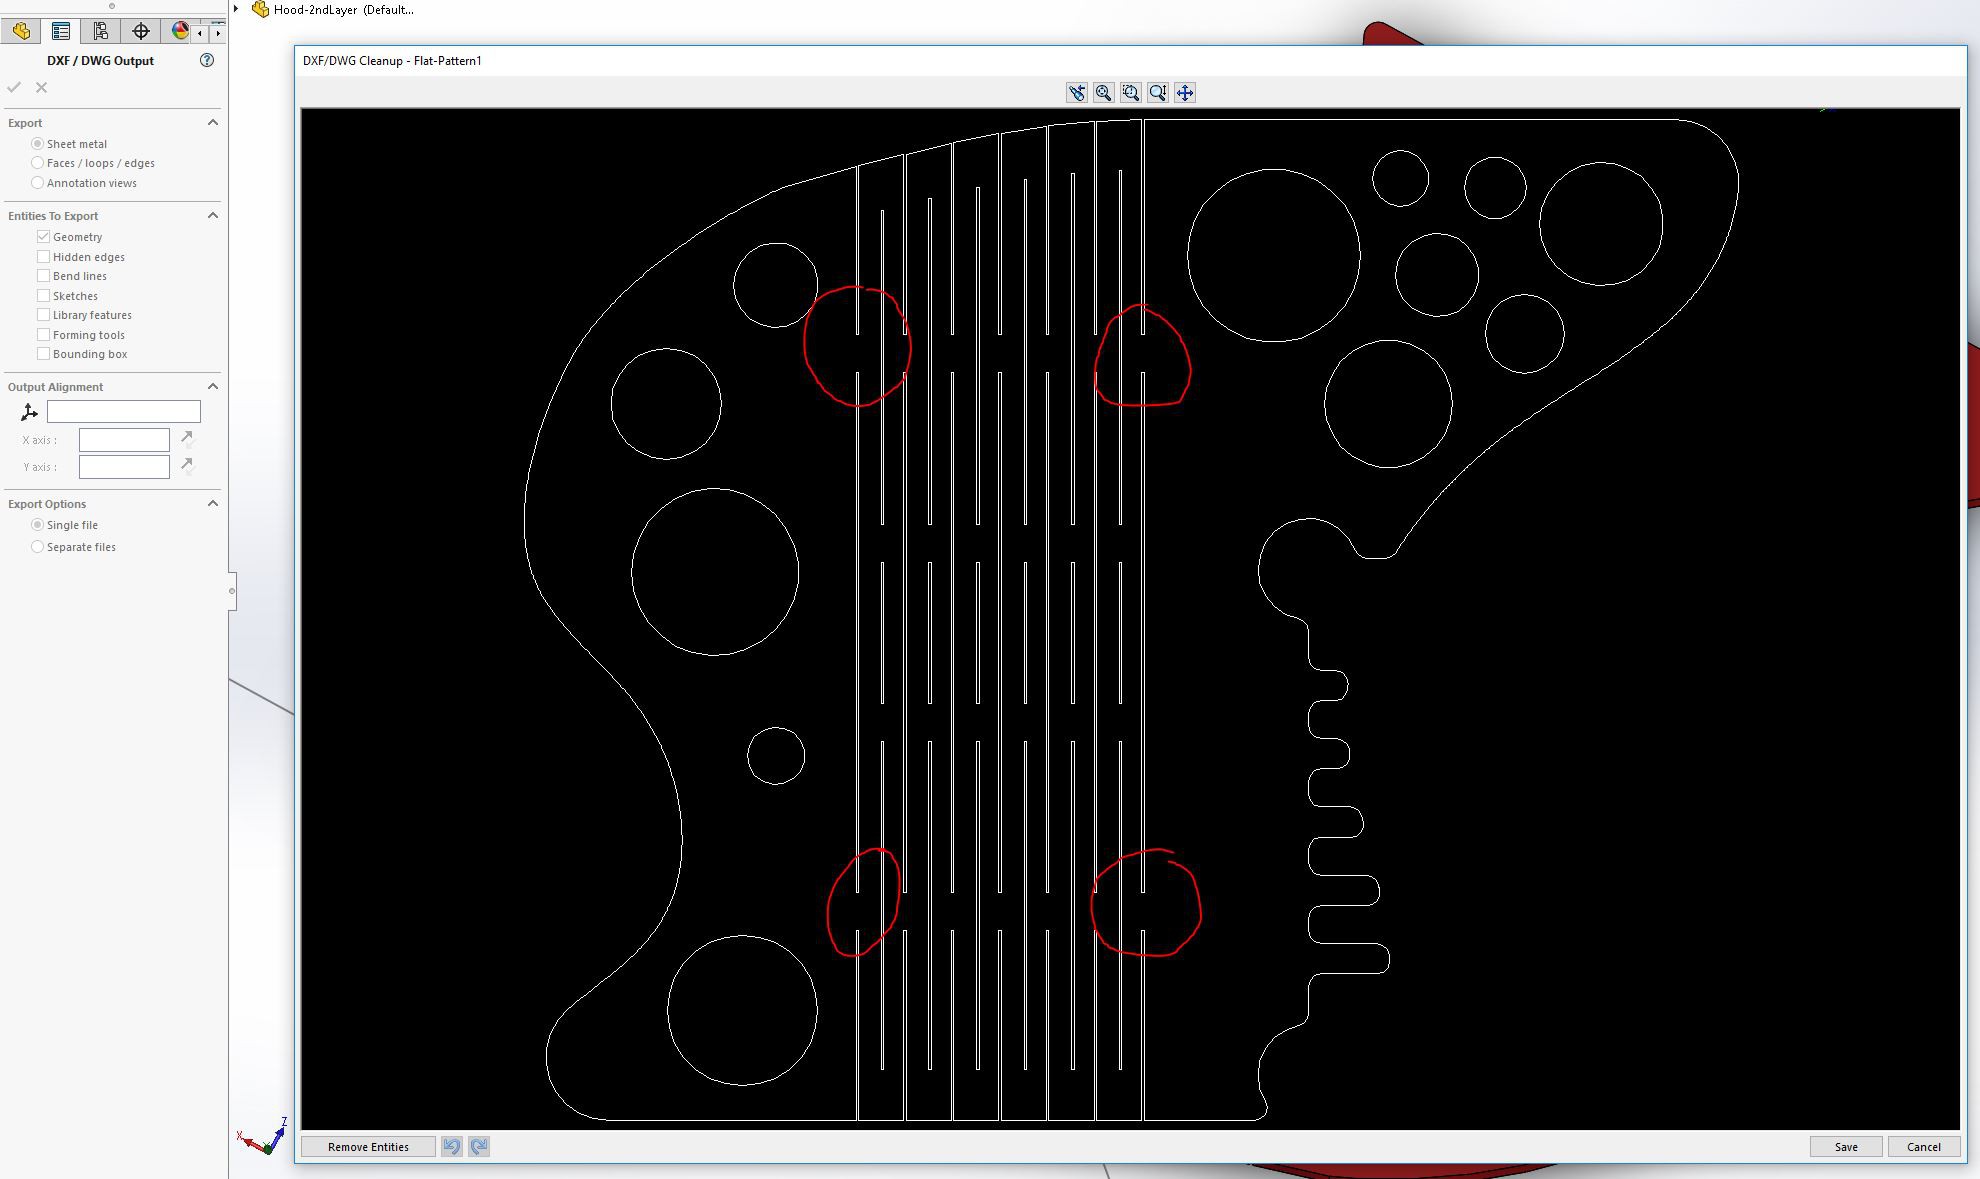
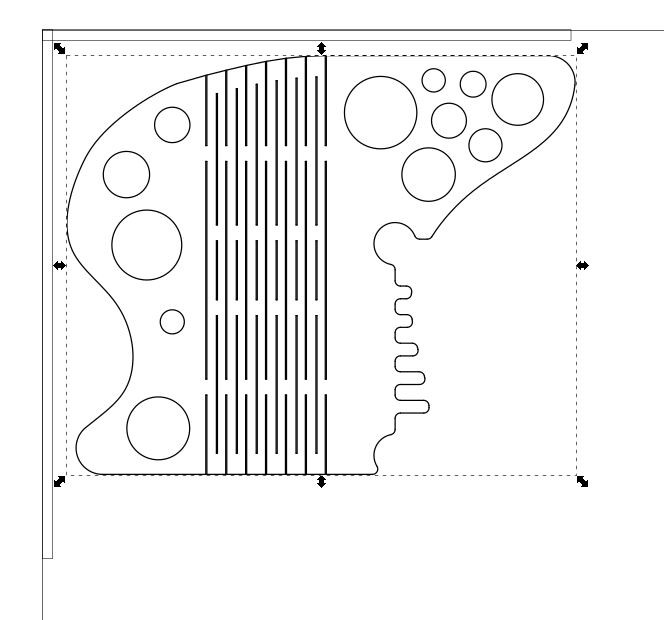
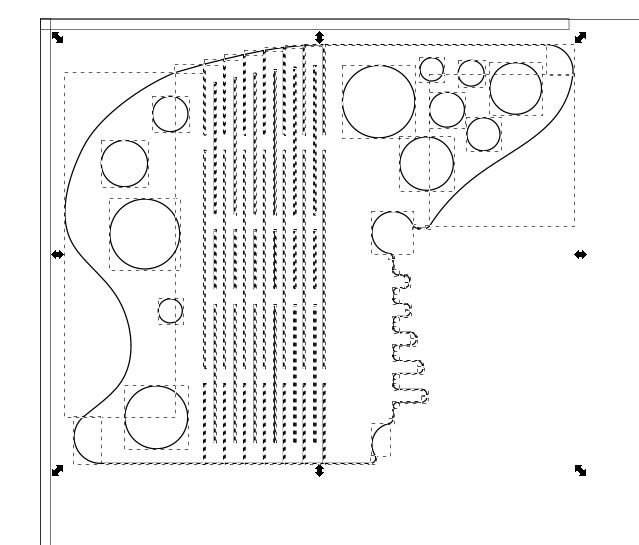
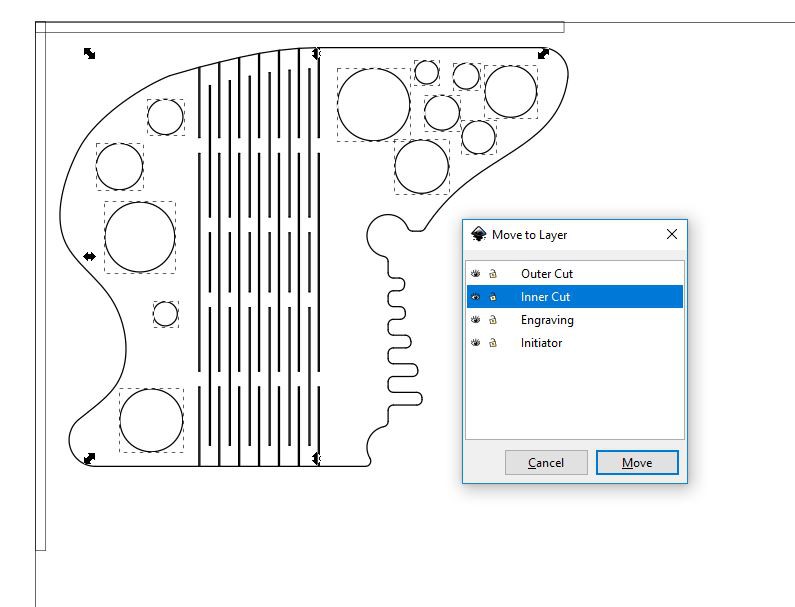
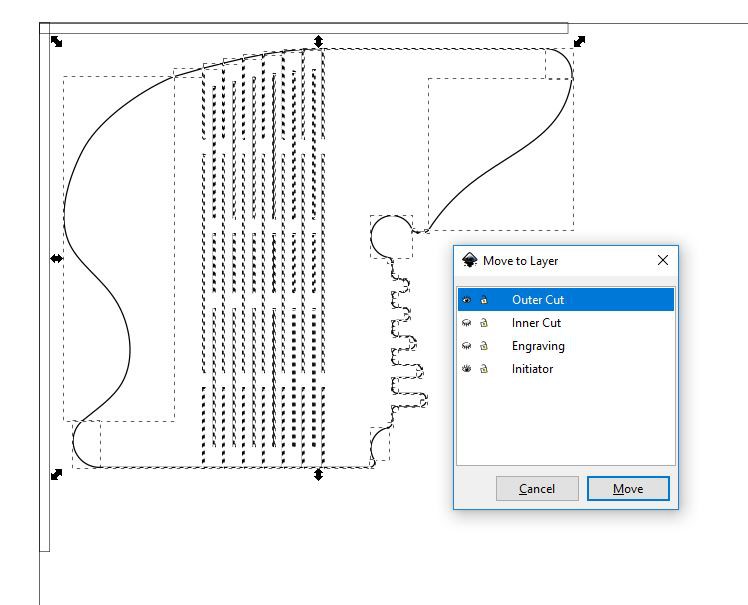
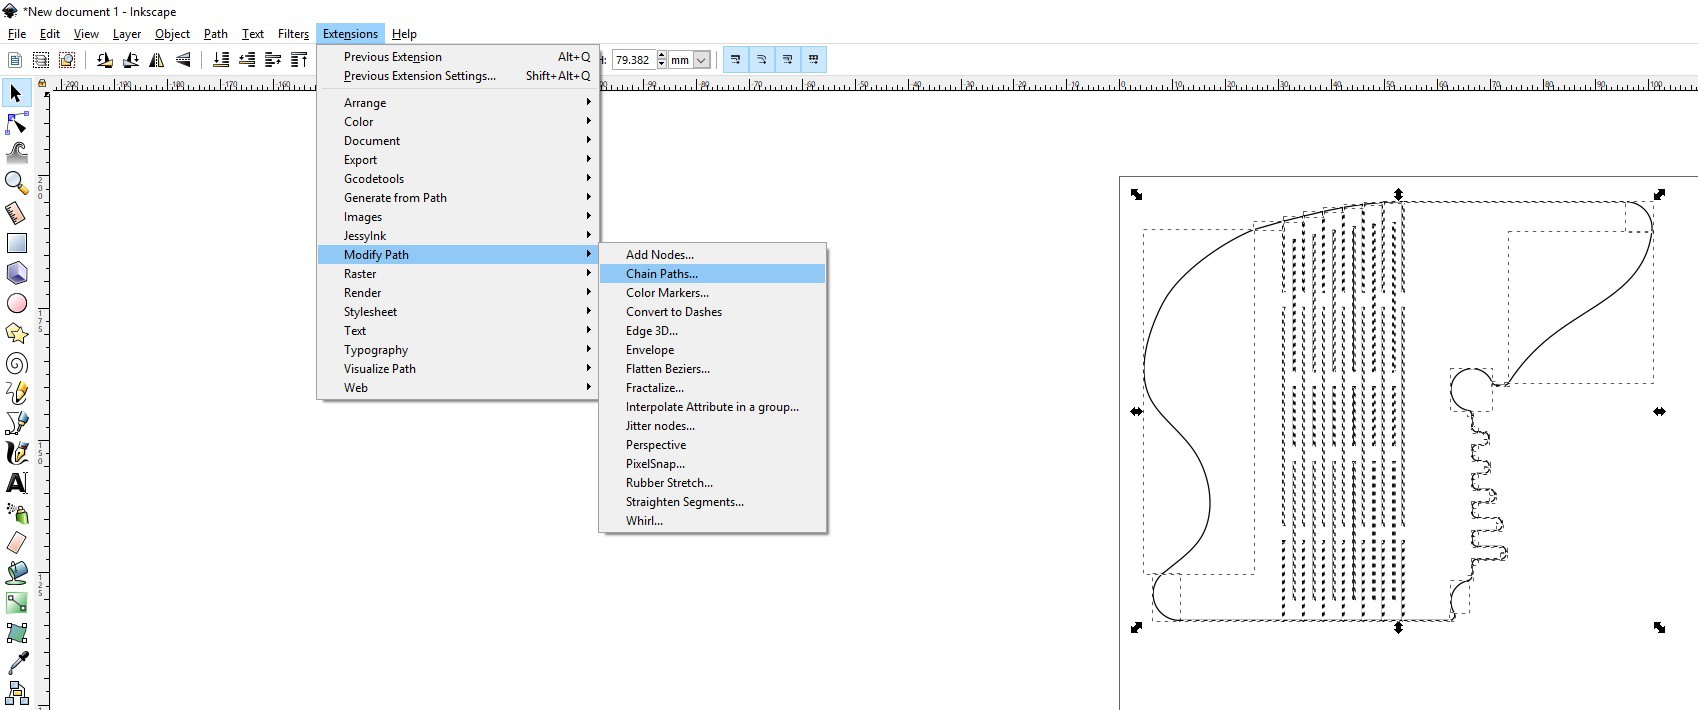
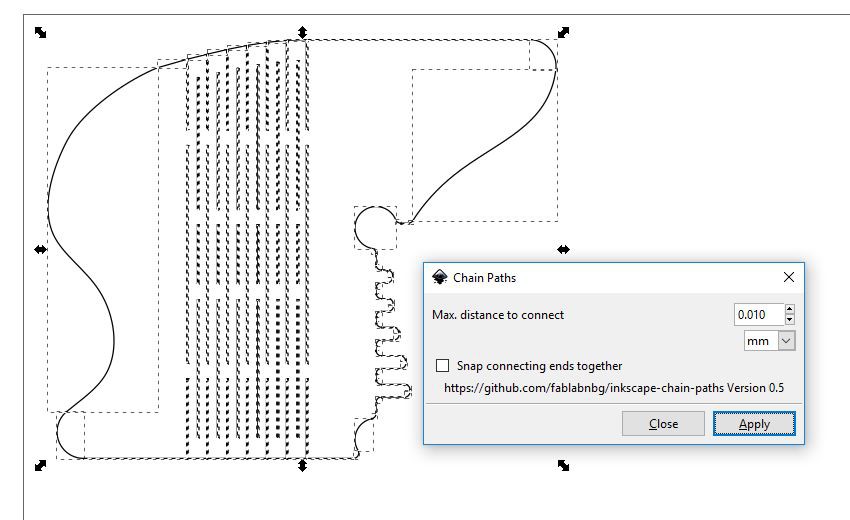
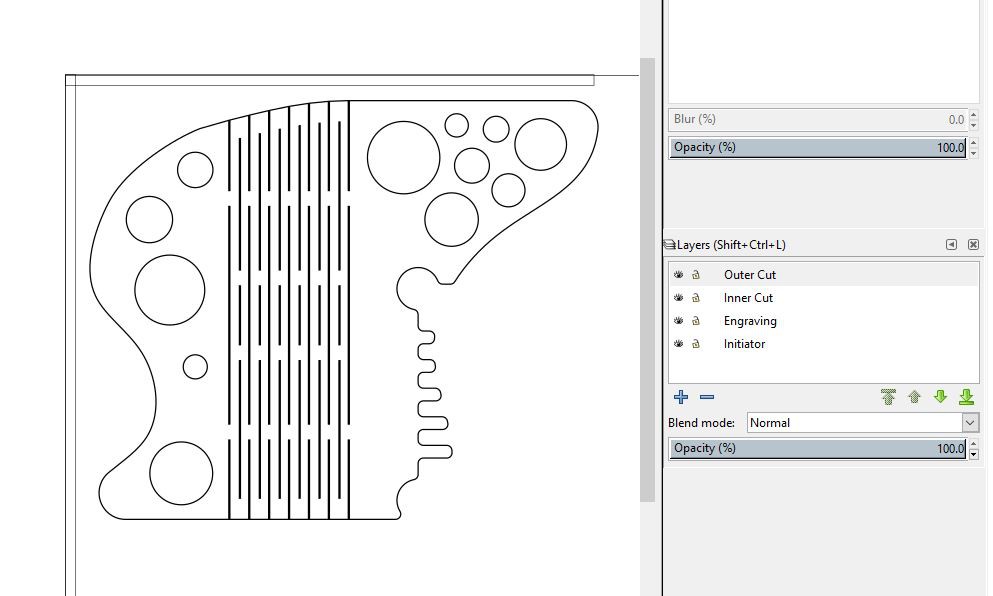
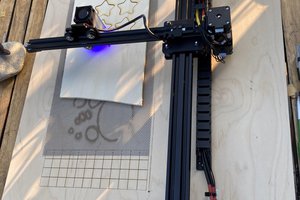
Inkscape + VisiCut = Perfect Lasercutting Workflow
A brief summary on how I use my K40 laser cutter with custom GRBL controller. However, this workflow should work for all GRBL lasers.
 Timo Birnschein
Become a Hackaday.io member
Already have an account? Log in.
Just one more thing
To make the experience fit your profile, pick a username and tell us what interests you.
Pick an awesome username
hackaday.io/
Your profile's URL: hackaday.io/username. Max 25 alphanumeric characters.
Pick a few interests
Projects that share your interests
People that share your interests


 vincentmakes
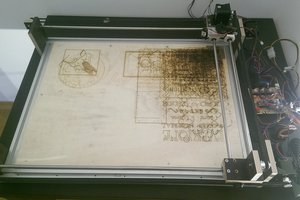

 gedm-dev
Timo, I tried your instructions and they are really cool! Especially your idea with inkscape layers
I guess this is the standard way, but I just start working with my new laser-cut cnc..
Can you explain what the difference between your VisiCut and mainline official
version?
I found your one out-of-date(there is no commits for two years) and took
mainline.