-
1Create the profile sketch
![]()
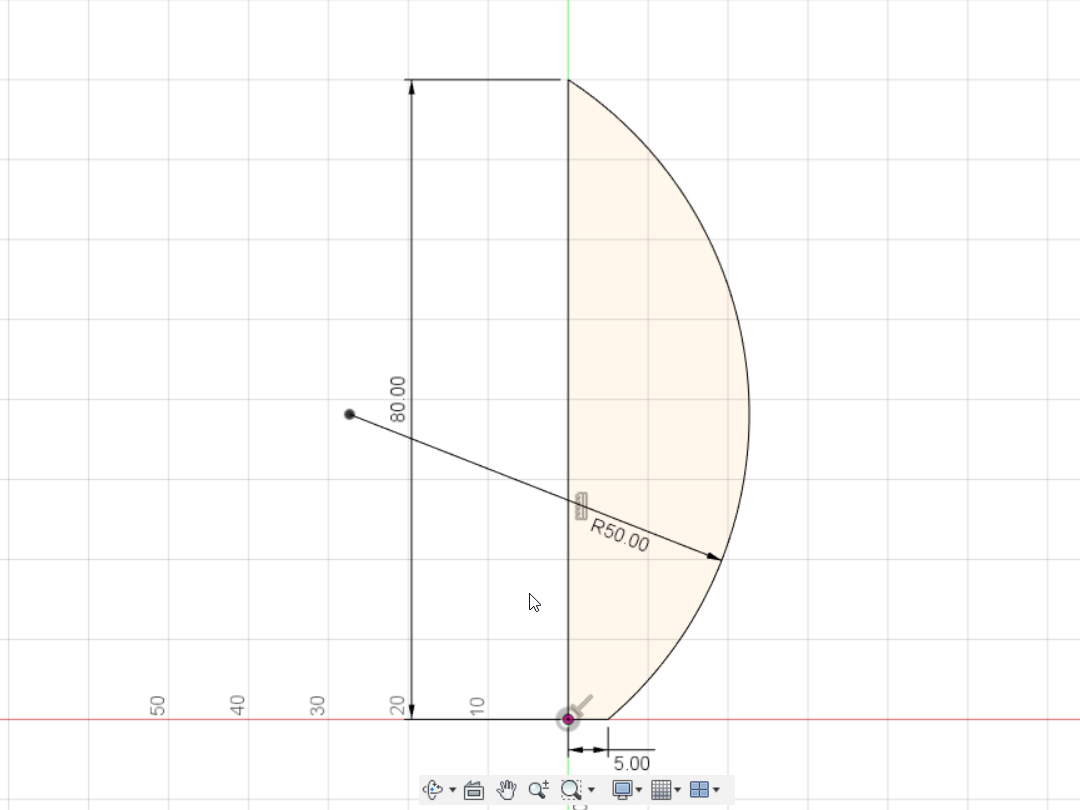
Click on Sketch - Create Sketch, select the vertical plane and sketch the following profile. Use the line tool to create the vertical line from the origin and give it a dimension of 80mm. Create another line from the base of the first line at the origin 5mm to the right. Finally use the Three Point Arc to connect the edge of the second line to the top point on the vertical line. Give the arc a radius of 50mm.
-
2Step 2
![]()
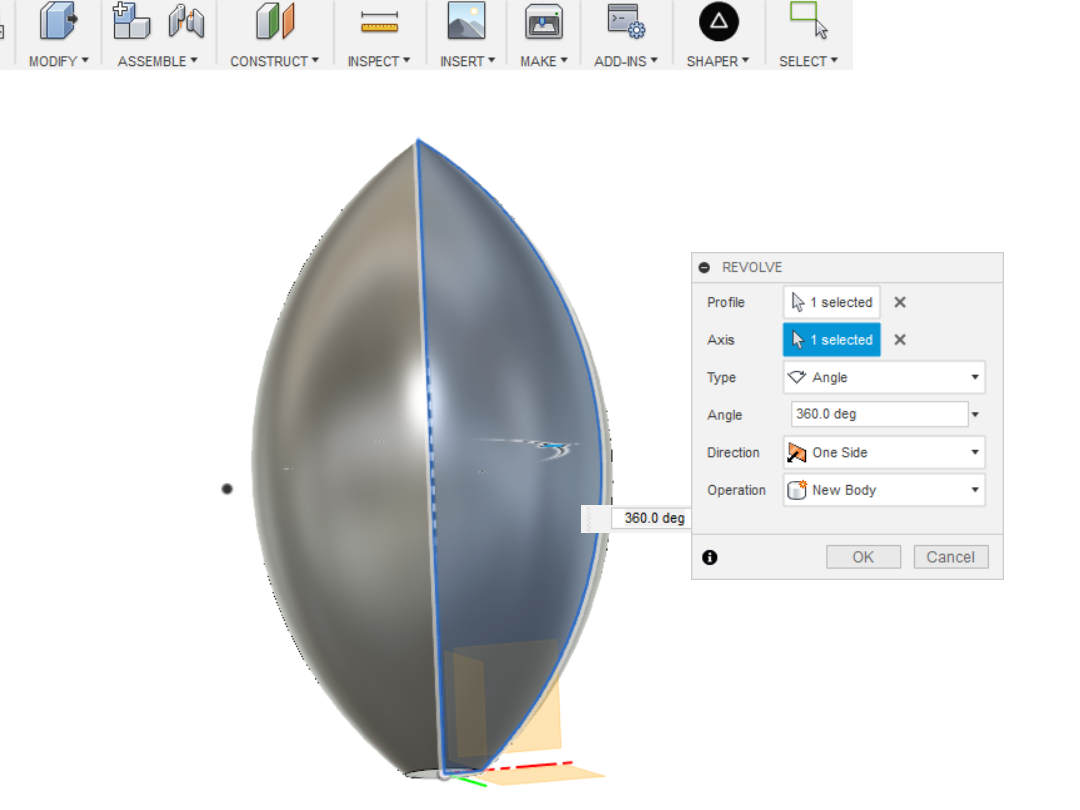
Next we’ll take that profile sketch and use the revolve tool to create a solid body. Select Create - Revolve from the toolbar. Click on Profile in the dialog box and select the profile sketch. For Axis, click on the left edge of the sketch. This will revolve the sketch 360 degrees and give you the above shape. Click ok on the dialog box.
-
3Shell
![]()
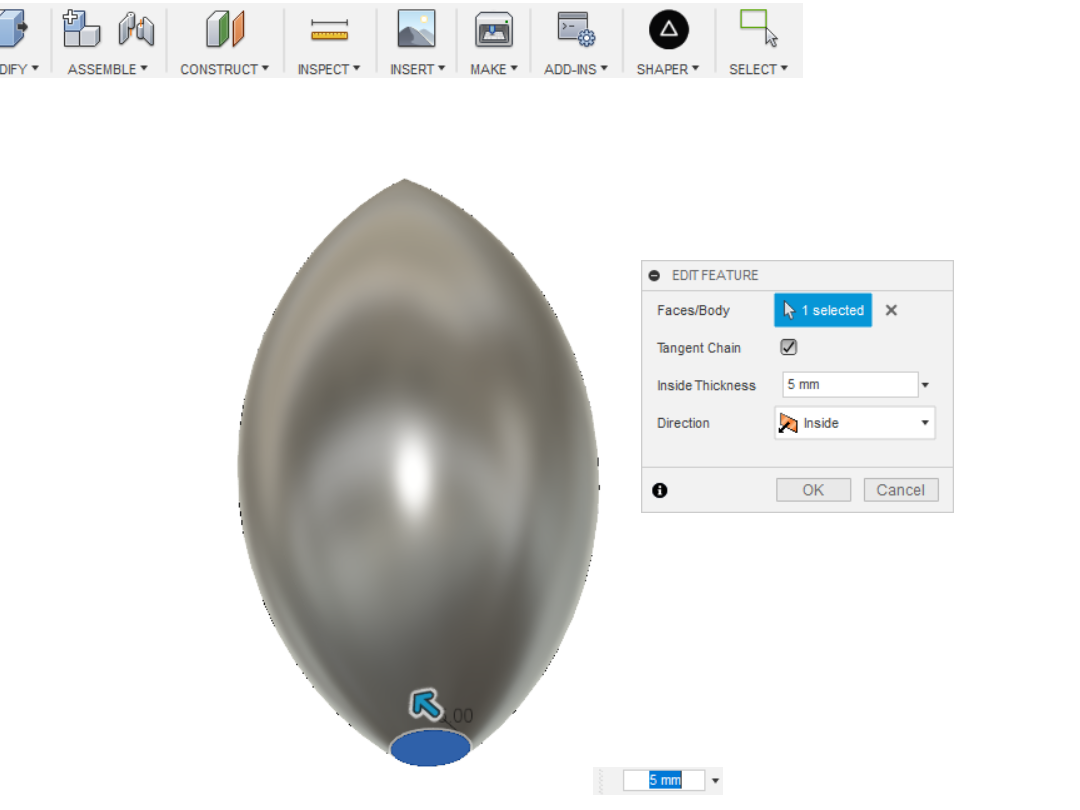
We want the body we just created to be hollow on the inside so we’ll use the Shell tool. Select Modify - Shell and for Faces/Body select the bottom flat surface of the body. Give it an inside thickness of 5mm and set the Direction to inside. Click OK. It looks as if nothing happened from the outside so let’s create a section analysis to take a look at the inside.
-
4Section Analysis
![]()
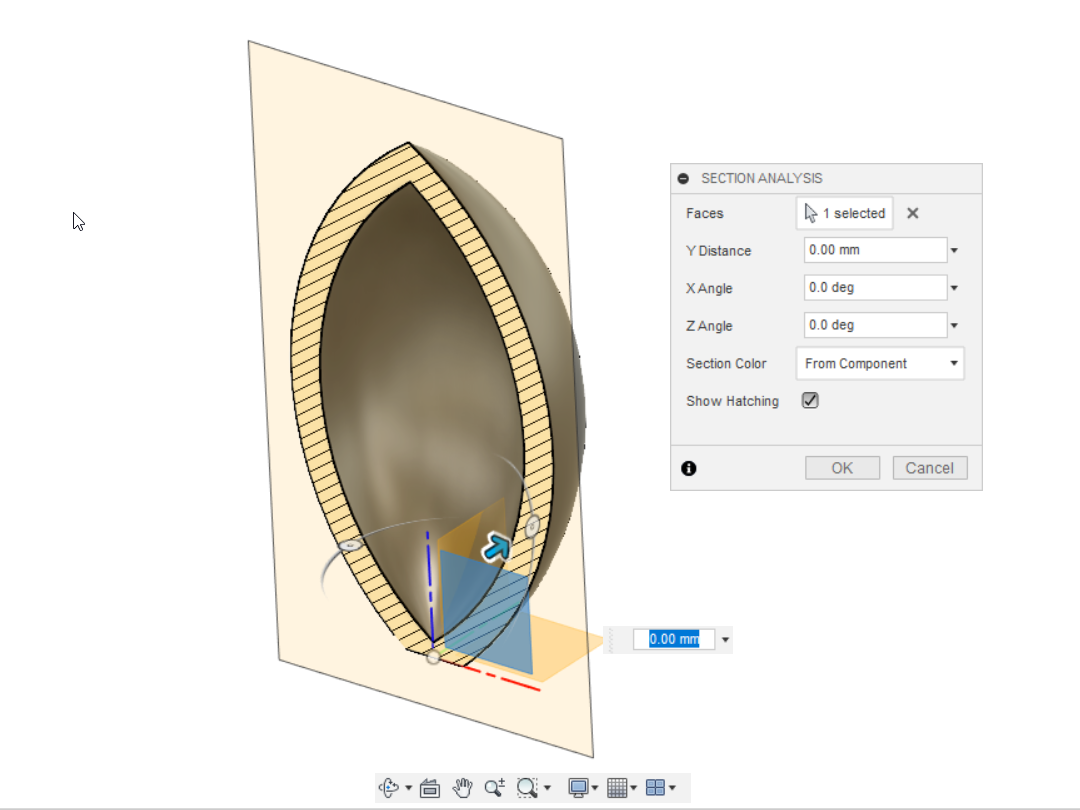
Click on Inspect on the toolbar and select Section Analysis. Toggle on the light bulb next to Origin located under the Browser on the left hand side of the screen. Select the vertical plane and click ok. This creates a section view through our part so that we now can see the result of the Shell command. To turn off section analysis simply toggle off the light bulb next to Analysis under the Browser.
-
5Sketch a Spline Curve
![]()
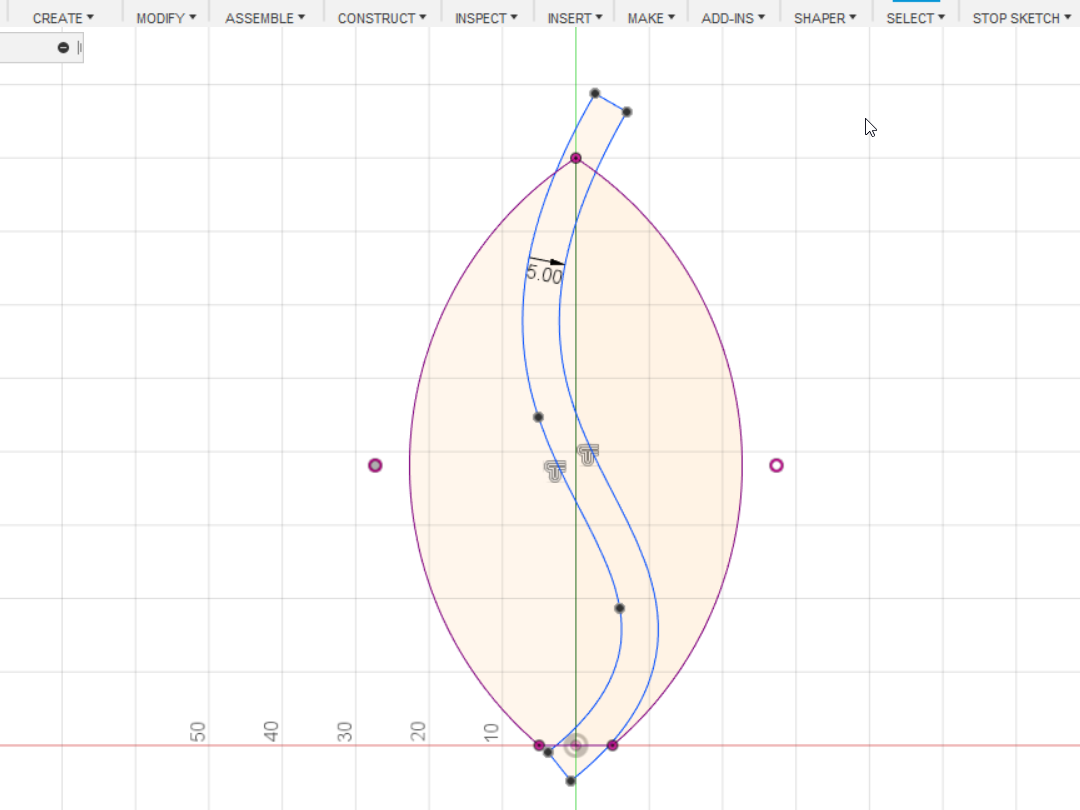
Create a sketch on the midplane of the body we created and sketch the above spline curve. Use the offset tool to offset the spline by 5mm. Click on Stop Sketch.
-
6Extrude as Intercept
![]()
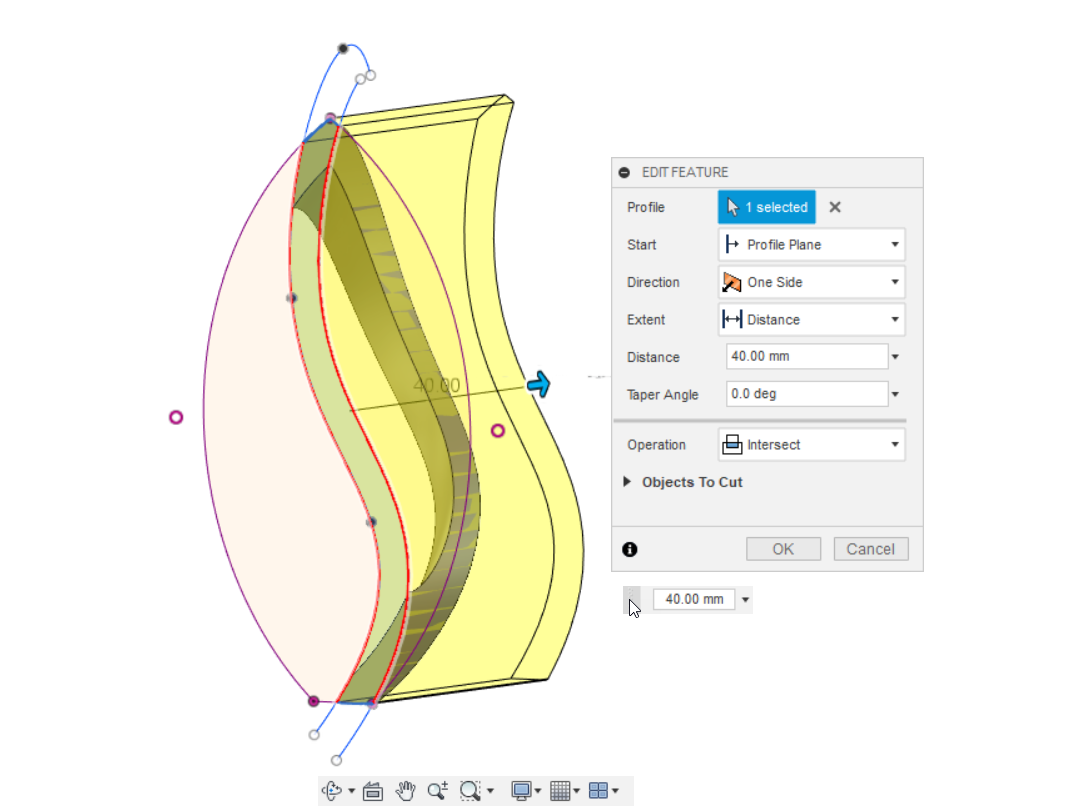
From the toolbar select Create - Extrude. Select the spline profile. Drag the blue arrow out so that it extrudes through the body we created earlier. For operation choose Intersect and click ok. This leaves us with a new body that is only the intersection of the spline profile and the shelled portion of our first body.
-
7Circular Pattern
![]()
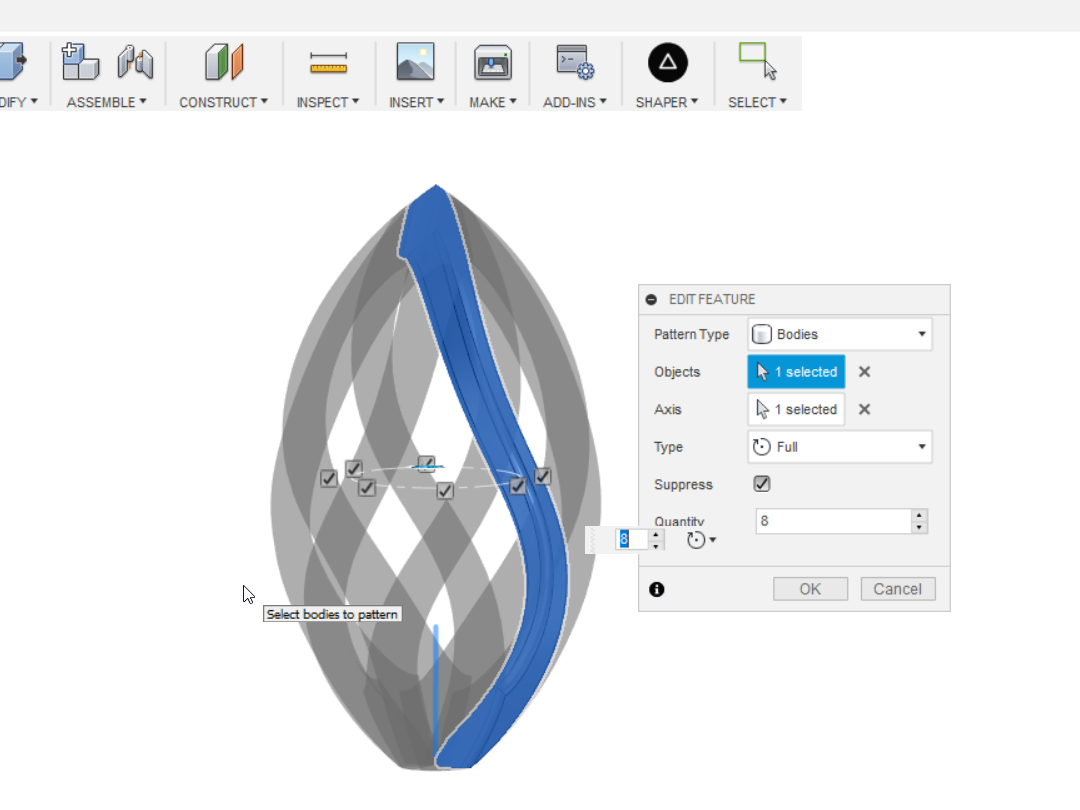
Let’s use the Circular Pattern tool to pattern the new body we created. Go to Create - Pattern - Circular Pattern. Choose Bodies as Pattern Type and select our new body as Objects. Choose the vertical axis as Axis and enter a quantity of 8. Click ok and you should see eight bodies in a circular pattern.
-
8Join Into One Body
![]()
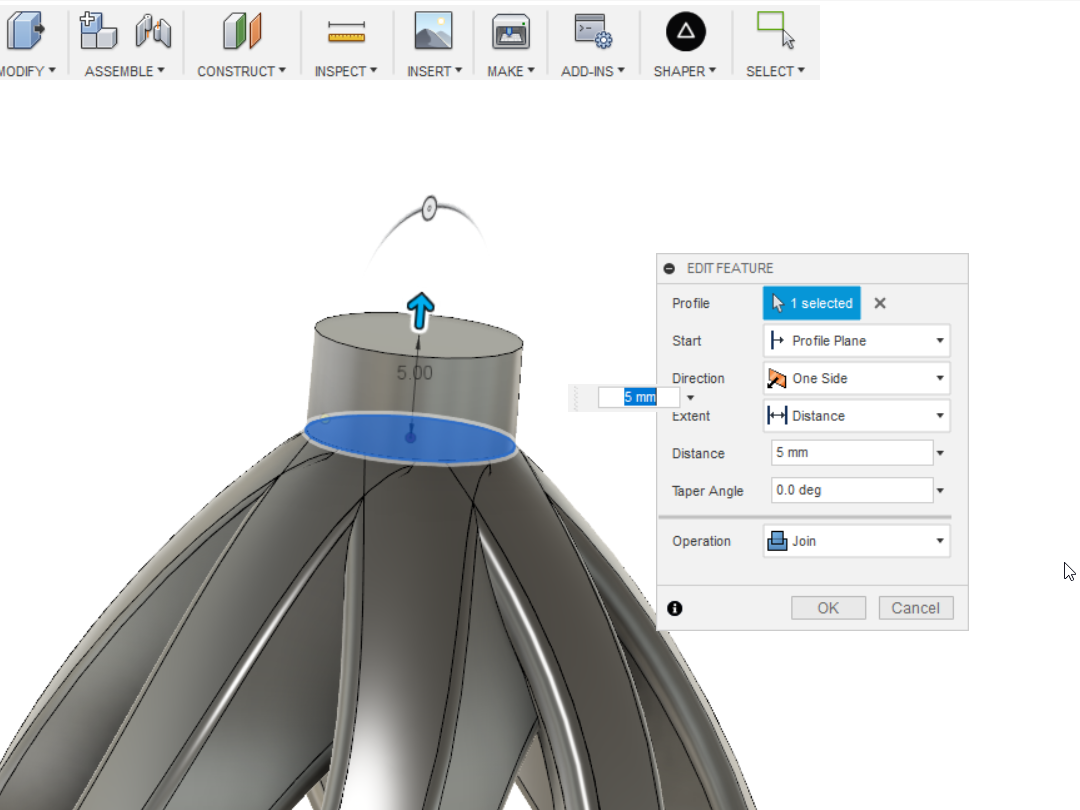
Create a sketch at the base of the patterned bodies and draw a Center Diameter Circle with a diameter of 10mm. Extrude the circle out 5mm and select Join as the Operation. This will result in all 9 bodies combining into one.
-
9Create a Hole for Hanging
![]()
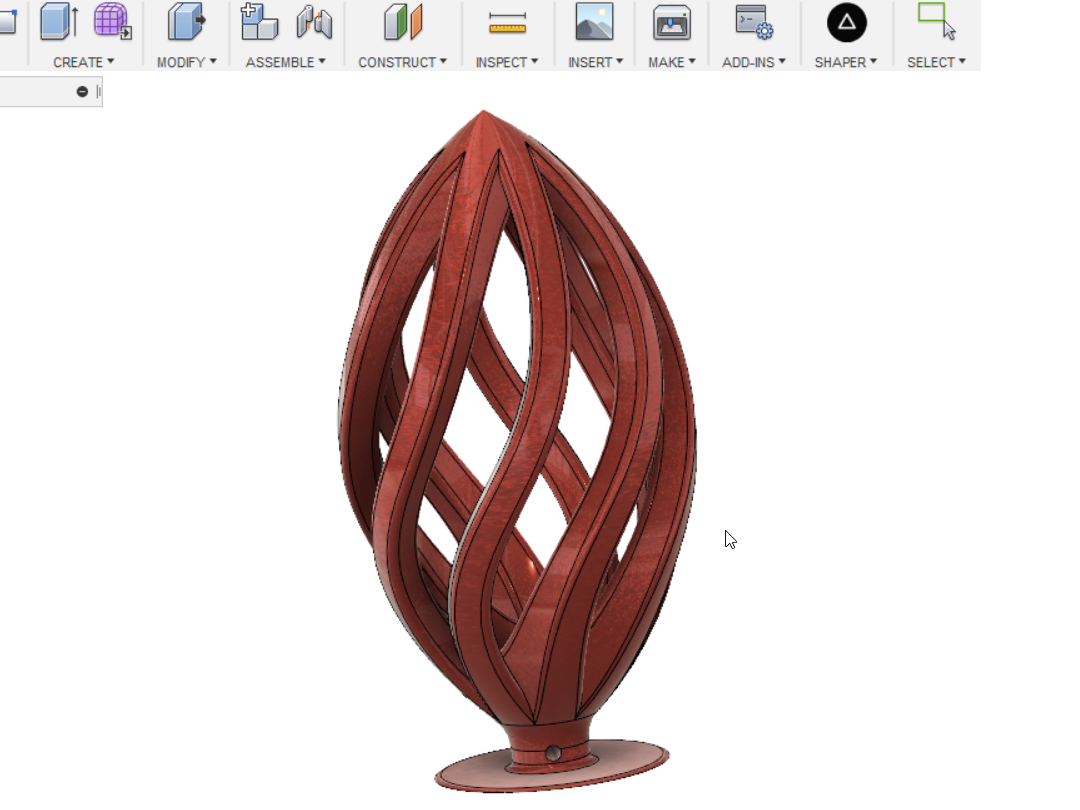
Create a 4mm circle through the last extruded cylinder and extrude a cut to make a hole for hanging your ornament. 3D Print and enjoy! Note in the pic above I also modeled a brim at the base to help the model stick to the build plate while printing. This can simply be removed after printing.
-
10Video of Steps
Watch the video above to see a step by step tutorial of the design. To learn how to design with Fusion 360, visit desktopmakes.com for in depth tutorials and design courses.
Design a Christmas Ornament in Fusion 360
How to take advantage of the Intersect tool while creating a beautiful Christmas ornament.
 Vladimir
Discussions
Become a Hackaday.io Member
Create an account to leave a comment. Already have an account? Log In.