 Stephen Holdaway
Here's a quick run-down of how I've been scanning negatives.
Camera settings
- Aperture priority mode with no exposure compensation. With my light source, shutter speeds range from 1/100s to 1/1000s depending on the exposure of the frame being captured.
- Aperture at f8.0 to give good sharpness and provide a small margin of error for getting the focus right.
- Lens set to manual focus, with image stabilisation turned off.
- White balance manually set for the light source.
- Shutter triggering with an infrared remote trigger to avoid touching the camera and adding vibration.
Framing and alignment
How much the negative image fills the frame is a balance between resolution and the speed you want to work. I've found the sweet spot for me is framing so the sprocket holes barely enter the frame. This makes it quick and painless to get each frame aligned to capture, and leaves the final crop and any minor straightening for processing later.
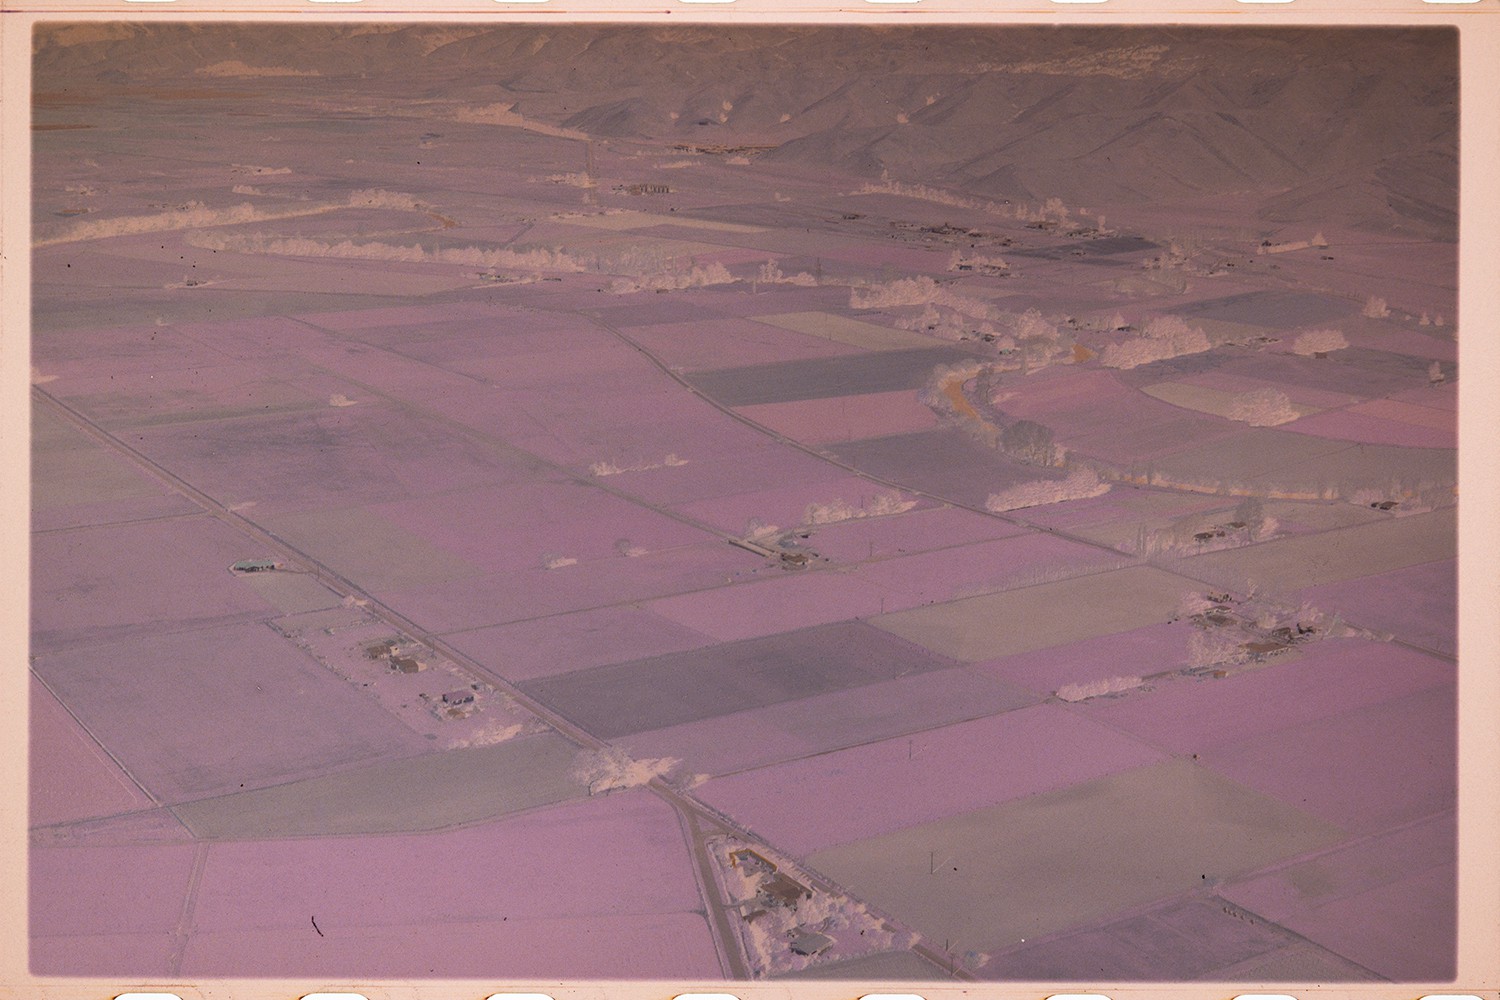
I did experiment with filling the whole frame in-camera, but I found it wasn't worth the extra time and precision needed for a small gain in final image resolution.
Feeding film
With my mount, I take the top plate off completely to insert a new section from film the top, then place the top plate back on. To move between frames the top plate is levered up slightly to release pressure, then the film can be slid along:
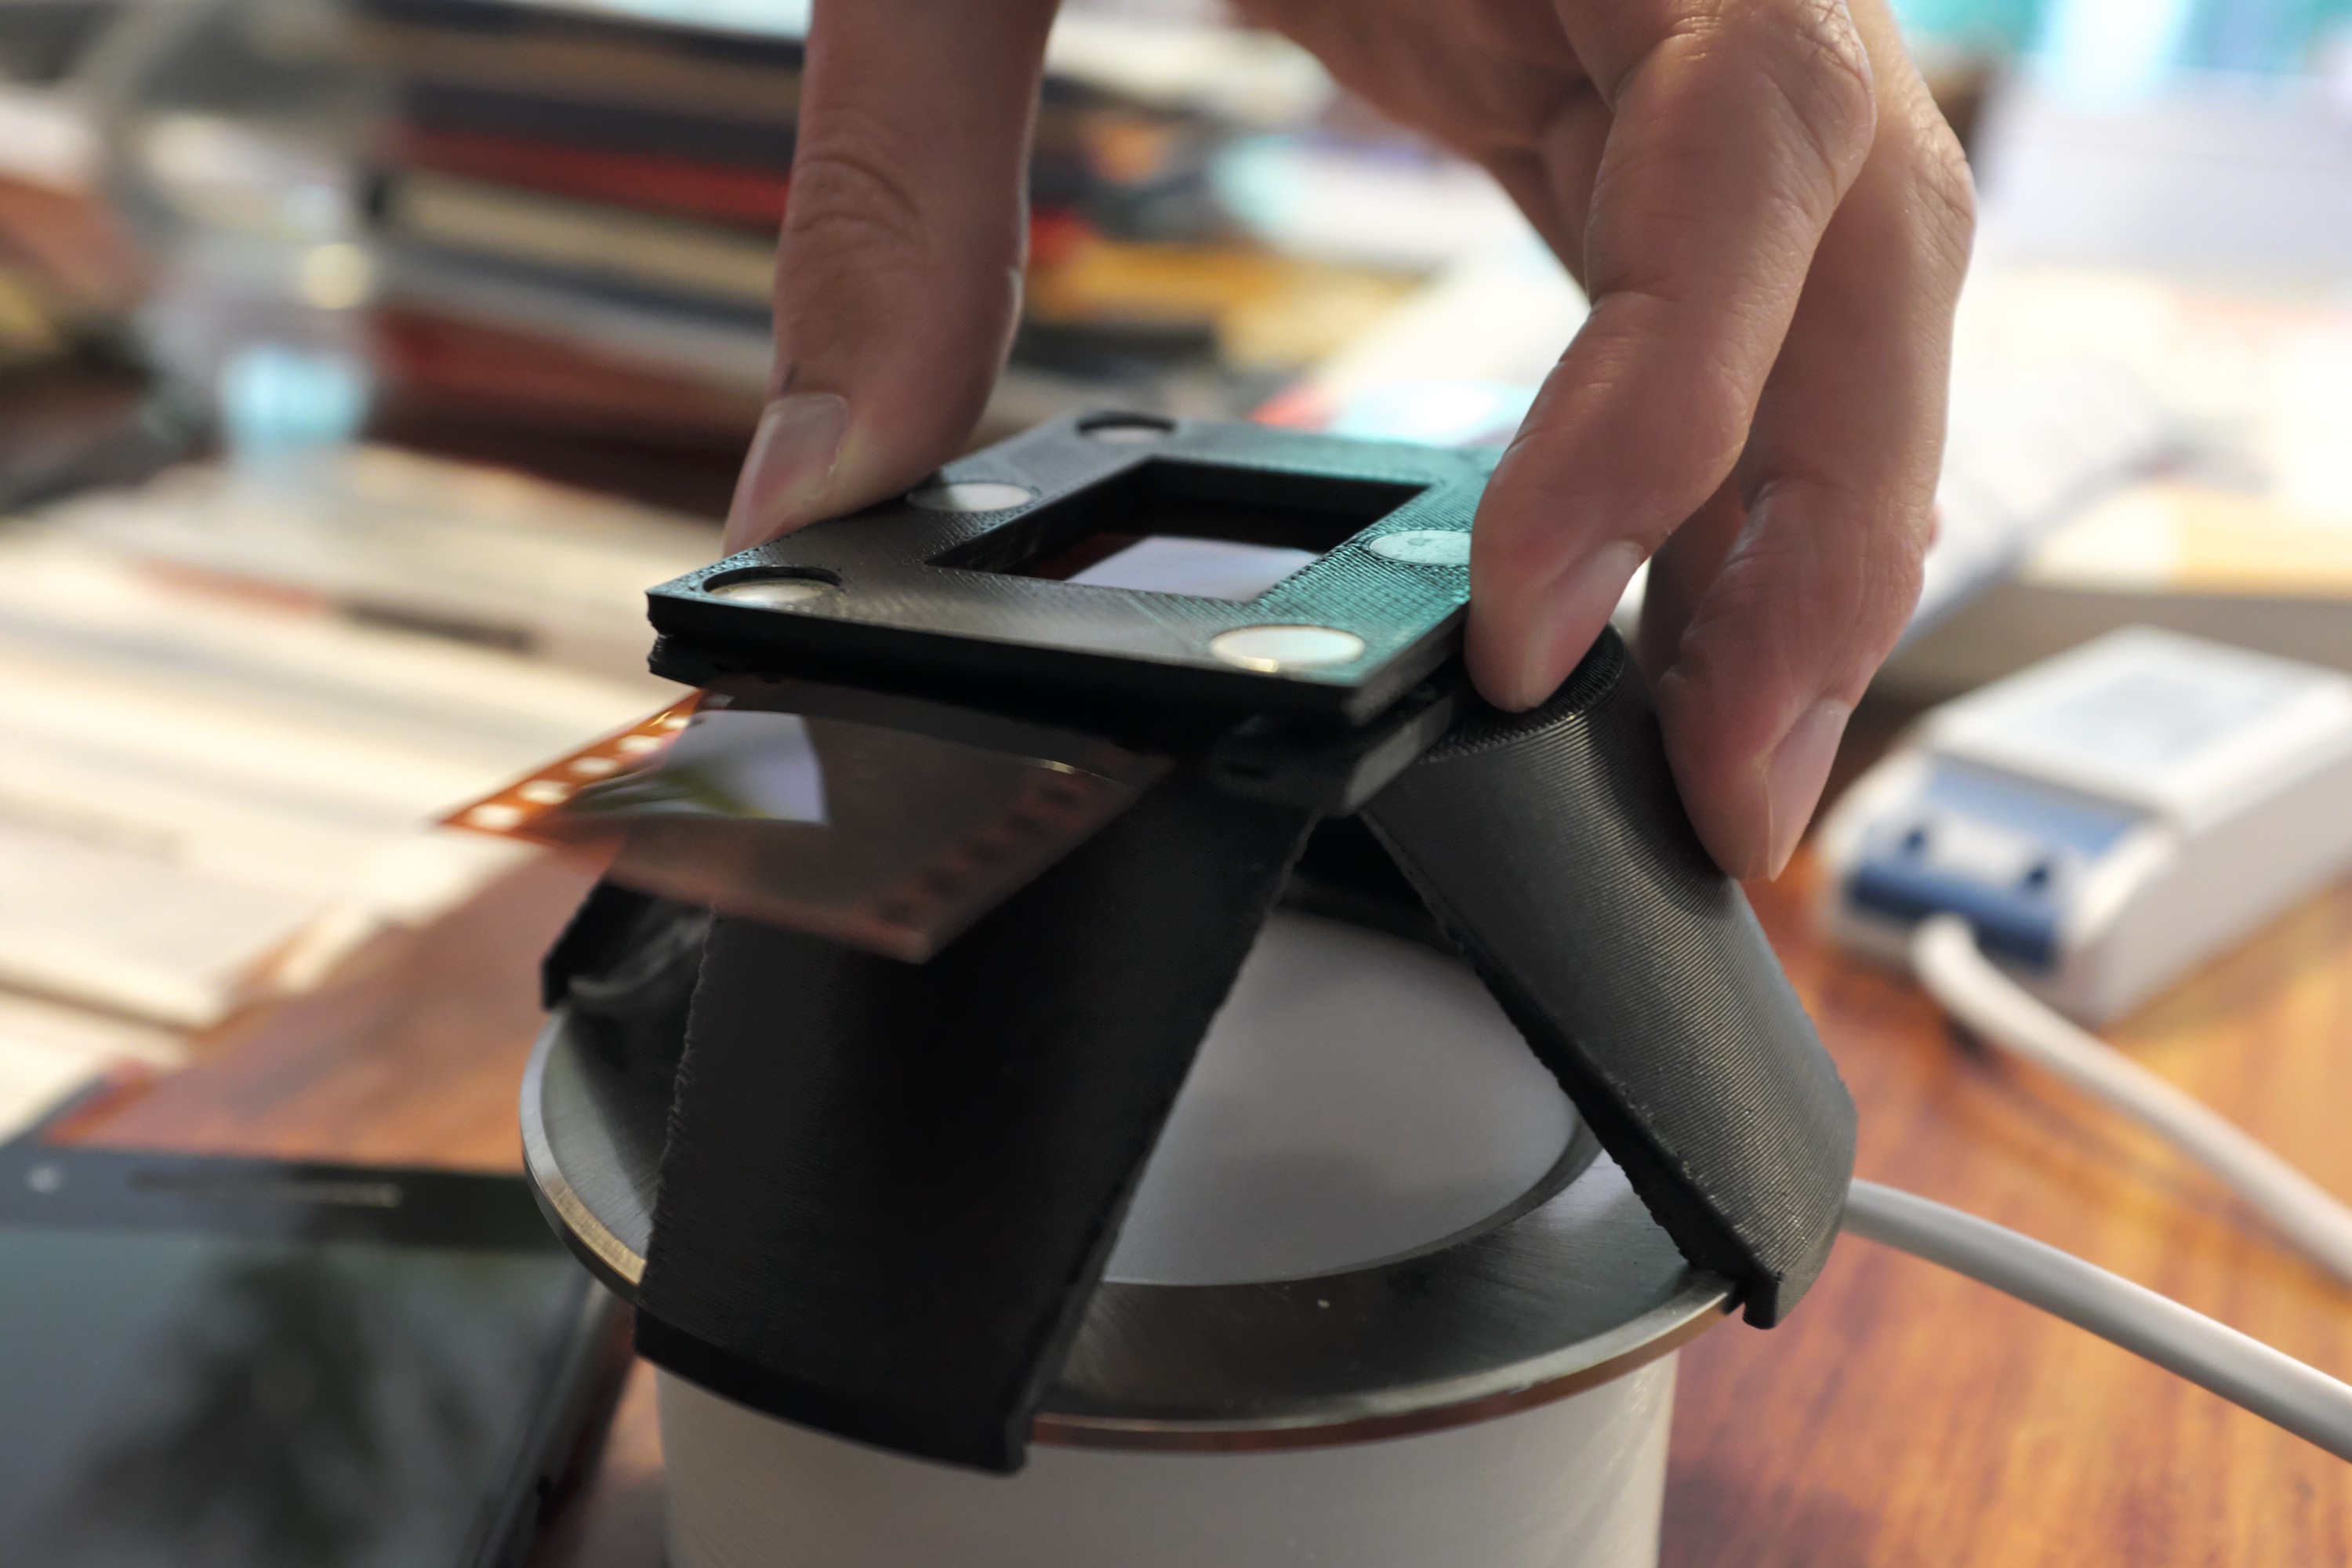
It's easy to do this with the remote trigger still in one hand, so it's a pretty quick cycle to capture each frame. Once focus is established for a roll, I use live view to quickly get each exposure framed without looking through the viewfinder again.
Focusing
I currently prefer to set focus through the viewfinder by eye, as it's easy to see when peak sharpness is reached across the whole image. Generally I found re-focusing at the start of each new roll was necessary, and more often if the image sharpness looked questionable.
During the first batch of scanning I did, I used the 5x and 10x zoom function in live view to focus on features or grain, but this frequently resulted in incorrect focus and was more time consuming than looking through the viewfinder.
Trying to set focus on a frame that is out of focus itself (or has motion blur) is difficult. I'd recommend setting focus for a roll using a photo that has a fine texture in focus (eg. hair, gravel, grass, carpet). I tried the camera's auto-focus in both in viewfinder and live-preview mode, and neither gave reliable results for me. The focal plane is tiny, so you really need to dial it in manually. Auto-focus would usually focus on marks and dust on the surface of the film rather than on the image in the film's emulsion layer, and it would move slightly with each exposure, even if the focus was already spot-on.
Ambient light
I was originally working in a room with the lights off and curtains drawn, but I've found some ambient light has no adverse effects (as long as there's no direct sunlight or overhead lights). It's much more comfortable to work in a room where you can see!
Organising image files
To avoid going back to a computer constantly, I note the start and end image number on the camera for each roll as I'm working, along with any available information (date, film stock, descriptions). Eventually when the SD Card is inserted into a computer I run a hacked-together script to use this information to move the images into folders:
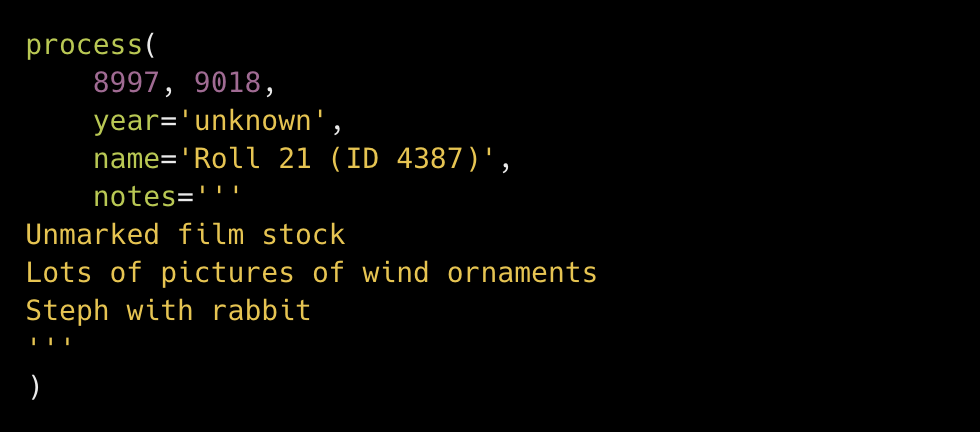
I like to have one folder per roll of film, grouped by year: Film Negatives/[year]/[roll name]. Where the year of a roll isn't clear I'll use "unknown" or a partial year like "199x". If none of the rolls have useful names, an incrementing scheme like "Roll 1", "Roll 2" is the only sane option. Including the strip's random ID in the name is useful if the roll needs to be located again in future.
Discussions
Become a Hackaday.io Member
Create an account to leave a comment. Already have an account? Log In.