Nathan Brown
-
Mounting Rabbit Hole
10/03/2019 at 18:27 • 0 commentsI've run into a problem with my drive design after considering building an equatorial mount. It sent me down a rabbit hole trying to design. I was a little over zealous in thinking I could devote that much time to it. So I am back to a simple Alt-Az mount and my pulley based "gearbox".
I do think it would be awesome if we could design up an open source printable / cnc'able equatorial mounting system. This is a little bit of a grad undertaking, so I think I'll take this on AFTER I have a totally working telescope.
-
Long Time Hard Progress
08/13/2019 at 12:17 • 0 commentsSummer is not the right time to work on a paper telescope in Florida, but...
The motion system is getting a new redesign to build an encapsulated belt drive "motor" that I can use to turn the two axis.
Also, I'm in the process of building an equatorial mount.
Some progress is still progress...
-
Drive Progress
01/21/2019 at 14:51 • 0 commentsHappy super blood wolf moon! I'll post pictures from this very telescope tonight!
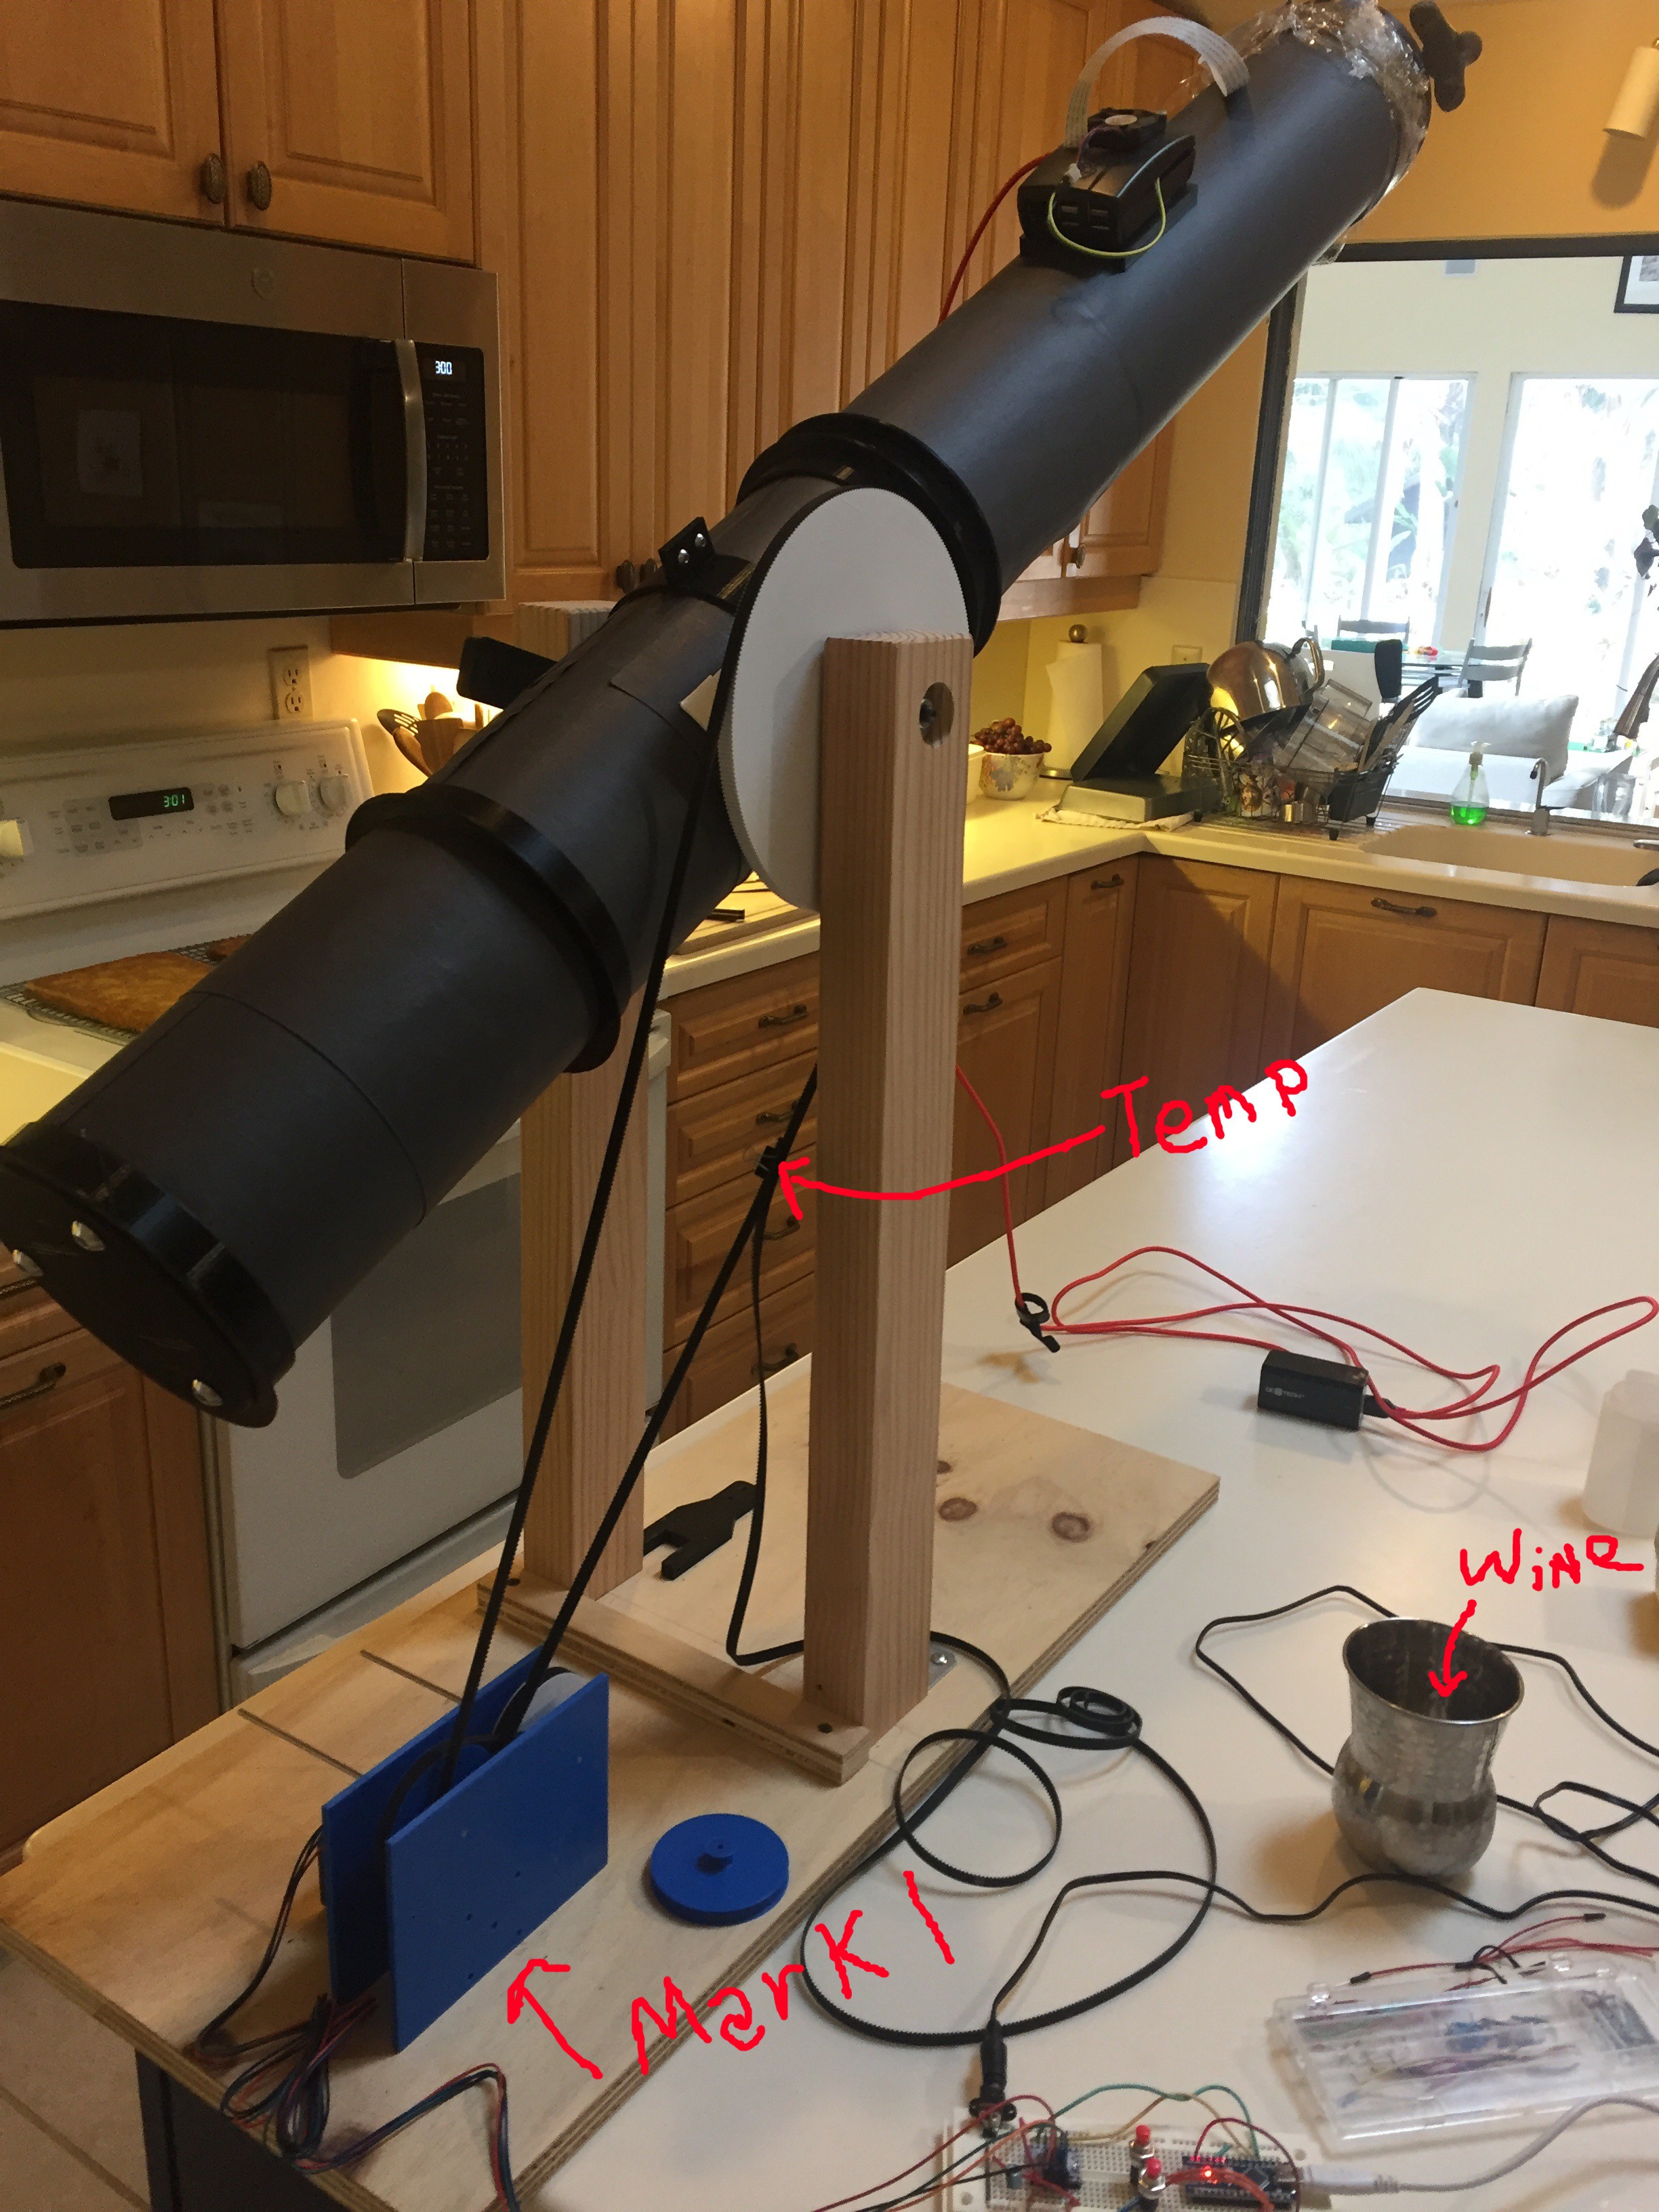
The drive system is progressing... I've hooked up the reduction box Mark I to the telescope and with the help of 32x micro-stepping I don't really need to have as much reduction. But the design of this reduction box is that I can change up the gears (add / remove) if I needed to.
Here is the Mark I setup:
![]()
Couple things to point out:
The Mark I box doesn't have any attachment points yet; it is more just for testing. I'm printing Mark II now that I can screw down.
The large belt (the one on the telescope) is just clipped together. I need to find the right point to clip it so that I have full movement of the telescope.
It would be nice if I could incorporate some kind of clutch that would allow me to move the telescope manually.
I should build in a "main belt" tension system into the pulley box. That might have to wait until Mark III.
The wine is important here...
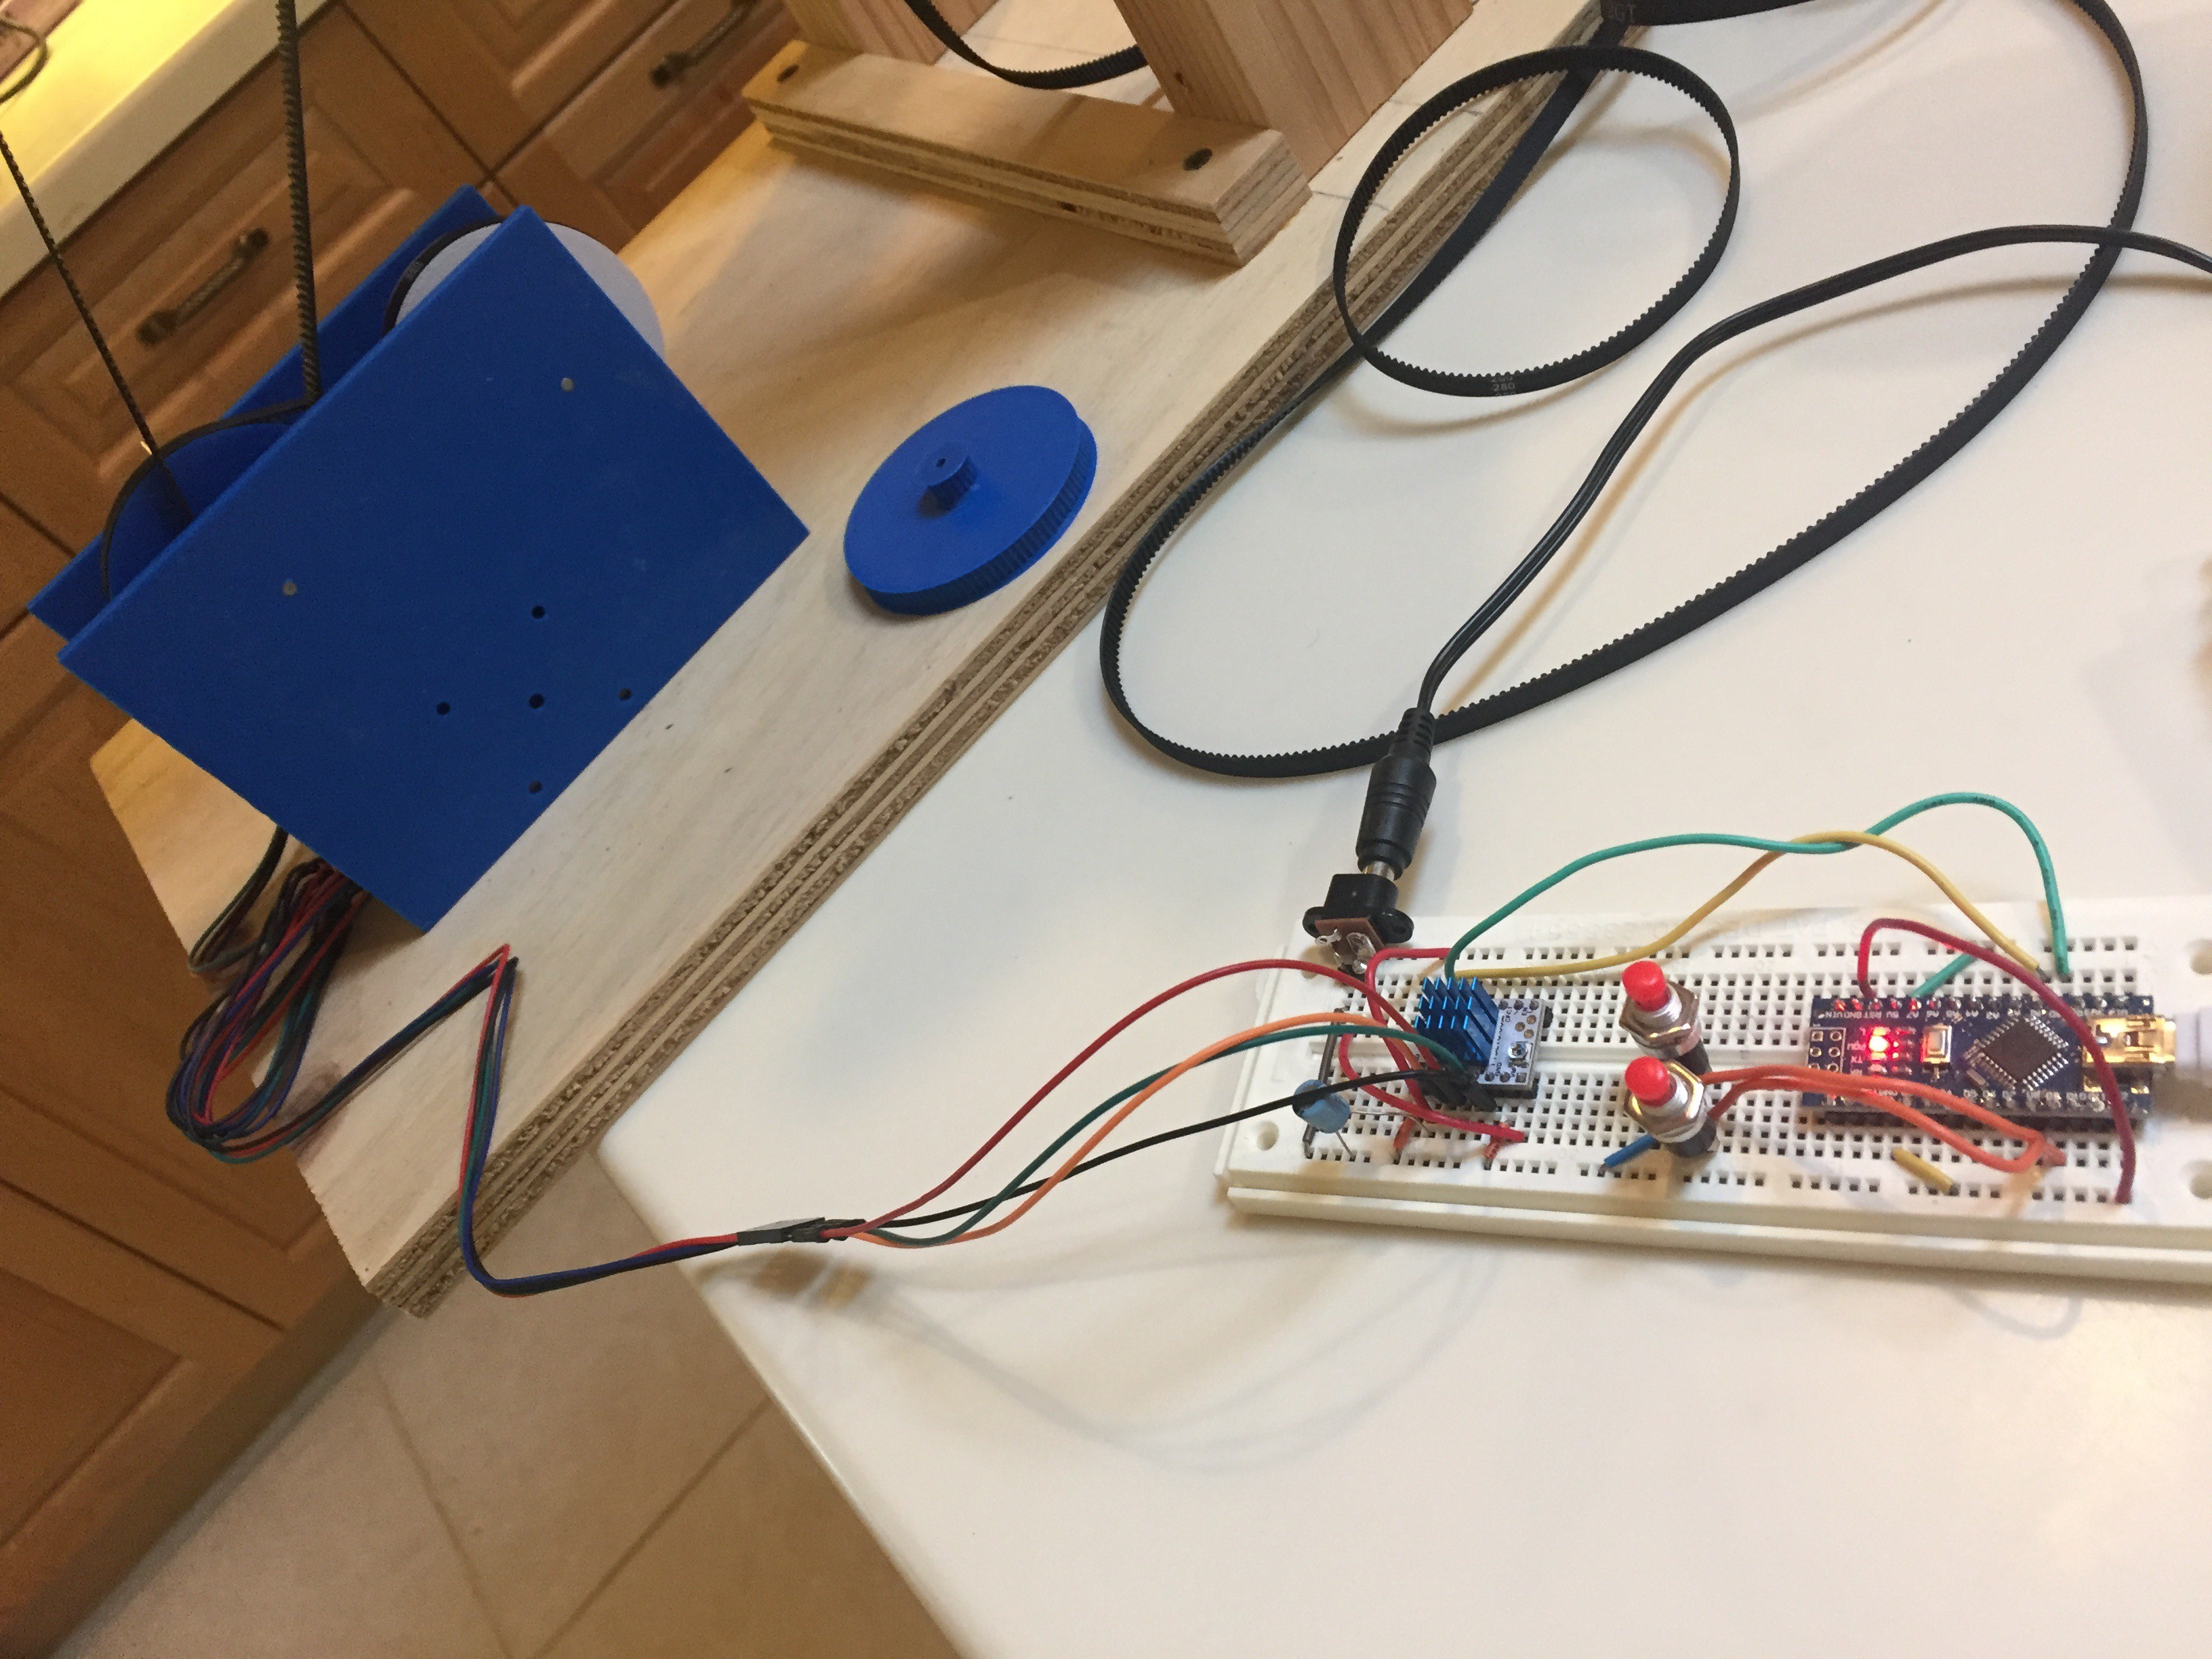
I'm just using a DIRT simple arduino setup. Just a pololu style stepper driver breakout, a couple buttons, and an Arduino Nano. I'll add those to the parts list when I get a little closer, but the goal is for this to be connected to the PI and have full control over the network just like Pate's.
![]()
Finally to the point...
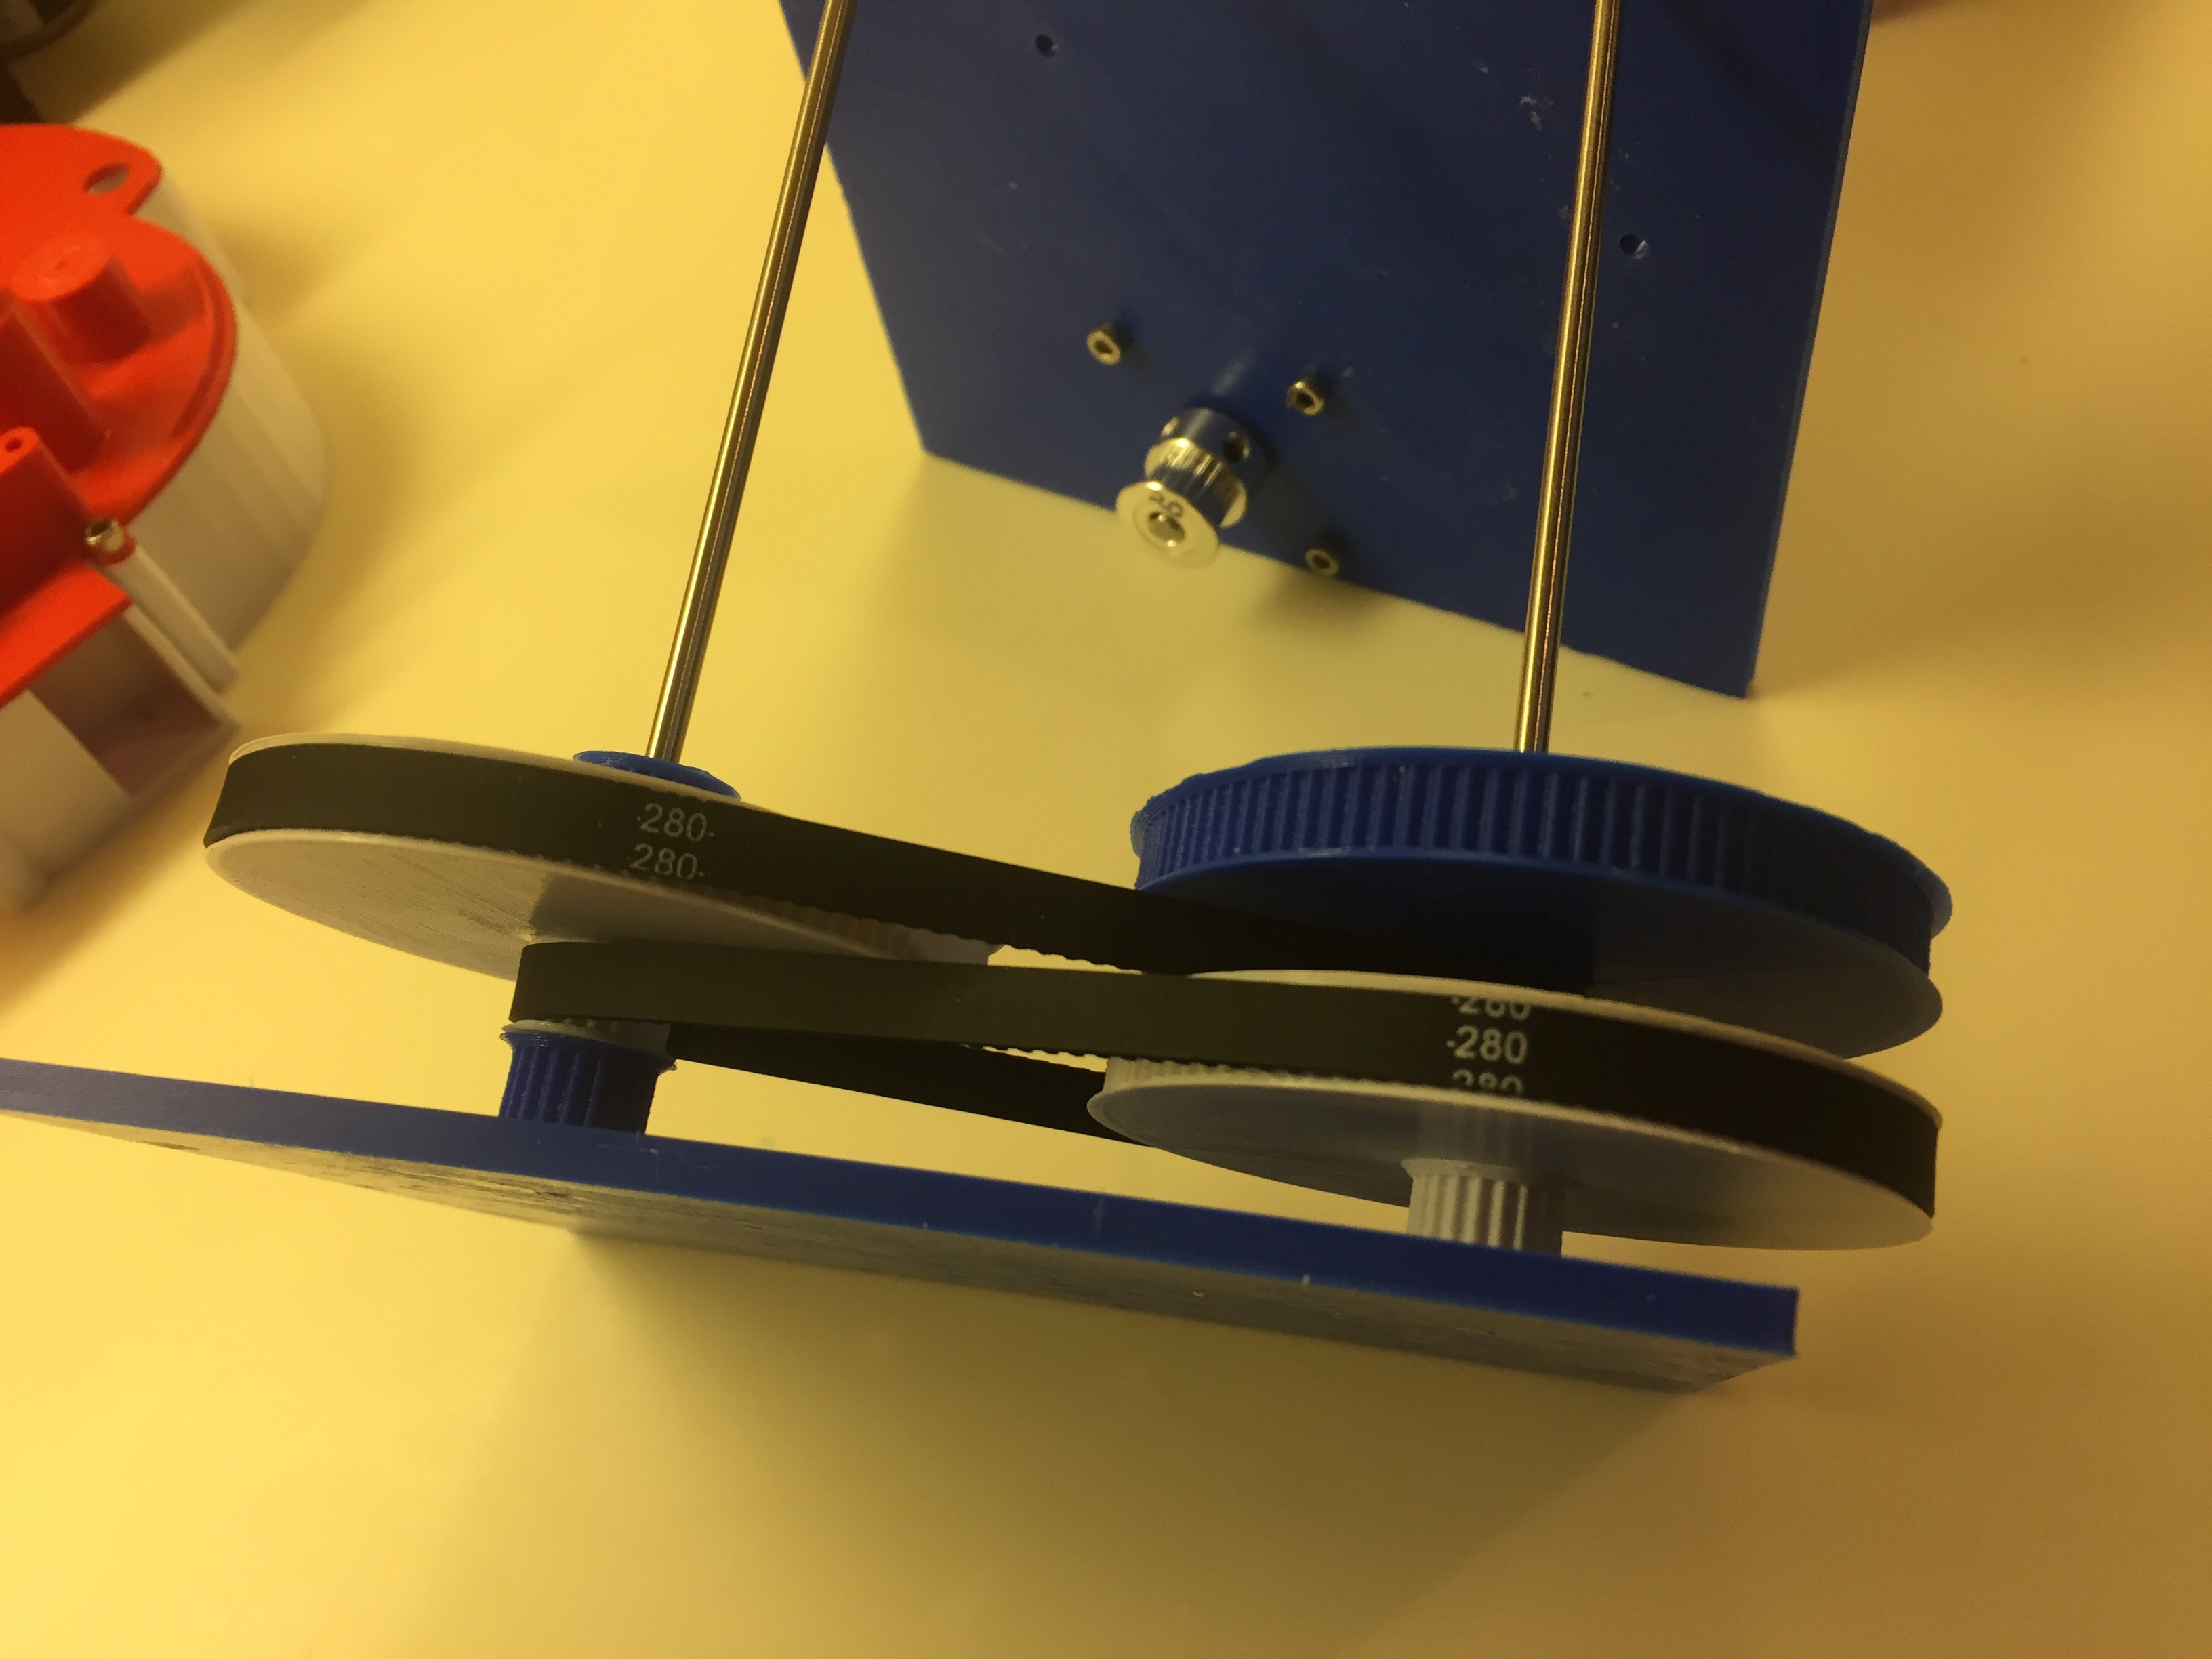
This setup with two reduction pulleys (20 -> 100 + 20 -> 100 + 30 -> 300) or ( 5 * 5 * 10) * 32X microsteping = 8000! I'm all set. Using just push button to move up and down works well and I'm able to track nicely and the motion is silky smooth. There doesn't seem to be too much backlash, but I'll need to tension the main belt a little better before I can say for sure.
At this point I'm at least confident that I can make this whole thing work.
-
3D Printed Pulleys
01/18/2019 at 17:21 • 0 commentsSo the last log was about determining that I would need a 6480:1 reduction to get a 1ars-second resolution from a 1.8 degree stepper motor. As other have pointed out (see Backlash section here), gears can be a little problematic, so the next obvious choice is timing belts. While not 100% backlash free they are a very inexpensive way to make a "reduced" backlash system.
So lets create ourselves a GT2 (2mm pitch) timing belt system to get us to that reduction. But first some goals:
- Target of at least 6480:1 reduction
- Flexible enough that I can add or remove reduction if I need to
- By printable on my ~210mm print area (which would include the box housing)
I happen to live close enough to drive to my favorite on-line supply shop MPJA.COM. They happen to carry a good variety of GT2 belt loops in the "standard" 6mm width used by most 3d printers. The belt sizes that they stock are 158, 188, 200, 260, 280, 400, 610, & 852mm. So if I want to make a reasonably sized reduction box I should probably not have anything too big, but on the other hand it would be nice if I could make the box flexible enough that I could add some extra stages (add more reduction) if I needed to.
Wait... why am I starting with the belt sizes instead of doing the math first? Well... there are a couple of things about GT2 belt systems that we know. First, for 2mm pitch belts any pulley < 20 tooth does not really have enough engagement with the belt so we will limit out small size pulley to 20 tooth. Next, we don't want to deal with an overly sized reduction box. To make use of the 400mm belt above we would have to use a 150+ tool pulley which would be ~100mm in diameter which kind of make the this a little too large. So the next size down is 280mm belt. Lets just see if we can make something that works out to some nice round number?
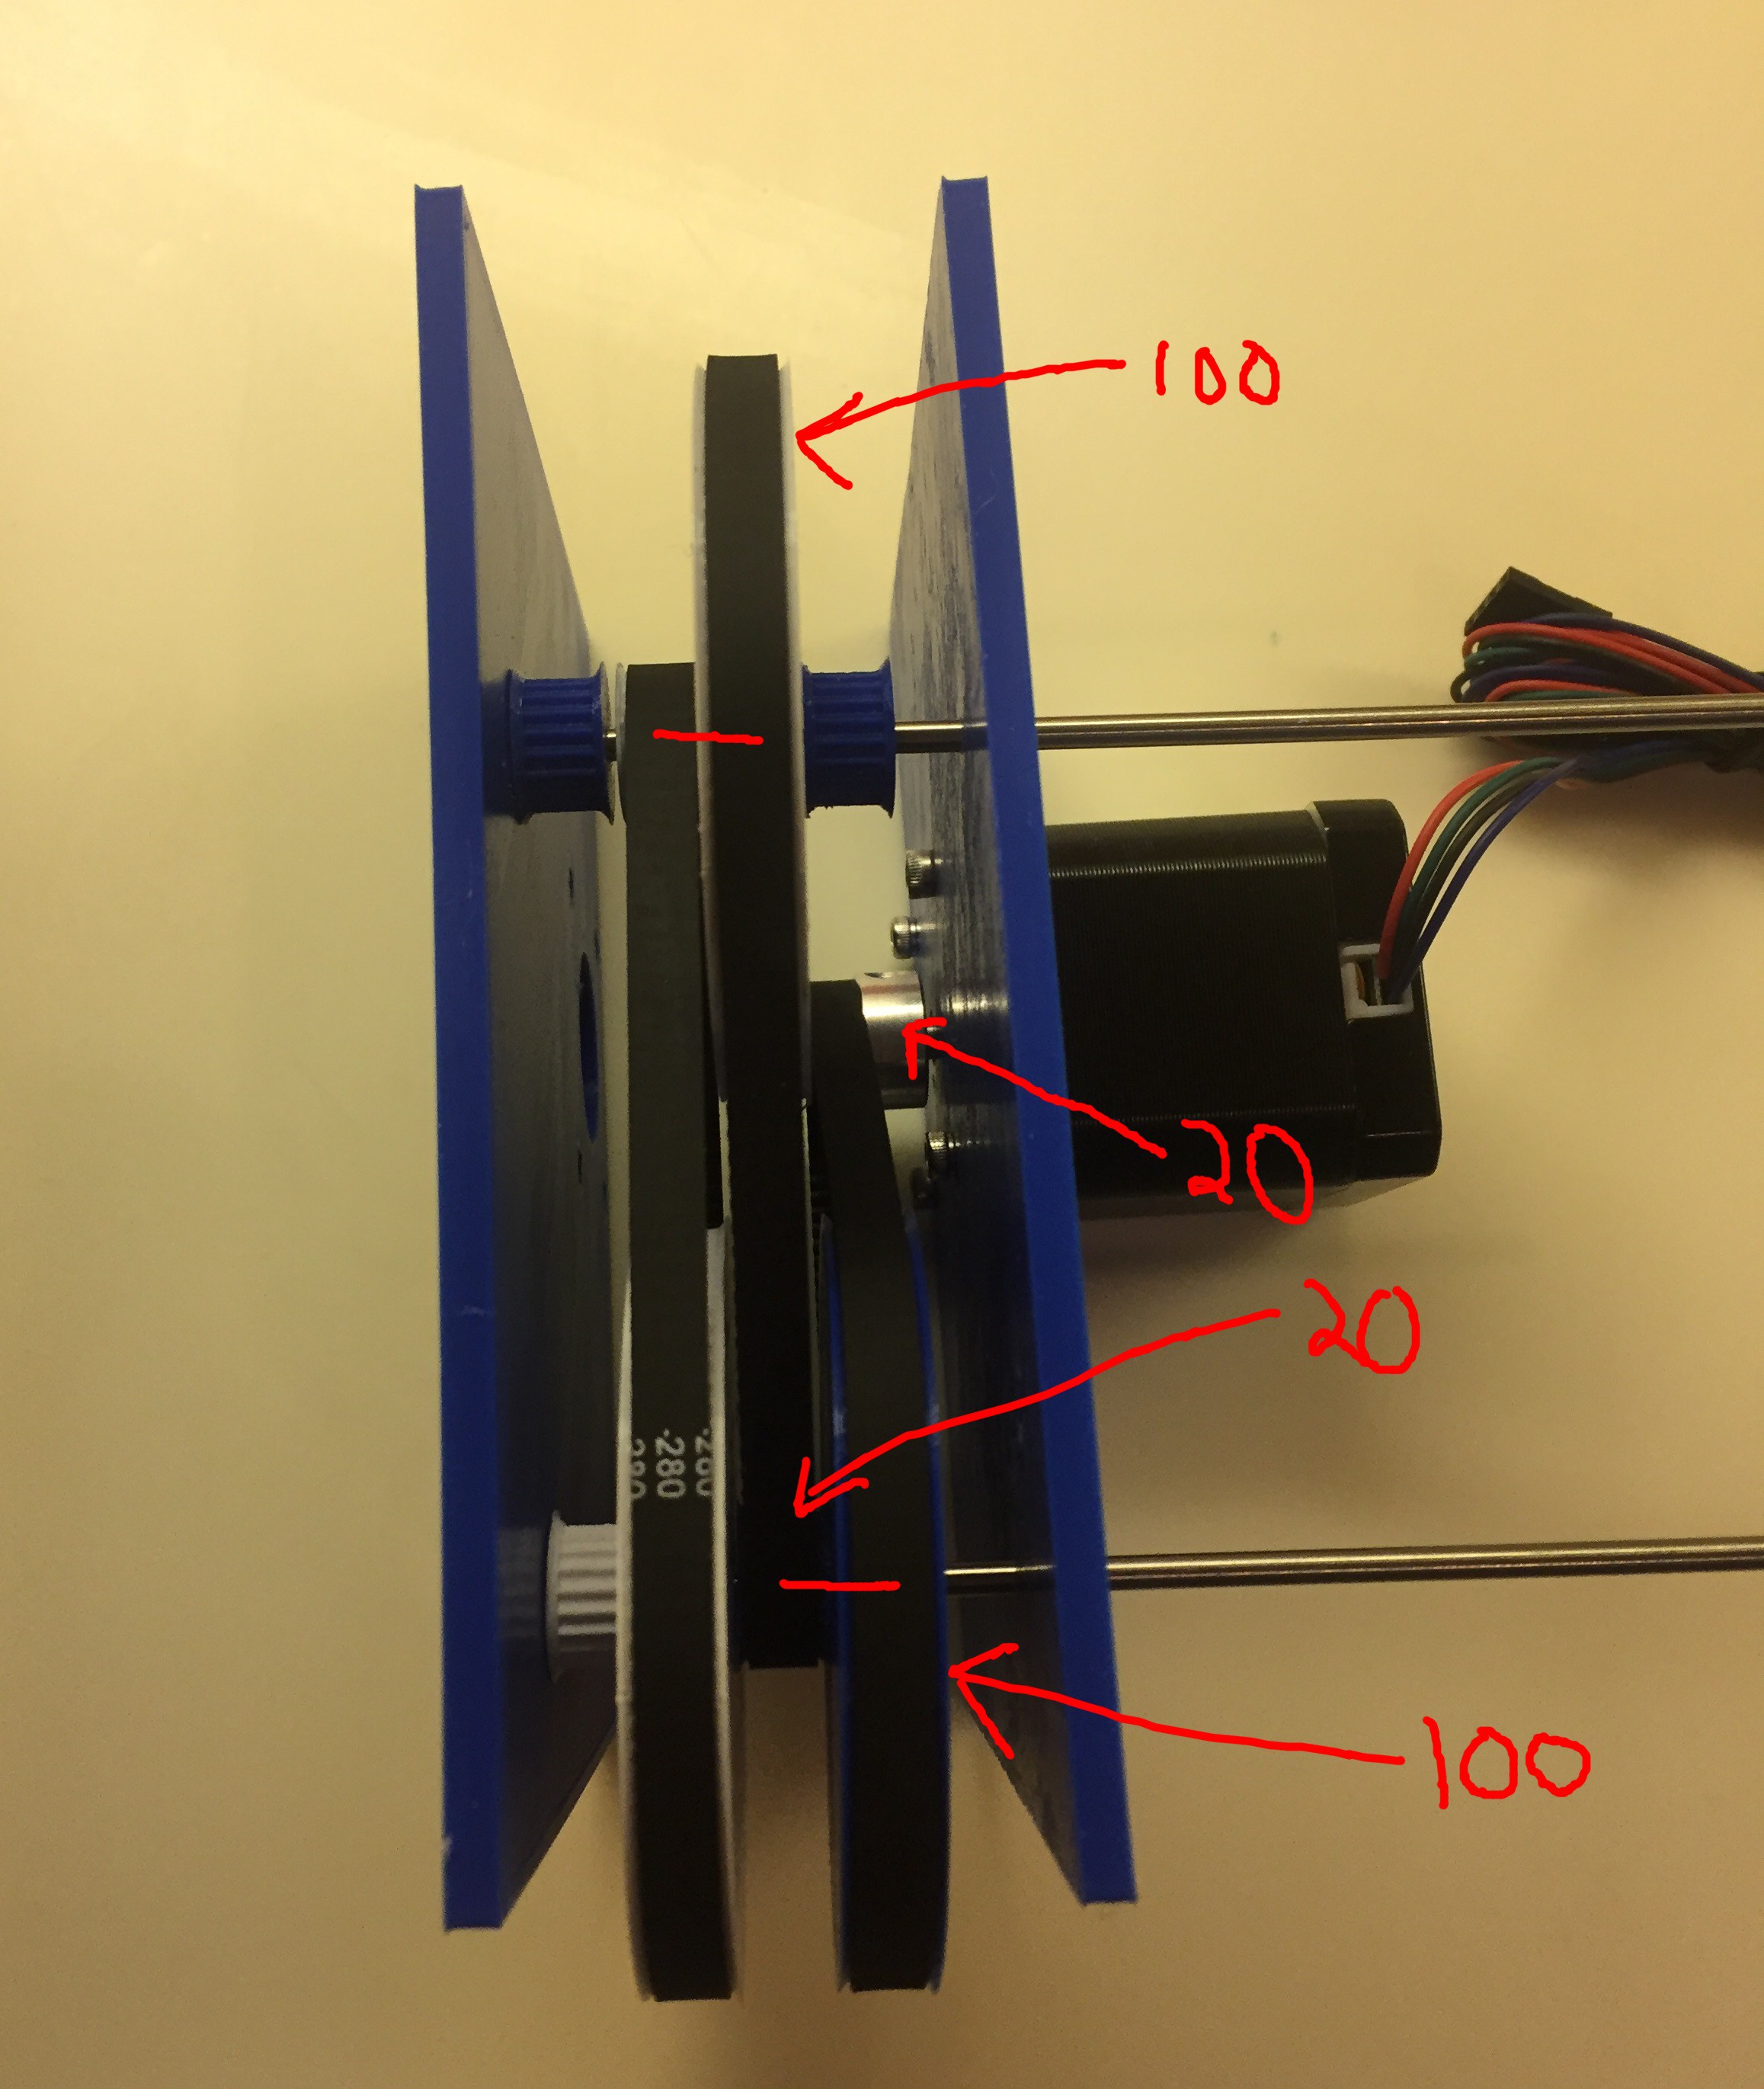
Well it just so happens that for GT2 2mm pitch if you use a 20 tooth small pulley and a 100 tooth large and space them out a nice even 75mm apart then it just to happens to fit a 280mm belt perfectly. Try it yourself here. I happen to know this because I'm played with these sizes before. I'll try to dig up the math that I used to calculate this, but the above calculator is great tool! When using that tool be sure to check out the "Teeth in Mesh" calculation. Anything less than 6 is just too small. The 20:100 combo leaves 7 in mesh which is respectable considering there won't really be much force.
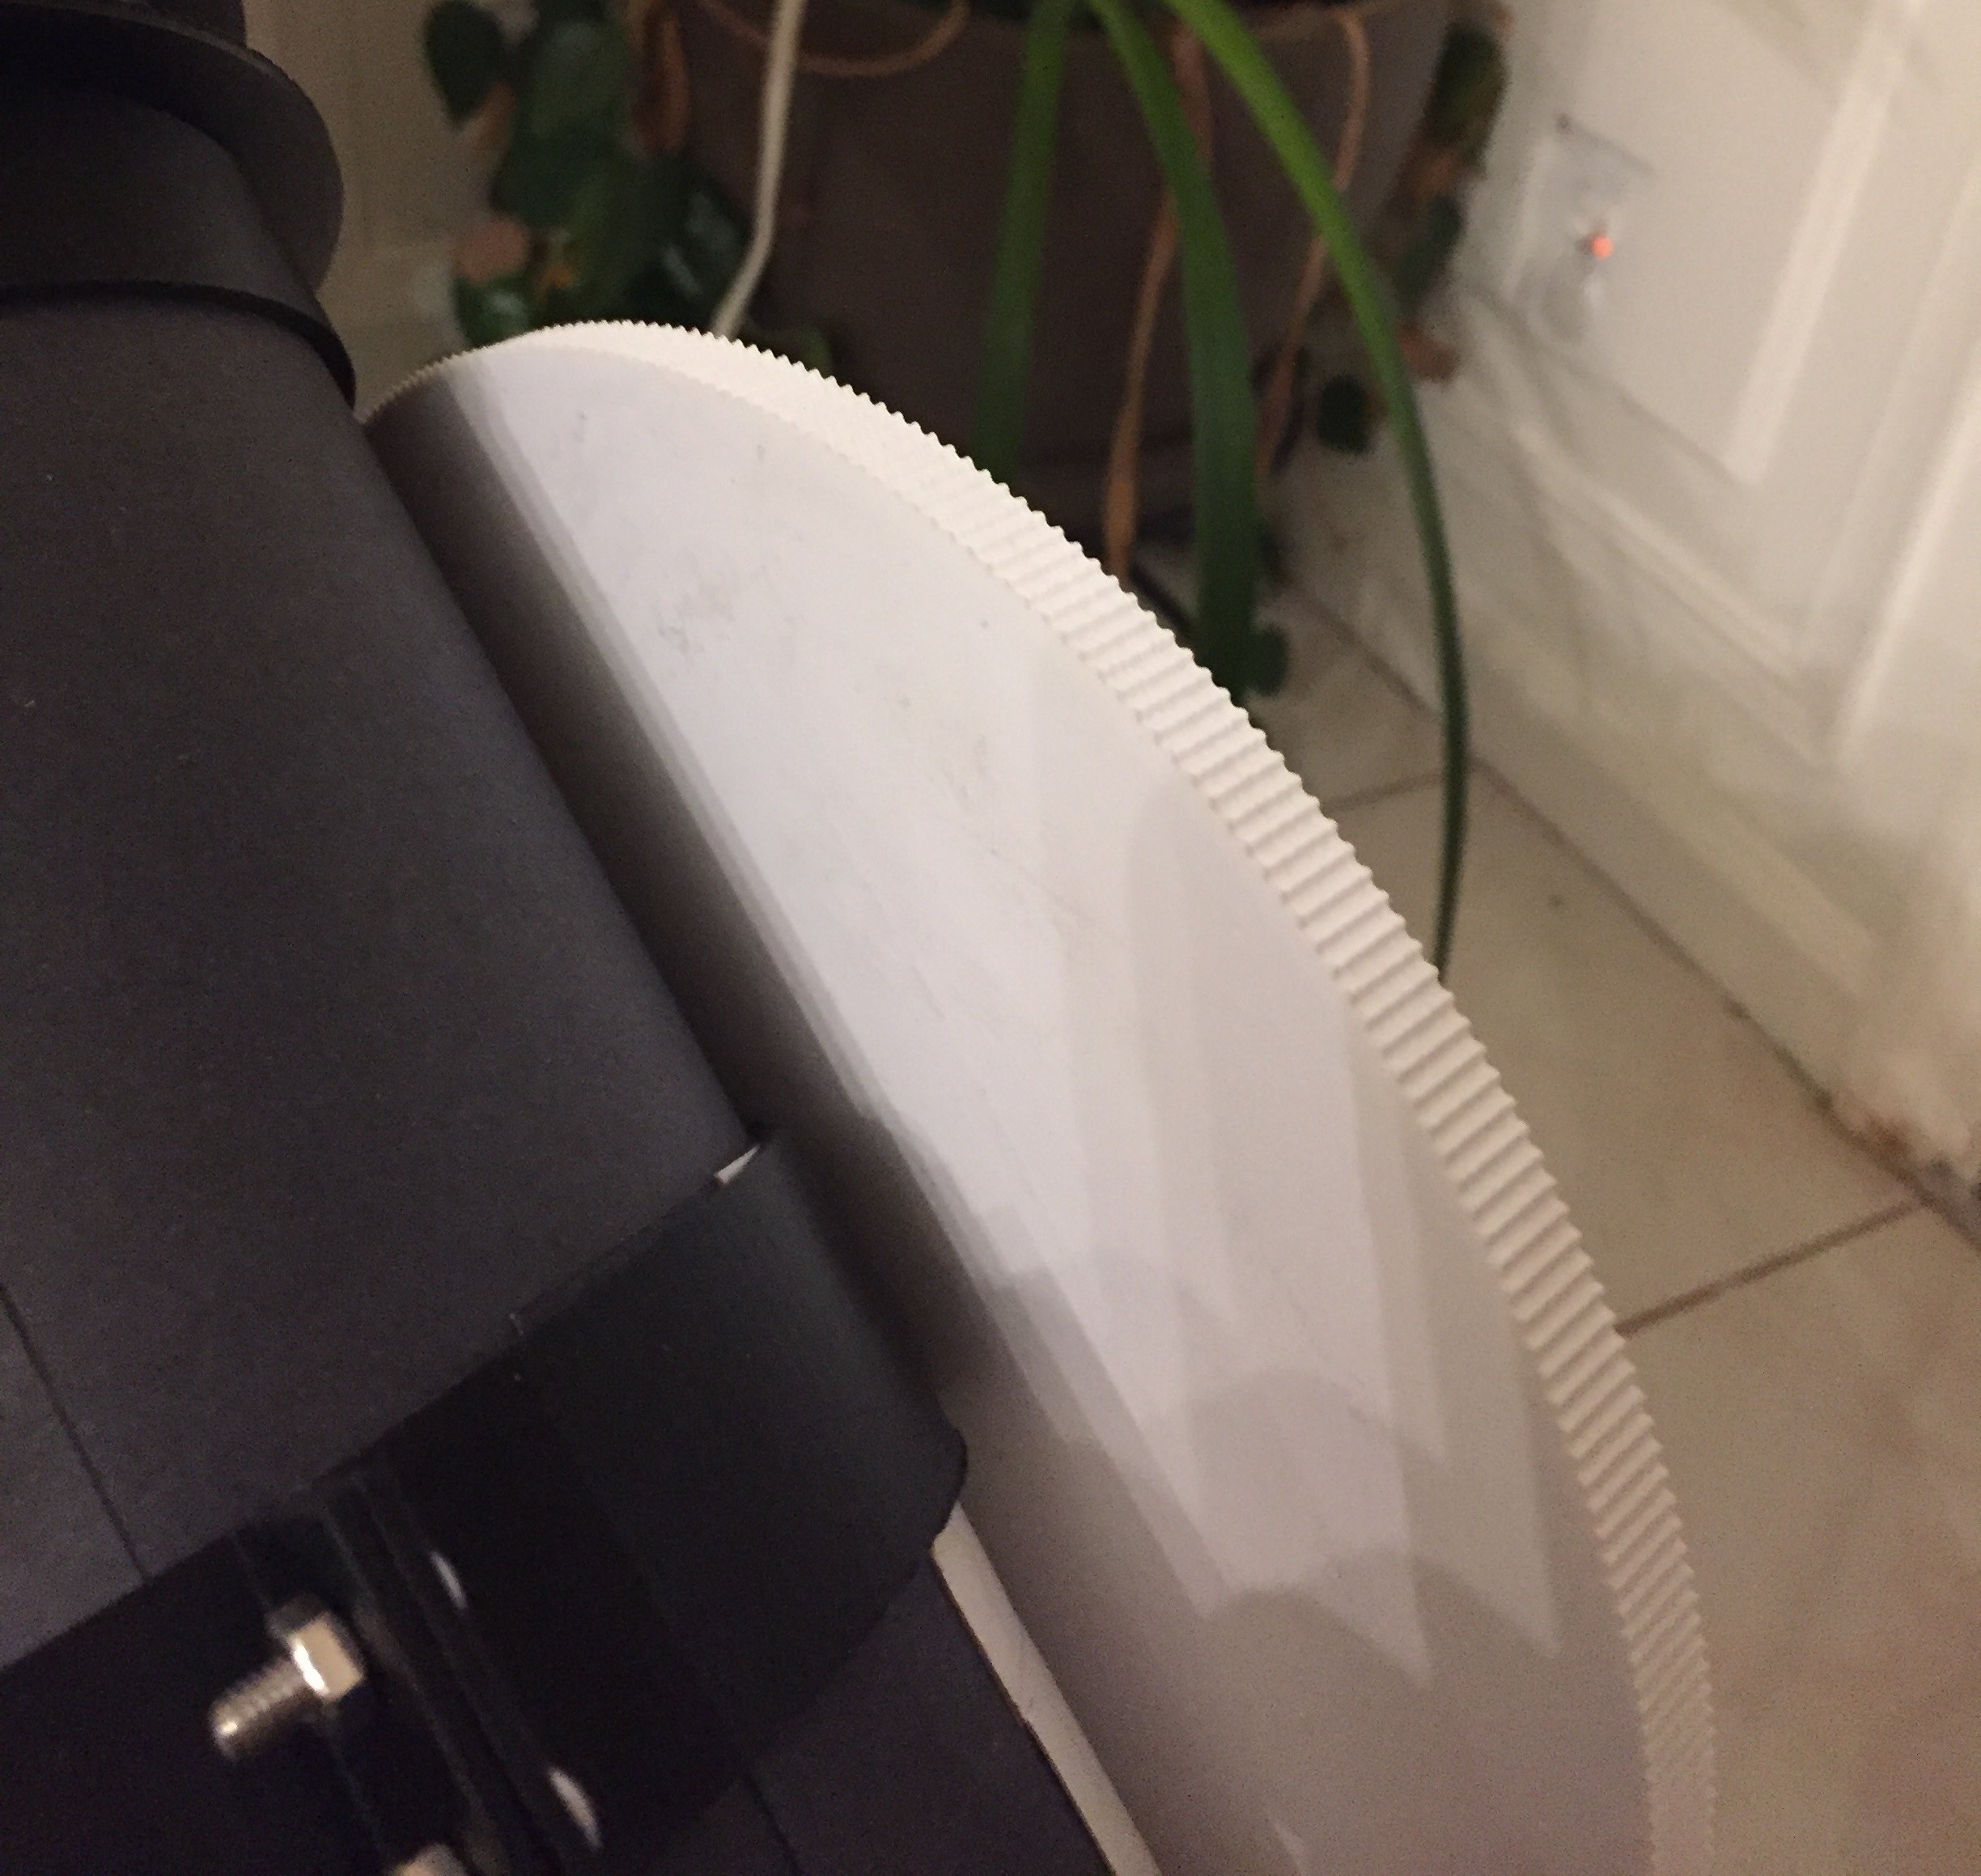
So now I have a 1:5 reduction set, but we also need one large pulley for the "main" drive pulley on the telescope itself. The largest GT2 that I can print is about 300 tooth. You want your largest pulley on the telescope so you have the both the largest belt engagement but also the largest final reduction. So lets print one of those up and slap it on...
![]()
![]()
So now I have 300, it is time to work backwards a quick setup is:
Stepper
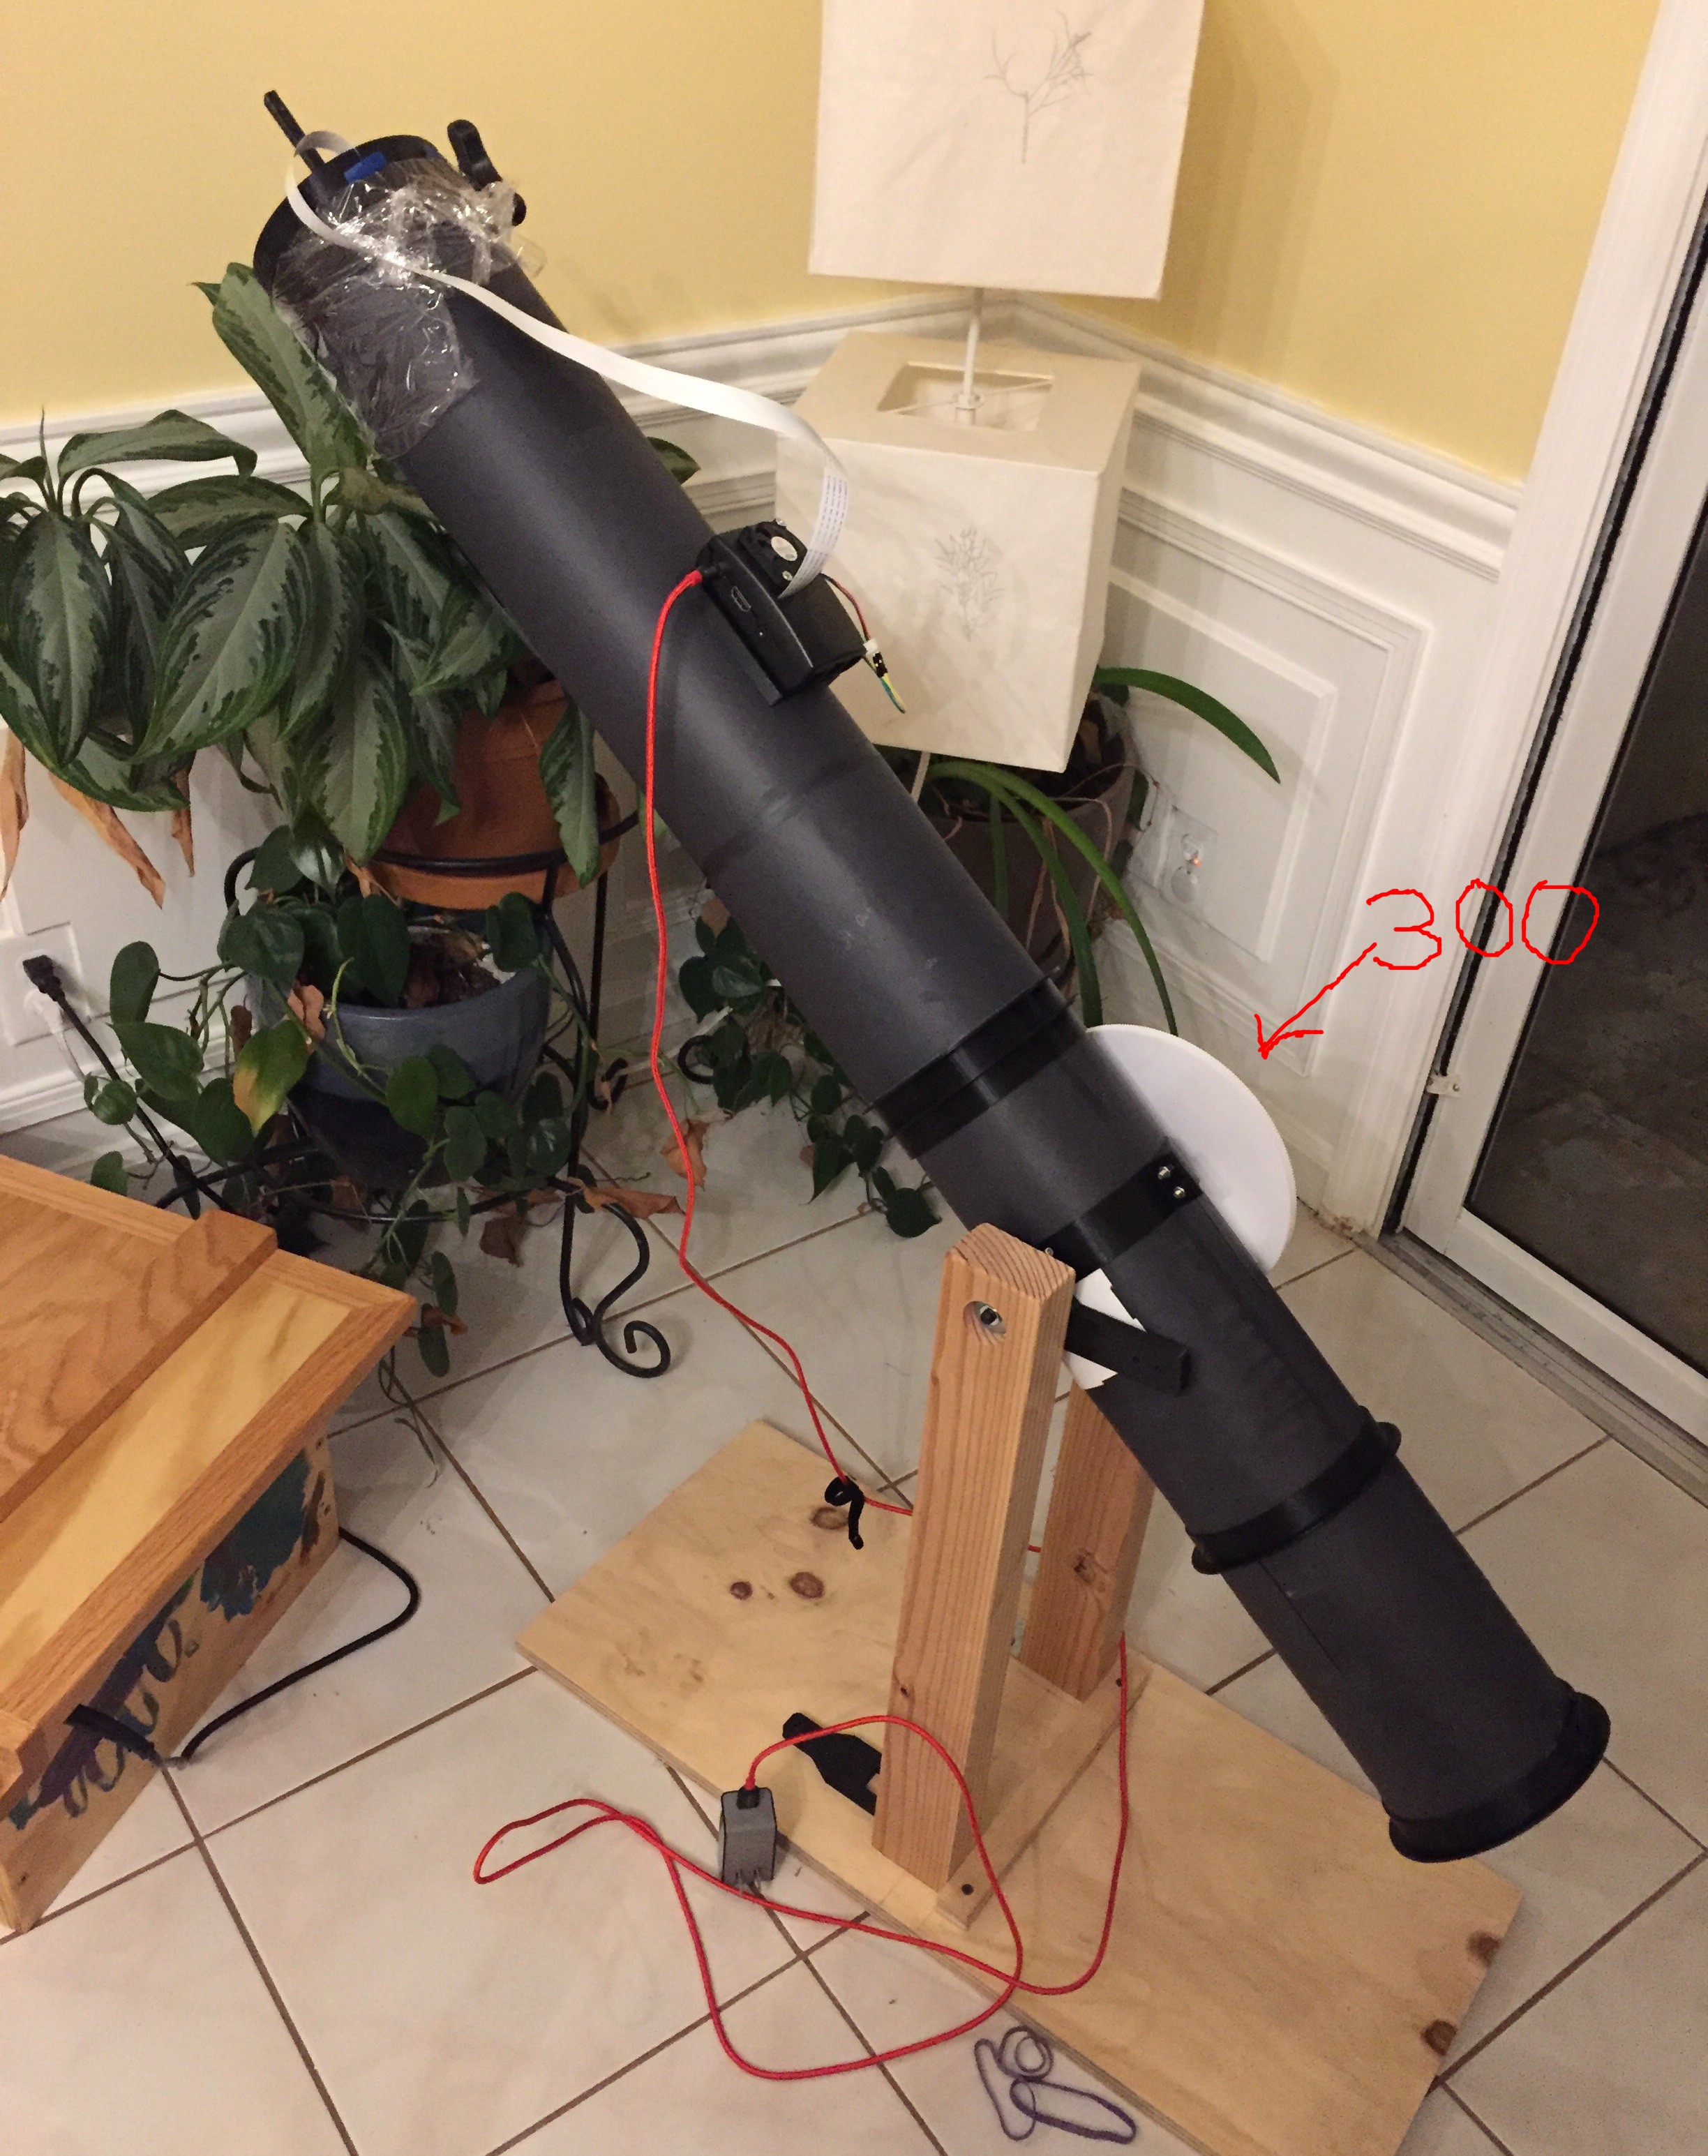
Stage Output Input Ratio : 1 ArcS/Step 5 300 30 10 6250 1.0368 4 100 20 5 625 10.368 3 100 20 5 125 51.84 2 100 20 5 25 259.2 1 100 20 5 5 1296 1 1 6480 So I will have a whopping 5 stage reduction. It will consist of four 100 tooth + 20 tooth pulleys compound pulleys plus one 100 tooth + 30 tooth. All of which can be easily printed... Here is what it looks like so far:
![]()
![]()
![]()
I just have to print up another two stages and I'll be all set. Then I just have to make the final connection from the final 30 tooth pulley to the big 300 tooth. For that I'm going to just make my own belt and clamp it together. Since the telescope is not going to turn in a full circle I don't have to worry about the joint.
Once I get the box finalized I'll post the STLs and the OpenScad files for the pulleys.
-
Thoughts on Angular Resolution
01/17/2019 at 17:20 • 0 commentsThis is the first telescope that I have ever owned. In fact, this is the first telescope that I have ever "looked" through (not counting images from Hubble, and yes I'm not actually even looking through this one either). Anyhow, I don't know what I'm doing... So much so that it took me a good 15 minutes to even find the Moon with this telescope. I have no spotting scope, I was just sighting along the barrel and I had trouble.
The problems boiled down to:
- Vibration / Stability - The whole setup shook while moving it by hand, not because it was unstable, by just because my hand vibrates enough to cause problems. Also I had difficulty focusing because that would move or jiggle the whole thing. In reality I am going to have a hard time making a rigid telescope out of paper.
- Positional Resolution / Repeat-ability - It was very difficult to move the telescope in only one axis or be sure that I was "scooting" it just a little bit and not to much to overshoot my target.
- Inexperience - I didn't know what I was doing or even how large my view of the moon would be
A little homework was in order... First, I've been using this site: in-the-sky.org to find the size of the objects that I was interesting in seeing. On the first day 11 - Dec My telescope was giving me a field of view of about a third of the Moon which was 1770 arc-seconds in size. So my field of view (FOV) is in the neighborhood of 600 arc-seconds. I'm using the 8MP Raspberry PI Camera v2 (native res of 3280 X 2464). Rather than do actual math, I figures that I start with some napkin math. I'm going to consider the my horizontal as equal to the 600 arc-second FOV and just round down a little so 3000 / 600 = somewhere 5 pixels per Arc Second.
Next, I went back to in-the-sky.org and found the sizes of some other things that I wanted to see:
ArcSeconds Pixels Min Min Min Min Mars 24 3 120 15 Saturn 18 15 90 75 Jupiter 44 30 220 150 So a day is 23:56:04 or 86,164 seconds to turn a total of 1,296,000 arc seconds in a circle or, 15 arc seconds per second. Thus, during a one-second exposure Saturn would move 15 pixels (1/5 of its size). That would be a pretty blurry image!
I will limited to 1/30 of second exposures if I want to limit my blurry to sub-pixel size, but that may be pushing the ISO limits of the camera. This will be my first experiment.
It would be better if I could move the telescope to keep up with the earth's rotation (like the big boys do). To do this I would need to be able to generate smooth motion at about 1/120 of a second of earth's rotation (I just made that number up). So 15/120 that give me 0.125 arc seconds "steps" or 10,368,000 steps per revolution.
A quick google search did not turn up any 9.645 * 10^-8 deg stepper motors. I think a little reduction is going to be in order. Likely 1/120 of an arc-second is probably an exaggeration of what I will likely need so to give myself a fighting chance, I'm going to aim for a 1 step per arc-second resolution (not to be confused with accuracy).
That works out to a 6480:1 reduction (3,600 arc-seconds per degree * 1.8 degree stepper motor = 6480). You can also think about it as 1,296,000 arc-seconds per revolution / 200 steps per revolution stepper = 6480 reduction.
6,480 is the magic number.
-
Catch up...
01/17/2019 at 15:25 • 0 commentsSo I have a little to catch up on so here is a quick timeline of activities.
Nov '17 - First read about the Pikon
March '18 - Purchased mirror from Amazon
March '18 - 3D Printed all the parts
April '18 - Moped about trying to source a tube
September '18 - Started watch Eric Strebel
Oct '18 - "Hey I should be able to make this whole this out of cardboard!"
Nov '18 - Built my tube... and realized that my mirror was 1000mm and not 500mm
Nov '18 - Extended my tube to 1000mm and took first pictures of daytime objects
Dec '18 - Moon was in good position so I got first clear pictures
Next post will be in the instructions and dimensions on my cardboard tube and construction method.
I am currently working to get the movement system built so that I can actually point with some degree of accuracy.
Paper Pikon with 1000mm Focal Length
Pikon Telescope made from poster board