Close
0%
0%

12 Servo Hexapod

A 2 DOF hexapod

Similar projects worth following
Recently I joined Hackaday, and when I learned you could upload your own projects, I jumped on the idea to upload my hexapod. It should weigh around 3 pounds, with 12 metal geared servos. The idea is either to control it via infrared remote, or autonomously via ultrasonic sensor and leaf switches. I got the original idea from http://robotoid.com/appnotes/project-build-12-servo-hexapod.html the chassis, at least, the electronics aren't detailed. The link is listed later...

Oh yeah, if you want to donate a buck or so, i just am posting this here:
https://www.gofundme.com/12-servo-hexapod

For the 2017 Hackaday Prize, i need to prove this is good for the world. I thought long and hard about this, and decided on one particular use. Military. I read something in popular mechanics about a weight problem- soldiers getting too weighed down with supplies. http://www.popularmechanics.com/military/g1345/the-day-the-marines-met-their-robotic-mule/, there we go. While reading it, i started thinking past how cool that is, and although @Radomir Dopieralski will disagree with me, hexapods are x100 better. They're more stable and versatile, and could probably carry more. When the soldiers carry less, they tire less, and can fight harder. Of course, small scale prototyping is always the first step, and while i'll probably never get to make one that size, hobbyists exploring the reaches of walkers pave new roads for awesome stuff like the robotic mule.
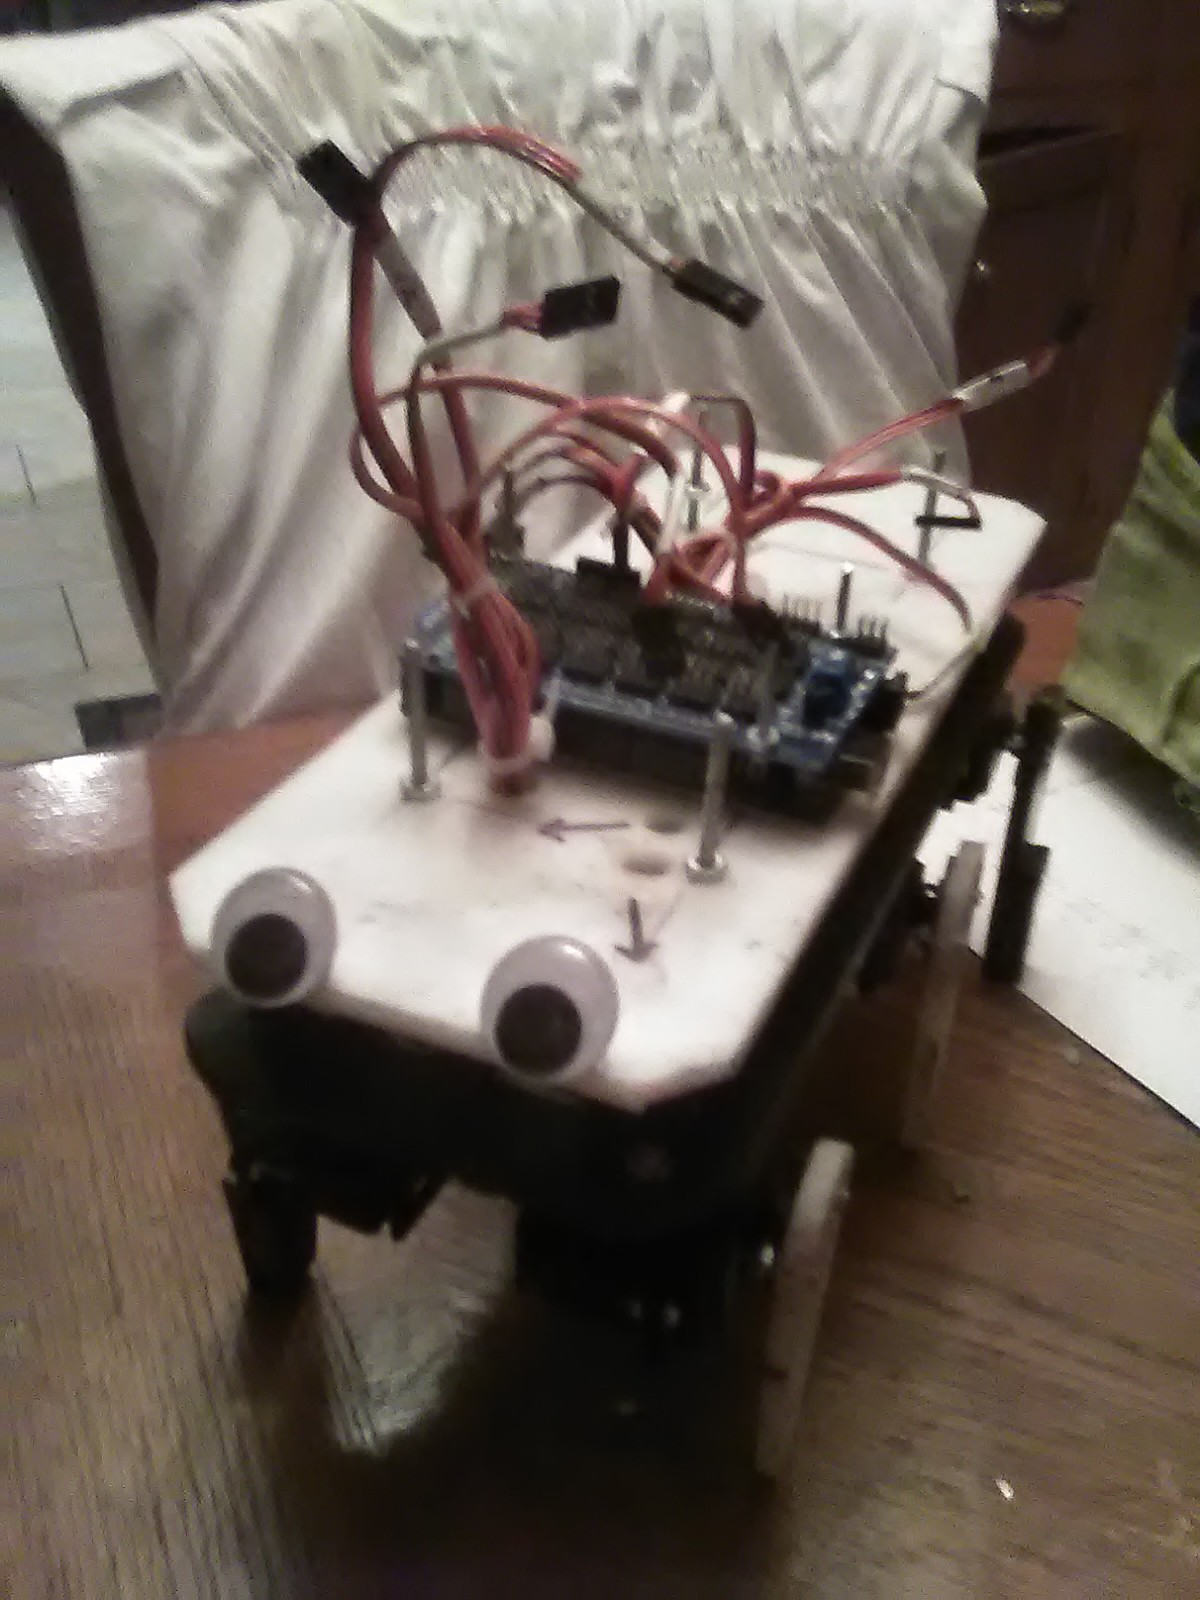
My Goals Are:

-To be able to move Autonomously

-To be co-controlled from the autonomous controls with an infrared remote

-To operate a lcd display and give updates on battery power, errors, and/or data from the autonomous componets

Zip Archive - 11.08 kB - 10/28/2016 at 11:16

Download

hex12bot-legs.png

The cutting diagram for the legs

Portable Network Graphics (PNG) - 23.18 kB - 10/14/2016 at 12:17

Preview
Download

hex12bot-base-layout.png

the cutting diagram for the base

Portable Network Graphics (PNG) - 10.81 kB - 10/14/2016 at 12:16

Preview
Download

  • 1 × Adafruit Adafruit 16-Channel 12-bit PWM/Servo Driver - I2C interface/ Arduino Mega https://www.adafruit.com/product/815
  • 1 × Arduino Uno (not needed if you went the mega route) I used a sparkfun redboard, but an uno is probably what you have laying around
  • 1 × POWER Connectors and Accessories / RF and Coaxial Connectors
  • 1 × 6 Volt Linear Voltage Regulator I got mine from mouser electronics, they're sold pretty much anywhere though, careful, they're static sensitive
  • 1 × 12 volt wall DC converter i was weight conscious, so i didn't want to have to use batteries

View all 15 components

  • Got it to walk!

    ActualDragon10/25/2018 at 23:49 0 comments

    I did this forever ago, and got it walking pretty sloppy, but walking nonetheless. After that, I accidentally deleted my code, had to rewrite it, then my arsonists shorted out and I haven't gotten around to ordering a new one. Sorry about the format of the video, it's from snapchat. 

  • Well, that took forever to upload

    ActualDragon05/12/2018 at 21:54 0 comments

    Next up is to copy that code for 3 legs, and reverse it for the other 3. (For the Tripod gait)

    CORRECTION: In the video, I had the jumper ON, but then it shorts out the computer (they have protection for that and you have to restart it). If the jumper is off I found, it works just fine with the computer, and allows you to use a battery.

  • Giving it a little Personality

    ActualDragon04/30/2018 at 15:24 0 comments

    So, it still hasn't been working. I'm not sure if I put this in the last log, but i'm ordering a new mega clone for a few reasons:

    1 - The problem is consistent with both shields, so that's not it

    2 - Having a few Megas around is never a bad thing. Especially if they're only like $10

    That being said, i posted my error code in the arduino forum, here: https://forum.arduino.cc/index.php?topic=541305.0;topicseen. That guy seemed to think it was a faulty download of the arduino ide, which would make sense because i can't upload to anything. This, however, is a problem. My mac is a 2009, so it's almost gone, and pretty much the only thing i can use. I'll have to get down to the makerspace one of these tuesdays. 

    After I saw noodlefeet (http://noodlefeet.zoness.com/, #NoodleFeet's Gripping Toes) I realized that one of the biggest pains in my ass was just that - a pain in my ass. So I decided to upgrade it and make the hatred go both ways. I added googly eyes and am going to give it a voice. With the DFplayer (around a buck on ebay) and some sound clips featuring bender, i'll have it play a random clip at random intervals. Still haven't decided what a "non annoying interval" would be. 

    - "Kill all humans!"

    - "Bite my shiny metal ass"

    - "Nothing a Lawsuit won't cure"

    - "Hello Peasants"

    - "Bodies are for Hookers and Fat people"

    - "Lets go get drunk!"

  • I won't be mad if you don't read this

    ActualDragon09/12/2017 at 23:47 0 comments

    Okay, so now there's something here, so please read this. I haven't posted in awhile, but i did a lot. I completely overhauled the electronics. instead of my custom shield, i bought one of these:

    It should work much better, especially with my new buck converter. I ordered the replacement servo, and I just found my battery charger too, so I'll work on the code soon. I will first get one leg down, then the rest will be easy. 

  • Stripboard

    ActualDragon03/10/2017 at 21:22 4 comments

    the stripboard connevtion for the servos to the mega

  • Just another update

    ActualDragon02/12/2017 at 02:12 1 comment

    i'm sure nobody cares anyways, so unless you're one of the judges for the sci fi contest, i honestly don't care if you read any farther. after seeing some of the other projects, i realized i don't stand a chance anyways, but who cares, right? it looks cool. a few notes-

    1. I haven't gotten my micro servo for the cannon yet

    2. the mesh in the front i am using to conceal a ultrasonic sensor

    3. the holes in the back are to loop the battery terminals to the top deck

    4. The holes in the side are for programing any my 9v for the mega

    5. the top will be taped or something, and will be connected to the turret via micro servo. i was going for accessibility there

    now that that's out of the way, here goes nothing

  • Legs Are On

    ActualDragon01/14/2017 at 19:30 0 comments

    I finished the legs, the two white ones are just because i ran out of black. For a while i was at a standstill because i couldn't find a screw small and long enough to fit through the small hole then reach to the other side of my plastic, then after two months wanted to kick myself- i drilled the horn's holes to take a 4-40. XD

  • Pictures

    ActualDragon01/11/2017 at 21:21 0 comments

    so, this was my first attempt, and I took off all the controls, so it looks like Swiss cheese, but you get the idea. I got bored, so I painted it. Also notice how the screws are bent? yeesh!

    Well, it started to bother me, so I cut a new one. The difference is amazing

  • Update

    ActualDragon12/06/2016 at 20:40 0 comments

    Hey, to all my 5 followers, if you even read these things, sorry i haven't logged anything in a while, i was working on my project for the science olympiad. Anyway, I was looking at Arduino Mega Clones, and Found one for like 15 dollars, so that's what i'm going for next. Also, I was thinking about my power from the wall wart, and if i'm going to make this thing autonomous, then i can't keep using that. I think i'm going to start using batteries.

    SainSmart MEGA 2560 Board for Arduino UNO Mega Nano DUE Robot R3 Duemilanove

  • Fritzing Diagram

    ActualDragon11/13/2016 at 22:37 0 comments

View all 12 project logs

  • 1
    Step 1

    cut out the chassis and legs. you can find the cutting guides in the files. Also, you can make your own XY servo joints for the legs or buy them I got mine from lynxmotion, but cutting files can be found at http://robotoid.com/printable-templates.html

    the ones I bought:


  • 2
    Step 2

    i didn't list all the hardware because there was a lot of it, you need to fasten the xy joints, then put a second deck on it for electronics. i used a sheet of polycarbonate. but it sucks to cut. then, of course, you need the legs onto the bottom of the xy joints.

  • 3
    Step 3

    Now for the electronics- the servos require 6 volts, so I used a linear voltage regulator (https://en.wikipedia.org/wiki/Linear_regulator) to keep it at 6 volts. careful, they are static sensitive! I blew two before i got it. use "dummy" parts until the circuit is properly grounded. The problem is that if it IS damaged, then there is no visible signs. It won't blow up or anything. Before you plug in the servos, ALWAYS CHECK THE OUTPUT VOLTAGE with a multimeter. The arduino needs a separate supply (same supply for me, i'm using a wall wart) so i just split it at the beginning.

    Image result for linear voltage regulator circuit basic

View all 5 instructions

Enjoy this project?

Share

Discussions

davedarko wrote 11/17/2017 at 08:03 point

I remember a tv thing where they said that the military would use simple/cheap robots to walk over fields to find mines. But they often use even simpler designs with one motor and just let it run - also a successful robot means a destroyed robot. So this might be useless information.

  Are you sure? yes | no

ActualDragon wrote 11/17/2017 at 15:18 point

yeah, i think a one motor cheapo would be cool with plastik strapped to it, remote detonator, the works. hmu with some and i'll make one. I don't want the feds showing up

  Are you sure? yes | no

janvb wrote 01/30/2017 at 22:51 point

Does it exist any video of this design actually walking?

  Are you sure? yes | no

ActualDragon wrote 01/31/2017 at 14:01 point

not yet, i still need to connect the servos to the mega, and, wait! that's about it! wow i thought i was farther than that. i'll probably pick up some stripboard and do that soon. how about yours?

Edit: i forgot, but i also need a replacement motor. mine are cheap, but strong like 150 oz/in i think. anyways, there's problems whenever i try to order another one

  Are you sure? yes | no

deʃhipu wrote 10/17/2016 at 09:53 point

Have you considered going for 3dof legs, or 2dof legs in mammalian configuration? That way you could make the robot actually walk instead of crawling, without having to rely on the friction of the floor. It also gives you a little bit more interesting options for how to move the legs, in addition to the primitive hard-coded sequence of movements.

  Are you sure? yes | no

Similar Projects

Does this project spark your interest?

Become a member to follow this project and never miss any updates