 Daniel Domínguez
I never intended on entering this contest because I like to keep to myself. But after reflecting on the new year I thought it might be interesting and worthwhile to contribute a project that had a deeper perspective than electronics and things.
I looked around in my parts bin and my shed and thought I might make something personal. Not too personal though, I wanted the subject of my entry to ultimately be bigger than myself. I wanted to try something different and unexpected.
So with a five gallon bucket full of junk, I laid it all out on my desk and began to think. 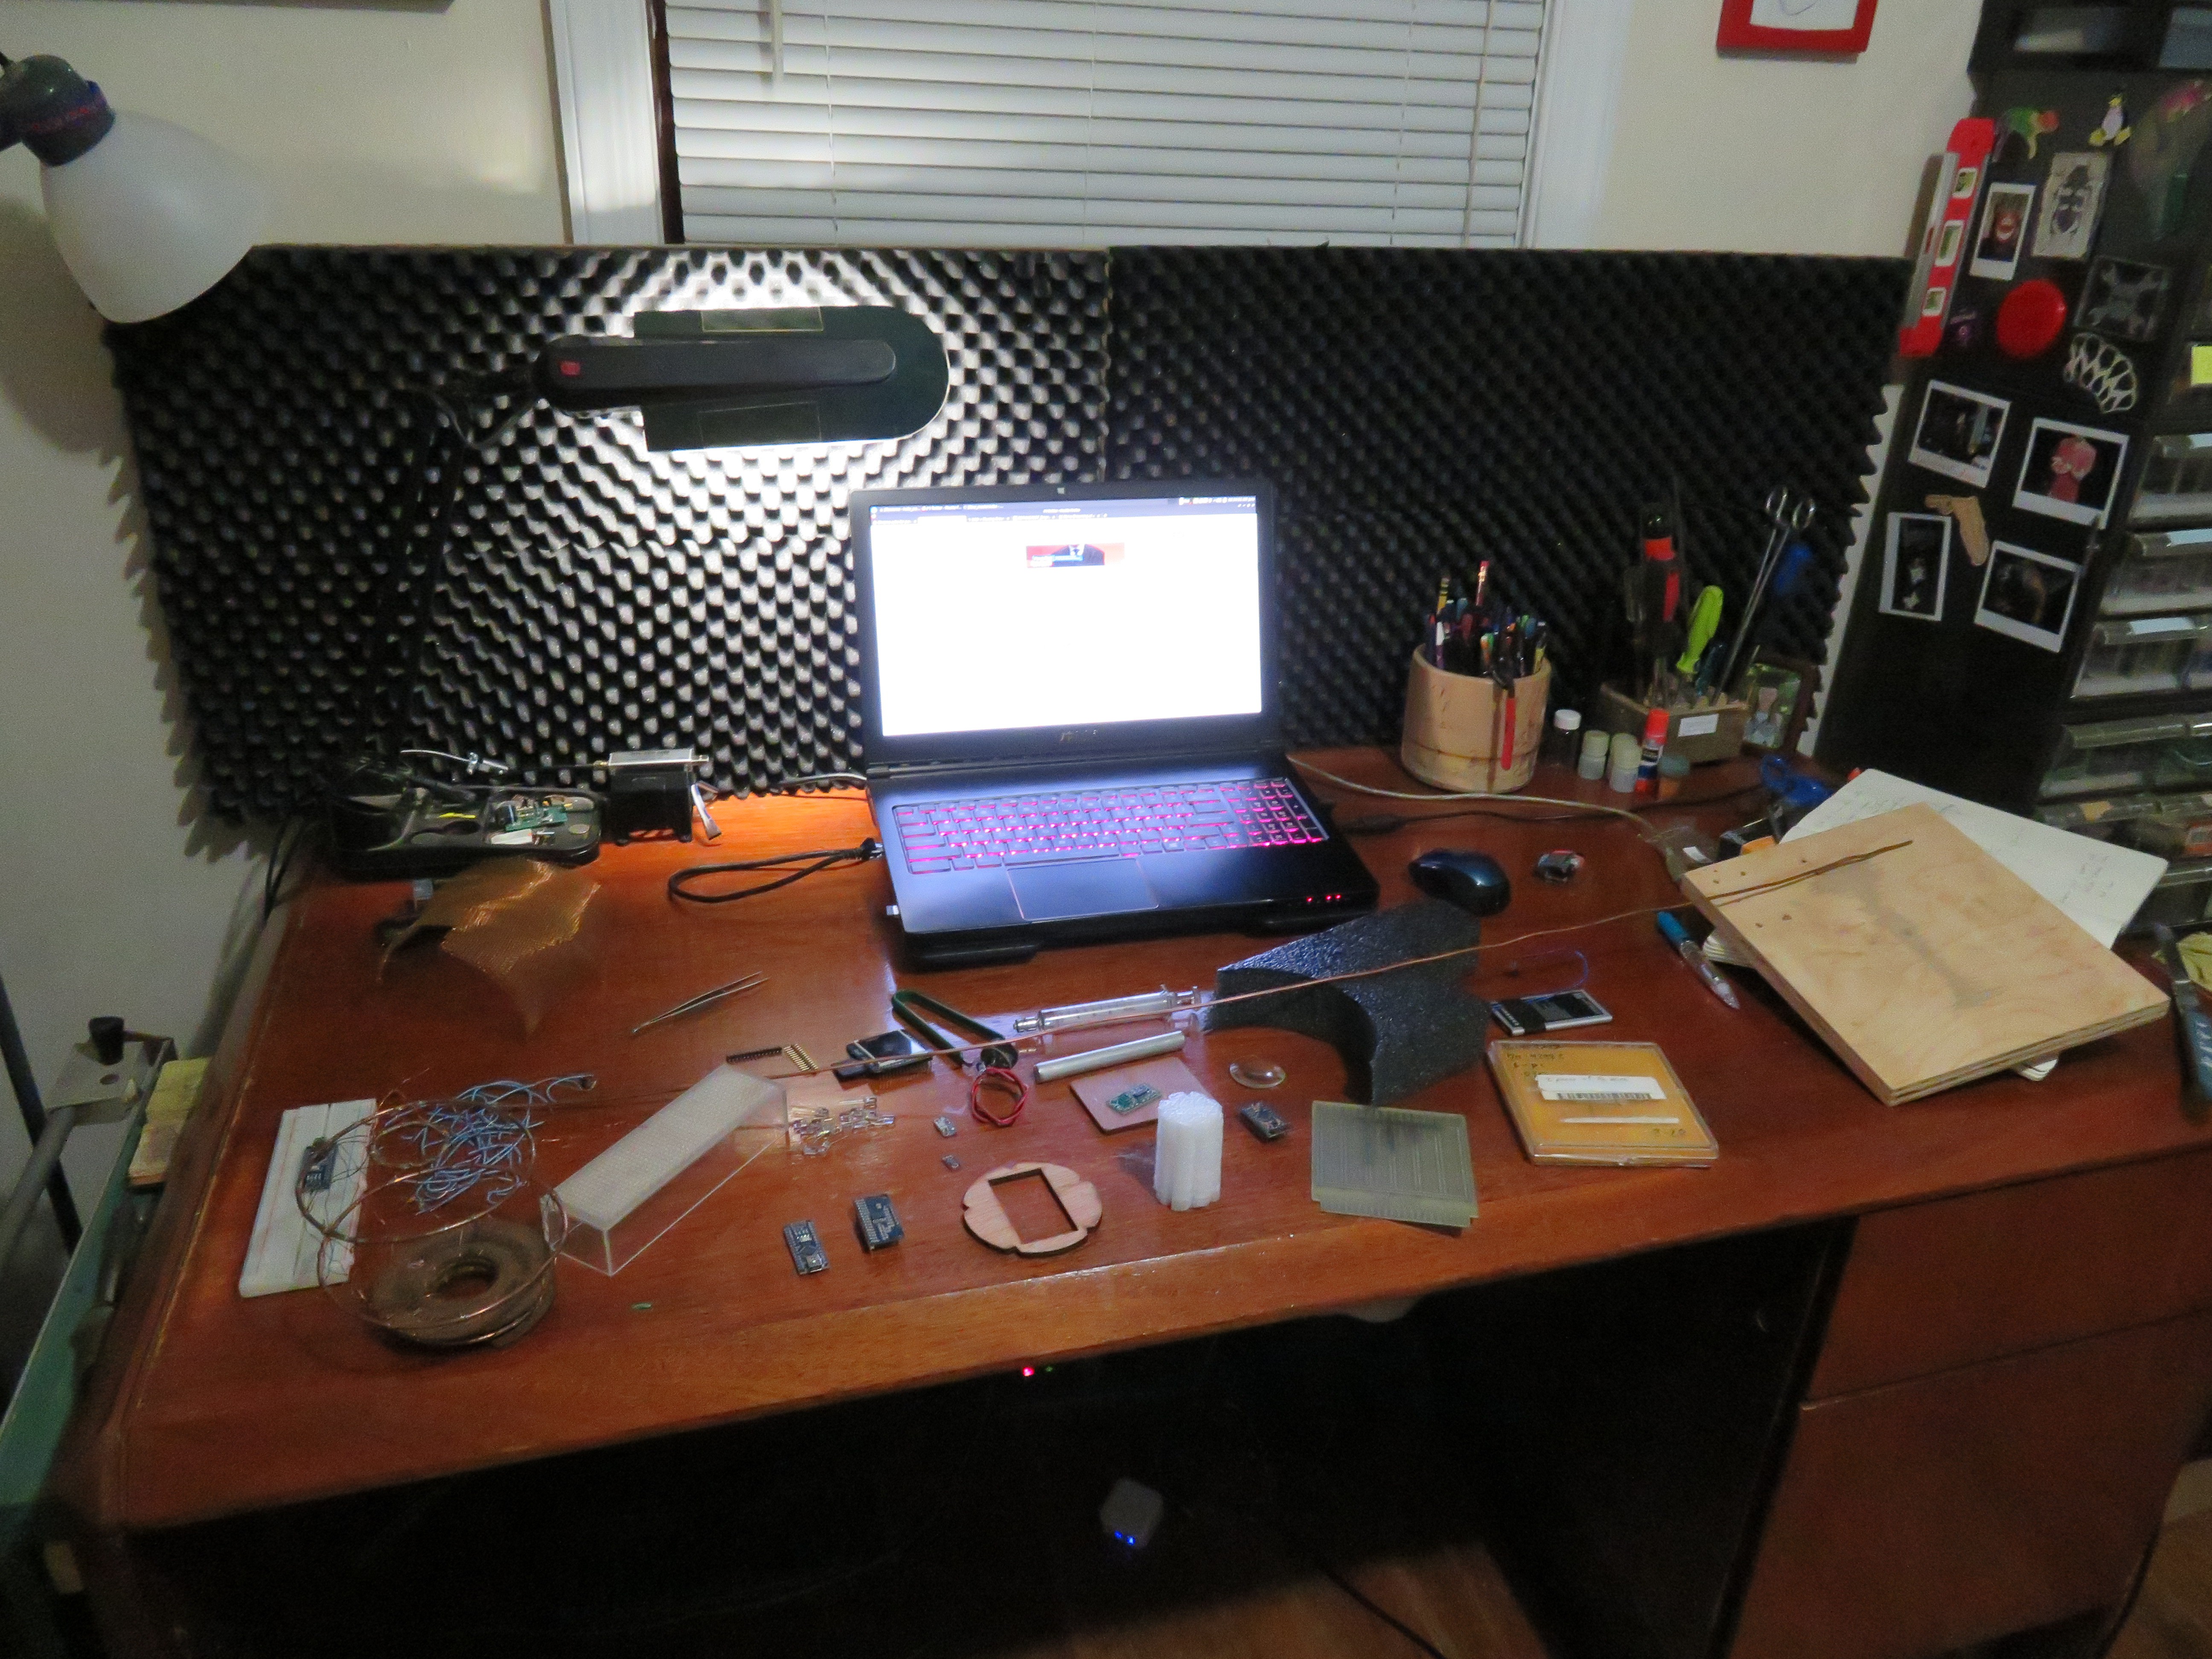
I drew a few sketches of free floating boards and lights and eventually came up with a plan for a self portrait of sorts, It was hard making decisions with nothing to go on in the beginning, but part of my creative process is to let the pieces build themselves as they aggregate.

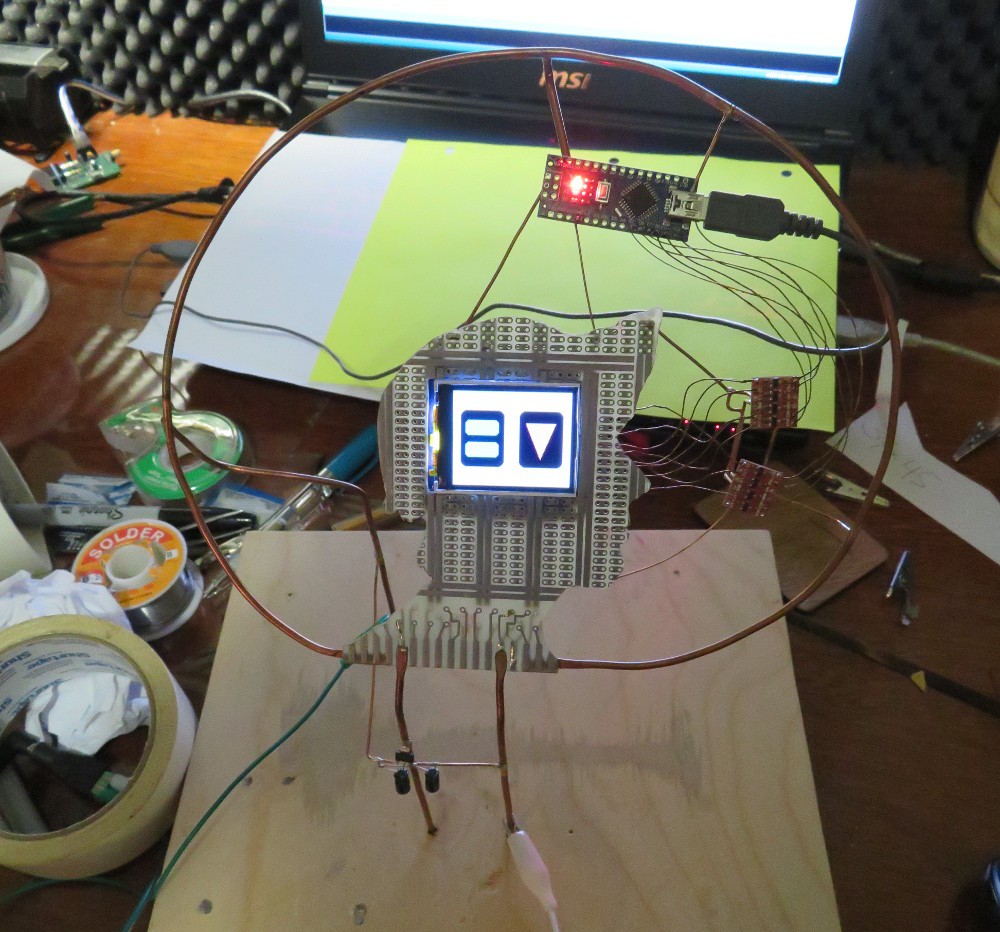
I began the sculpture by taking a picture of my profile and used GIMP to make it a black and white silhouette which I glued onto a (very old) piece of circuit board that I dug out of the dump at my local university.

After I epoxied in the display I began building the support structure for the PCB. The support wires were carefully arranged to also be the power rails for the circuitry. The copper wire that I used was heavy stuff from the dumpster that I had been saving for some time. It was difficult to work with as the really heavy gauge wire does not solder without substantial heat, and as many of us know, substantial heat has a tendency to tear traces from a PCB.
I was very careful and finally able to install the thick copper wire with only a superficial trace tear. I took the whole thing and epoxied it into a block of plywood that I had saved from a previous salvage project. This left me with a sufficiently stable structure on which to mount the circuitry and move forward.
 The way that I mounted the LCD necessitated the location of the logic level shifters as they needed to be close to the SPI connections. I next installed a voltage regulator for 3.3v and the Arduino Nano clone to power rails. At this point I felt I needed to hook up the display and make certain that it was still working after all the handling and stress, -but I didn't want to use bare wire for connections. Because the circuitry is free form, if any wires were to cross the result could be catastrophic and conjure the magical smoke that we have all love so dearly.
I thought to use magnet wire for this case because it is insulated with enamel but still metal in appearance, yet I had no magnet wire on hand and I wasn't about to violate the spirit of the project (or my wallet) by running out and purchasing any. My solution was the typical one, wake up in the early morning (on January 1st) and look for some in the trash.
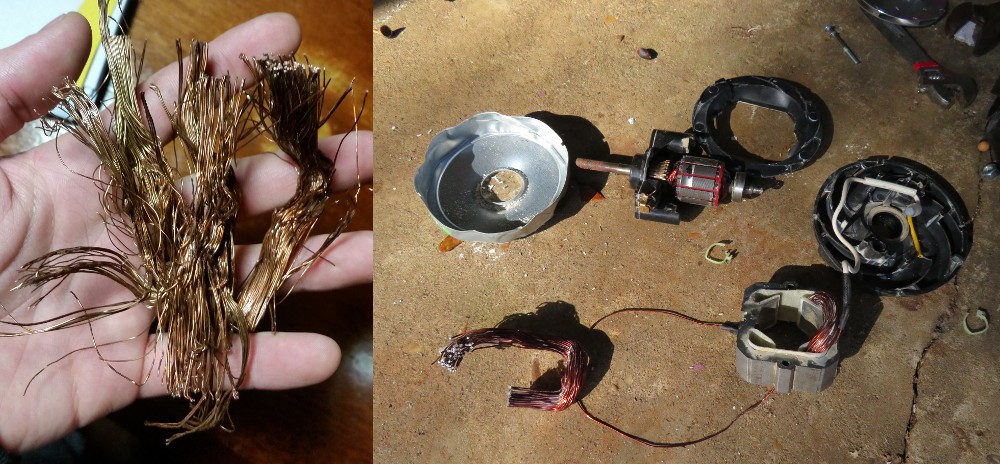
I drove around for about an hour and was able to find an old vacuum and ceiling fan discarded on the side of the road.
With some hand tools and my dremel I was able to liberate a good amount of magnet wire from these trash motors and was on my way to making bus connections to test the LCD.
Now, soldering magnet wire is not easy without the proper equipment. I remember many years ago at Ham Fest, an older man demonstrating his magnificent hot tip magnet wire enamel stripping gear to a wide-eyed younger version of myself. How I wish I had something like that laying around. But I'm not a ham guy, heck- I'm not even a true engineer, so I don't have anything that specialized laying around. I do have some good ole fashioned 150 grit sand paper, and I used that to PAINSTAKINGLY sand down the tips of each and every connection I needed.
Much to my enjoyment the display fired up correctly the first time I applied power. The magic smoke gods shuddered.
Next I assembled the rest of the components into the wire frame to fill out the empty space and get a better idea of the circuit layout before I began to lay more magnet wire.
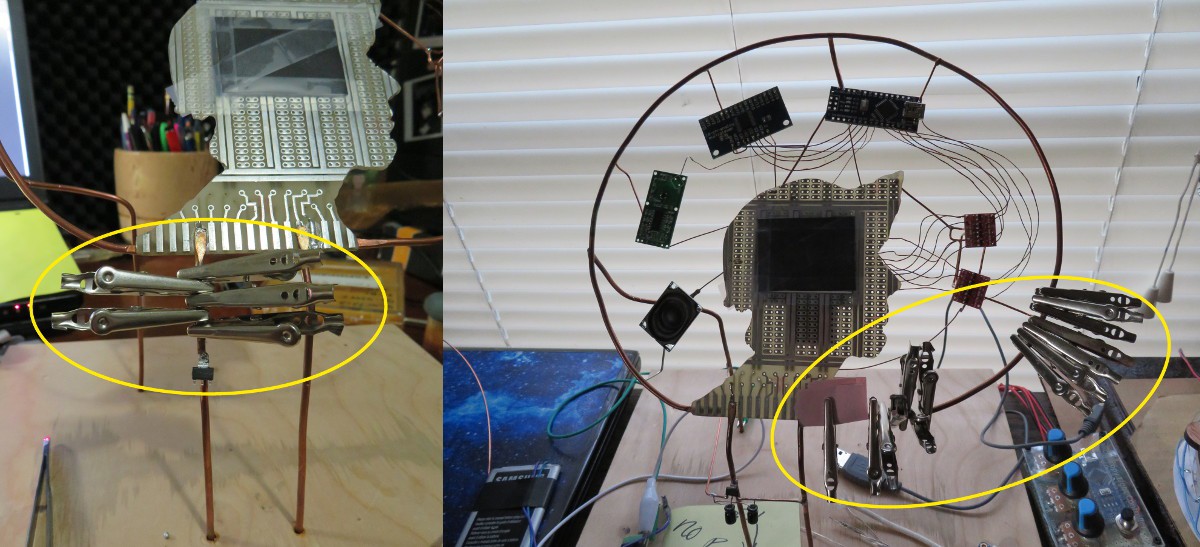
This part was exceedingly difficult because those heavy copper supports are unforgiving under heat. I had to use my blow torch and soldering iron to make most of the major connections. To prevent heat from unsoldering the work I had already done, I used a bunch of alligator clips as heat sinks to wick away heat from sensitive connections. This looked odd, but worked better than expected and saved me from self defeating work.
 The next step was to hook up the main components to the microcontroller and test them. My heart was pounding every time I hooked up power. I'm a careful guy, but I still make mistakes, and a single mistake on this thing would have been all she wrote. One of the cool details about this sculpture is that not all the support wire is copper. I had very limited solid core copper wire resources, but I happened to have two lustrous and sturdy platinum electrodes (from the dumpster) which were included to help mount the speaker and multiplexer. I imagine chemist round the world cringing at that very notion.
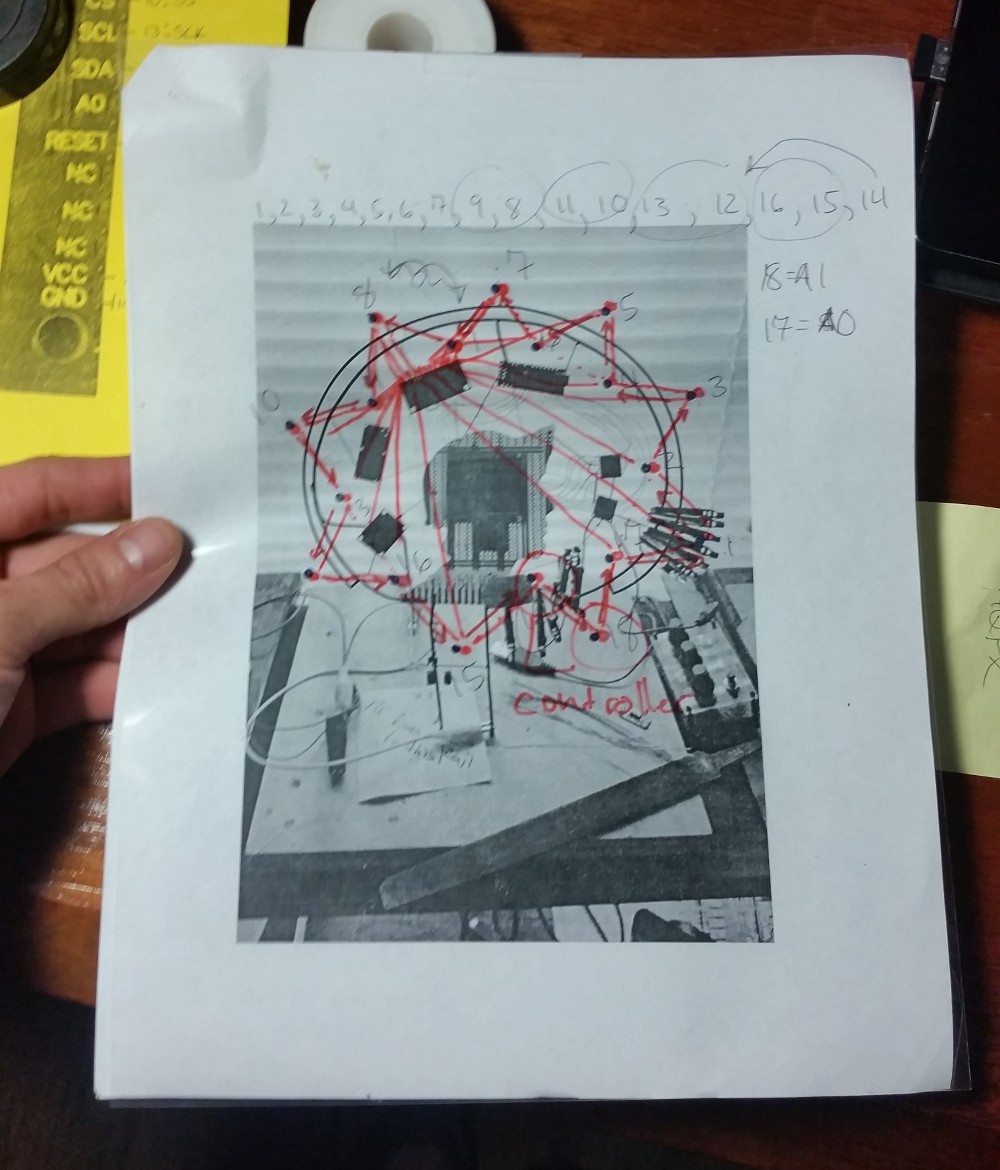
At this point the sculpture was looking near complete but lacked the final critical components, 18 white LEDs. I debated on what LEDs to use and on how to connect them. I ended up planning the LED locations on paper first and installed the necessary hardware to support them.
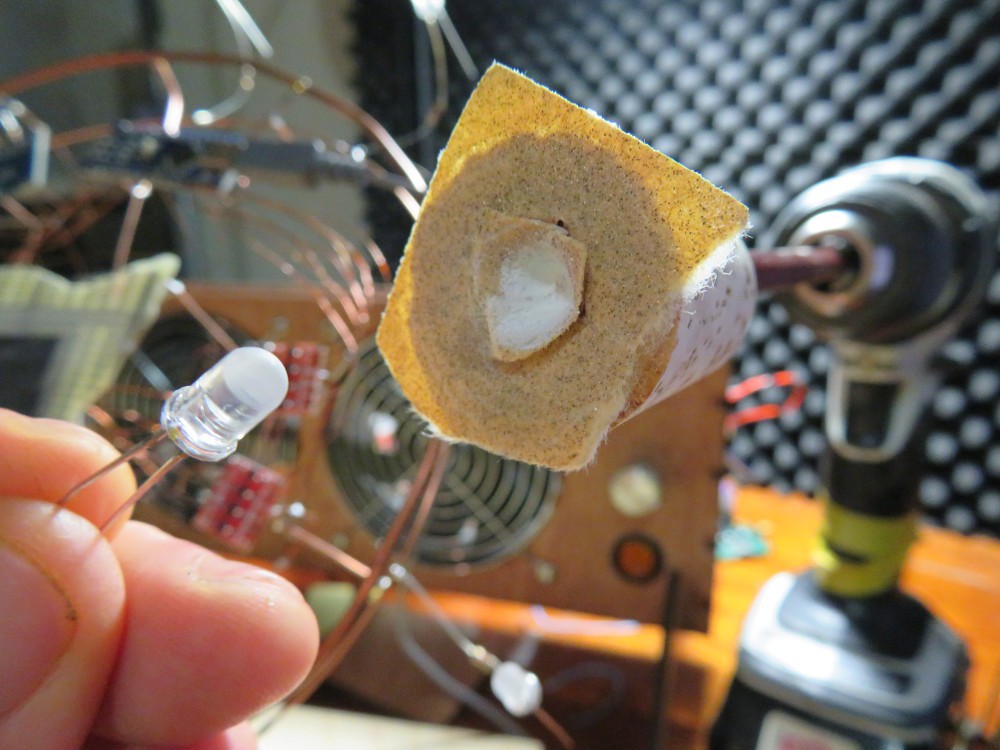
My LEDs are crystal clear and I found this to be a problem as they can be very bright and harsh on the eyes. I resolved to diffuse them with sand paper. To do this I made a sanding bit from a pencil and old cork to which I epoxied some of the aforementioned 150 grit sand paper.
18 LEDs soldered to 18 1K Ohm resistors were soldered into position. What followed was a finger numbing sanding experience in which I sanded the enamel off the tips of some 30 pieces of magnet wire to connect the LEDs to the muxer and microcontroller. I ran a final test, everything fired up and the hardware was finished. People the world over cheered my success and perseverance, at least I imagined they did. It was time to code, and code I was born to do.
I set my sight on the LEDs first. I never made a POV, but 2019 belonged to me and so I began mapping the LEDs, made arrays, and dropped C++ functions like they were hot coals. After I accomplished a sufficient (but never complete) number of LED animations I moved on to my next great love, music.
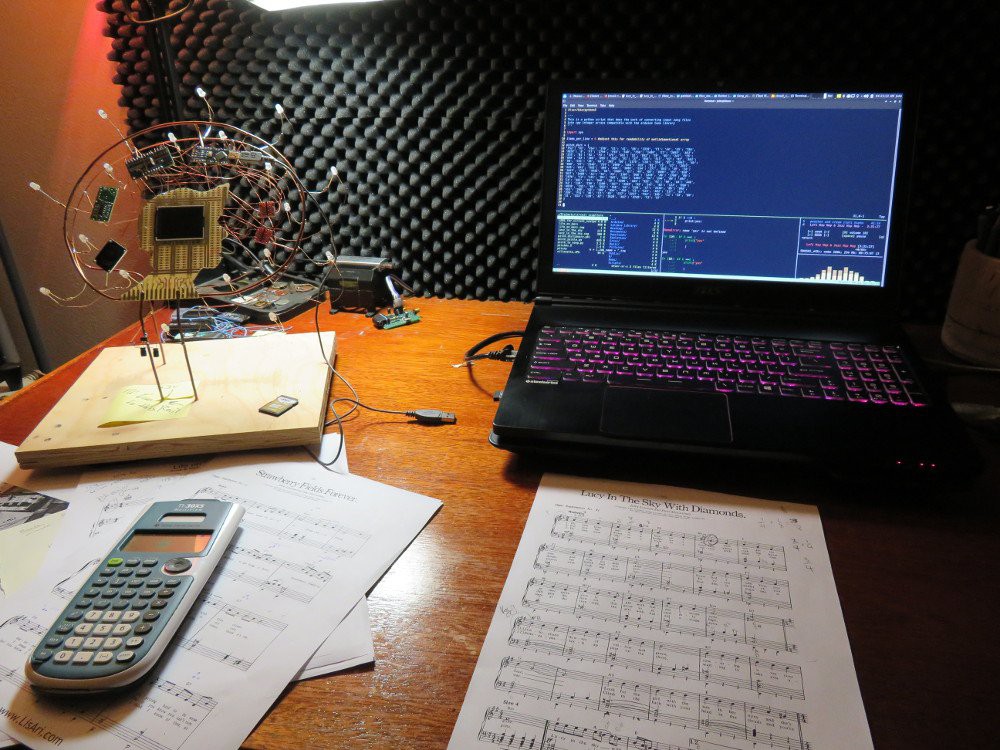
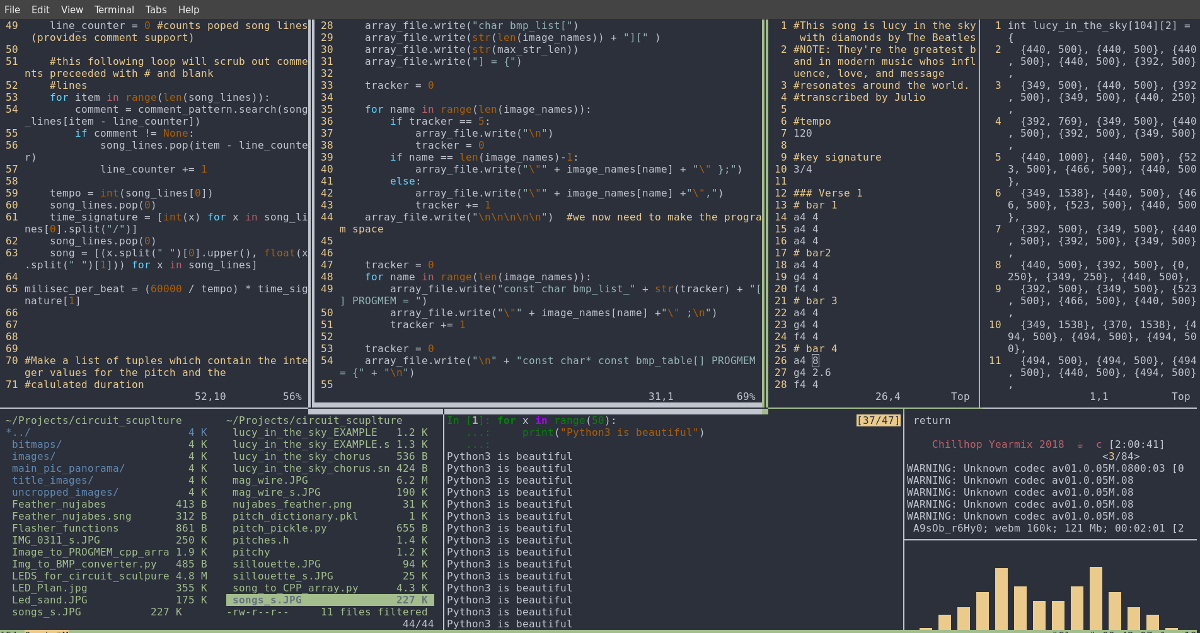
Making this sculpture sing was labor intensive. I intended to use the Arduino Tone library to make squarewave tones but needed a better way to arrange them other than trial and error. This got me firing up the Julio Termux IDE and writing python3. I wrote a script that could interpret a time signature, a tempo, pitches and note timings. The song files that the script accepted were horrendous to look at and navigate. So I did what Ken Thompson would do and added a regular expression to allow for comments and blank lines which greatly increased readability.
With my script complete I turned my sights on sheet music and began transcribing tunes by hand. I turned David Bowie, Nujabes, Rage Against The Machine, and The Beatles into text files and crunched them into multidimensional arrays.
Finally I had to add images on the LCD. For me this is the most important component of this art piece. I recognize that who I am is the sum of the people and ideas that nurture me. I set sail into the internet and began to assemble portraits of people that make a difference to me. Philosophers, Stephen Fry, Cory Doctorow, Martin Luther King Jr., Adolf Hilter*, Amy Goodman, my friends, and the people in my family that love me. I collected about 50 portraits all seemingly contradictory and disconnected.

To get them in the Arduino I went back to Vim and began the python process again. I wrote one script to convert all the portrait images I collected into the proper bitmap format and orientation. Because SRAM is precious on a microcontroller I wrote a second script that gobbled up the image names and spit out the long PROGMEM and char pointer arrays.
It's funny how exhaustion always sets in right before completion. However, ceasing at this point was unacceptable and the deadline for the circuit sculpture contest was fast approaching. I spent a lot of time working into the early morning consolidating all the code parts into one cohesive program. I smashed bugs until enough were driven out and then I sat back and admired my portrait. It was more than I had hoped for.
I epoxied on an old keyed transmission switch and the rest is history.
You see, this portrait is more than a thing. It is a piece of me grappling with the world and those that make it the unusual, frightful, and spectacular place that it is. Beyond Hackaday and circuit things, beyond the impulse to consume, I am a human being. I am Julio and I know where I come from.
You can see a video of this project below. Thank you for reading and remember to always be as excellent as you can to your fellow human beings. However small you feel you impact peoples lives and the world they are a part of. Use your understanding to make it a better place. Yours, -Julio