 Kelly Heaton
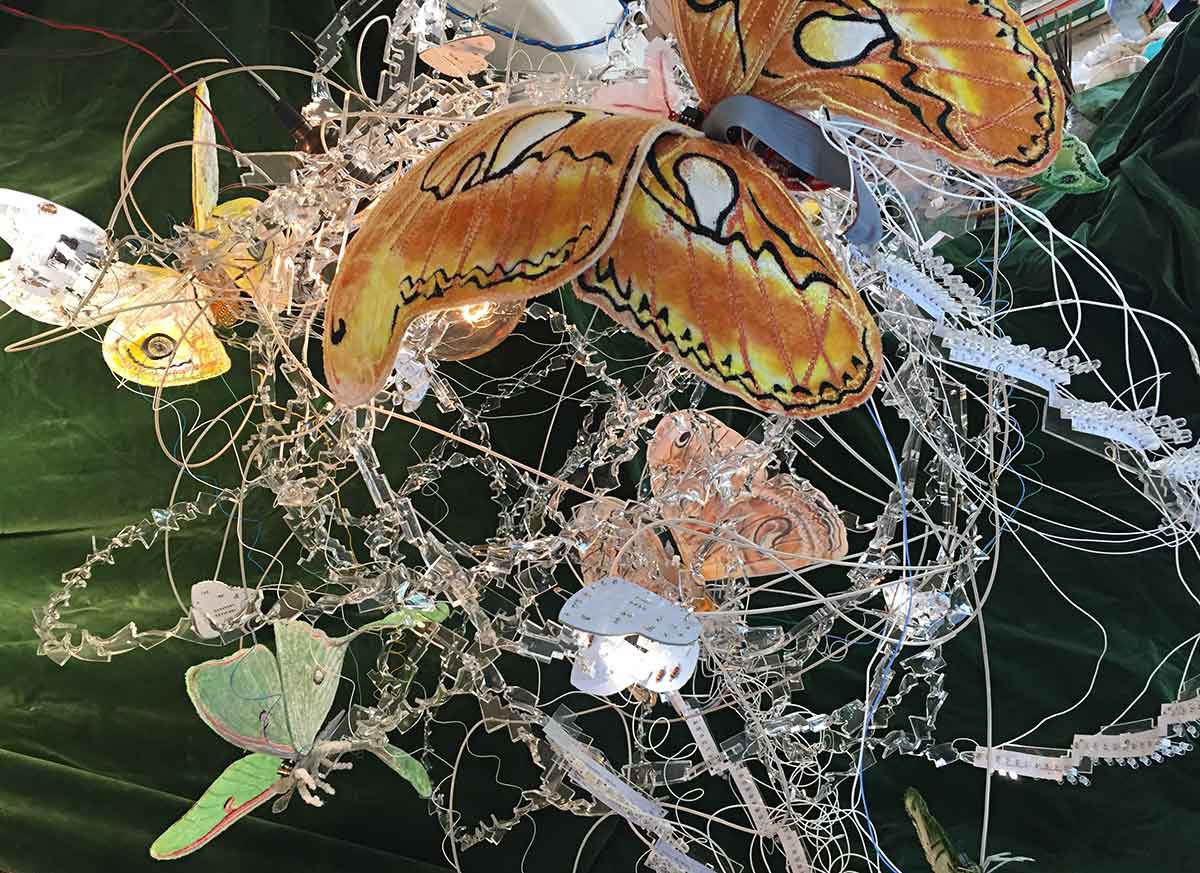
About a year ago, I created a sculpture titled "Moth Electrolier" (2018) in which I used animated LEDs to represent the trails of moths flying around a bulb at night. Here's a video on Vimeo:
This post is about the design of a bus to drive trails of individually addressable LEDs using only hardware (discrete components, no software).
In artistic words, I made moth trails in the form of animated light.
First, some background info...
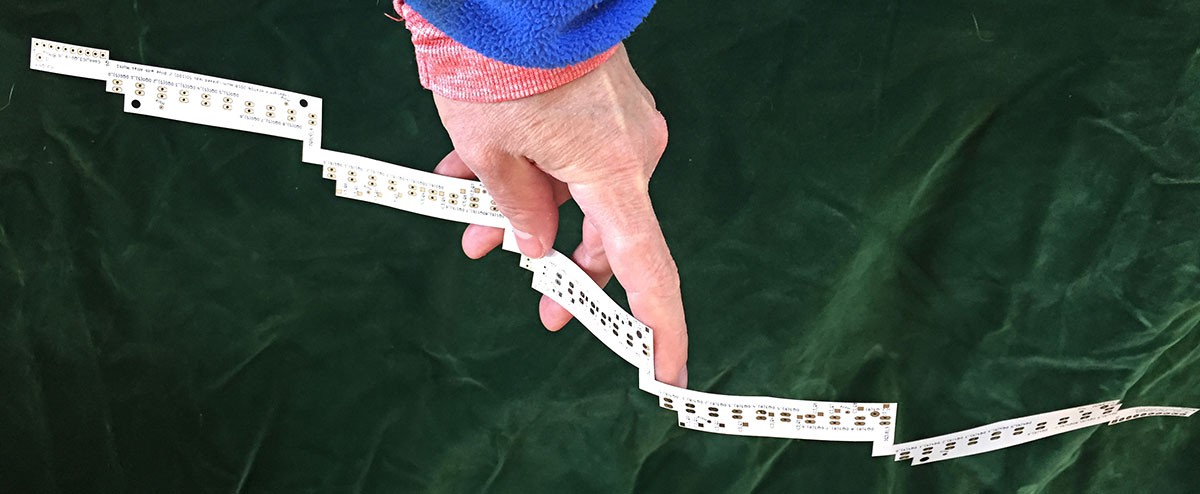
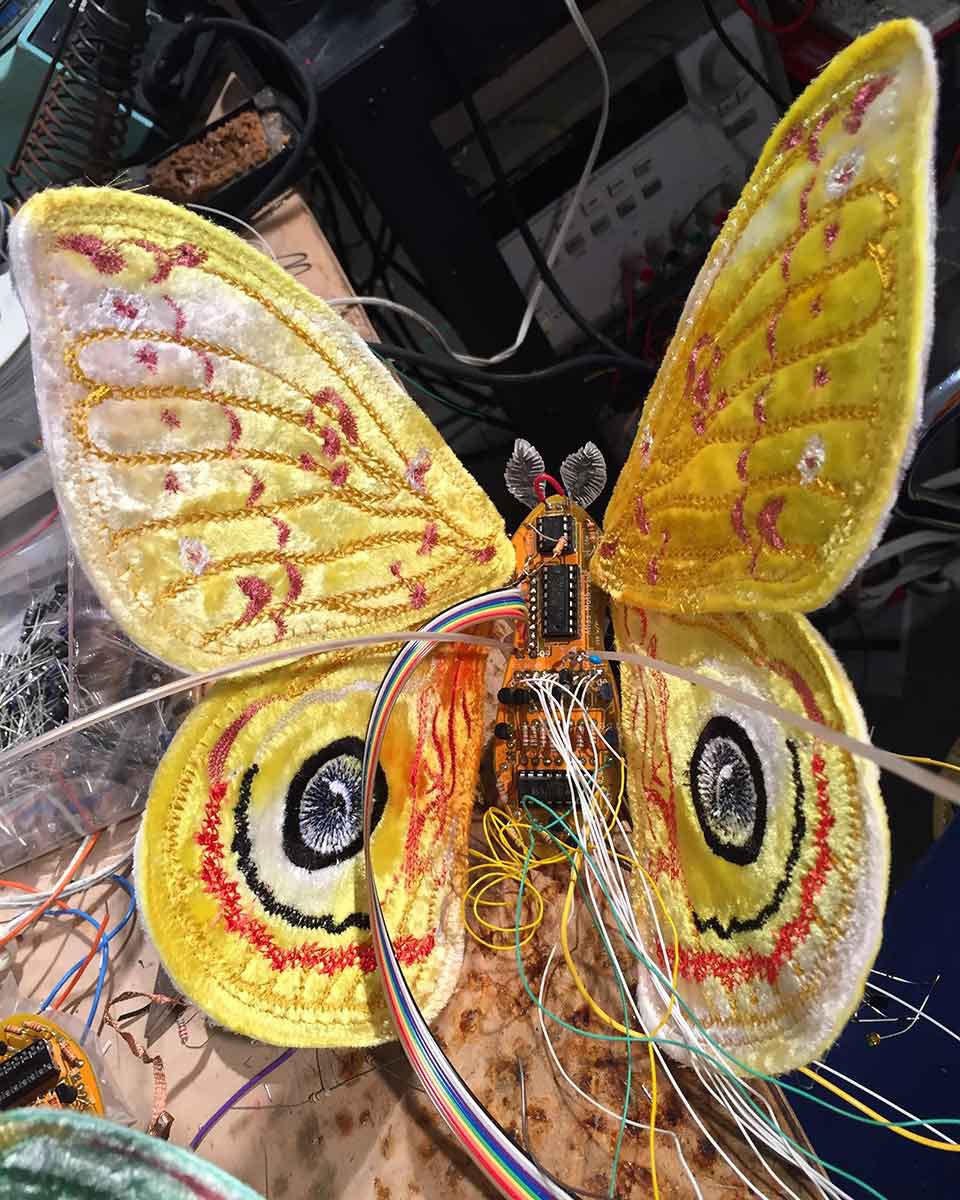
For my sculpture "Moth Electrolier (2018)," I made my own flexible circuit boards to animate 50 LEDs using 4017 chips and some astable multivibrators. My custom LED controller boards (not detailed in this post) double as sculptural bodies for the large moths with embroidered wings. As seen in the aforementioned video, each large moth acts as a controller for the long white trail of LEDs that spills out of its backside.
If you want to make your own LED controller from discrete parts, search for the iconic "Knight Rider circuit" and go from there. If you want to CNC embroider your own moth wings, you can read about my process here.
Even with flexible PCBs, my 2018 "Moth Electrolier" still needed extra hook-up wires to drive the LEDs because I couldn't elegantly fit all of the necessary traces on two sides of the board (and more layers are $$$). Because I soldered the flexible circuit boards end-to-end, each controller is trailing 100 LEDs plus a minimum of ten wires... and sometimes more wires to solve whatever unexpected real-world problems I encountered. The resulting chaos looks crazy-cool (like crazy flying moths) so I was fine with that.
The design for an individually addressable bus of LEDs is not new, and you can buy an off-the-shelf solution from any number of manufacturers. However, I wanted control over my own LED bus design for several reasons:
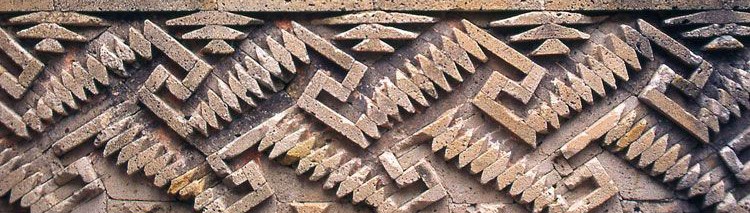
(1) AESTHETICS. In my case, I was inspired by a design that I saw at the magnificent ruins of Mitla in the state of Oaxaca, Mexico;
(2) HUMAN SCALE. It drives me crazy that so many manufacturers insist on teensy surface mount components. I know that miniaturization is useful for a lot of applications, but as an artist who makes things by hand, I want parts that I can see and touch -- especially now that I wear reading glasses. I love big, chunky, sculptural electronic components. 5mm through-hole LEDs lend a sculptural dimension to my moth trails that would not happen with surface-mount parts;
(3) POSTERITY. I used 2-pin headers for the LEDs so I can easily replace them when they burn out. If my sculpture is purchased by a collector who keeps it blinking 12 hours a day every day, the LEDs will die in about a decade. That's not a long time where art is concerned. Can you imagine replacing several hundred of surface-mount LEDs in a delicate sculpture like this? Yikes.
So... while my flexible circuit boards used for "Moth Electrolier (2018)" are functional, I made one annoying mistake from an engineering perspective. As previously mentioned, I was inspired by these awesome rectilinear designs at Mitla:
That's all well and good, but I should have placed a small curvature at every corner where my flexible circuit board experiences physical strain:
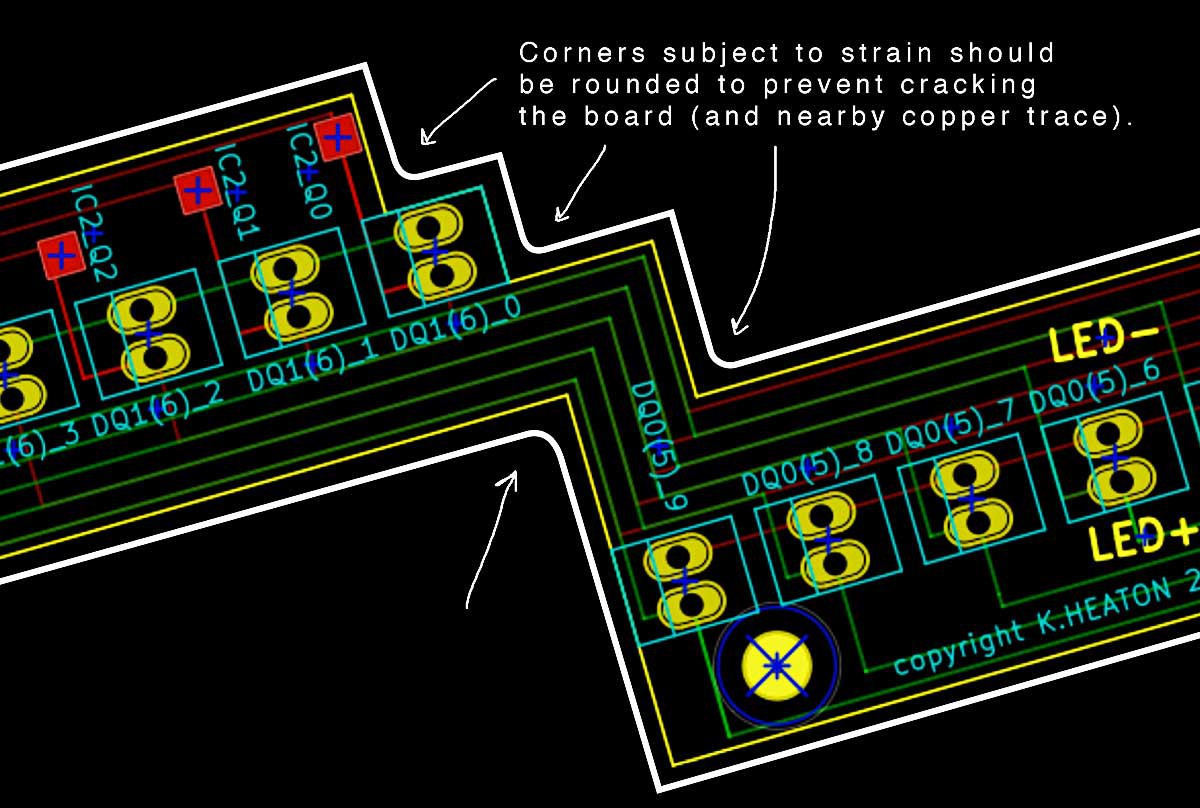
I hope that you will avoid this mistake in your designs. Flexible PCBs move. Expect mechanical strain. I managed to stabilize my boards with a tiny dab of glue on both sides.
... and that leads me to my current design and contest submission....
At first, I considered submitting a redesign to Hackaday's Flexible PCBs competition, but the contest reward is limited to a board size of 2 square inches or less and my original board design is 17.5 inches long -- a PCB behemoth. Luckily, constraints are often the mother of invention. I'm still ballooning outside of 2 square inches, but at least the Hackaday contest constraint got me thinking.
Here's a screenshot of my latest approach to a moth bus PCB, which measures 1.75 x 4 inches. Yes, I could make it smaller but then the moth wings would be so tiny and sad! No.
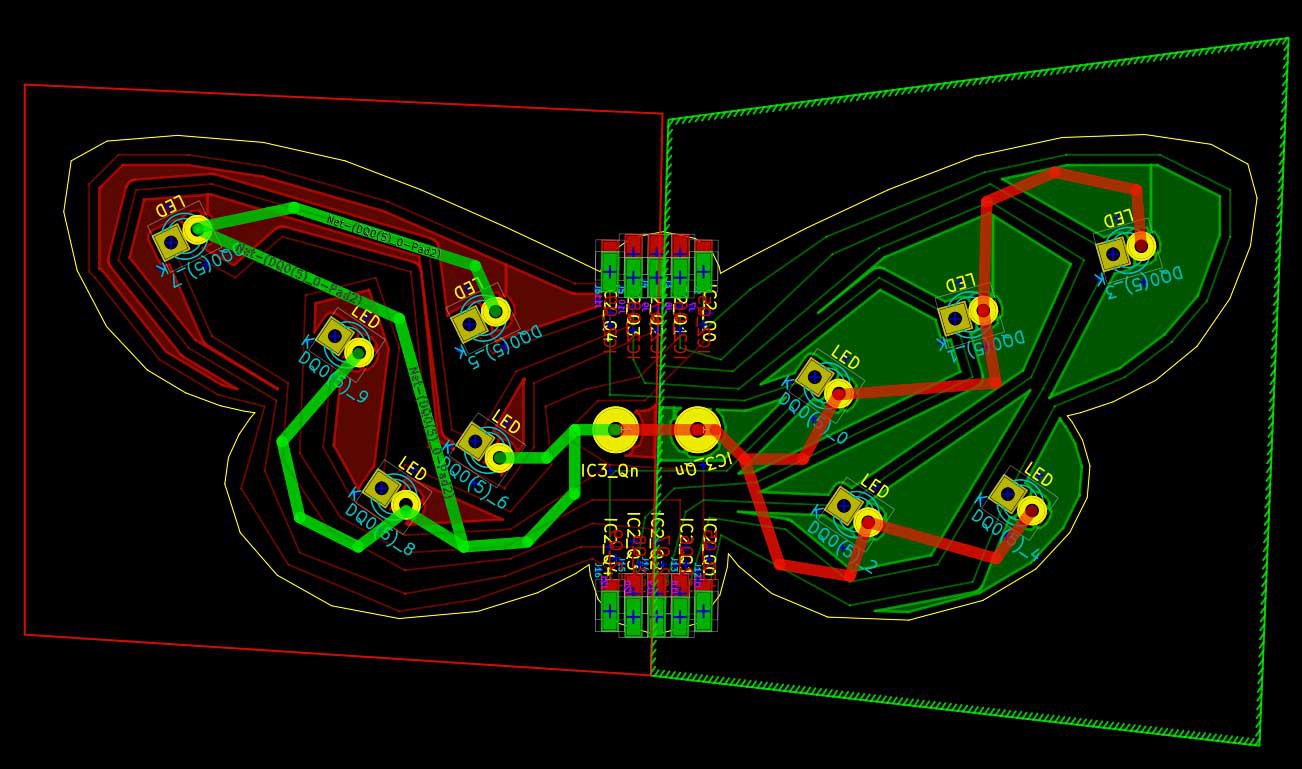
(My apologies for the KiCad fill zones borders being visible in this screenshot.)
My new design is a single "moth bus" unit for addressing up to 10 LEDs with an external controller. My board features solder pads on the moth's head and tail enabling these units to be daisy-chained for as long as desired, or until the resistance of the copper gets too high.
For the literal-minded among you: this board is a single unit for addressing 10 LEDs via an external controller. For a longer bus / more LEDs, solder these units end-to-end.
For the artistic among you: yes, you can make almost any circuit board into a cool shape.
If you're very observant, you might be wondering why I placed two pads called "IC3_Qn" for connecting only one extra wire. It's because I plan to use these holes to physically position the moth's wings. I've spaced them a little further apart in designs that are slightly more recent than the one pictured here in order to give myself a more mechanical leverage.
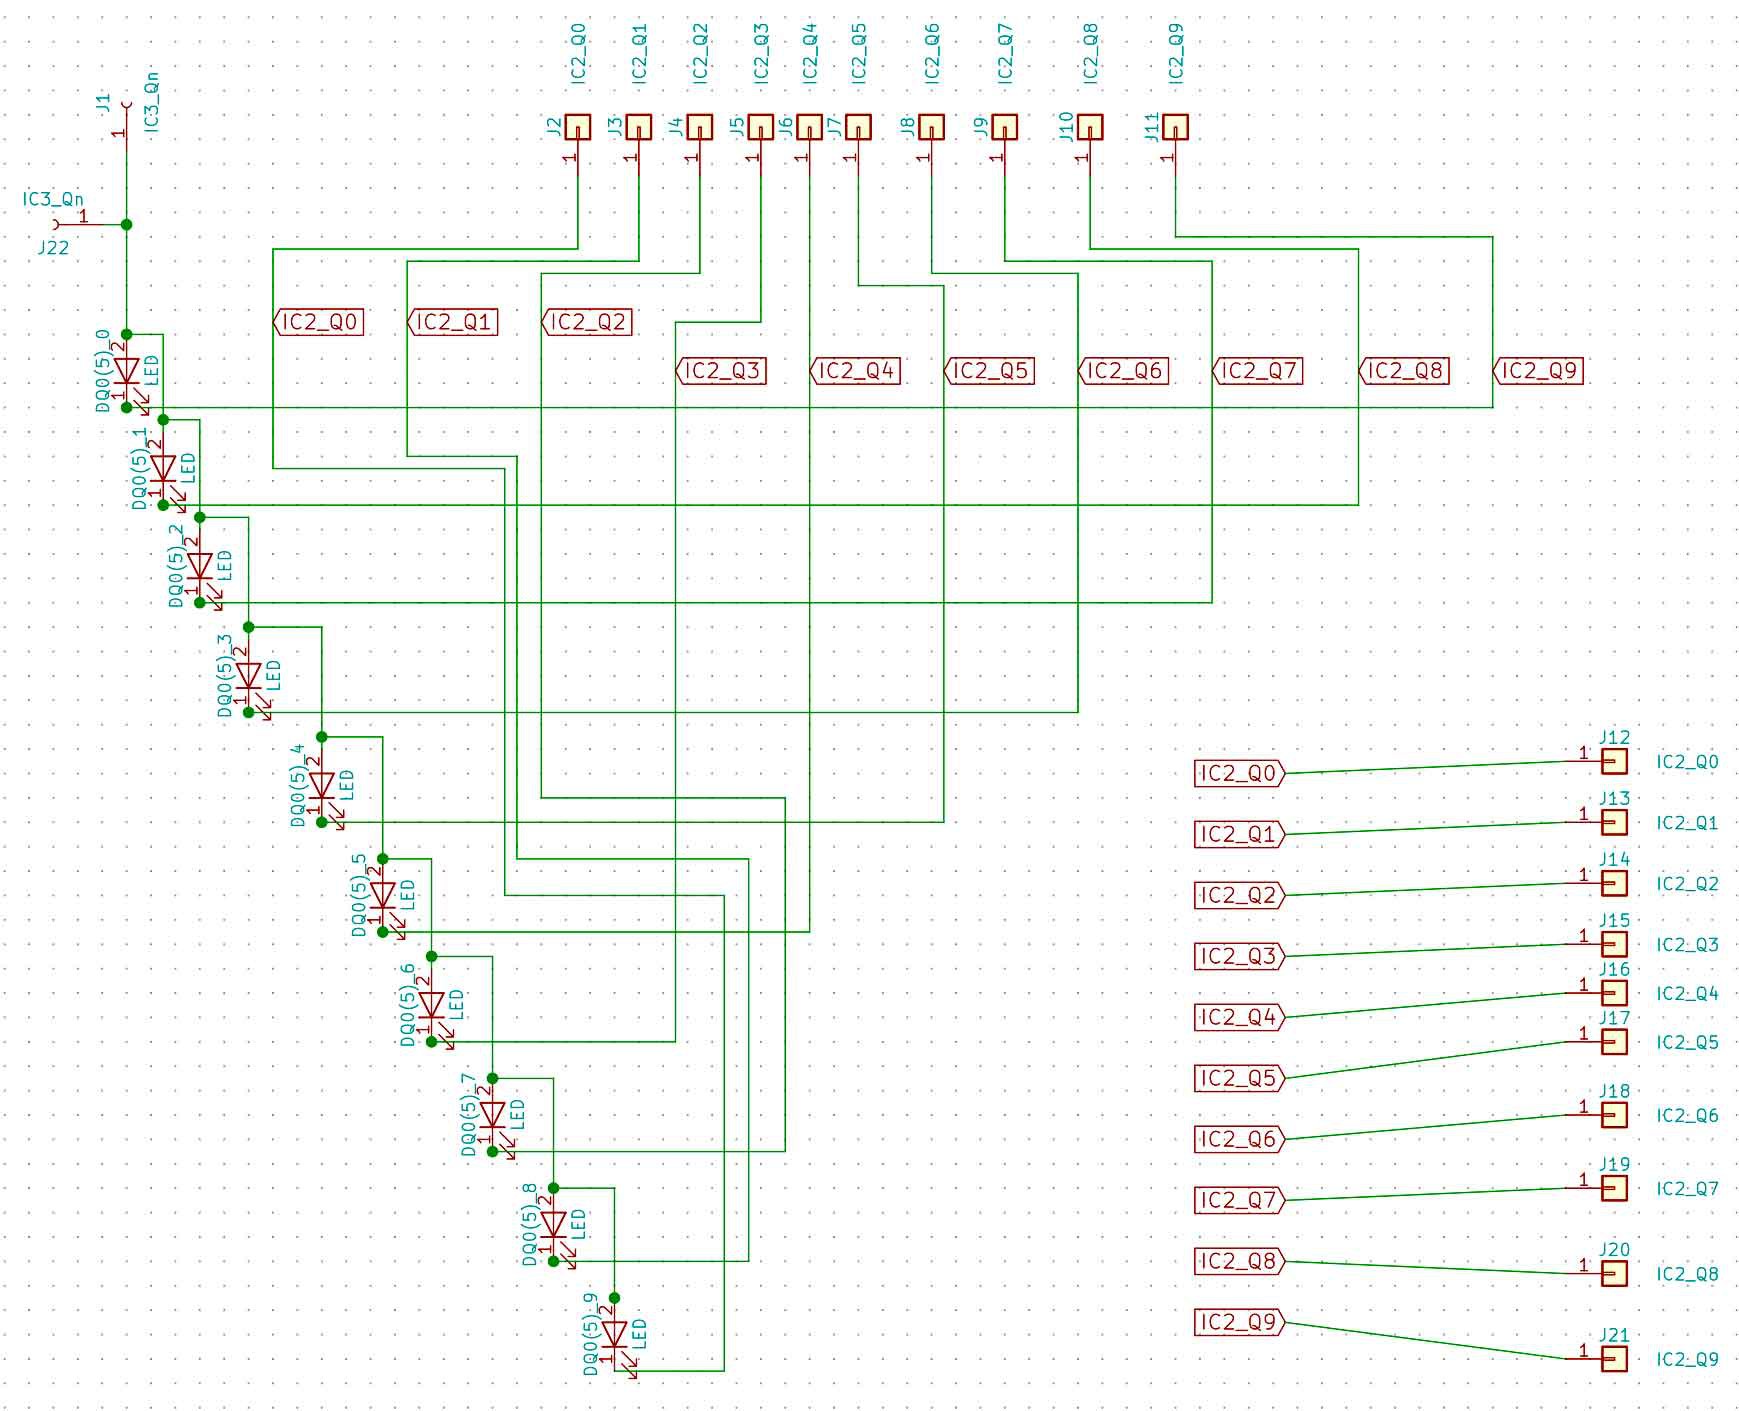
Here's my quick-and-dirty moth bus schematic:
Here's a photo of a scale paper mock-up that illustrates how my moth bus will look when four units are soldered together:
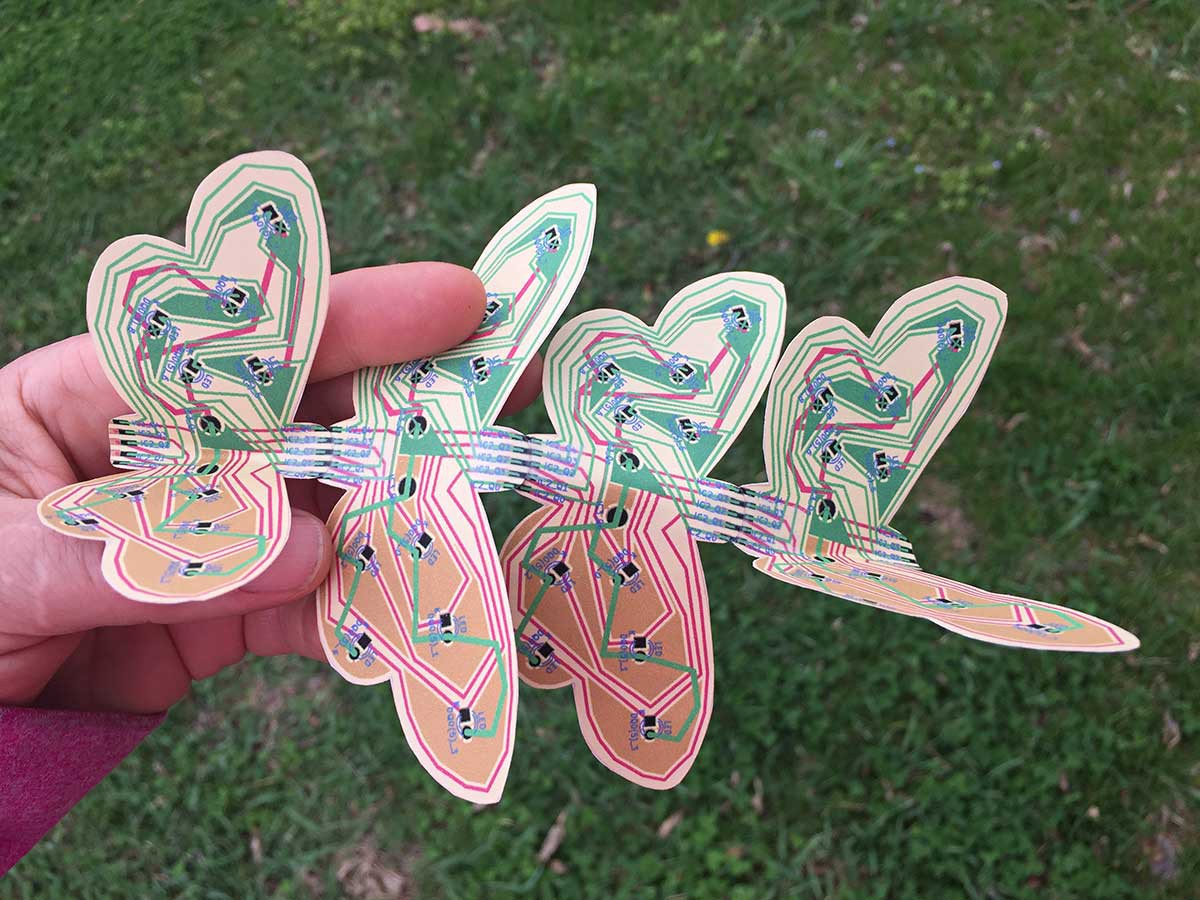
And here's a close-up illustrating the end-to-end solder pads that should, in theory, connect the moth bus to make a long strand of individually addressable LEDs:
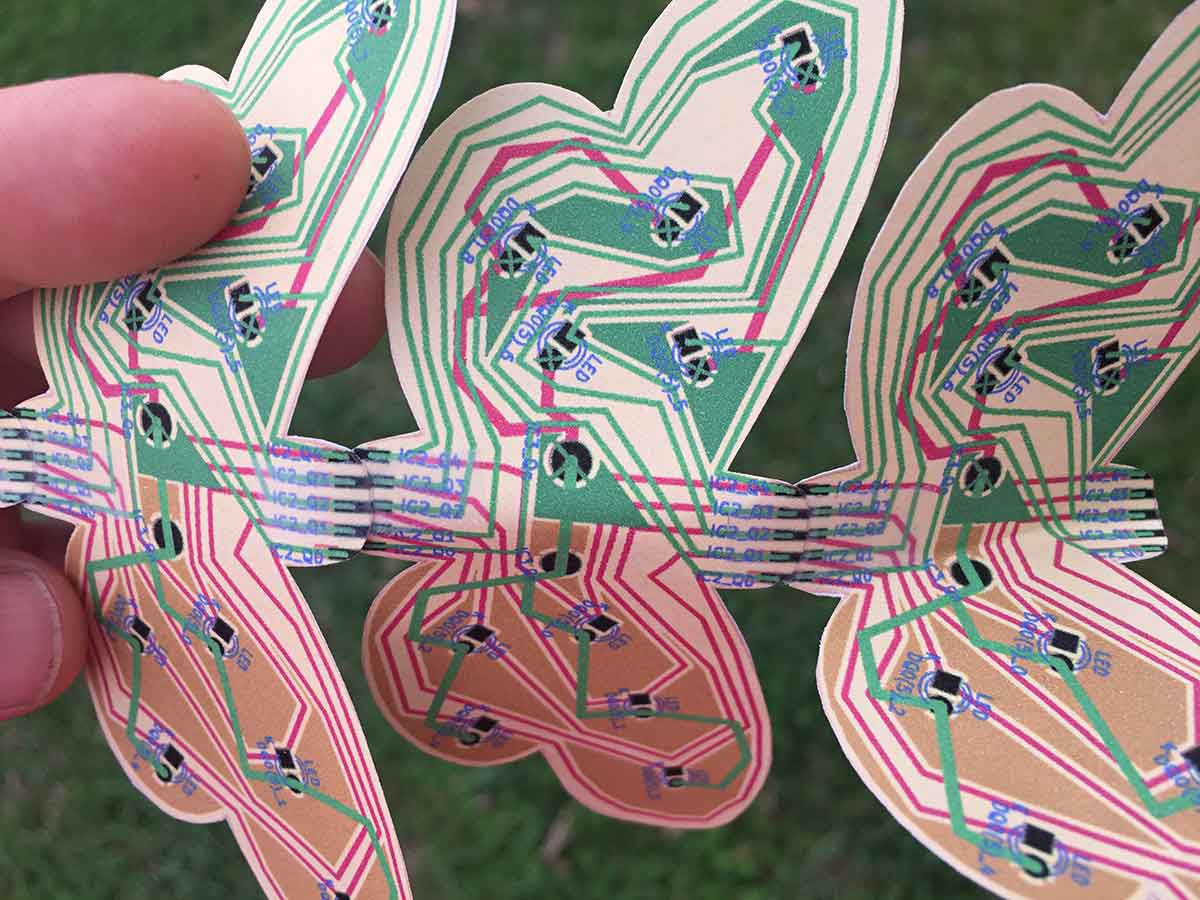
As you can see from my paper mock-ups, a flexible circuit substrate enables me to position the wings in space (along with their associated LEDs).
Hopefully it's evident why my board design exceeds the 2 square inch requirement: my moths *are* sculpture -- they are meant to be seen. Visible electronics are a critical dimensions of my art. I don't want to make teeny tiny moths that are barely visible.
I would also like to manufacture these moths without solder mask because I really like the see-through effect that a flexible PCB substrate offers. Concerning the relationship between PCB transparency, beauty, and nature.... here's a photo of a leaf that I designed in 2013 and manufactured myself using nasty home-brewed ferric chloride etching:
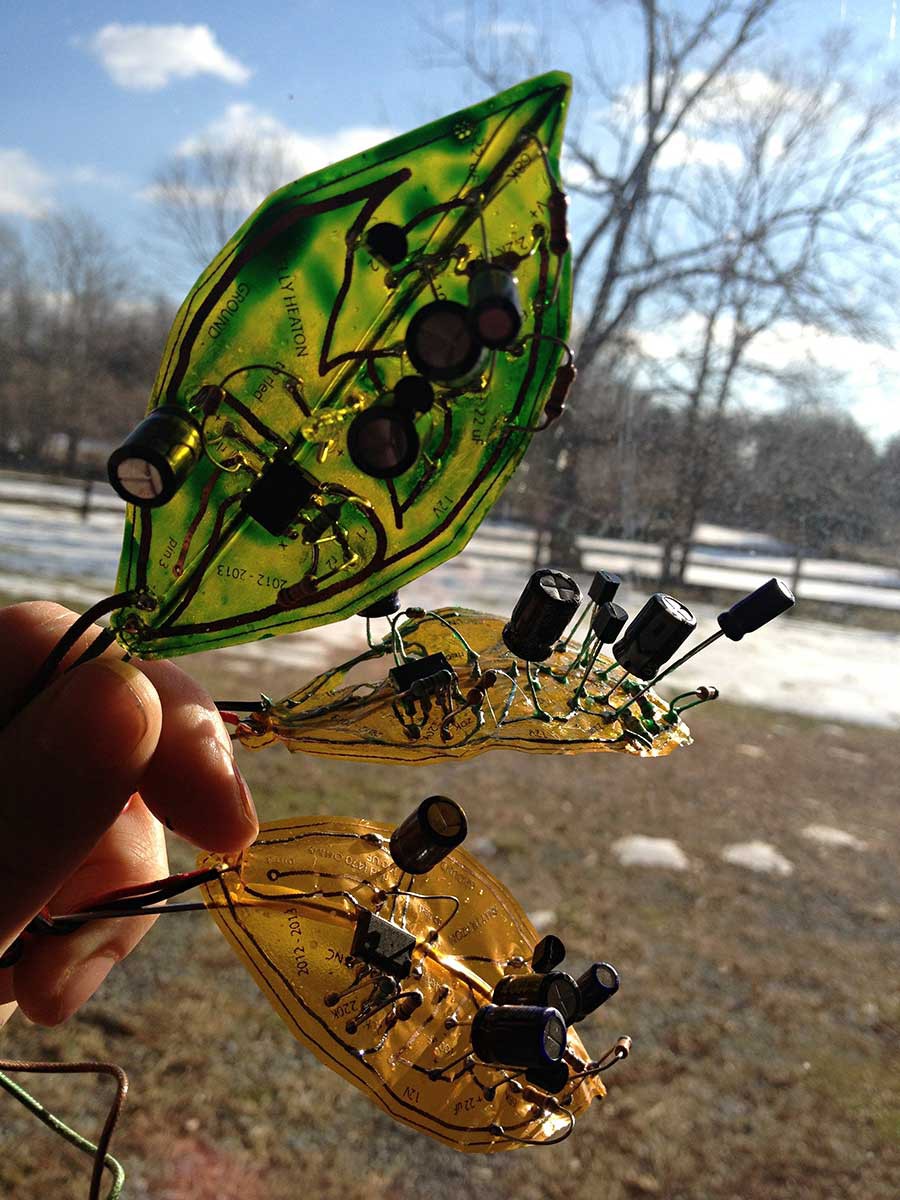
If you're wondering about the green color on the top leaf, I painted that on after I made the board. (The green paint is translucent because I added medium-bodied acrylic medium.)
+++
Last but not least, if you like my work, please give me your vote towards the 2019 Hackaday competition. While my work can hardly be called "product design," the world would be a very boring place with only products and no art.
Thanks!
Discussions
Become a Hackaday.io Member
Create an account to leave a comment. Already have an account? Log In.