 Kelly Heaton
I've built artistic circuits for years, but when the Hackaday challenge came along, I took it as an opportunity to build a purely sculptural circuit. I was intrigued by the challenge to ditch all forms of 2D and go completely freeform. (Incidentally, non-traditional planes for embedding electronics, like paper and canvas, are a great way to make electrified paintings. Totally freeform circuitry is an eccentric labor of love... but then again, so are all forms of art.)
Here's what I ended up making for the contest, a mama bird with her baby in a nest:
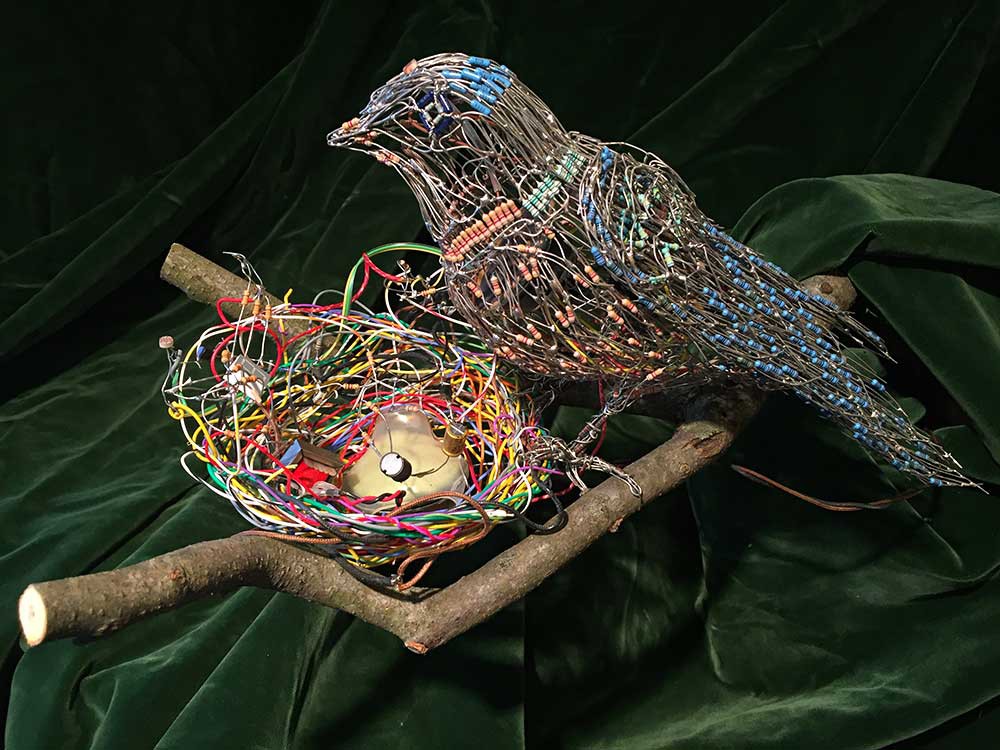
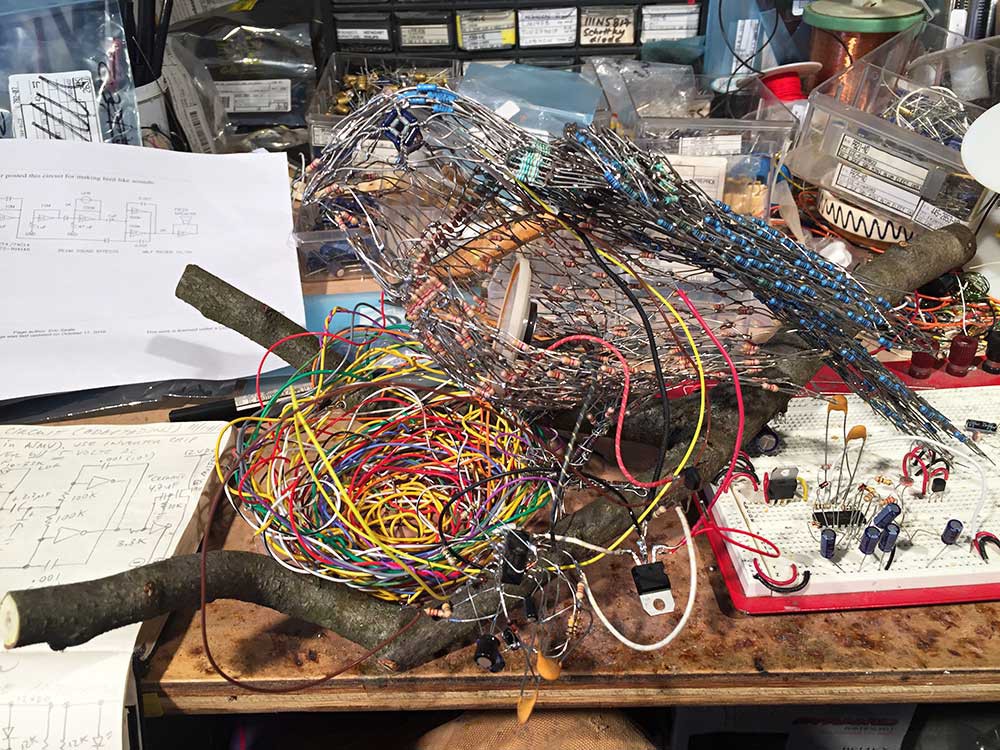
Disclaimer: the branch is wood, but I had to put the nest on something... and I preferred the contrast of a natural material over a piece of wire. I could have put them on a big electrical transformer, like some birds do for reasons I can't understand, but I didn't have a transformer handy.
However, I do own loads of surplus resistors in different colors, collected over the years, which I use to create mosaic effects in my art. If you want a similar aesthetic, don't buy new resistors -- get some old surplus components and/or unsorted resistors for cheap. You can always measure them (and combine them in series or parallel) if you want to use them in a functional circuit.
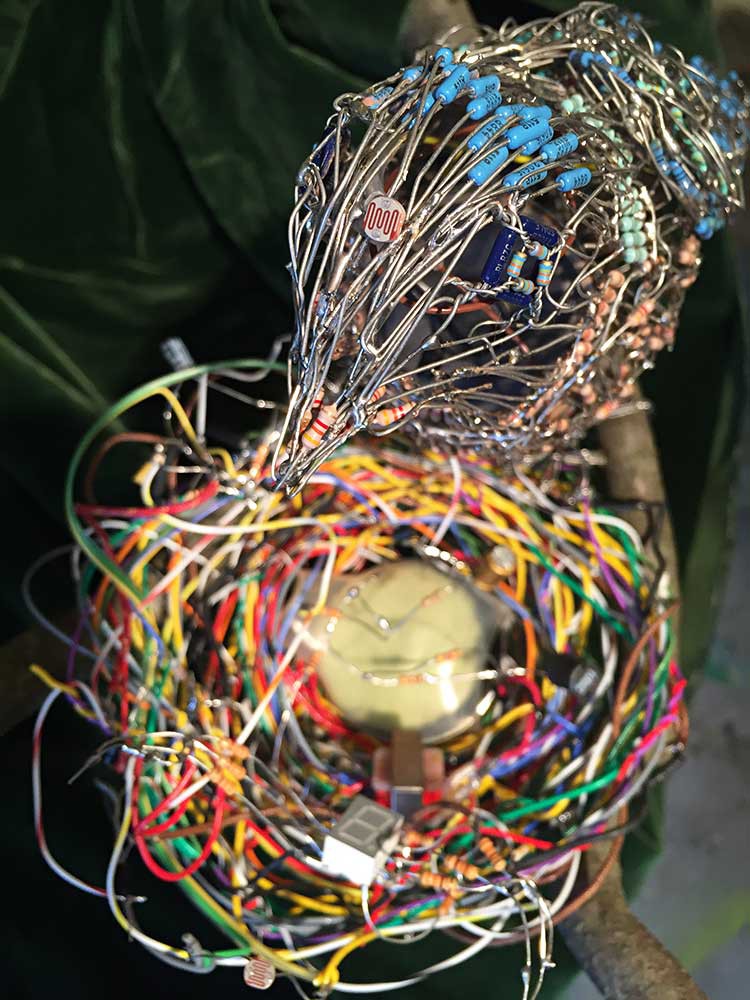
The shape of the mama bird is made entirely out of resistors and she's hollow inside, which is where I carefully, painstakingly installed her freeform singing circuit. The baby bird is nestled in a nest of wires --not altogether different from the real thing-- and the light-colored object in the nest is an 8 ohm speaker wrapped in heat-shrink tubing (to mechanically dampen the sound). Both birds have a photoresistor that enables you to interactively affect their chirping. Here's a video showing the pair making their avian sounds:
I used a small segmented display to visualize the baby bird's yapping beak. I love how it "shuts up" when you wave your hand in front of the photoresistor. I have uploaded my baby bird schematic to the project files so you can check out how I achieved this effect using discrete hardware components.
The mama bird's form was time-consuming and required two types of jig. First, and most importantly, the overall shape of her body: it's very hard to create a complex shape from hundreds or thousands of resistors without some guidance, especially because wires are prone to deform and collapse inward on a volume. After some experimentation, I discovered that regular modeling clay is a great substrate around which to form and solder electronics. Don't use plasticine clay - it will melt if you solder near it.
Below are a series of photographs showing how I made the shape of the mama bird:
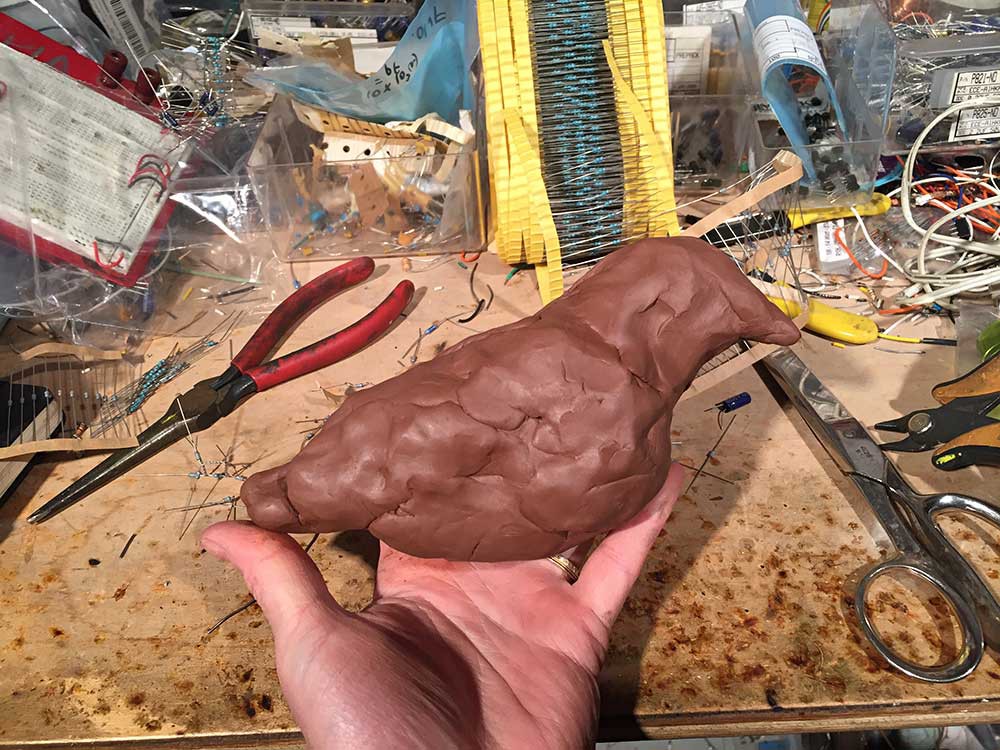
First, I modeled her rough form in clay. The volumetric proportions must be accurate, but the details don't matter -- you'll use needle nose pliers to shape the final touches when your wire sculpture is nearly complete. Don't cut corners on the basic volumetric form or else your fundamental proportions will be wrong, and that's hard to fix.
Next, I arranged resistors on the surface of the clay form and soldered them with the aid of a jig (more details on the second jig in a moment). Press the resistors into the clay to hold them steady. Natural clay is a great substrate onto which to solder, assuming it's not too wet and mushy. Don't worry about getting your resistors dirty, because you can wash the sculpture gently before you add active components (just leave time to dry if you plan to use the sculptural resistors as part of a functional circuit).
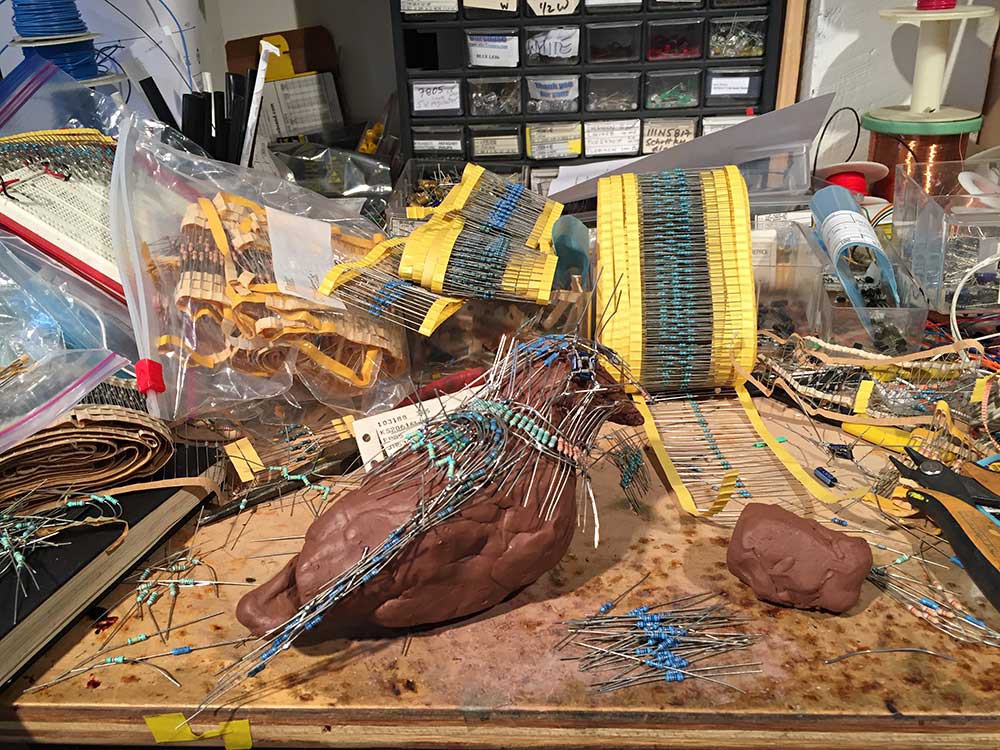
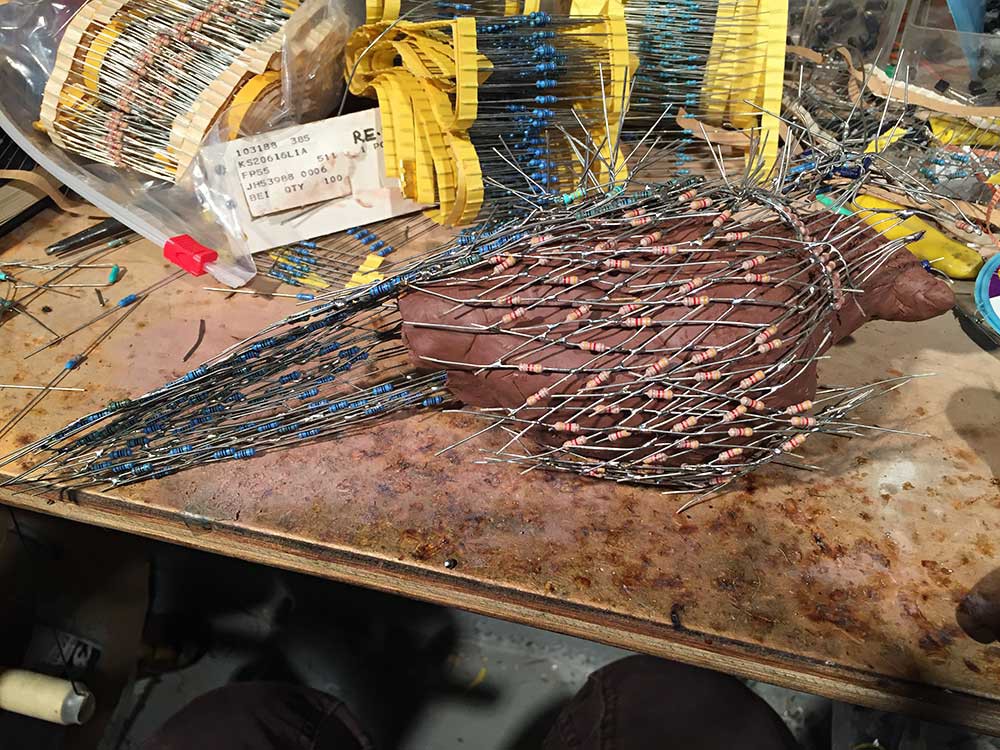
I played around with different patterns to define regions with texture as well as color.
As you go along, leave yourself an opening to remove the "resistor shell" from the clay form. I left a seam along one side, underneath the bird's wing, where it would not be visible in the final piece. I also used this seam to insert the functional electronics inside.
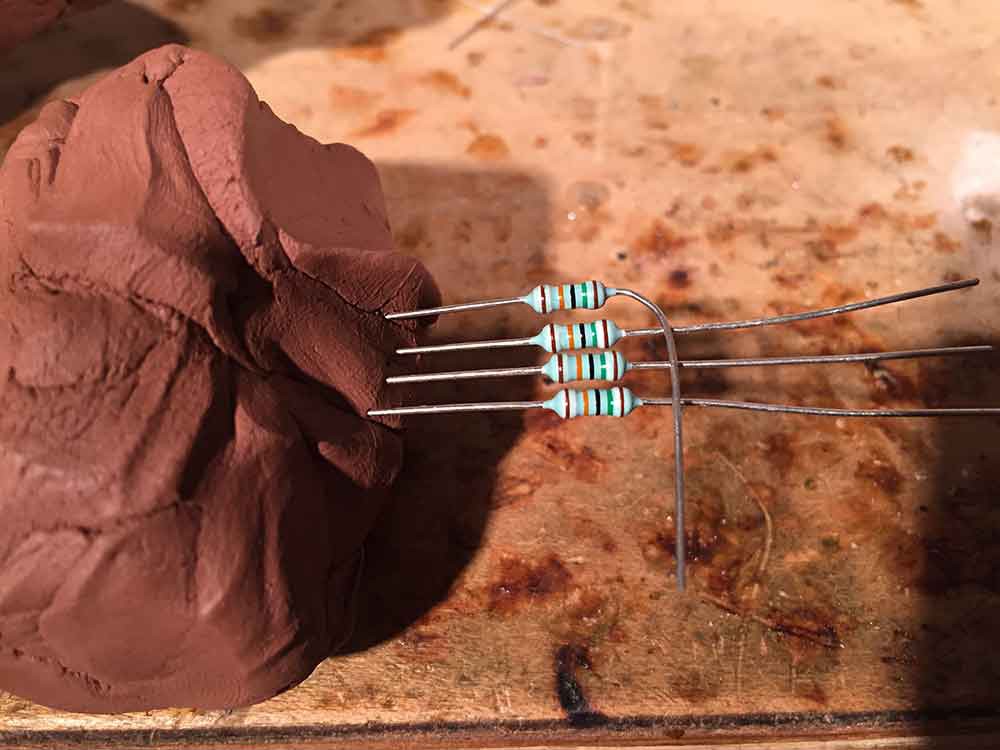
Now for the second jig: if you try to solder together a bunch of resistors (or whatever) lying freely on your bench, they are prone to move. That's another great application of modeling clay: see the small blob sitting on my bench to the right of the bird? I used it repeatedly to hold resistors in a pattern so that I could shape and solder them. Clay is a really great way to hold parts in place. Mash it into whatever form you need.
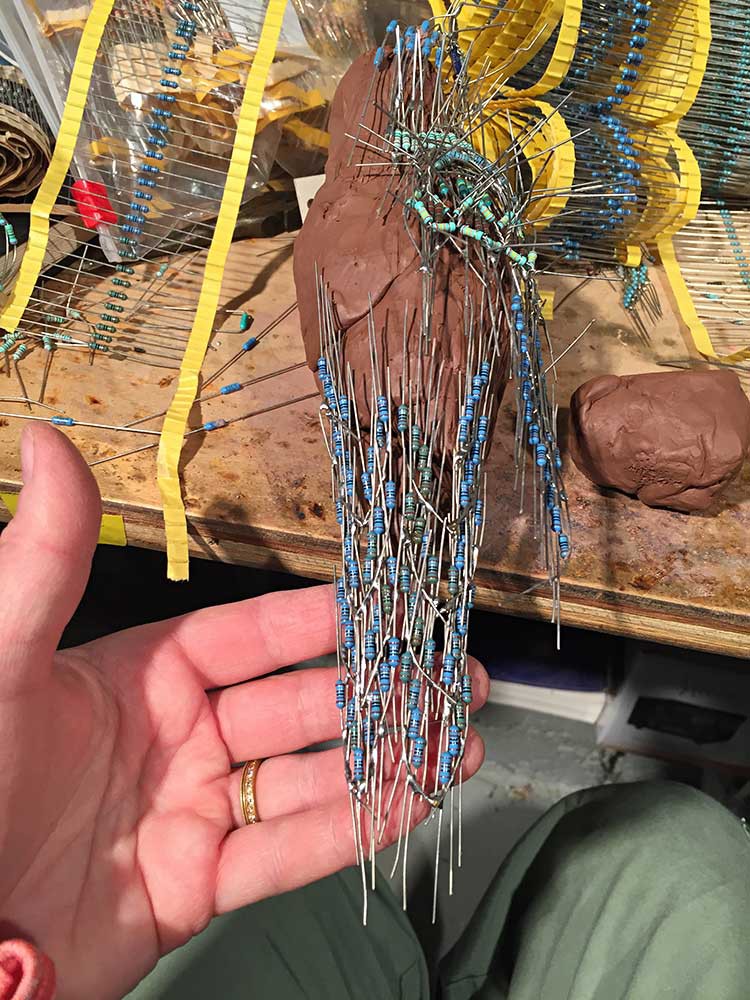
So that's how I made the form of the mama bird. It took me several days. Each night I would remove the clay form from the wireframe and store it in a sealed plastic bag (so it wouldn't dry out). If you keep the clay damp, you can reuse it indefinitely.
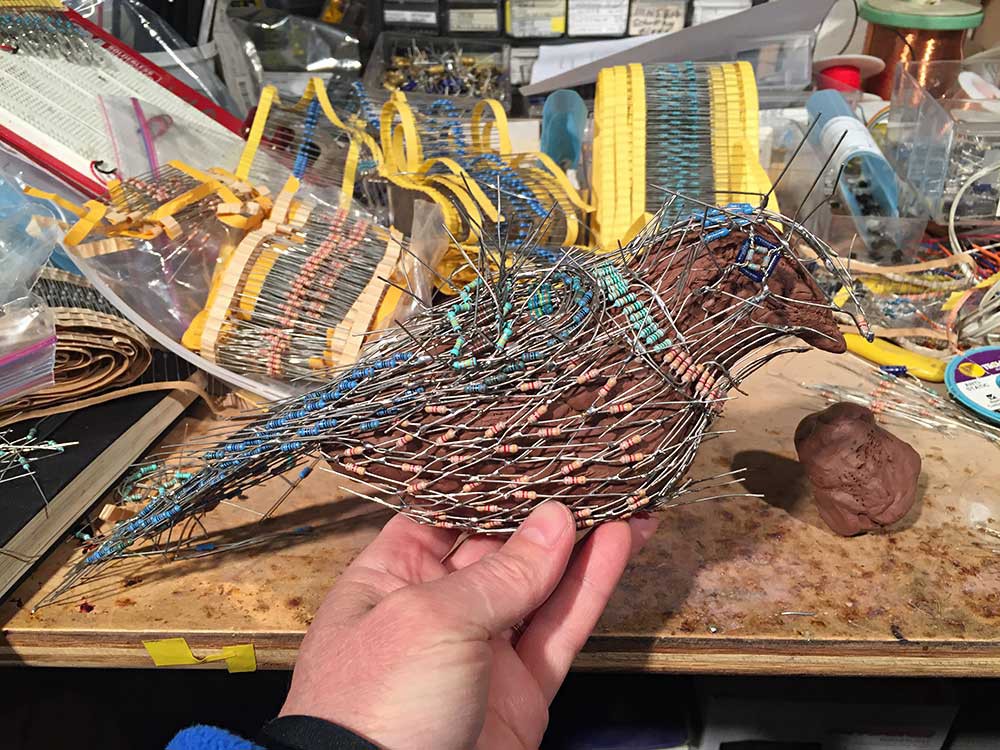
Below is a photo after I finished sculpting the mama bird on the clay jig and opened her along the seam to insert the functional electronics. (Her circuit was based on a bicore design by Wilf Rigter).
Unfortunately, it's hard to see what's going on with so much complexity... but if you look along the underside of the wing you can see a horizontal opening that runs from the base of her belly to the tip of her beak. I left several longer, unsoldered leads along both edges of the seam so I could twist them shut without soldering (in the inevitable case that she needs to be opened for repair).
An interesting side note on making a complex sculpture out of linear electronic components: remember Thevenin's equivalent? Find any two points on the resistor network, measure them with your multimeter, and voila -- you have a resistor of known value at your disposal. I didn't end up tapping into her body for resistance, but I certainly could have done this (and probably will on future projects). I did insert the photoresistor into her head though, like the third eye that bird's reportedly use for long-range navigation. You can see a detail of that below.
Thanks for reading! Ciao for now.
Discussions
Become a Hackaday.io Member
Create an account to leave a comment. Already have an account? Log In.