 ziggurat29
Summary
about 4:00 pm, Monday, January 21, 2019
Soldering stuff together. Out of fear of destruction, this was done in steps, testing along the way.
Deets
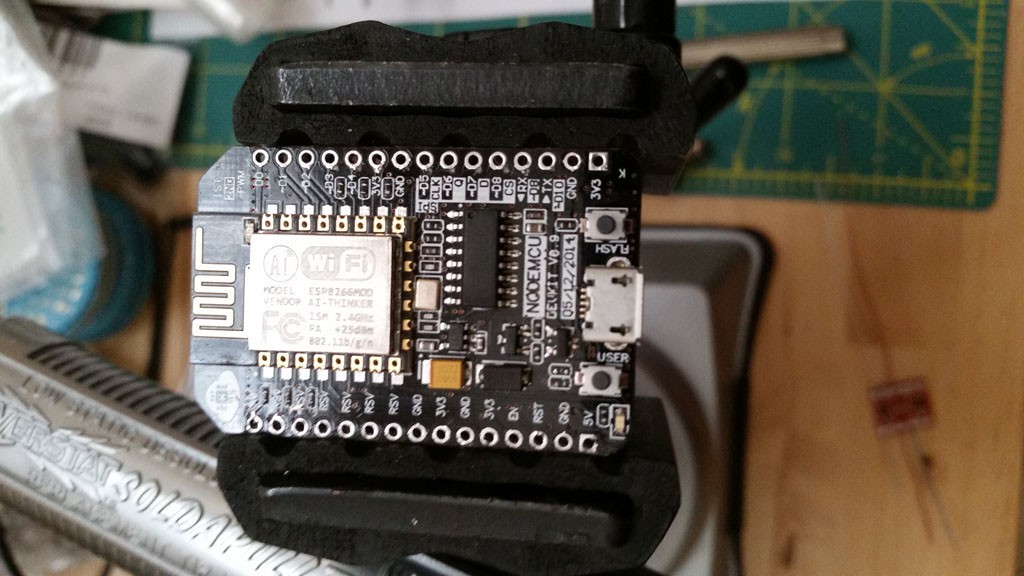
First, the NodeMCU board has pin headers soldered on (or at least mine do). These aren't handy for me, so I desoldered them.
As mentioned before, it is necessary to tap off a component on the NodeMCU Dev board for power (in), since the desired point is not brought out to the headers. Fortunately, there is a big fat diode that is somewhat easy-ish to solder a lead to. Not super easy, though! It is a power diode, and is thermally conductive. On my first attempt, the heat from the iron on one lead conducted quickly to the other and the diode went flying off the board. Ugh, now I have to do some SMT soldering to put it back in place, and solder the originally intended wire. Oh, well; this is what happens. Be quick, and flux helps in being quick. I find a 'flux pen' useful to paint on a little flux in magic marker fashion useful in a pinch without making too much mess.
Also, be fully aware that the large capacitor next to the diode is NOT directly connected to that diode as you might guess from the layout. Do NOT bridge those two.
The ground lead was straightforward.
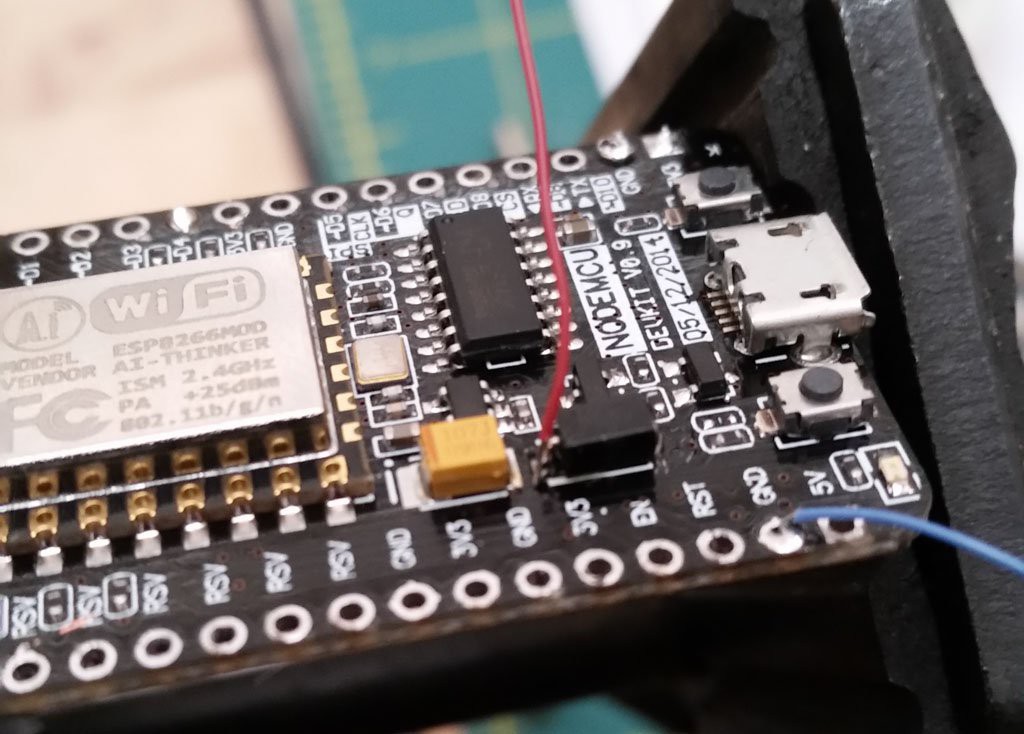
Not exactly pretty, but after having flung the diode off before, I am a little iron shy. The joint is not as cold as it looks. I wouldn't ship it so someone else, though.
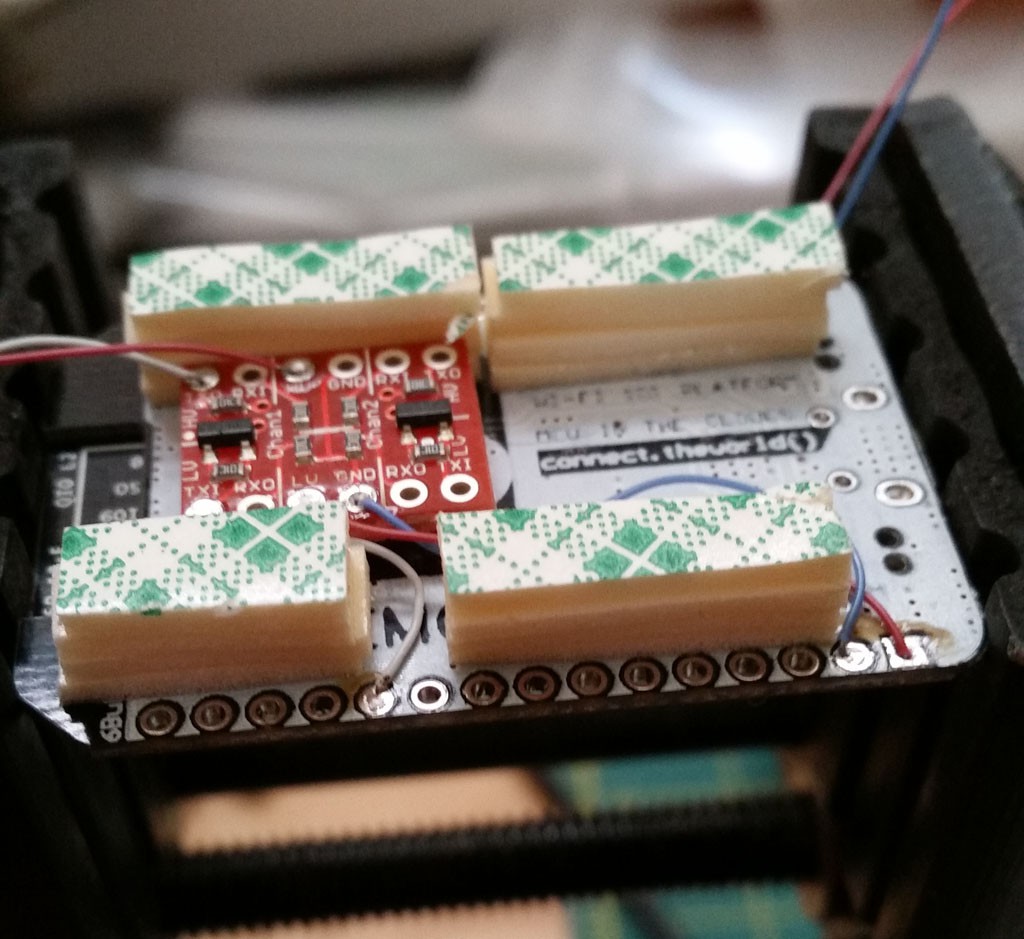
OK, having gotten the pieces prepared, it was time to assemble it, somehow. Since there were no plans beforehand, I am winging it by using ye olde double-sided foam tape to stick the parts onto the back of the clock's PCB.
I decided to stick the shifter onto the back of the NodeMCU Dev board:

and this gave me an idea: to build a 'standoff' from multiple layers of foam tape:
This should allow me to have some clearance away from the clock PCB, which has all sorts of electrical points that I don't want to touch the module. I found a place to put the module and stuck it on:
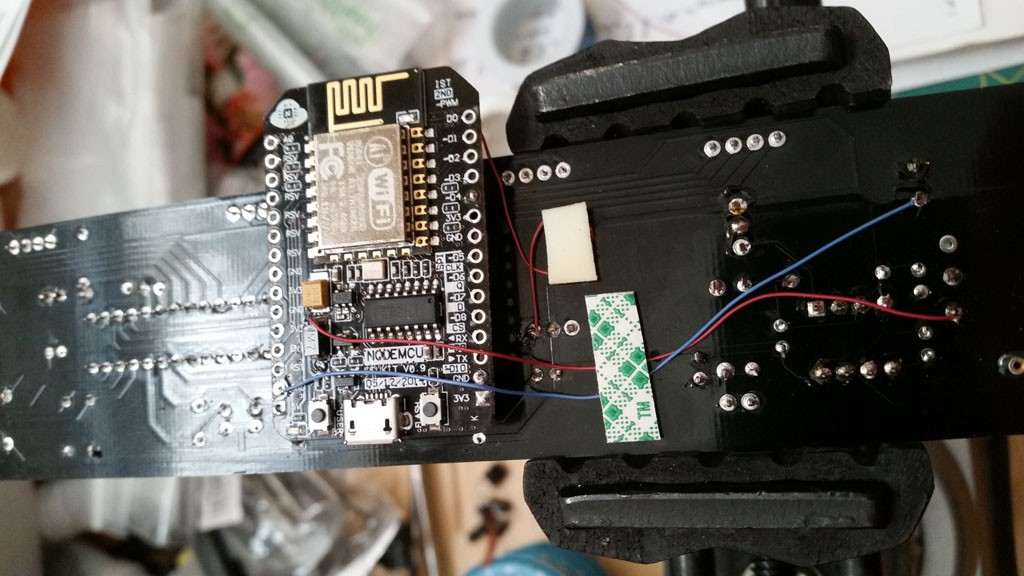
You can see the clearance from the top:

With the things mounted in place, it was time to connect the wires and test. I am really paranoid about making a mistake and blowing up something. The Nixie board has 175 V on it (and boy, do I know what that feels like!), so one false connection or accidental shorting would be all it takes. Additionally, I will be connecting this to my desktop system via USB, and I most definitely do not want to destroy that. So I do this in steps.
First, some sanity checks before proceeding with intended connections:
- I connect the NodeMCU board to a USB charger. No power to the Nixie, and no computer connection. OK, no 'magic smoke', and some blue lights on the board blink in a familiar way. I cycle power, and I still get the familiar blinking lights.
- I connect NodeMCU board to USB to computer. The board boots and I can connect and execute some simple Lua commands on it 'Hello, World!' style.
- I disconnect computer, and just power on Nixie. The clock runs as expected.
- I disconnect the clock power, and reverify the NodeMCU board on the computer. Still working, yay!
- I disconnect computer, reconnect USB charger and Nixie power. Nothing is burning yet.
So that gives me confidence that there aren't any accidental connections between the boards. Now for the first stage of coupling them together:
- I connect the clock's ground and 5 V to the level shifter's 'high voltage' side.
- I connect the level shifter's data to the clock's serial input.
Since I now have electrical connection between the boards, I do a mini 'smoke test' with the Nixie power and USB charger power. This time there is random data shown on the clock -- no familiar clock display! Yikes! After that moment of fright passes, I remember that the way the clock handles the serial data is that as soon as it receives data, it immediately shifts into the 'display data' mode. So it's possible that garbage data from the NodeMCU at boot-up triggered this. Since you can manually change the display mode via a button, I give it a click and get back to the clock as expected. Whew.
At this point almost all the connections are made except the final power input to the board from the Nixie supply. I decided to save that connection for last since the NodeMCU board can be powered from the USB, and since I'm going to need the computer USB connection for a while.
I do connect and boot the board, and can connect with a serial terminal. OK, for a little fun, I will try sending some data. The uart must be configured for 9600N81. Then the documentation states that you must send a complete display's worth of data. There is no mention of any command termination, like CR/LF, so I guess it just knows by counting?
On the terminal:
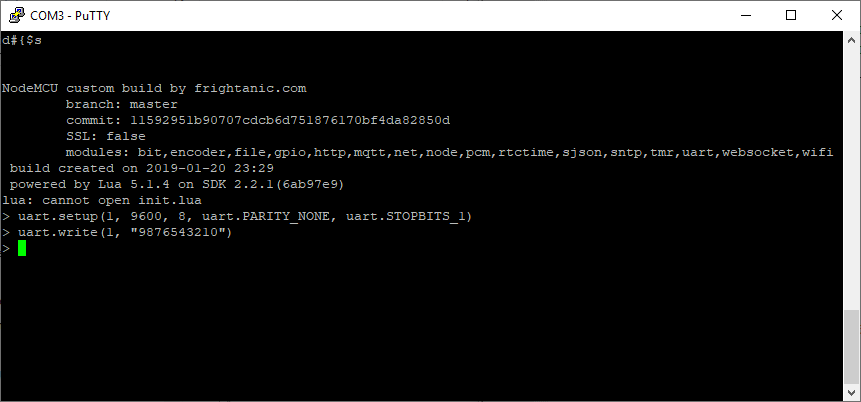
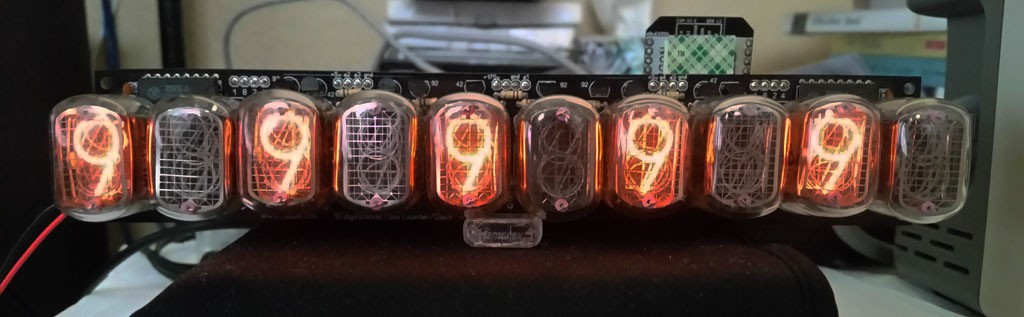
And on the clock:

Something demonstrable happened; hooray! And sending a different pattern:
After this I tried out some of the other commands. The 't' will switch to time diplay mode, and 'd' will switch to date. There isn't one to switch back to the arbitrary numeric display, so you would have to re-send that data to trigger the switch, overwriting what is there. I couldn't get 'a' to do anything -- it's supposed to show and cycle through the alarms -- but I don't care that much about alarms, anyway.
Finally, I soldered the last wire coupling the Nixie power supply to the power tap point on the NodeMCU board. It occurred to me that I don't want the USB power to try to power the Nixie clock (i.e., which USB is plugged in, but not the clock power supply), so I added a diode to prevent that.
I took a little breath, and tried various power combinations without plugging into the computer, and then finally took the leap and connected to the computer and nothing popped. *exhale*.
Next
Writing the code for a server application.
Discussions
Become a Hackaday.io Member
Create an account to leave a comment. Already have an account? Log In.