 Stefan-Xp
Since i didn't want to use ordinary hardware buttons or switches i had to implement a little UART protocol to spreak with the Clock.
This was the easiest approach ==> Read every Byte from Serial port, if it matches one of those letters, do more special reading. I'm sorry I was a bit lazy with this. Maybe the proper way would have been to use a state machine or something. Most of these commands are more of the Backend and for Testing.
The general working of the clock is, that each Second an Interrupt occurs which increases the seconds. If the Seconds are >= 60, increase minutes, if the minutes are >= 60, increase the hours. If the hours are >= 12, increase the half days.
// This Timer is executed every second
void countSecond()
{
  mySeconds++;
  if(mySeconds >= 60)
  {
    mySeconds = 0; // mySeconds % 60;
    myMinutes++;

    if(myMinutes >= 60)
    {
      myMinutes = 0;
      myHours++;
      if(myHours >= 12)
      {
        myHours = 0;
        myHalfDays++;
      }
    }
  }
}
Btw: I noticed a notable deviation between a Stock Arduino board and my own board. The Arduino Uno lost almost 15 minutes a day :(... But fortunately my custom Arduino board does not do that.
In the meantime, in the main loop there is a check for the Serial communication and also a checker if another minute has passed. If a minute has passed, show the time on the clock.
So, around each minute there is an update of the time - depending on the minute and hour count.
I also spend another function to show a word on the clock. Since I used the
<Adafruit_NeoMatrix.h> and <Adafruit_NeoPixel.h> I used the filled rectangle function to fill all the words.
The Time is always shown in the selected color (White or the one which was set via serial).
The LED Strip was laid out 11 times 10 pixels in Zigzag configuration.
I also added some special functions.
So i added these Commands:
* Available Commands:
* t .. Set the time by ""hh:mm:ss""
* d .. Enables / Disables DebugMode
* r .. Send the actual Time by Serial
* ? .. Send Help & Info by Serial
* k .. Display Circles
* h .. halt/continue the clock updating
* c .. Set up the Clock Color by ""RRRGGGBBB""
* l .. Show each Line of clock in clock color
* m .. Show tHe mAtriX
* x .. Clear Clock face
* f .. fill screen with clock color
* p .. print point ""xxyy"" (from 0)
* b .. set brightness (from 0 - 255)
* u .. shows the time once
* n .. shows the Rainbow
I think the description is really self explanatory. But maybe you might to know more about some commands:
h: This halts the updating of the clock - so the actual LEDs will stay on until you "unhalt" the clock. This is really useful to print points etc.
m: This is a nice matrix animation which cost me almost the most time. But for my taste it is really neat!
p: This is a function to only set the LED at the specified coordinate with the clockcolor. F.Ex. p0000 will light up the first LED of the first Row. p1009 will light up the last LED on the last row.
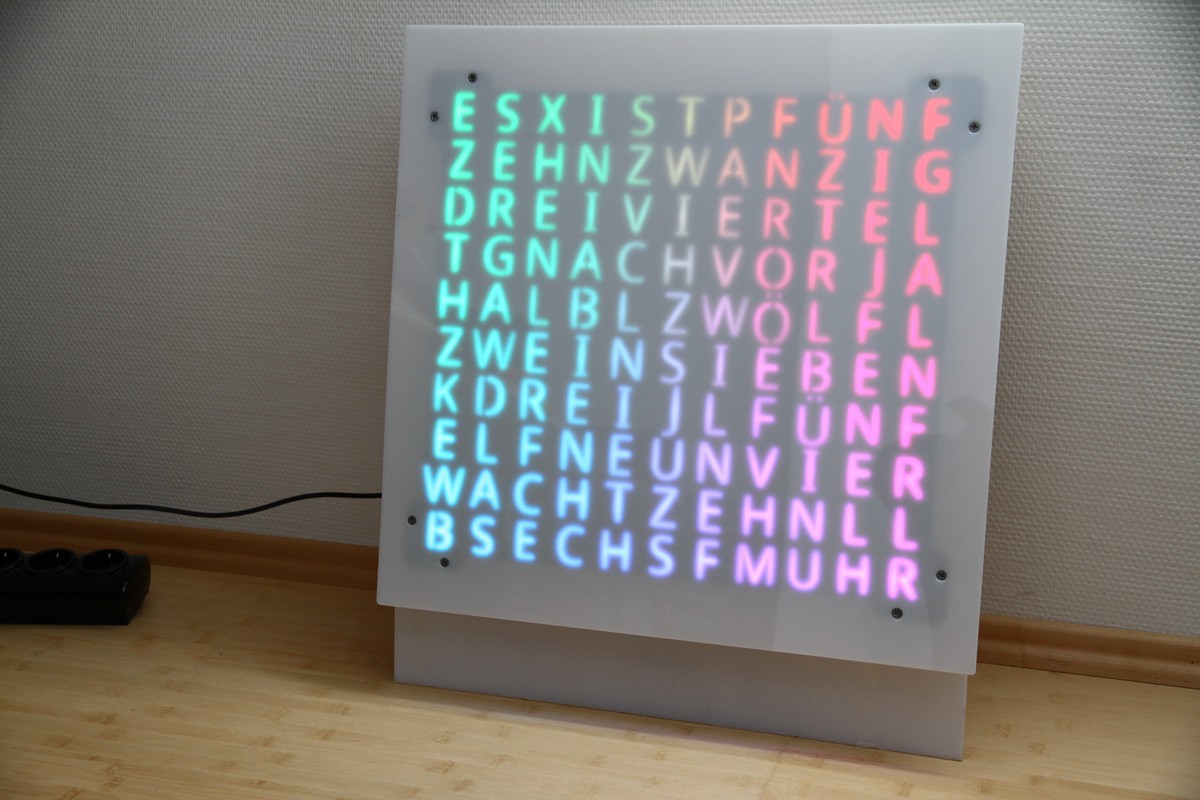
n: This is a function to just show a static color gradient on the clock:
For Communication with the clock i prefered the
"Serial Bluetooth Terminal"
https://play.google.com/store/apps/details?id=de.kai_morich.serial_bluetooth_terminal
It's a amazing app. Maybe there are others or betters but i really liked this one.
Discussions
Become a Hackaday.io Member
Create an account to leave a comment. Already have an account? Log In.