 Just4Fun
In the following I'll use Quartus II version 13.0SP1 (Service Pack 1) because it is last version supporting the Cyclone II FPGA series.
After installing Quartus II IDE (you can get it from here after a registration) it is necessary change some default setting on your Quartus II project to better suit "The Thing" (the default configuration is potentially dangerous for the board).
This setting must be used for every new Quartus II project.
From the Quartus II menu select "Assignments" -> "Devices..."
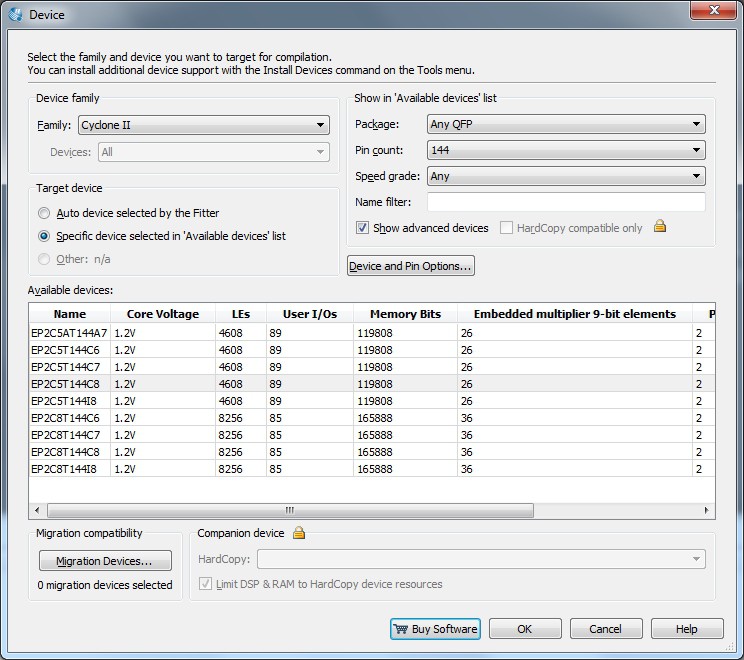
click on the "Device and Pin Options..." button
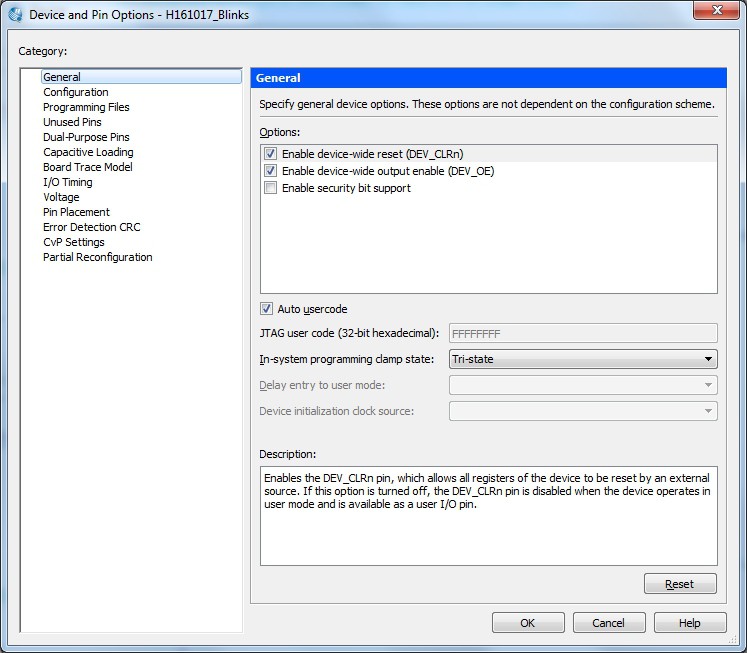
set the "Enable device-wide reset (DEV_CLRn)" and "Enable device-wide output enable (DEV_OE)" check boxes. In this way you enable the "DEV_CLRn" key and the "DEV_OE" switch in the "The Thing" board.
These are two important functions: the first will reset all the FFs inside all the LEs (Logic Elements) with the "DEV_CLRn" key, and the second will enable the possibility to set all the FPGA pins to HiZ using the "DEV_OE" switch.
Some important notes about these two function:
- The DEV_CLRn key is active also when all the FPGA pins are in HiZ;
- When all the FPGA pins are in HiZ by means of the DEV_OE switch, the "DEV_OE" led is ON;
- If you doesn't enable the "Enable device-wide reset (DEV_CLRn)" check box, the DEV_CLRn key will not operate;
- If you doesn't enable the "Enable device-wide output enable (DEV_OE)" check box, the DEV_OE switch will not operate, but the DEV_OE led will turn ON anyway. This because it is not possible from the outside to know if this function is enabled or not.
Now you will set up the state of all the unused FPGA pins. "Unused" here means not referenced explicitly in the "programming" phase.
From the above windows, on the left side, choose "Configuration":
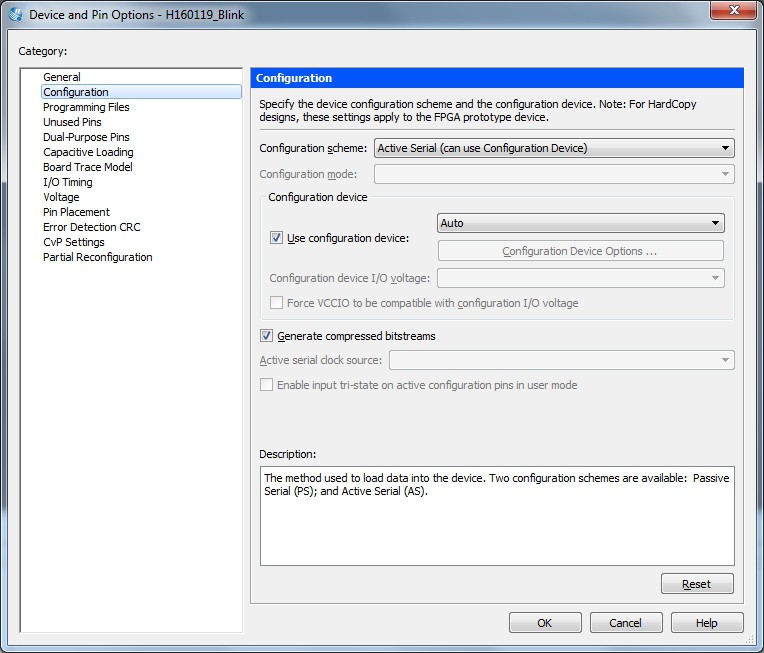
Check that the Active Serial mode is selected.
From the above windows, on the left side, choose "Unused Pins":
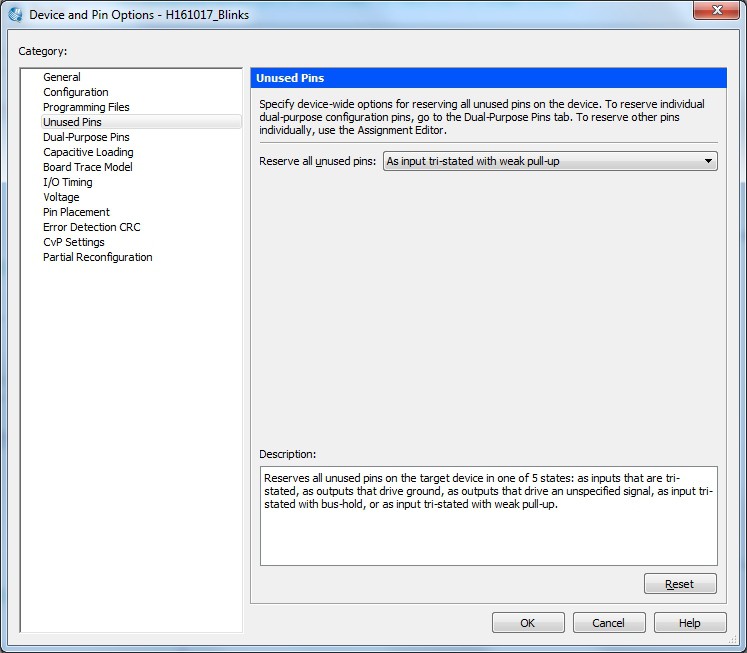
and in the "Reserve all unused pins" field set "As input tri-stated weak pull-up". This is the best (and safer) option for the "The Thing" board.
From the above windows, on the left side, choose "Dual-Purpose Pins":
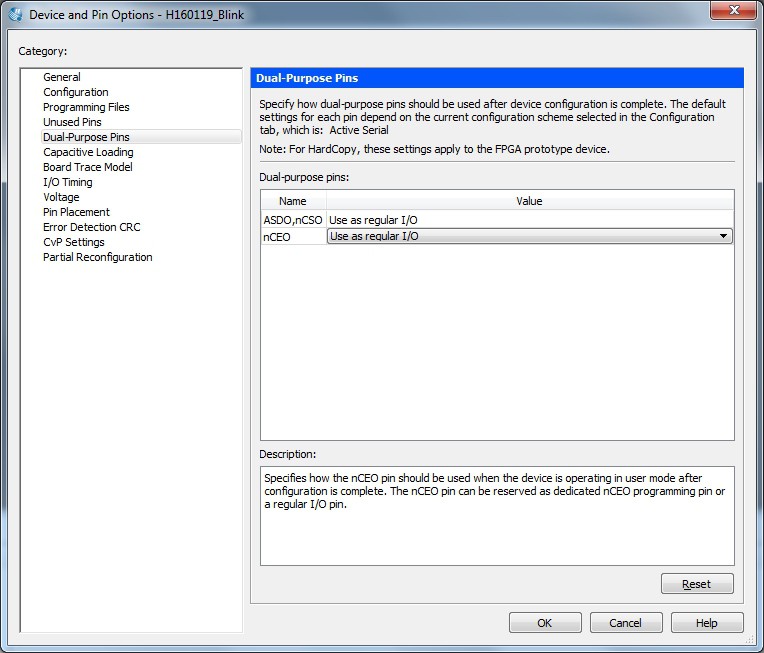
and select "Use as regular I/O" for the nCEO pin.
All done!
Discussions
Become a Hackaday.io Member
Create an account to leave a comment. Already have an account? Log In.