 Jakob Kilian
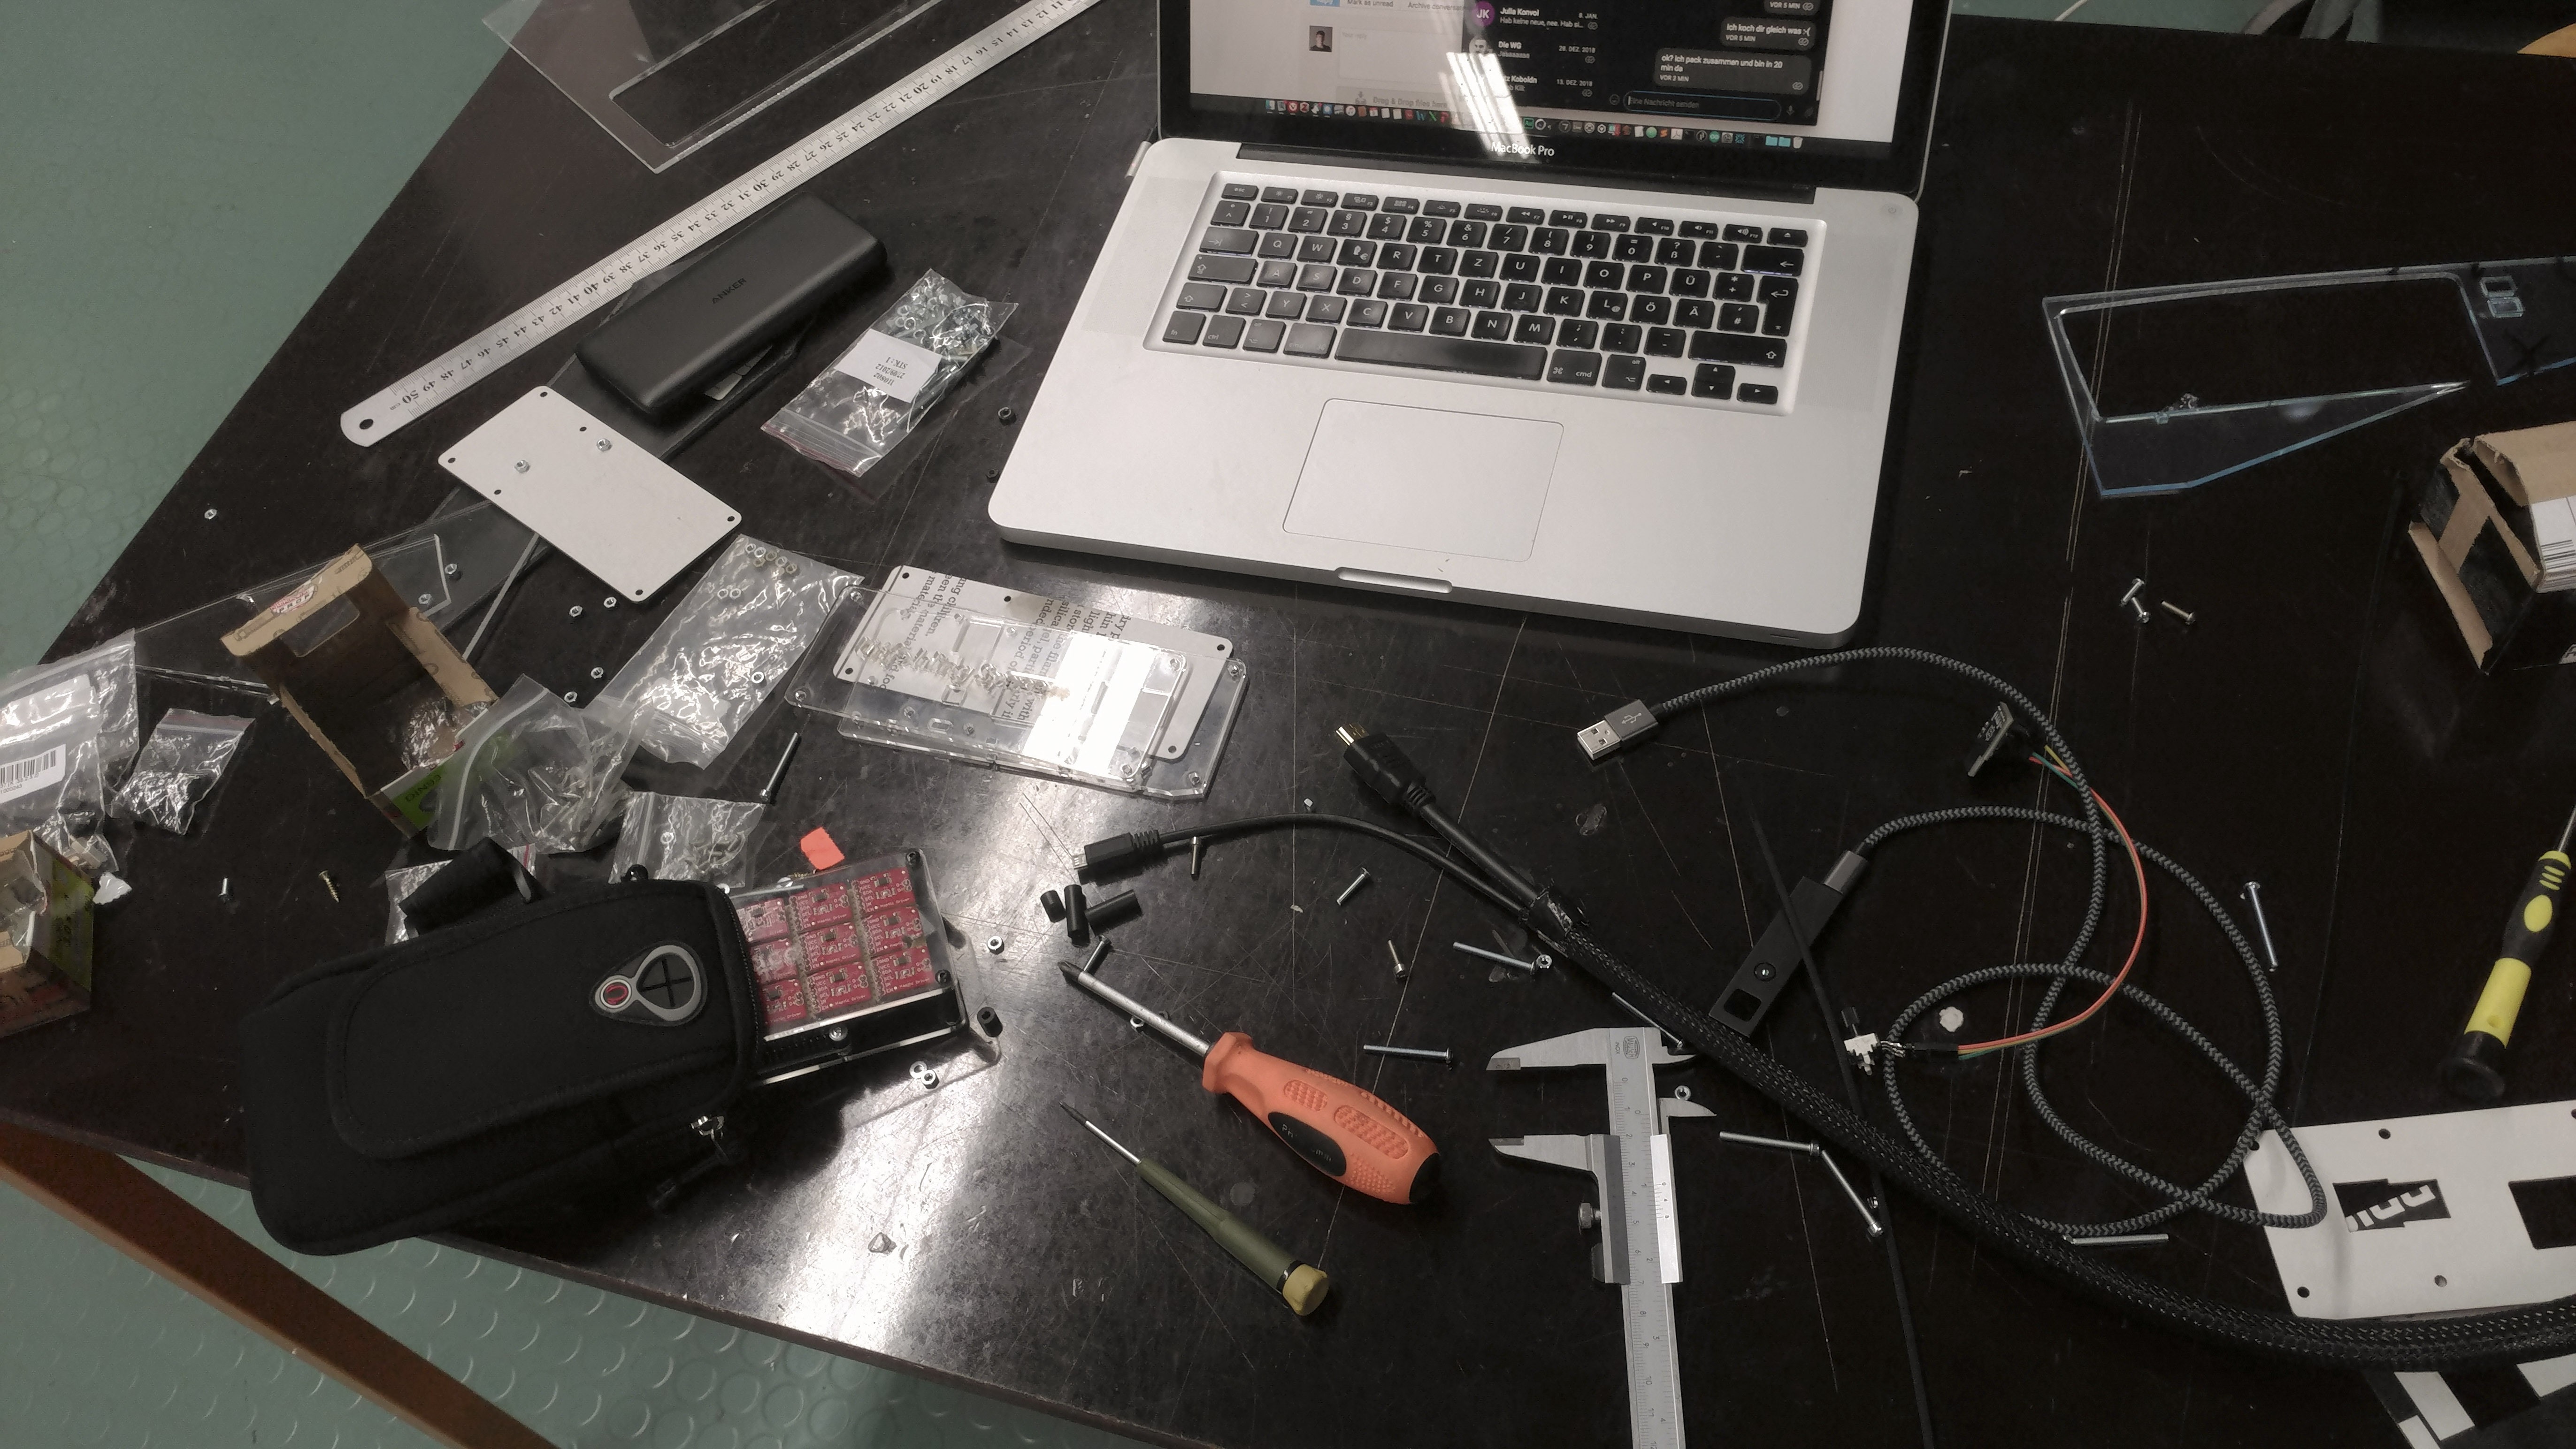
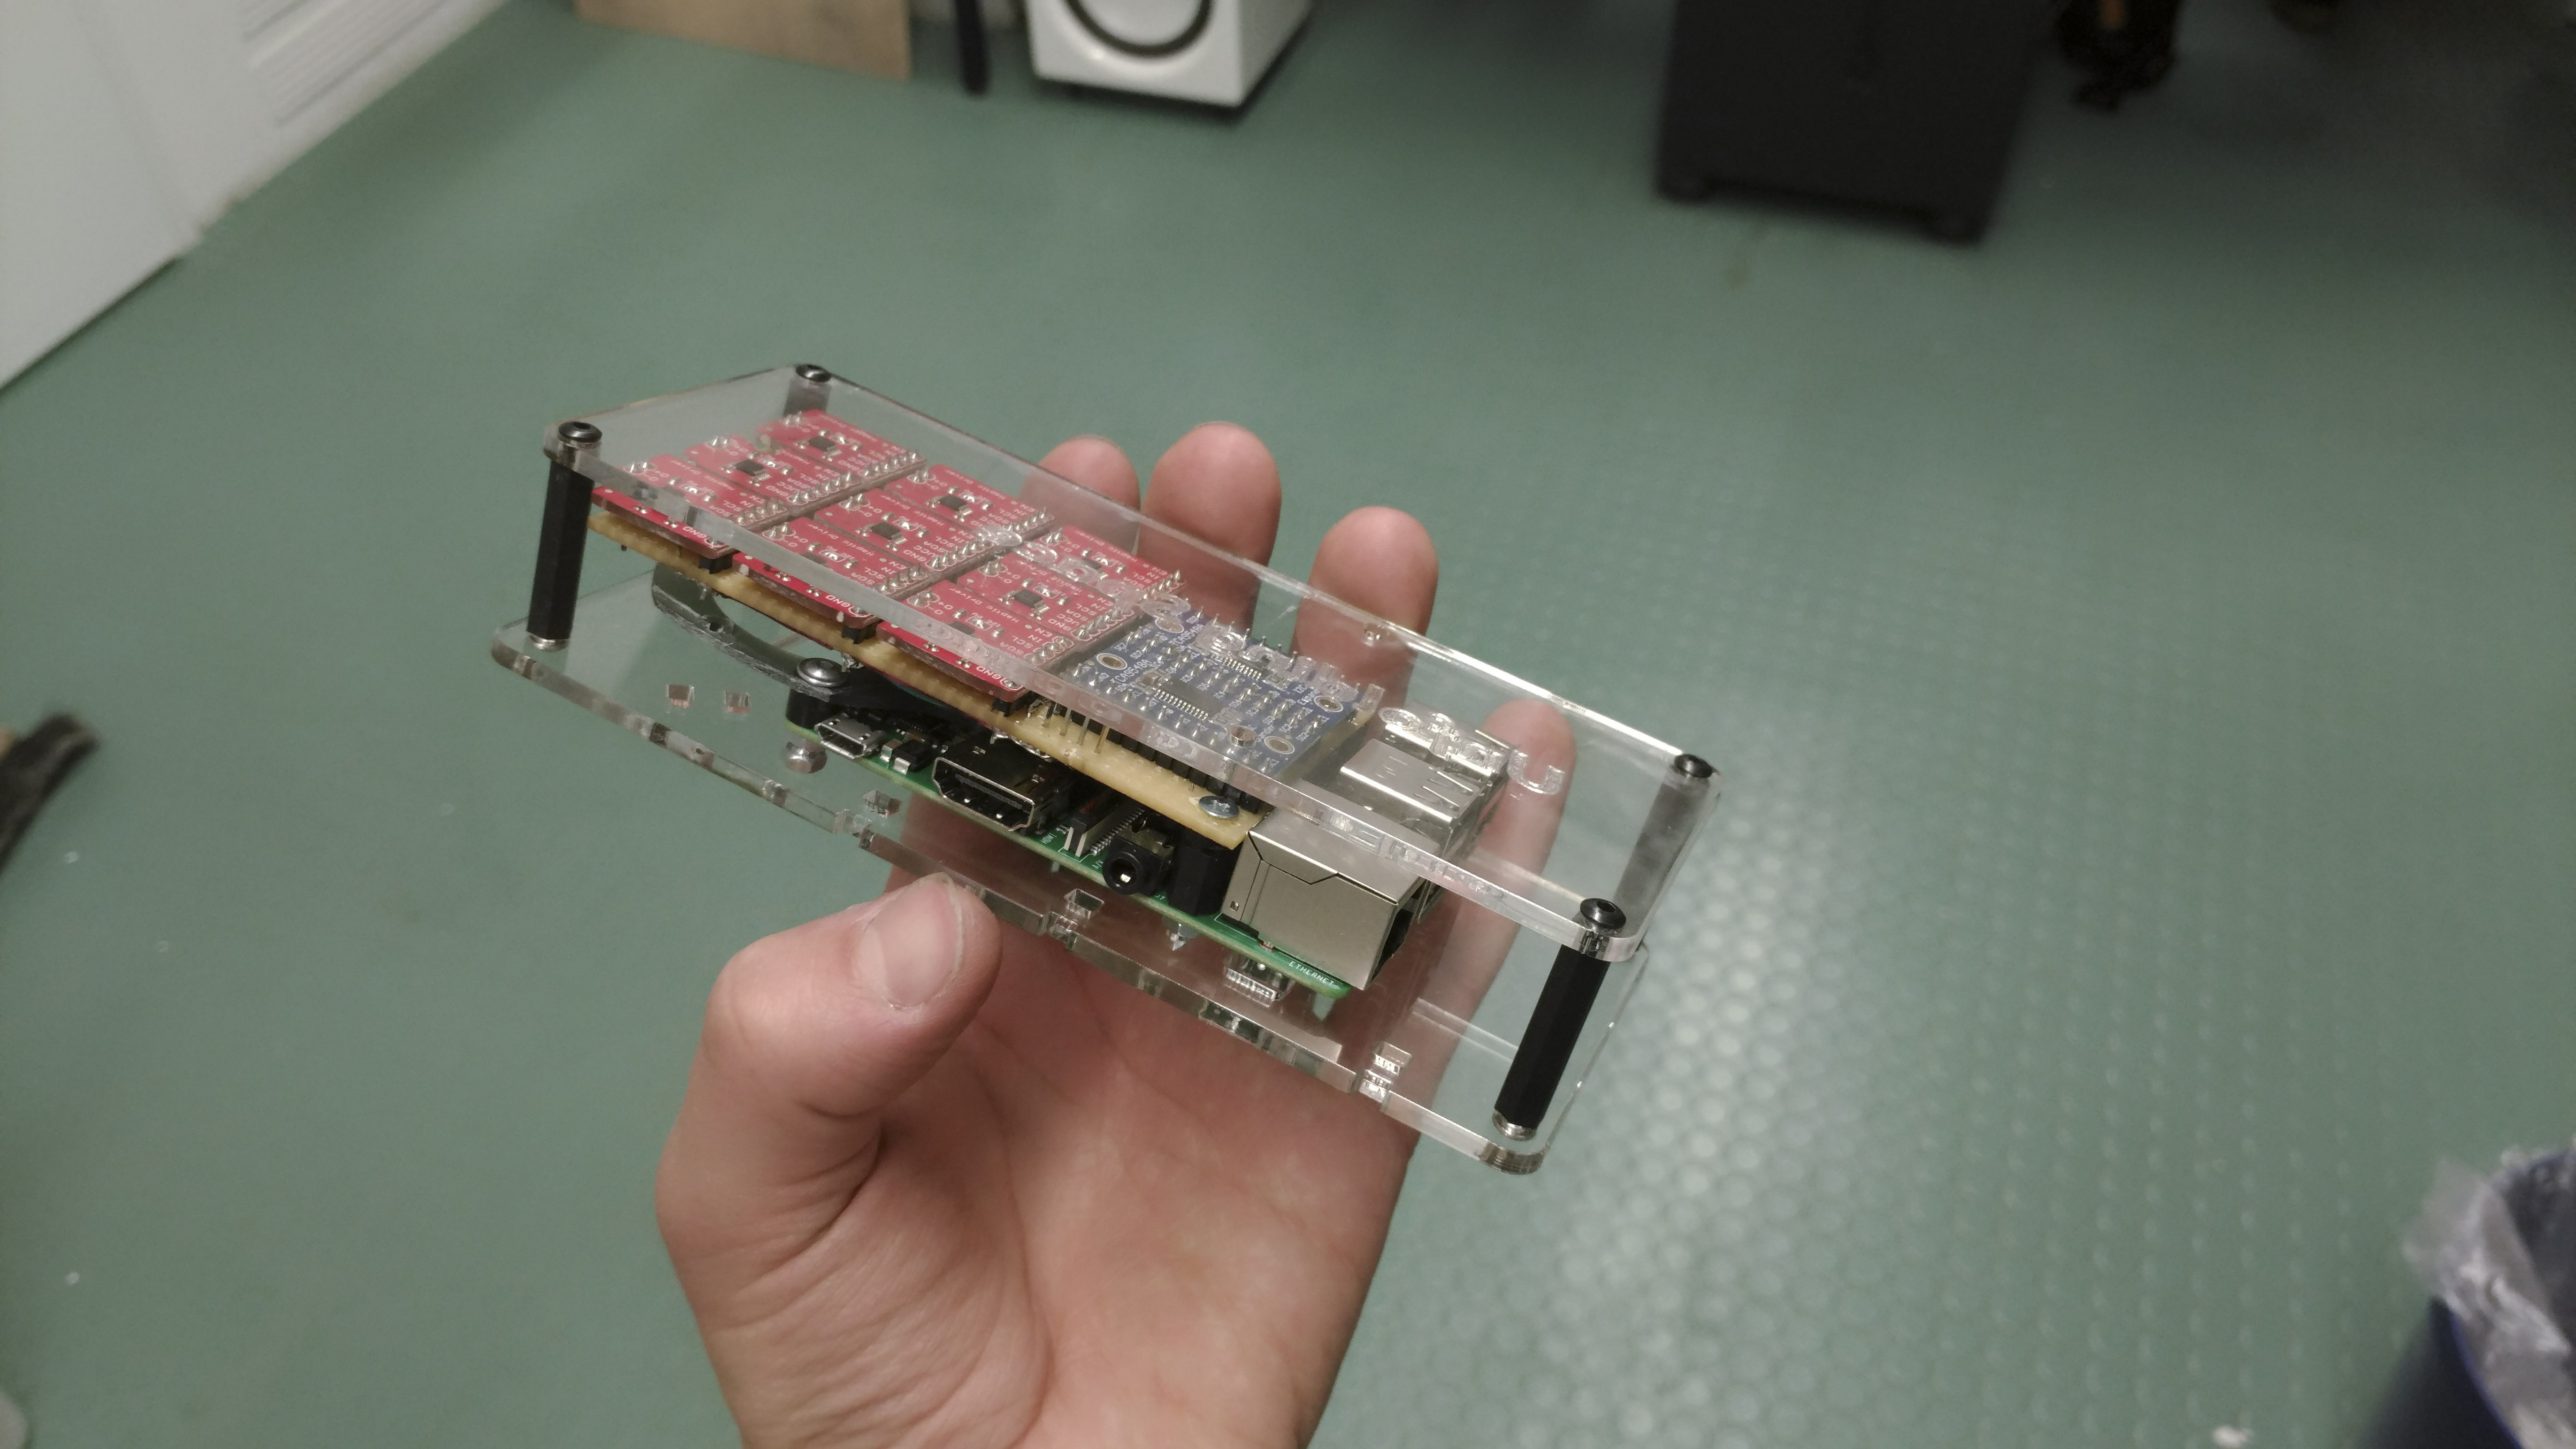
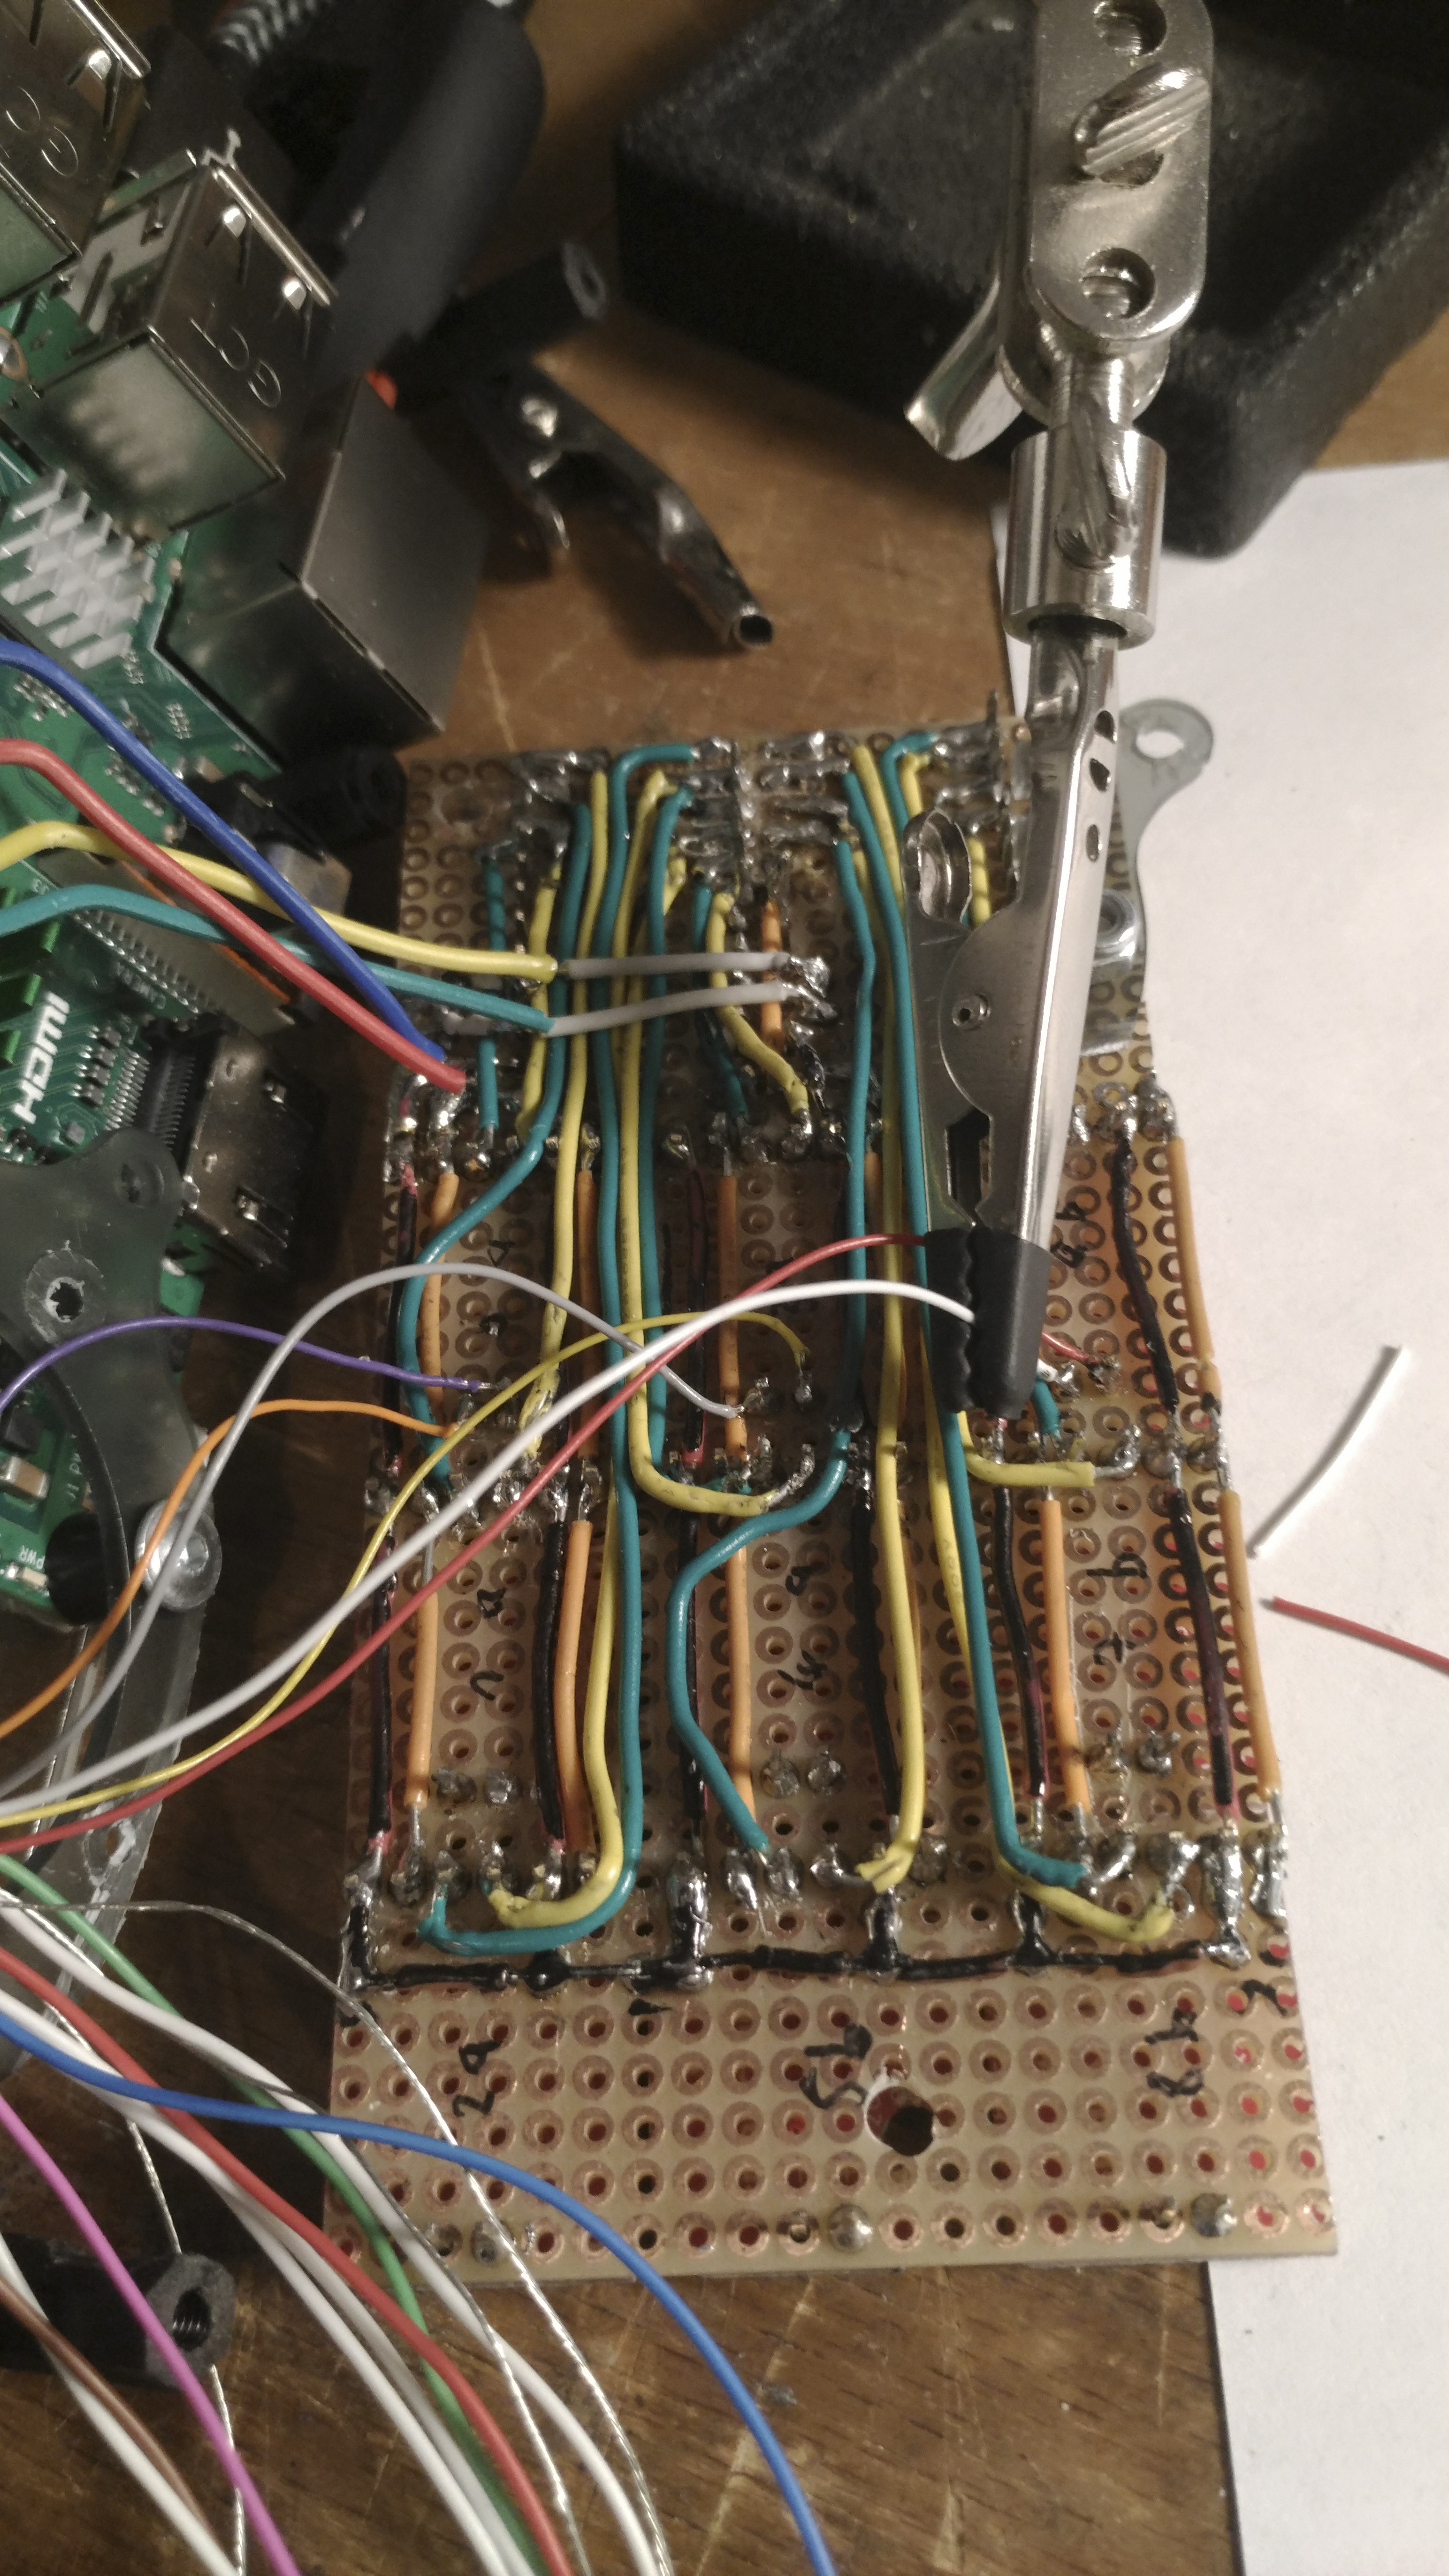
Having an upcoming TV shooting with a blind test person in mind, I reached another intermediate goal: as already mentioned in my previous post I moved the platform from laptop to Raspi 3b+ and from crappy plugged electronics to a soldered shield doing all the output stuff. Things can be much smaller in future being soldered on a pcb made for this purpose. But for now I used the breakout boards of the TCAs and the DRVs as it is easier to solder them and to replace them in case of faults.
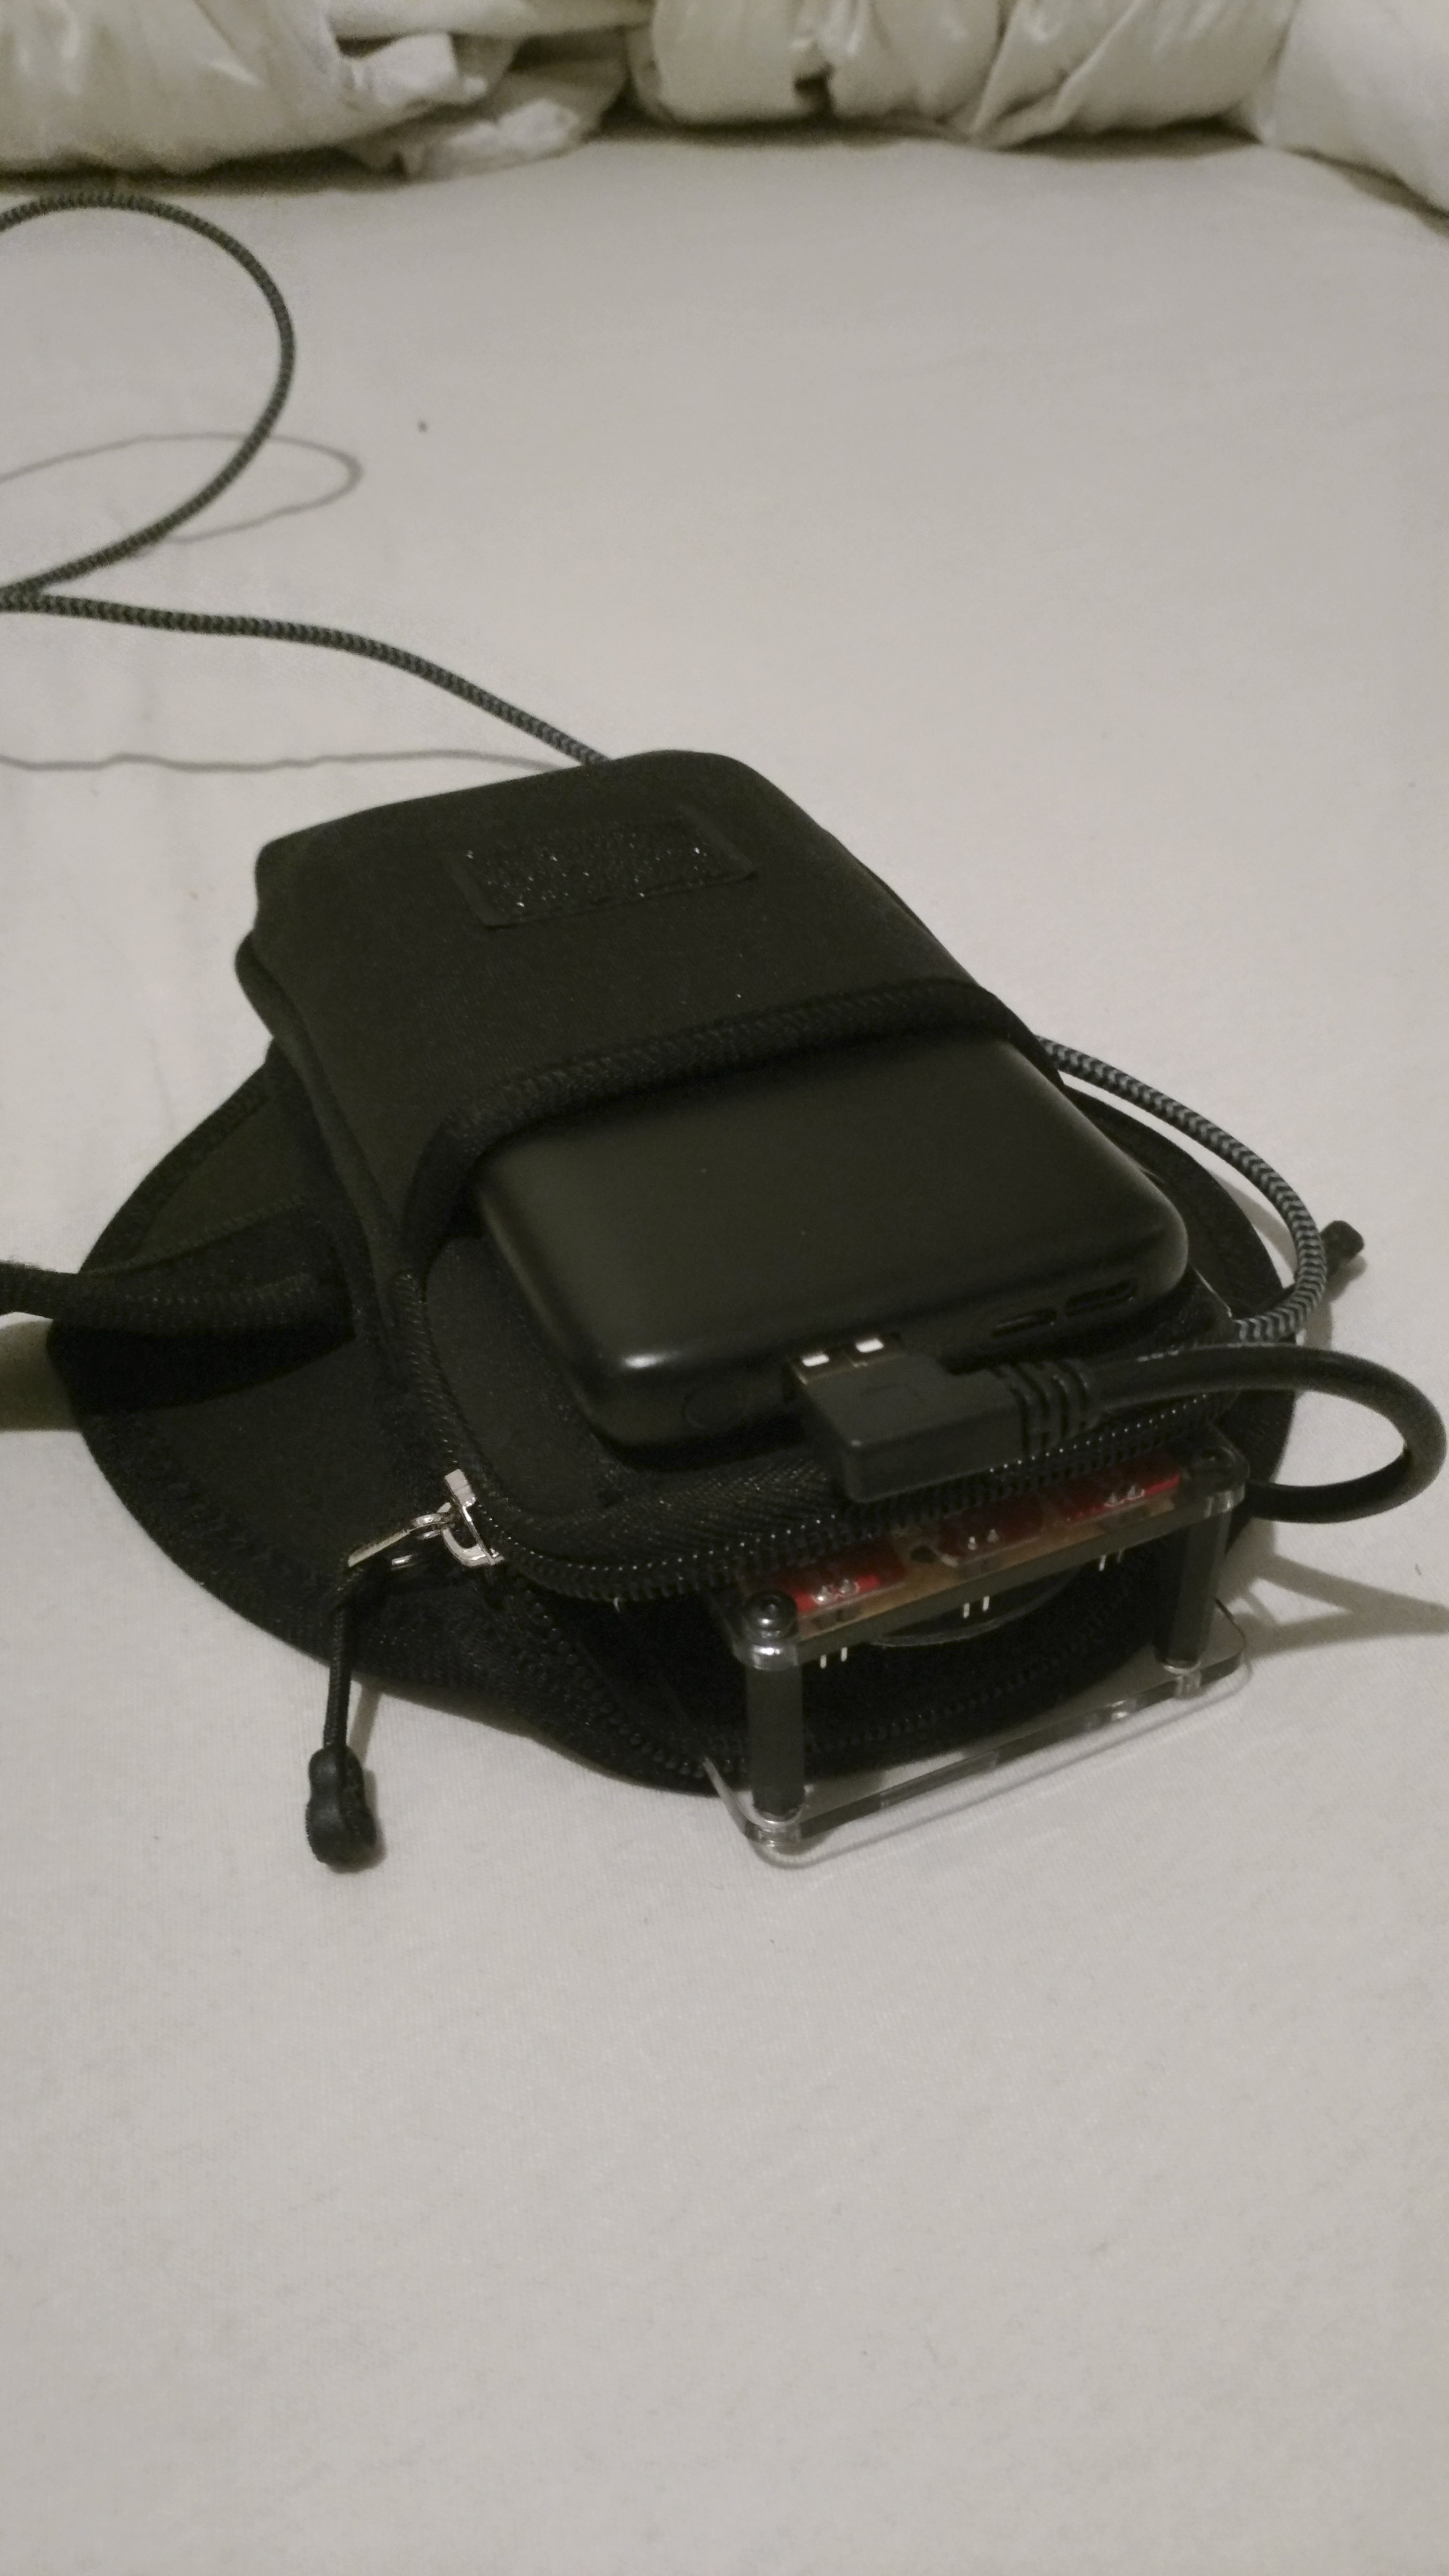
Power Supply
I decided to use standard USB powerbank for power supply as they are interchangeable, they already come with housing, charge controller and some safety features. As my nine vibration actuators take around 400mA at 3V I decided to power them from the raspi’s 3V output pin. Therefore I can power the whole device with a powerbank. As one read in many discussions on the internet, voltage is a critical thing for the 3b+. Using bad USB cables (and most of them out there are indeed bad) voltage can drop significantly under full load. That is because powerbanks are not made to keep the voltage on a specific level and those cables come with very thin wires (some of mine had more than 0.2 ohm on 20cm which would lead to -0.4v at 2A). As it is difficult to find cables that have specific data about their quality (like the AWG value) I just ordered a few to test. In the end I chose a 10cm cable from System-S and got a the Anker PowerCore Lite 10000mAh which comes with 5.2V output (little bit higher than others) and which is said not to have huge voltage drops. With this setting I have relatively stable voltage supply and didn’t get the voltage-warning-bolt.
Range Adjustment
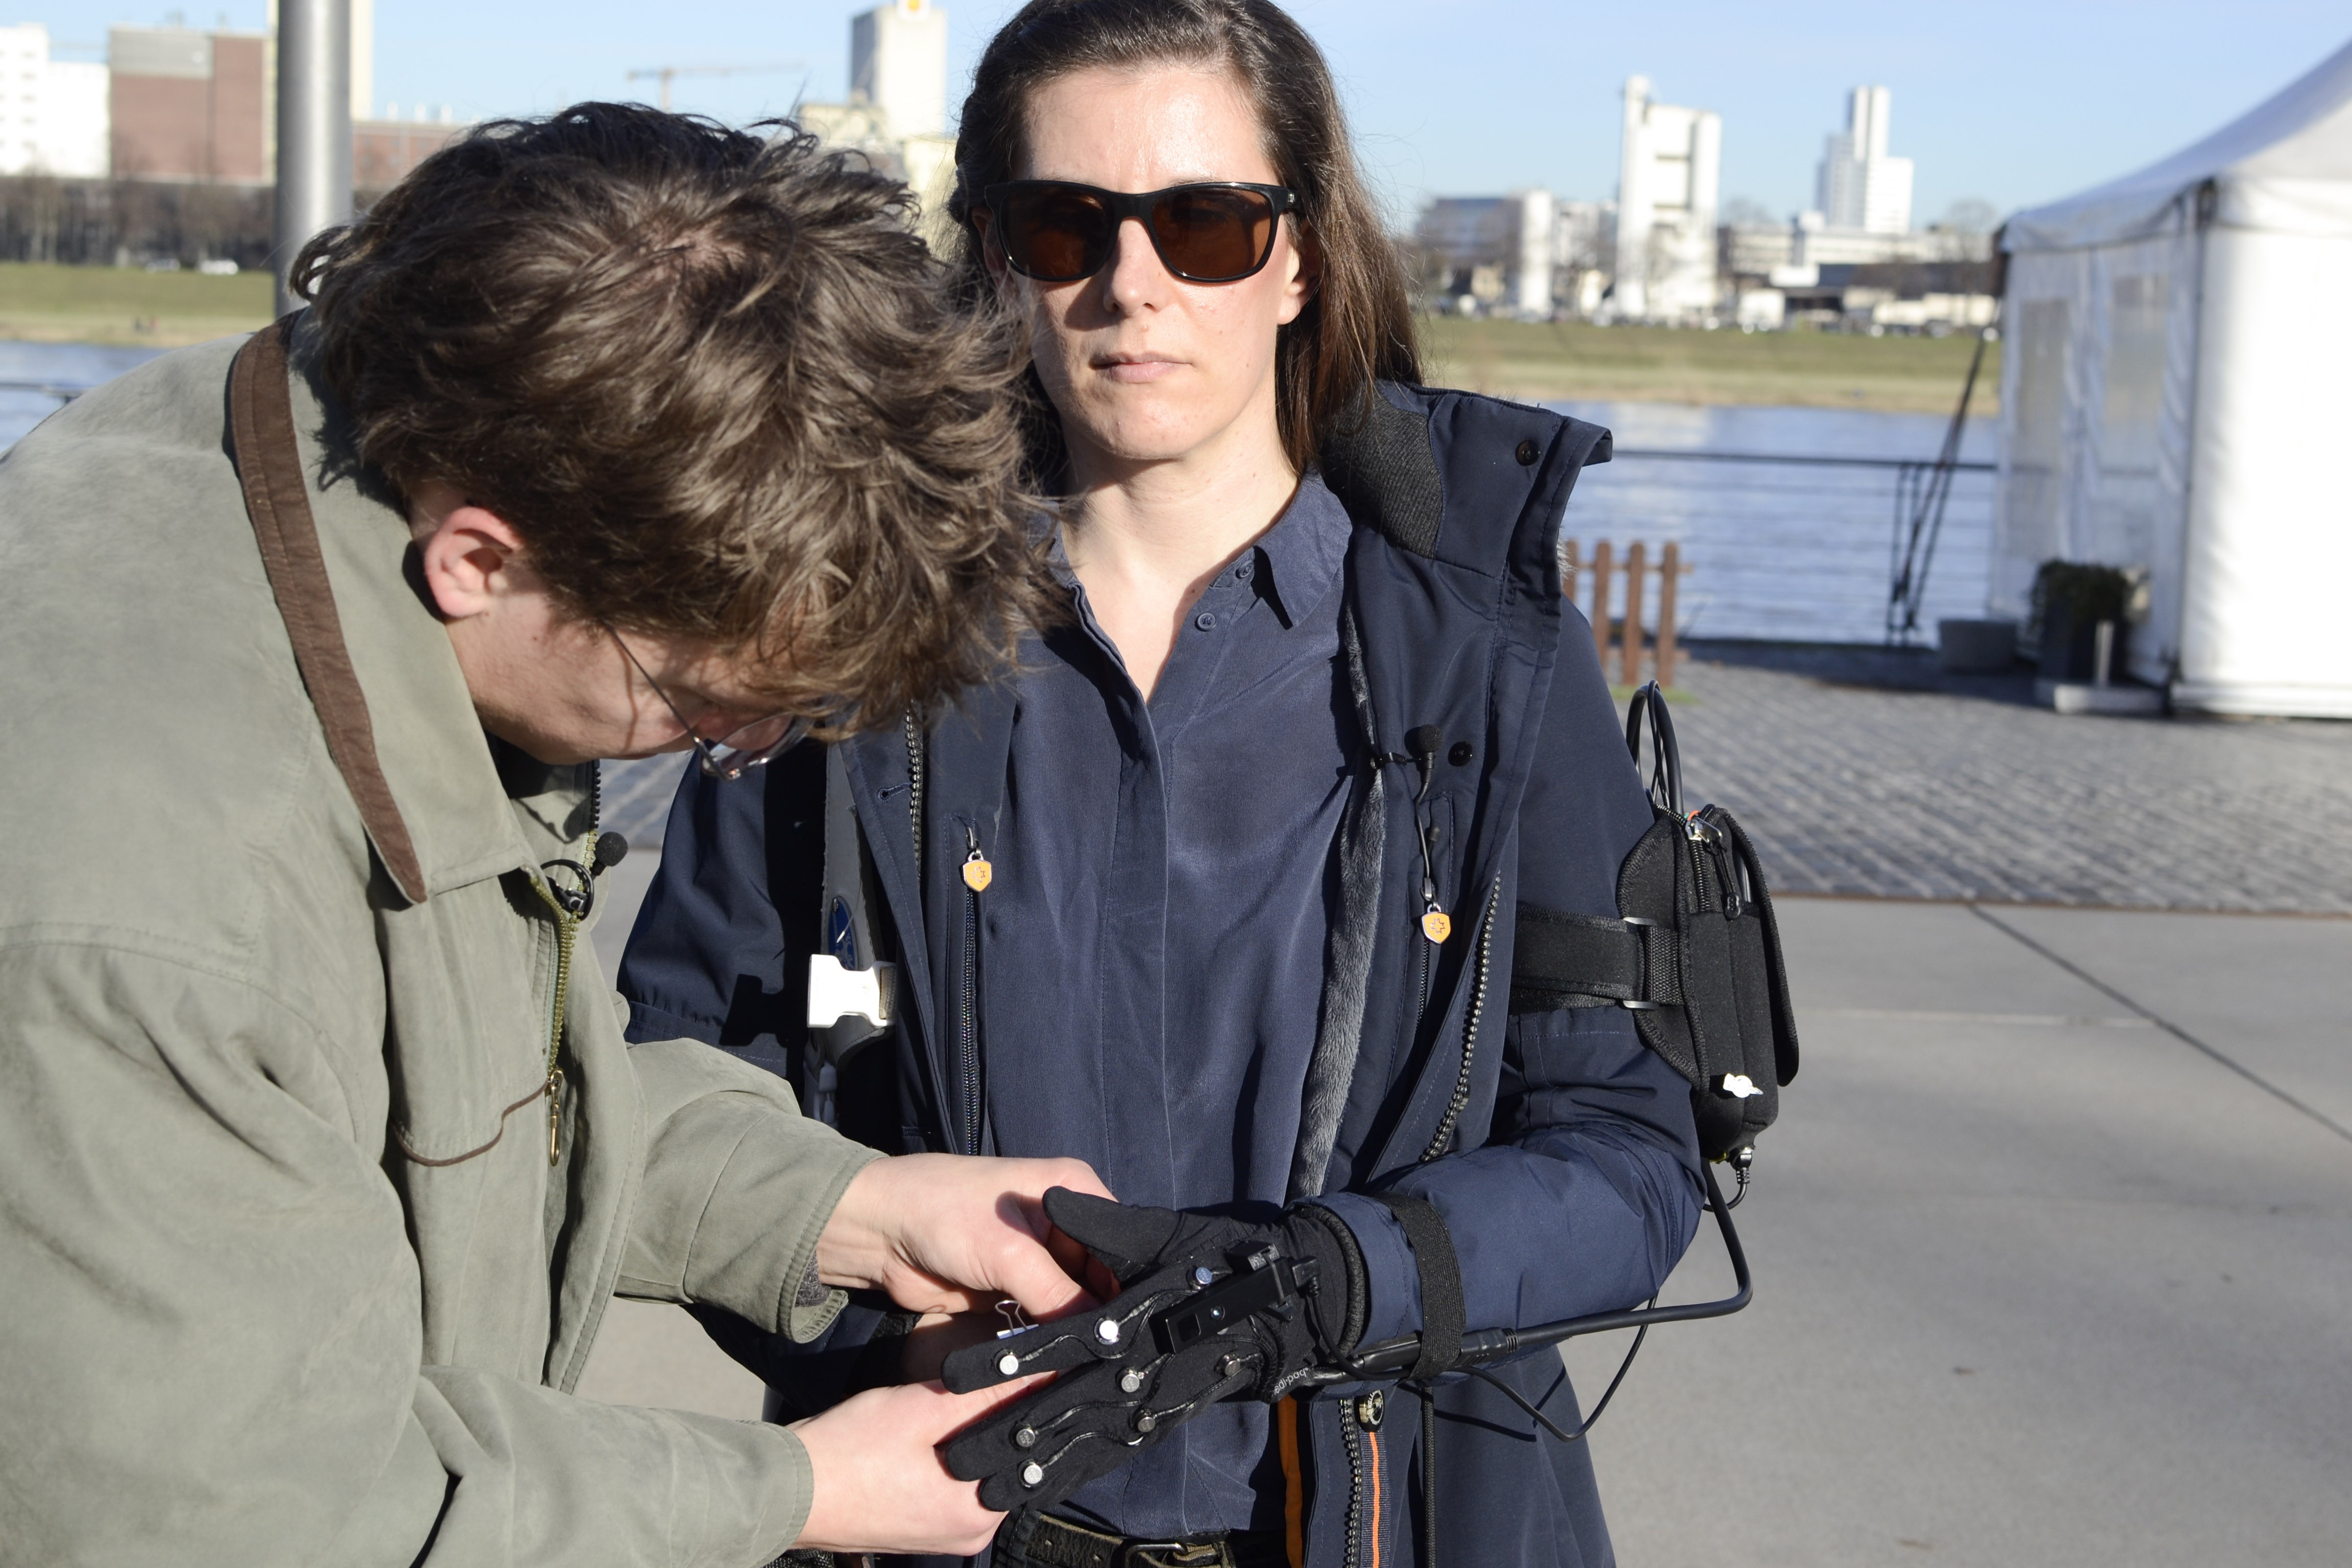
As the use cases of the device differ a lot (e.g. indoor vs. outdoor) I wanted to have a adjustable depth range. As I needed an interface which is useable for blind people, I went for an analog potentiometer. It is input and output at the same time as it can be used both to adjust
the value as well as to read the current range setting. Using an analog poti with a raspberry is more difficult than I thought, as you need a separate a/d converter because of the absence of analog inputs on the raspi. The Digispark microcontrollers are a good workaround for this (thanks to: Paul C. Brown) I had some trouble setting it up but in the end it worked out pretty well. For a better tangibleness I printed out an asymmetrical poti cap.
Shield and Case
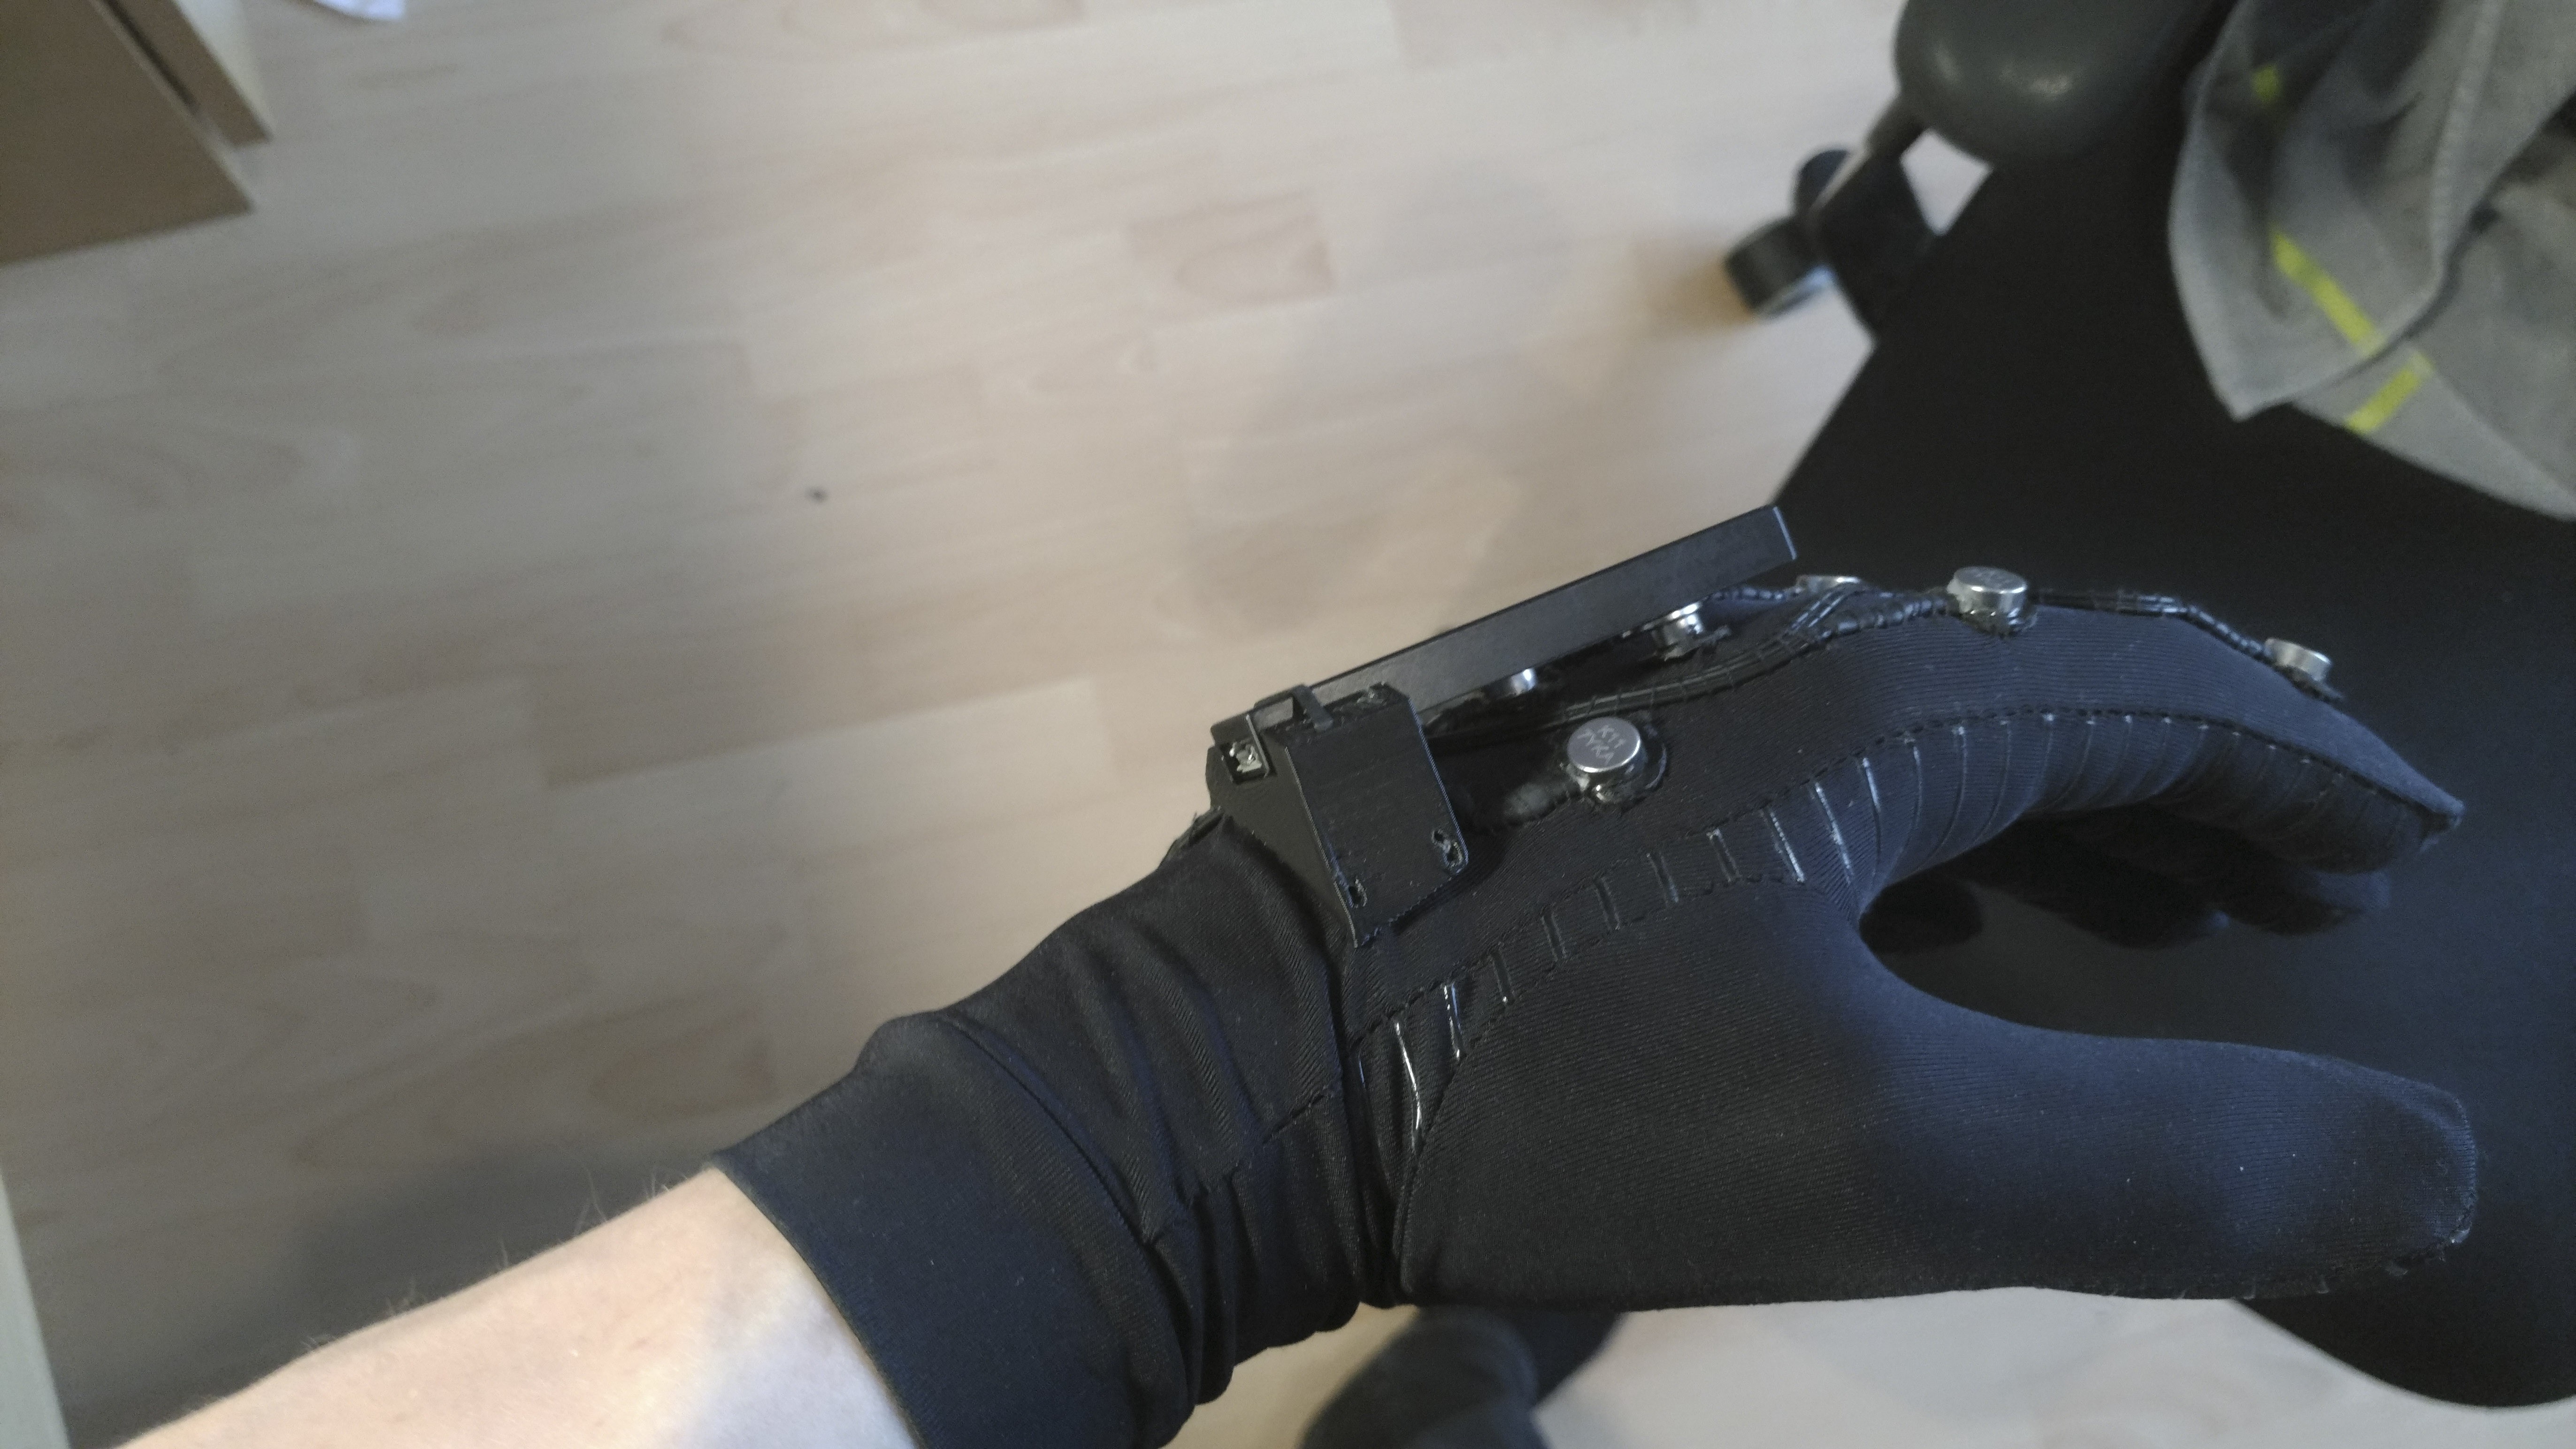
The soldering of the shield and the mounting on the raspi wasn’t planned very well but included a lot of improvising. As I wrote in the beginning, this is just an intermediate step and the ICs can be placed in much higher density on a single pcb in future. When everything was fixed I lasercut an acrylic case to protect the electornics from shorts and pressure whilst ensuring enough air flow to protect the raspi from overheating. Everything was crammed in the cheap sport arm band you can see on the pictures to wear it at the upper arm. The camera on the glove also got a new 3d printed support:
Code
I am designer and therefore not an expert in coding. To port the code to the raspberry I I therefore got help from friends at Press Everykey. After loads of performance and stability issues I added the adjustable range function and the possibility to stream the raw tof camera data to a tablet as well as the processed tiles that control the vibration actuators. As I already announced, I will release the code, when it is on a clean and understandable level. If you are interested in hundreds of messy code lines you can of course contact me now… ;-)
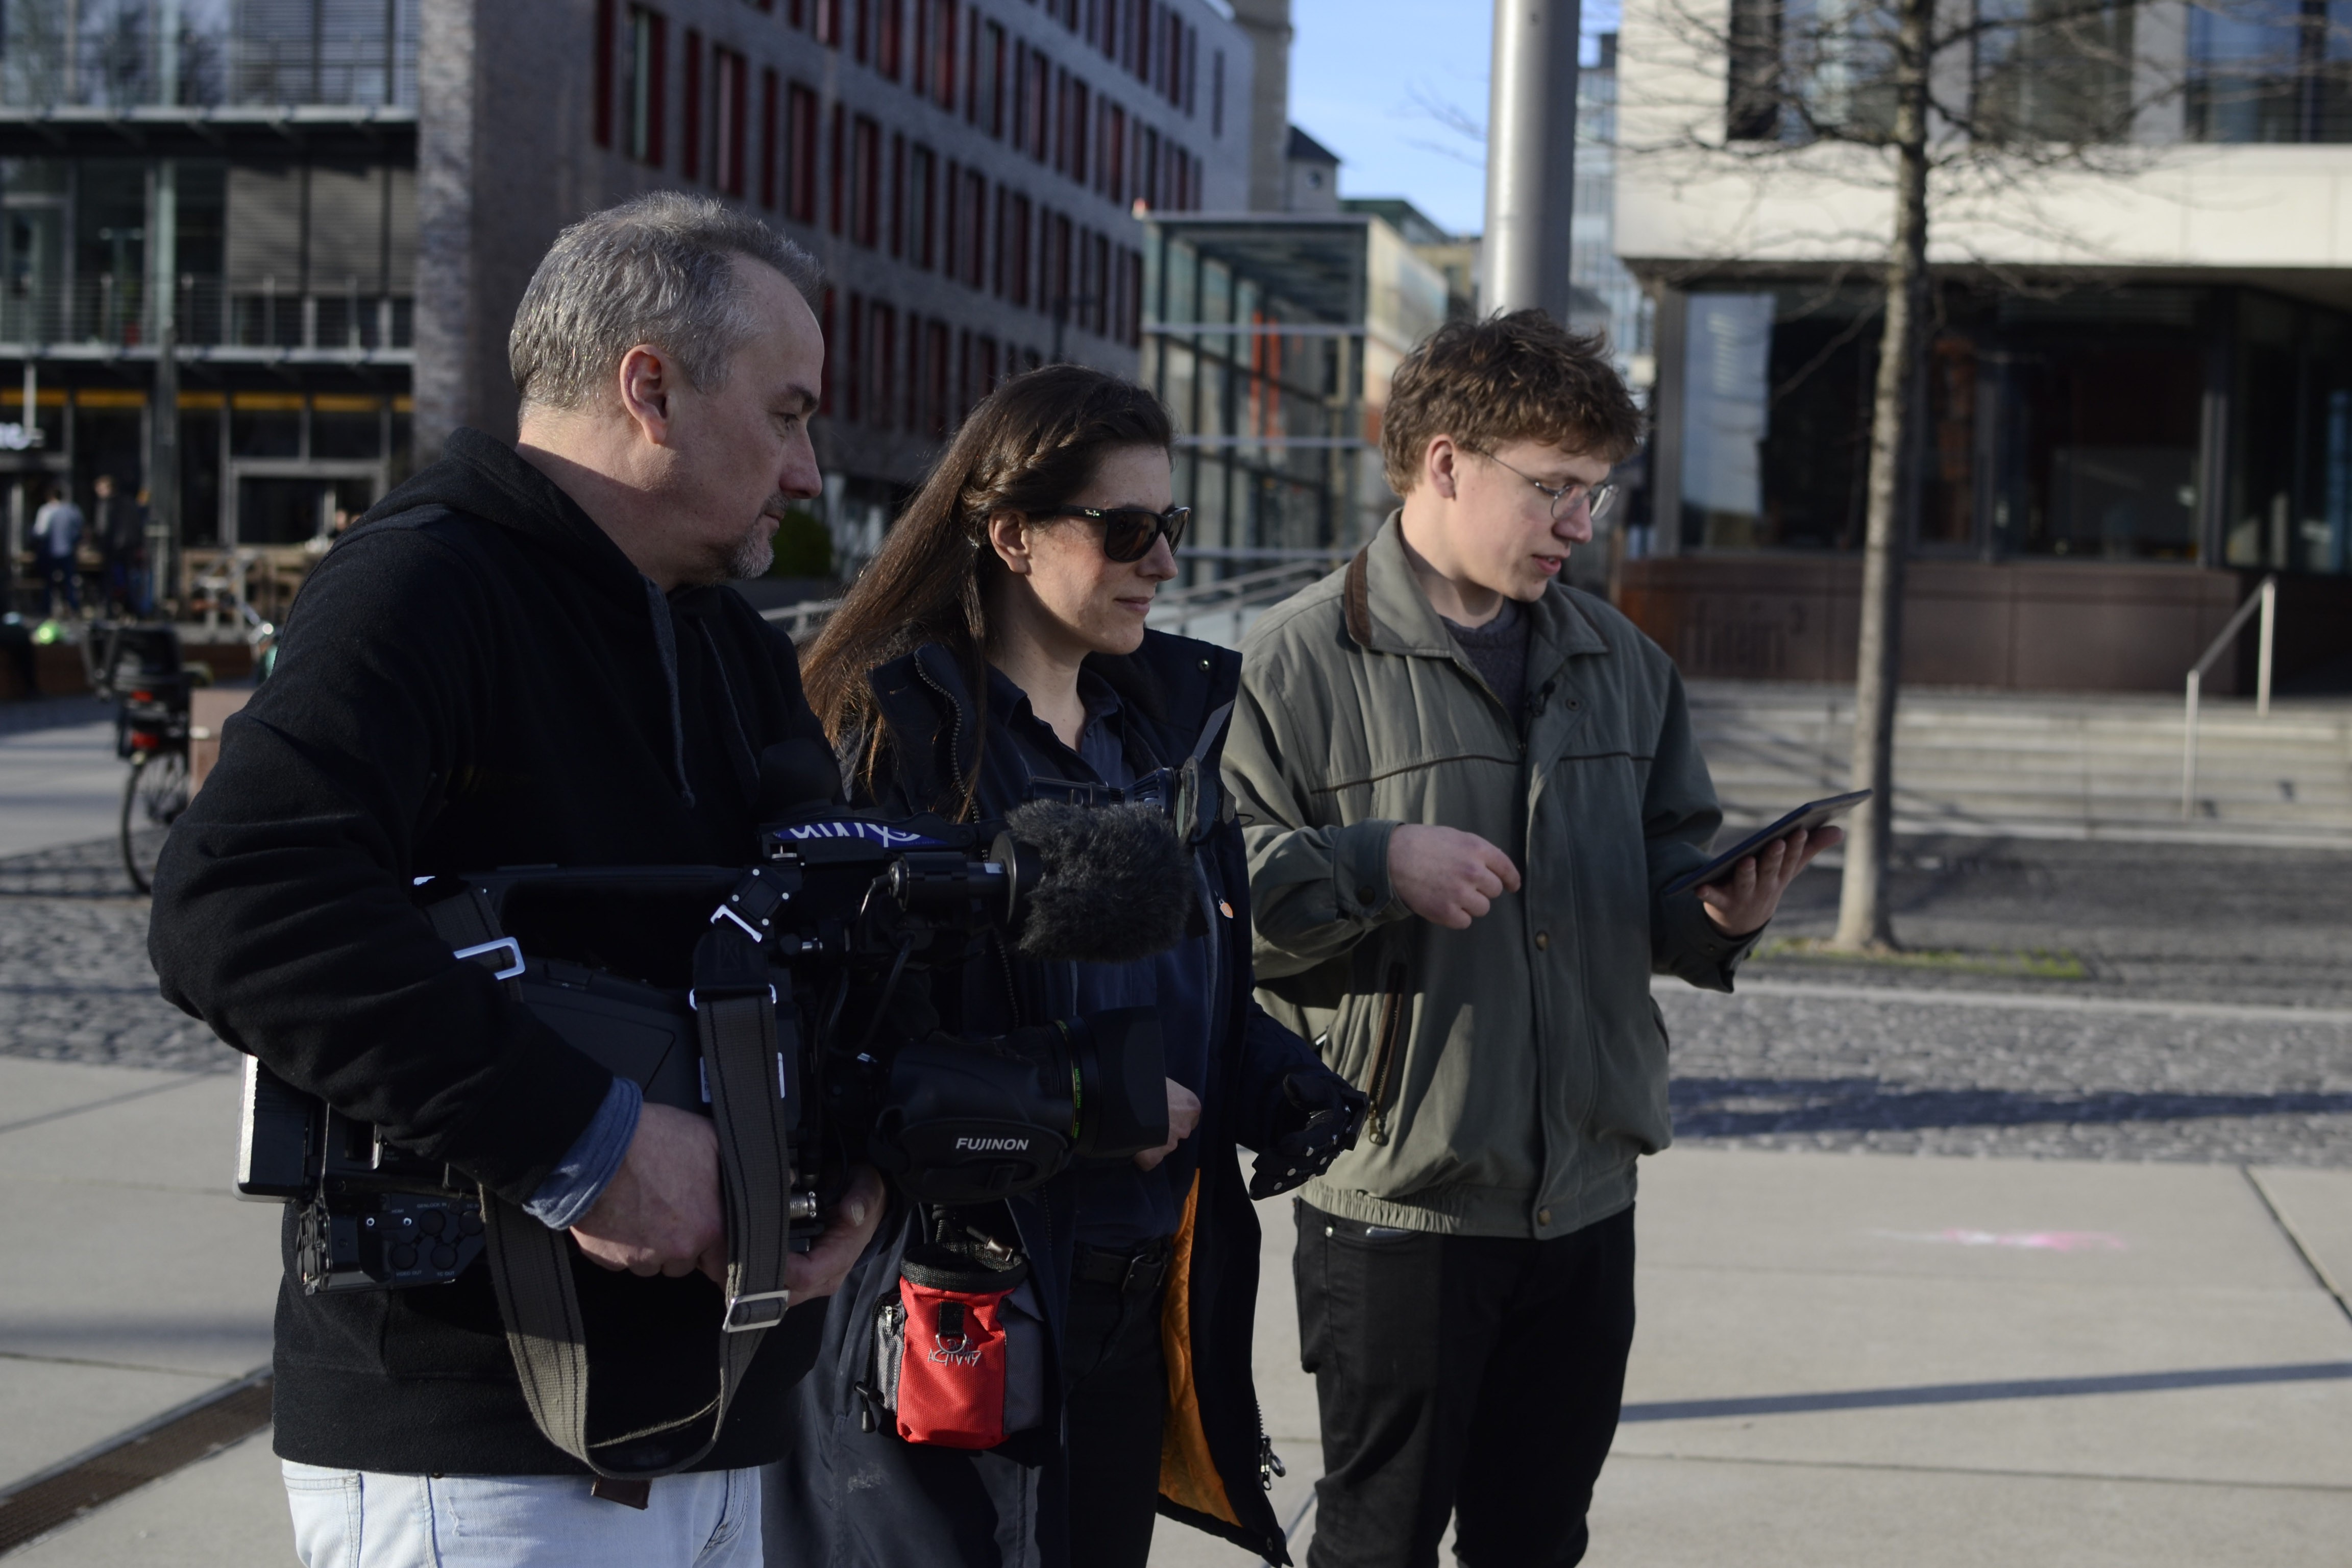
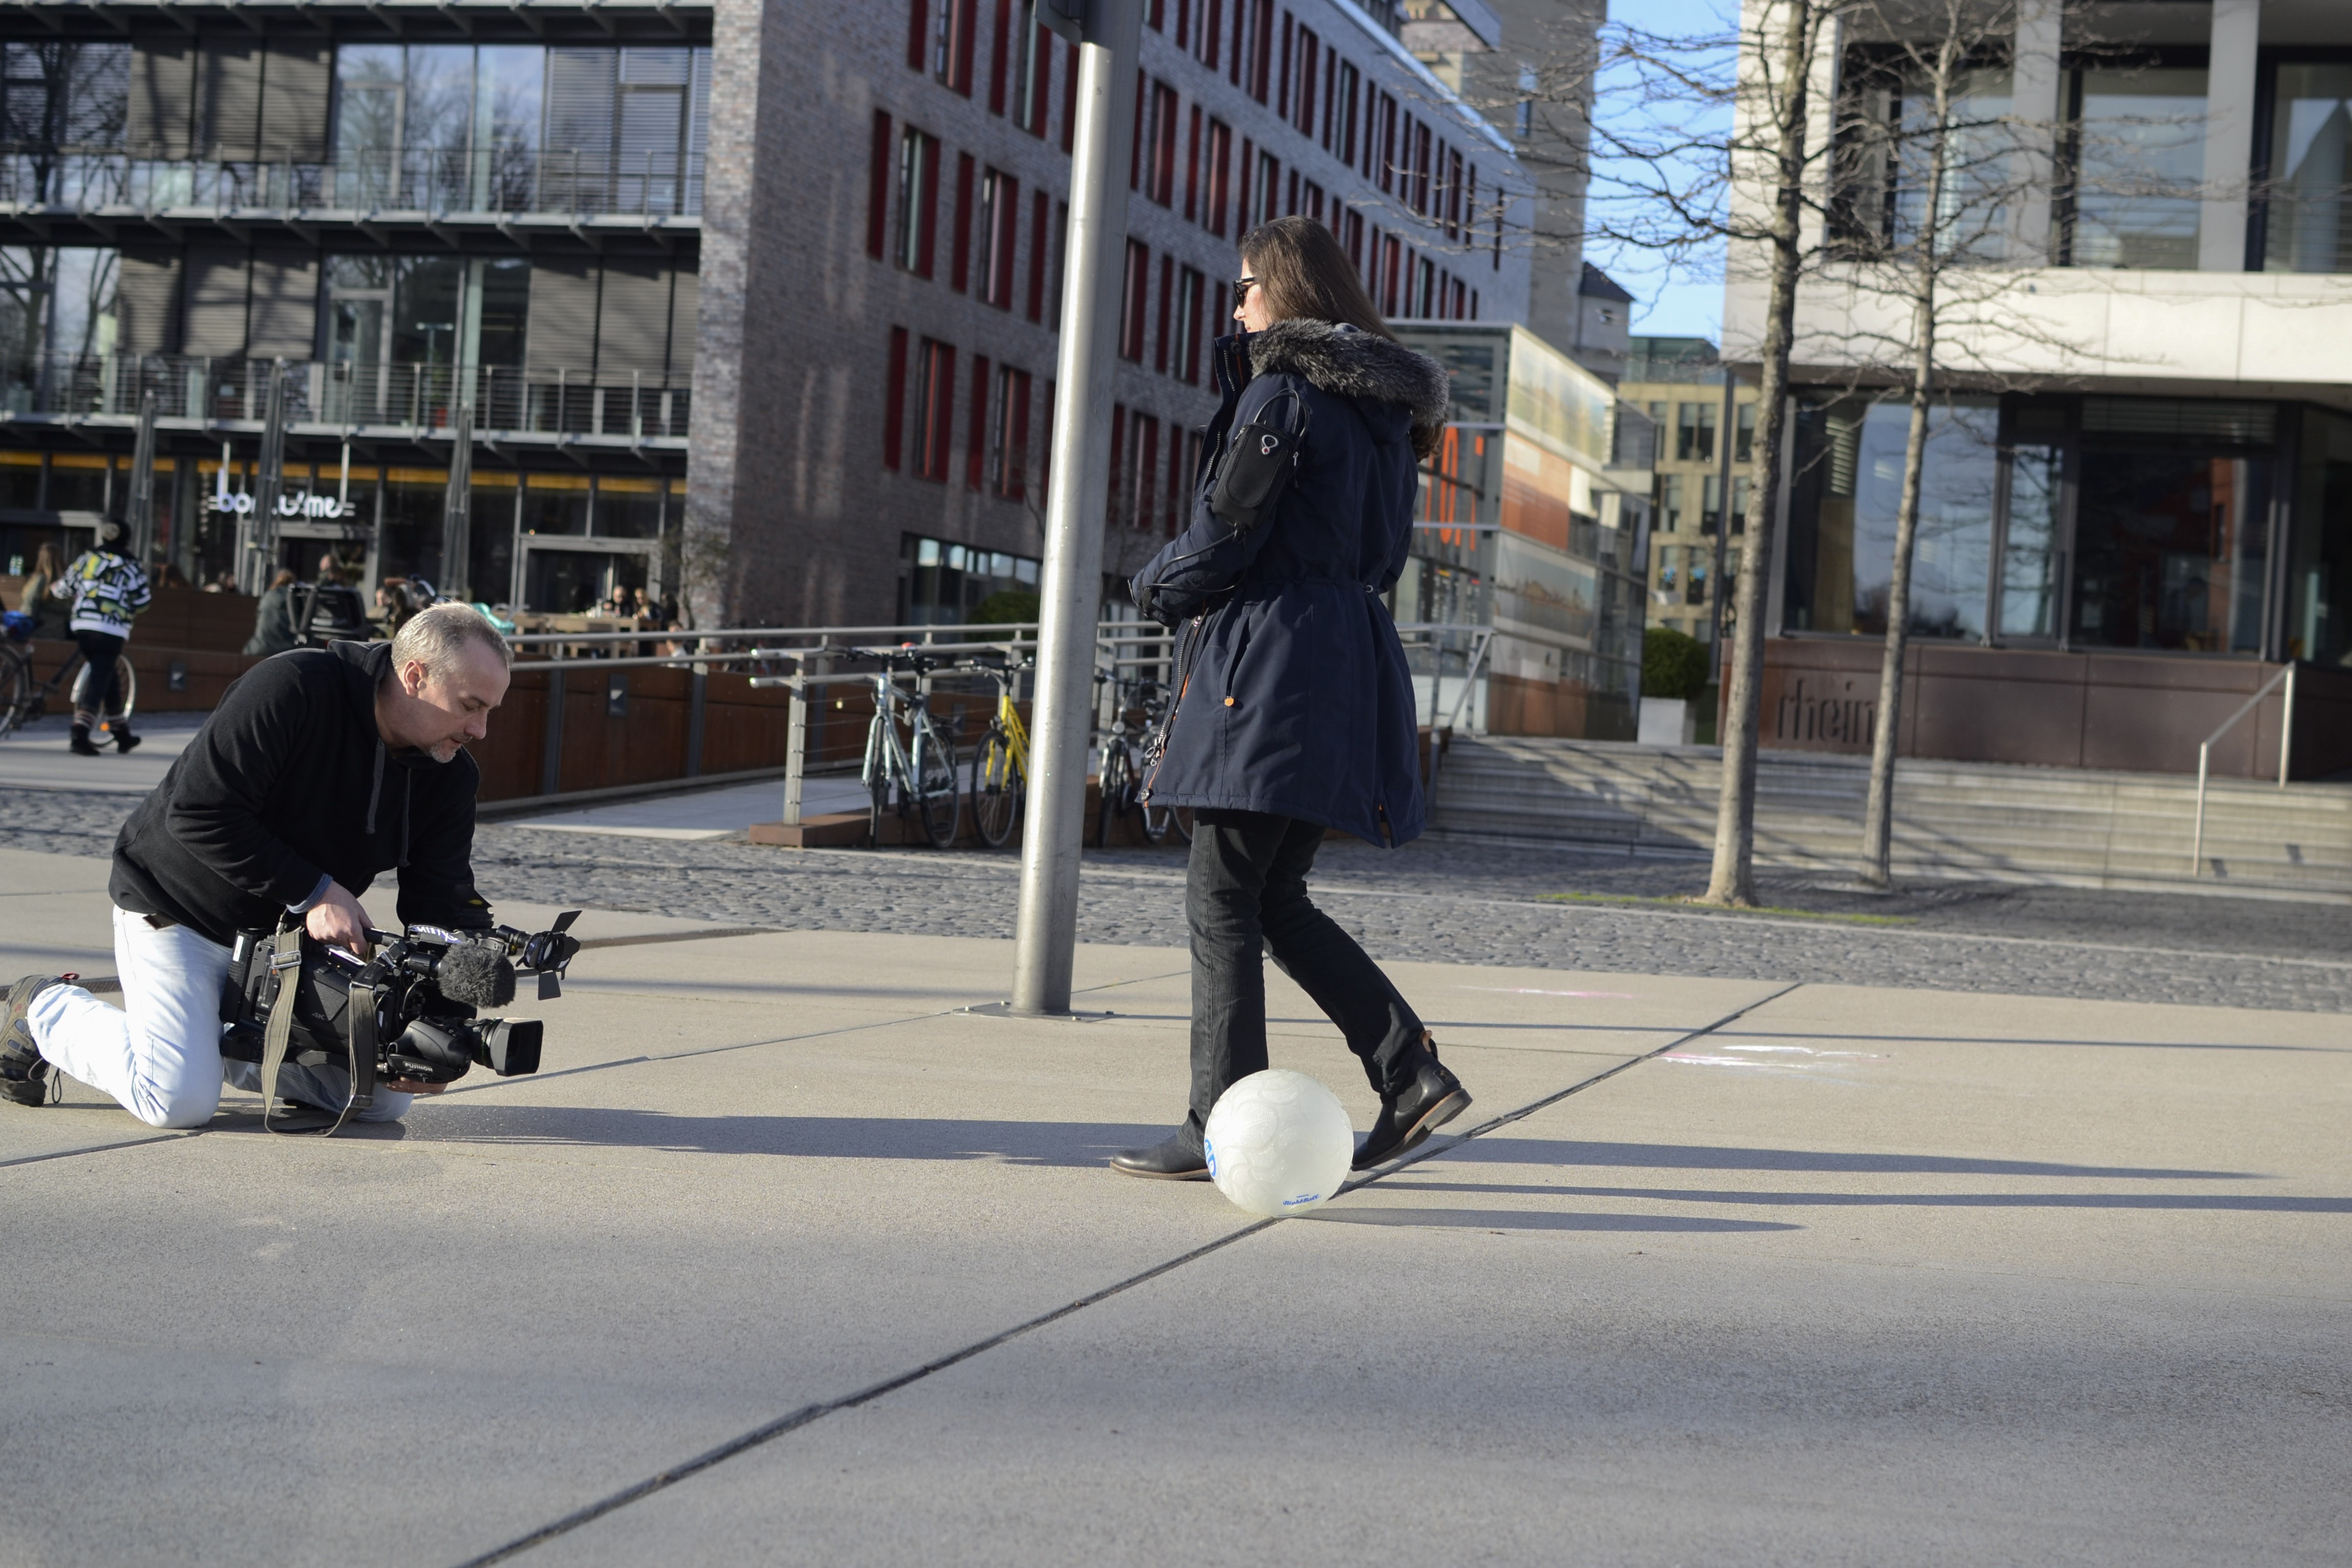
Shooting
After replacing a broken actuator in the last night, the stuff was finally ready for the shooting with the german tv station. Technically everything went well but due to a fix schedule there wasn’t much time to go into detail. The blind test person had problems to get familiar with the new device as we didn’t really have the possibility to train the new inputs with calmness and sensibility. I am looking forward to the (very short – 03:15 mins) broadcast but proper evaluation and testing of course need to take place in another setting with more time and also more test persons…
So far for the moment, hopefully I will find time to upload details and files in the next weeks. Feel free to contact me, if you have any question or if you are interested to work on this topic…
Discussions
Become a Hackaday.io Member
Create an account to leave a comment. Already have an account? Log In.