Close
0%
0%

Say hello to AR3

STEM-based humanoid robot

Similar projects worth following
I love robotics because it is an interdisciplinary branch of engineering and science that includes mechanical engineering, electronic engineering, information engineering, computer science, and many others. STEM robots are a great way to introduce Science, Technology, Engineering, and Math to our children. Using STEM robots can be a fun and educational experience for just about anyone, regardless of age.

AR3 is a small modular humanoid robot of the LEGO EV3 form factor. The brain of AR3 is an ARDUINO MEGA 2560 with an according shield. Different to the LEGO BRICK parts of the electronics are exposed. The shield utilizes several 2.5mm pitch pin-and-socket connectors for analog and digital sensors and four 2.54 pitch pin-and-socket connectors for actuators (servos). The shield contains furthermore the low drop voltage regulator LM1084-5.0 with an output current of up to 5 A, an on/off switch, a monochrome 1.3" 128 x 64 OLED graphic display, a micro joystick, a SD card connector, a voltage monitor and a SMD piezo buzzer to generate sounds.

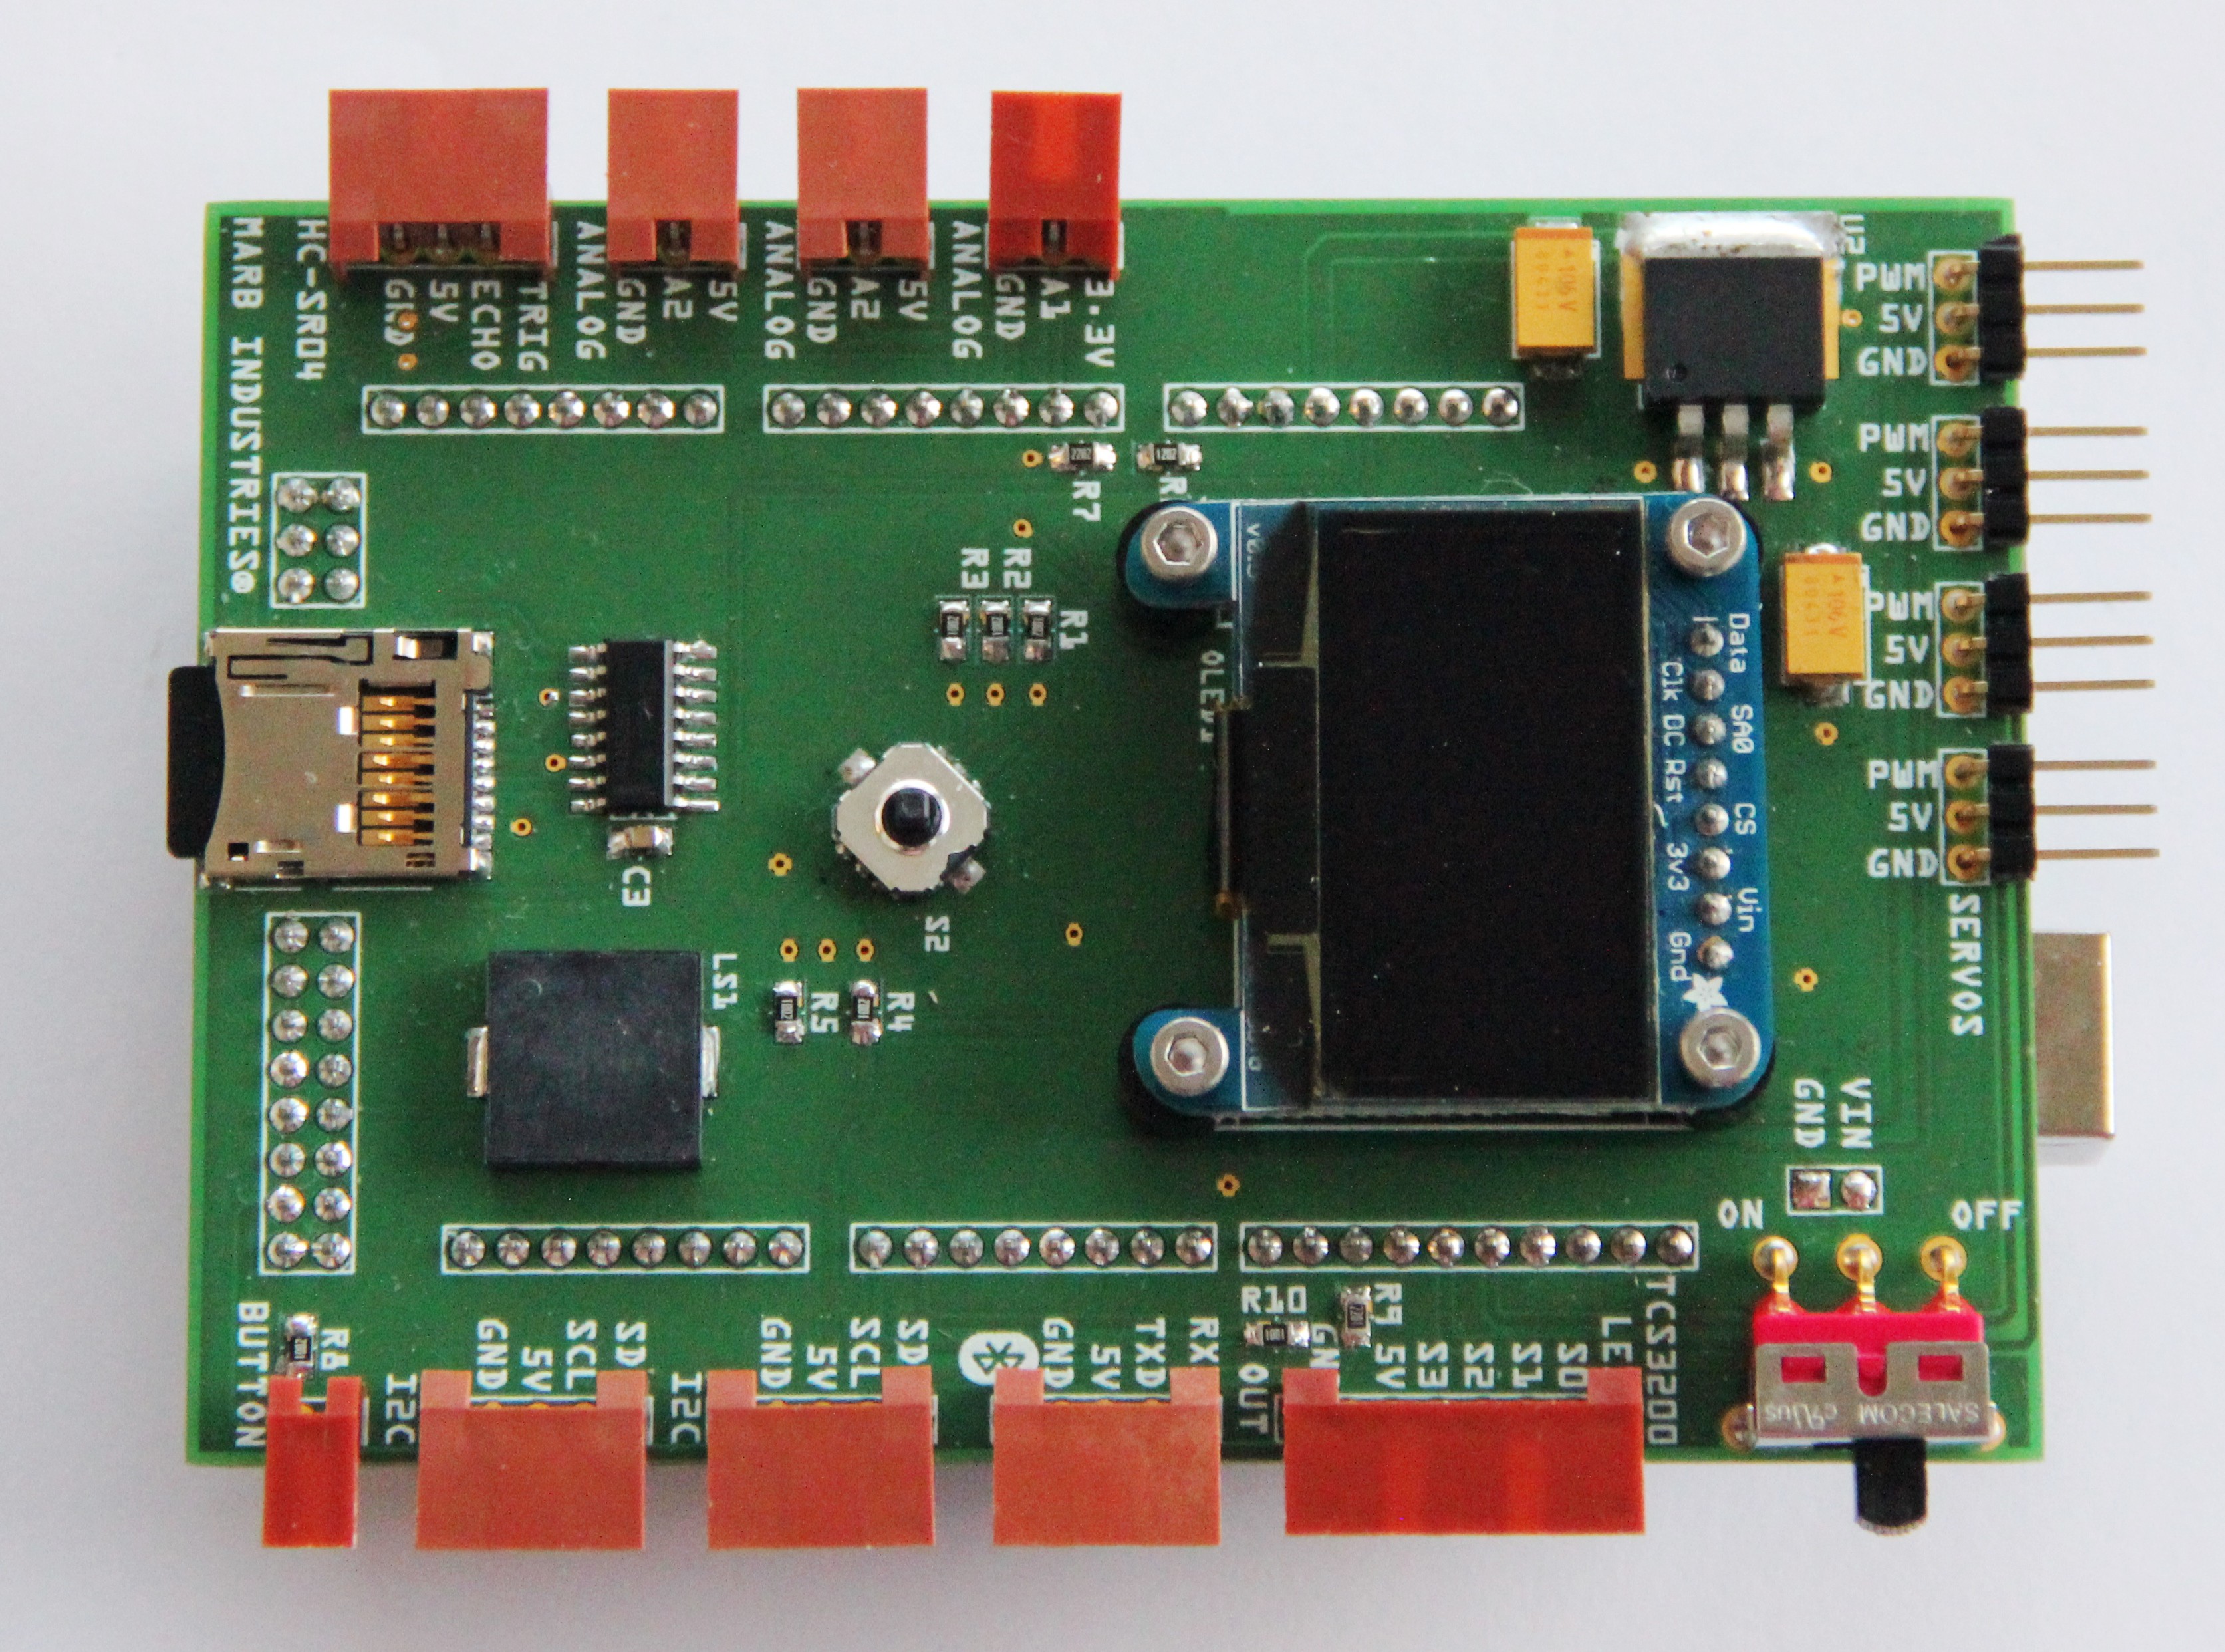
Fig. 1 Populated ARDUINO MEGA shield 

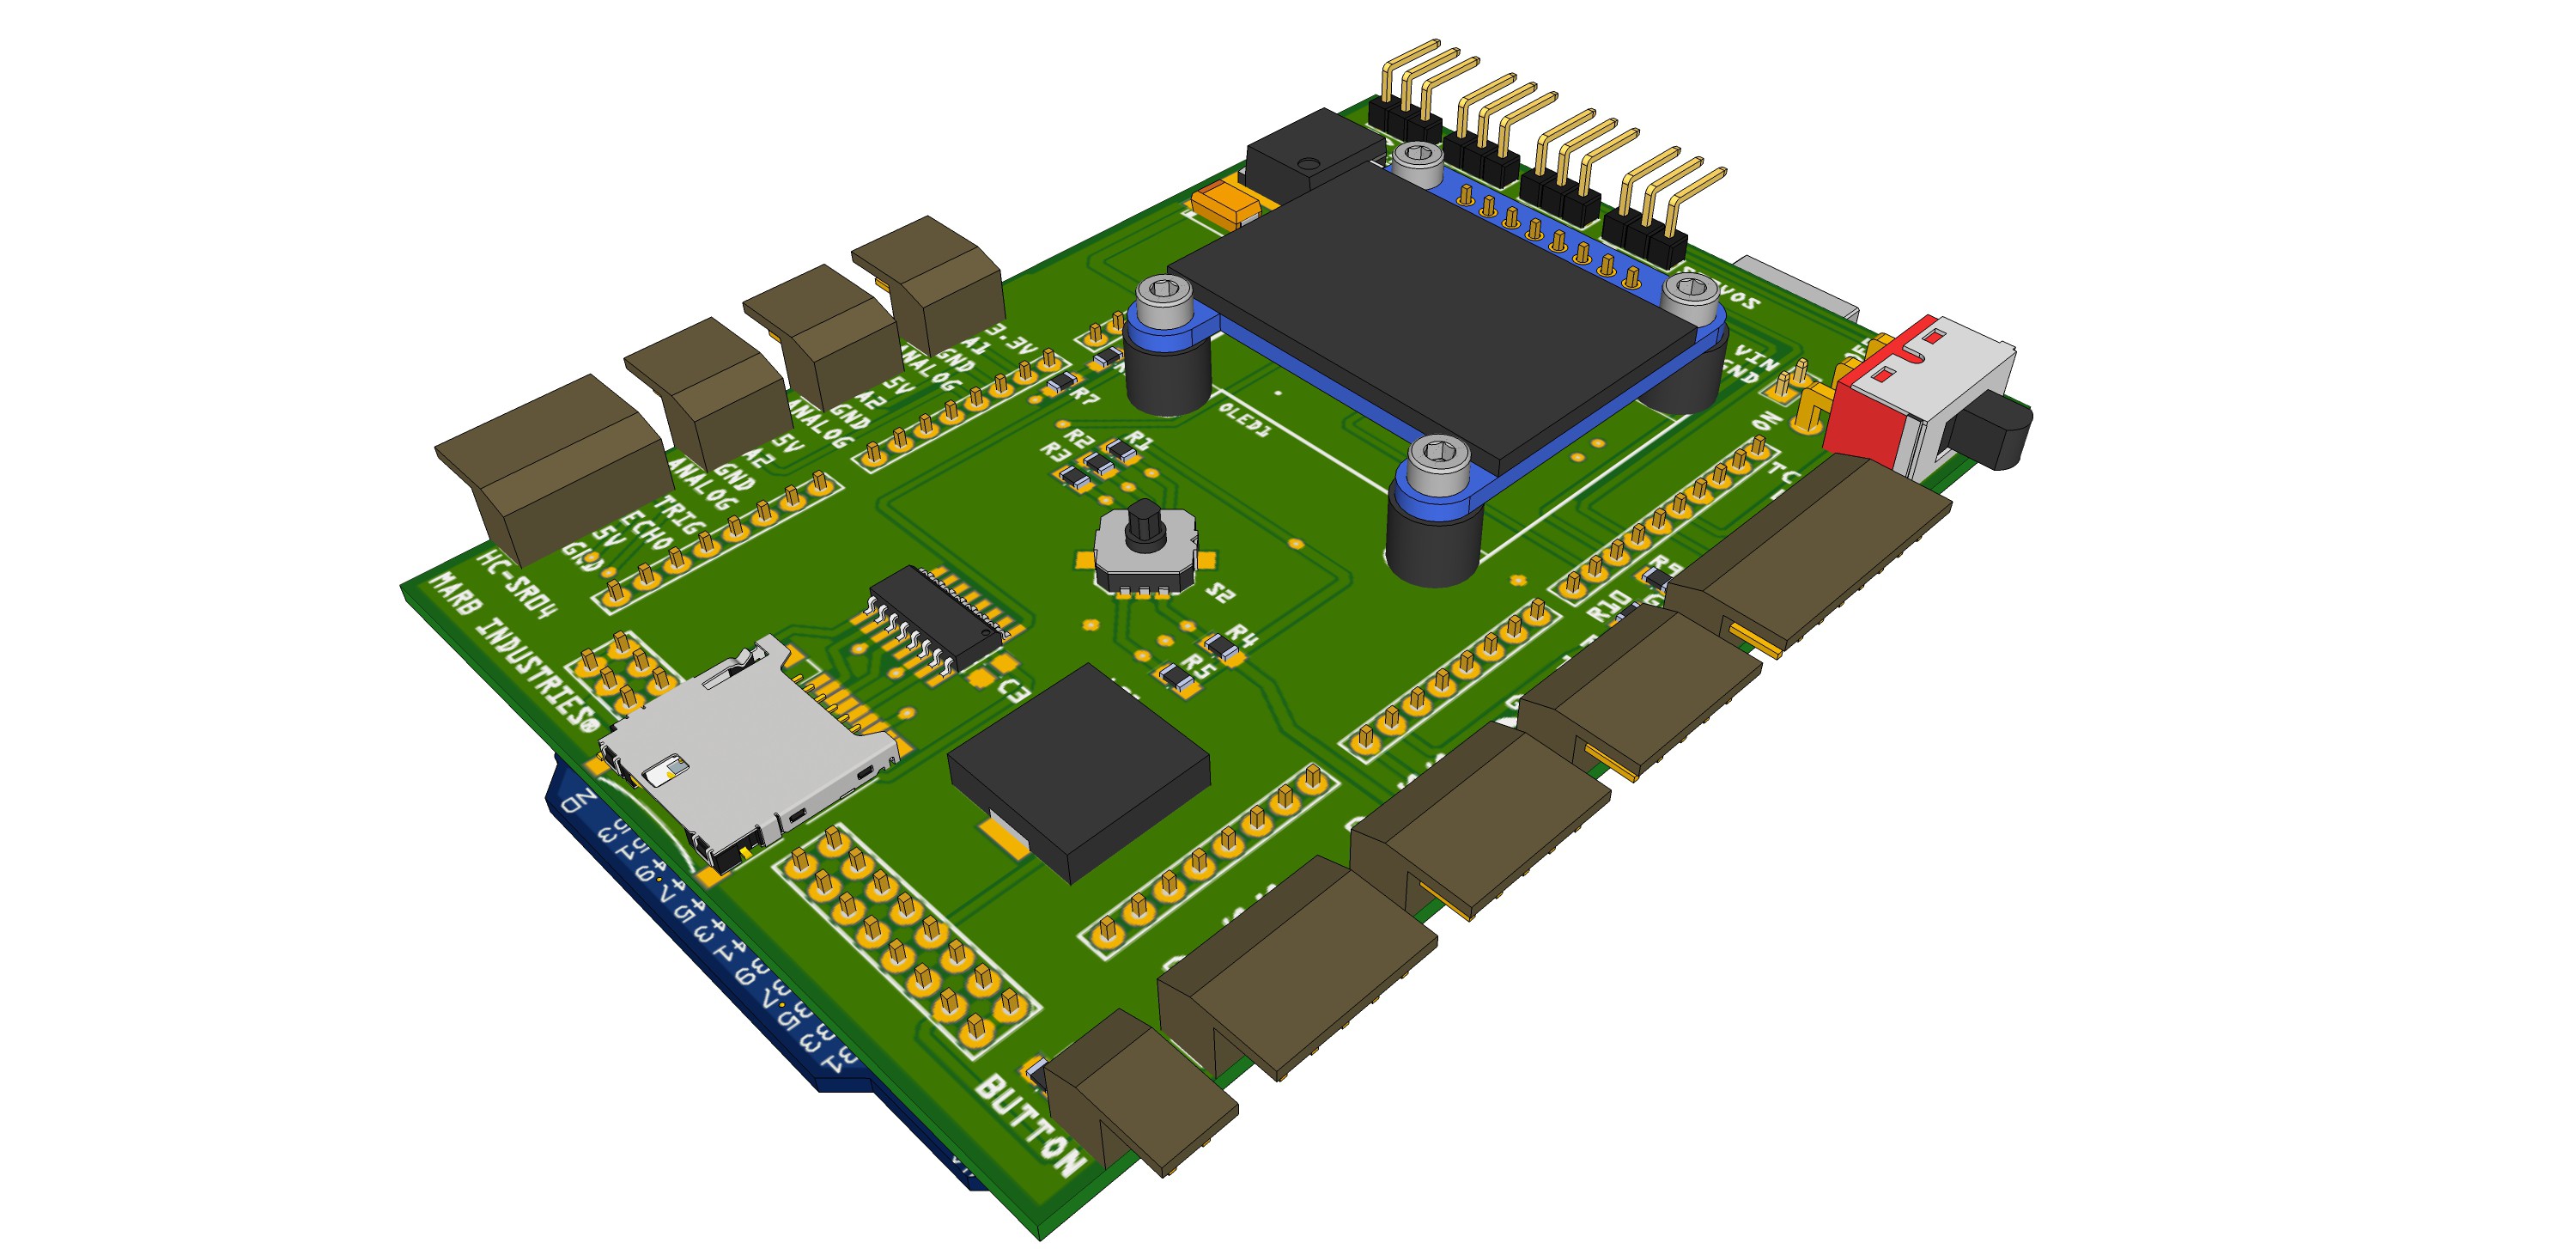
Fig. 2 CAD model of the shield

The head of the robot consists of 6 selective laser sintered, processed and different colored parts, printed by Shapeways and a HC-SR04 ultrasonic distance sensor as the "eyes" of the robot. The head features several additional mounting holes on the sides, top and bottom with a pitch of 6.5 mm and a diameter of 3 mm to attach additional actuators or sensors. Similar to LEGO I will keep this 6.5 mm pitch for mounting holes on all parts to make everything very modular and flexible. Different than LEGO I will use standard M3 screws and nuts to connect parts.
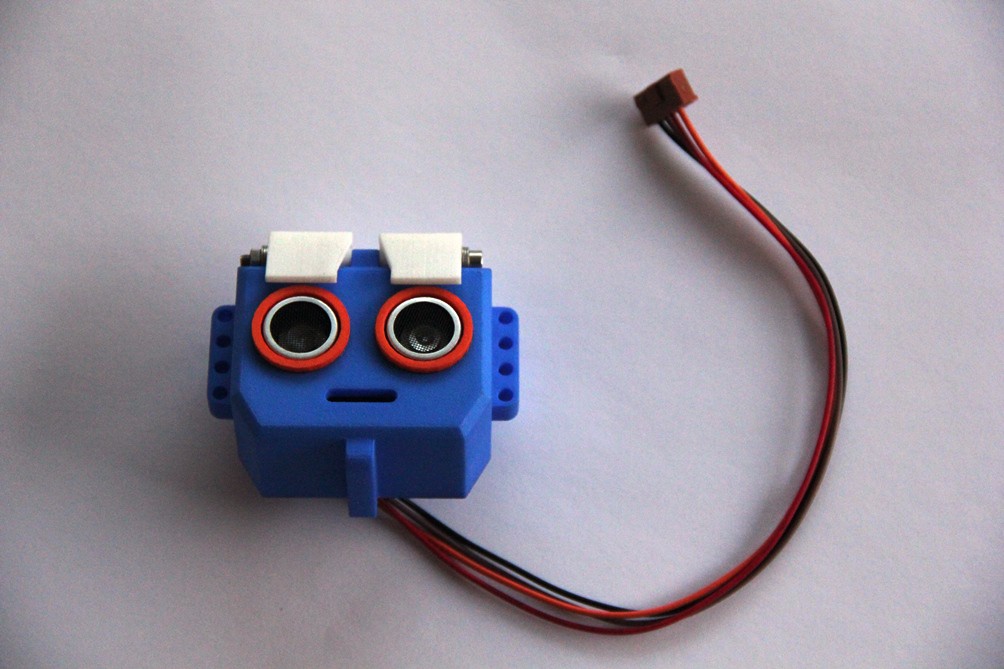
Fig. 3 Head of AR3

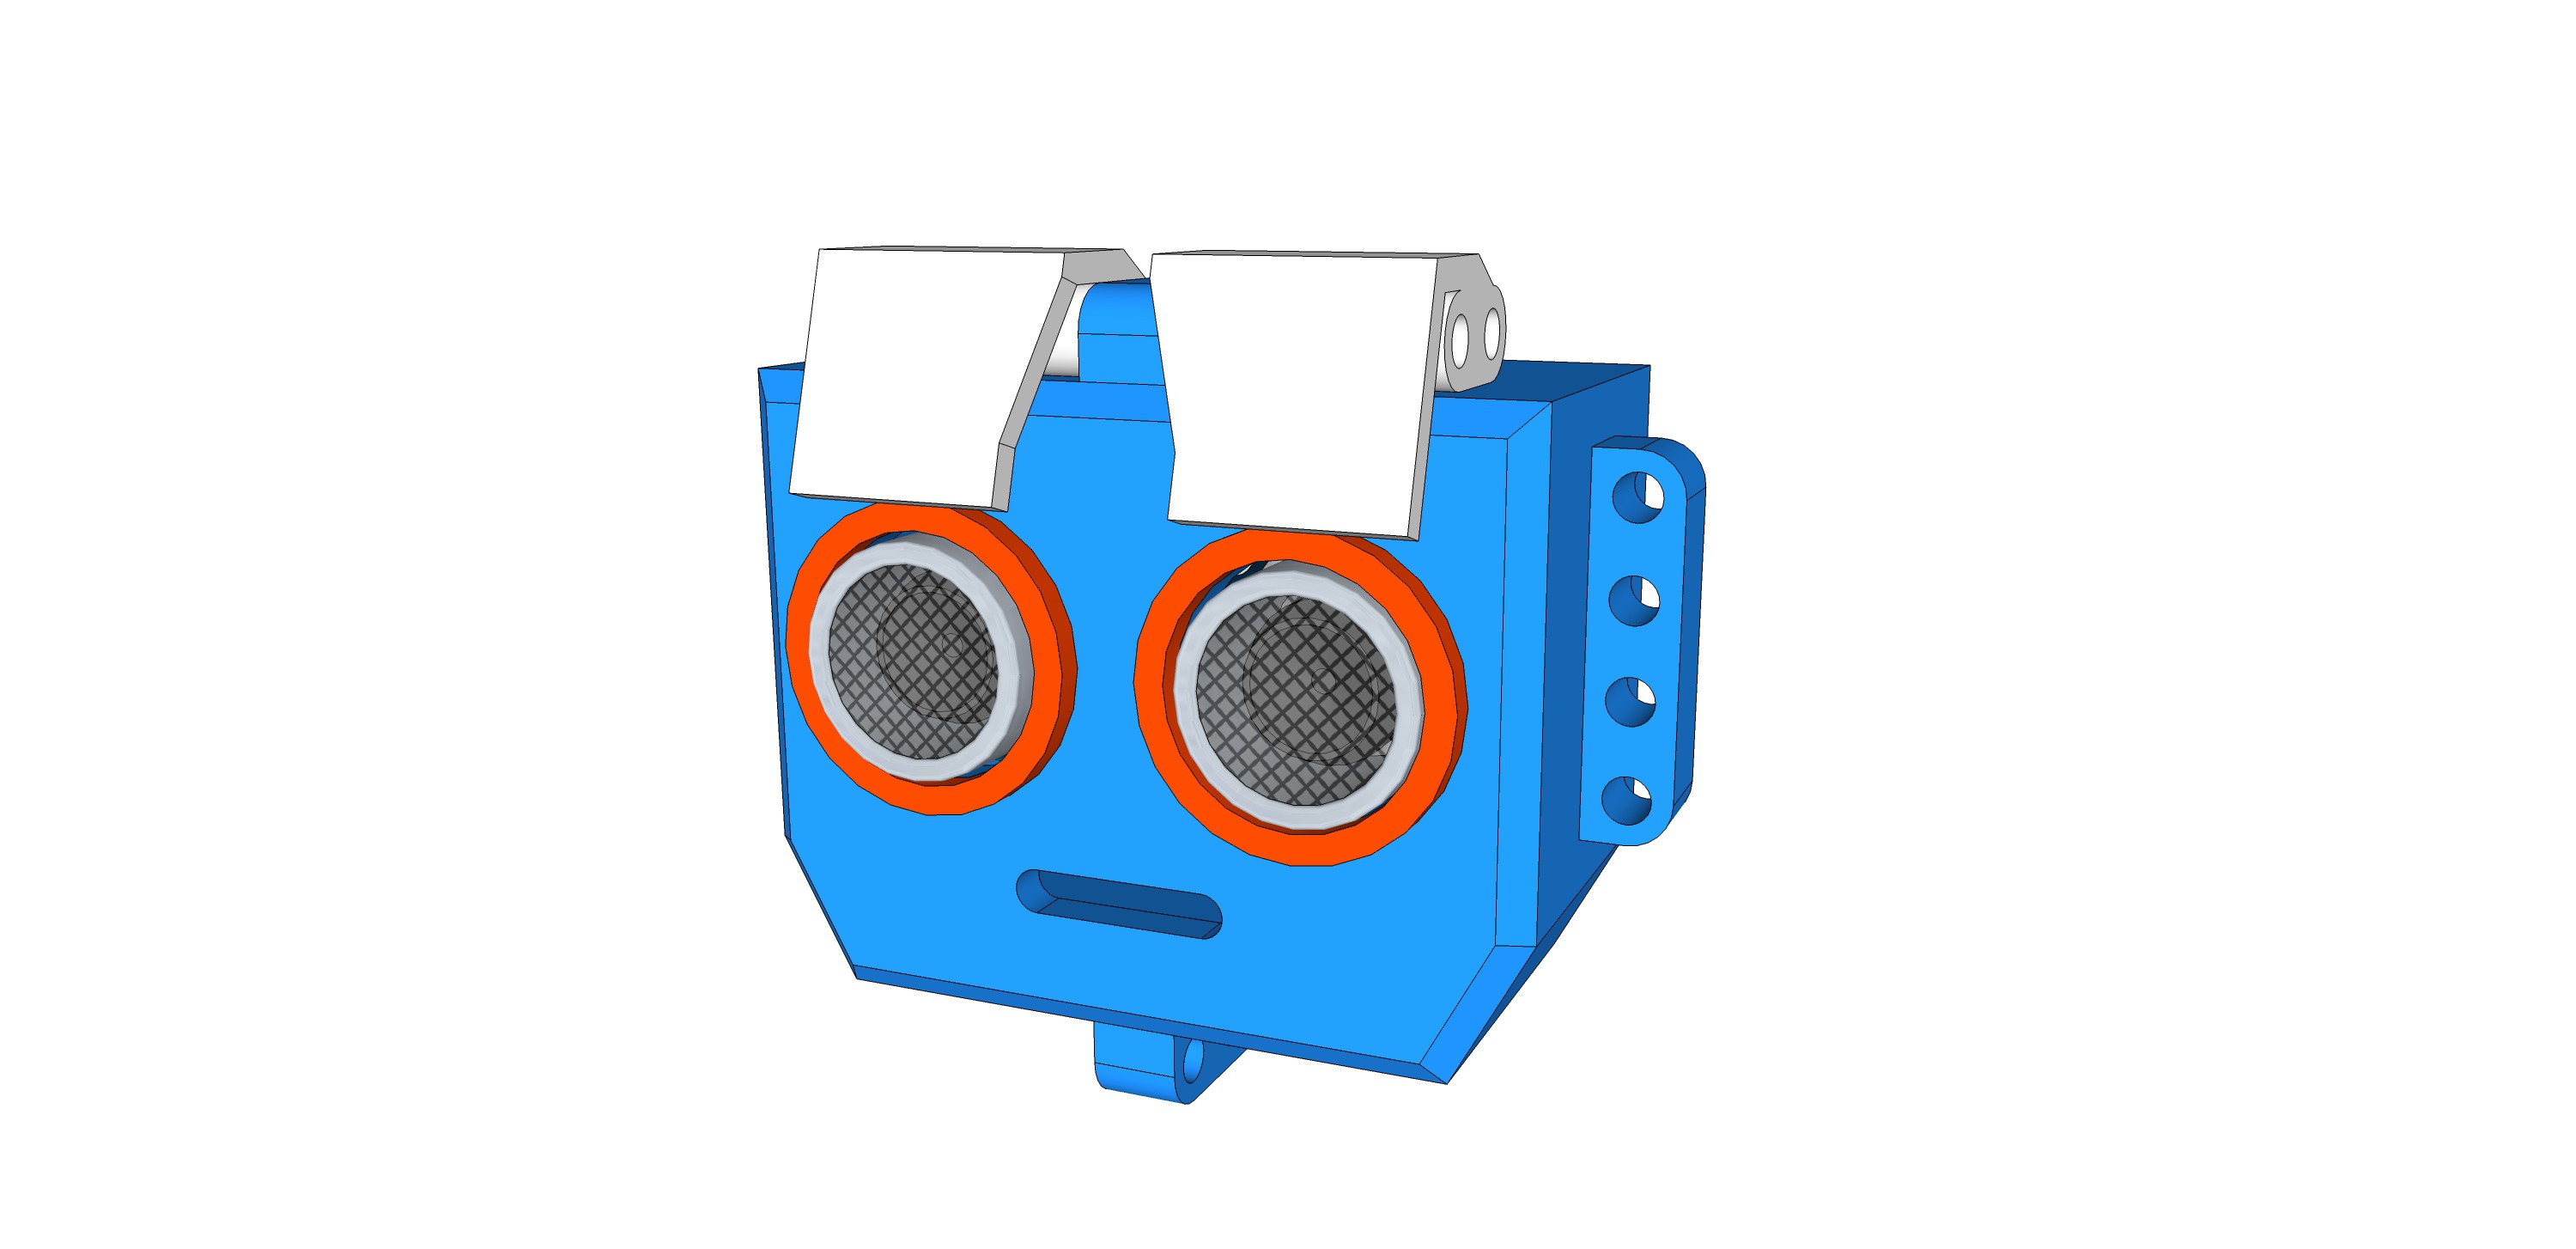
Fig. 4 CAD model of the head

Next figure shows the base of AR3. The robot is propelled by two continuous rotation servos (modified MG 995 servos, see tutorial here) in the back and two omni wheels in the front, where each wheel is supported by double bearings. The base consists of 5 selective laser sintered parts, two omni wheels from GTF, two servos, two tires from Makeblock, four Ø 4 mm bearings, two stainless steel axis with a dimension of 38 mm x Ø 4 mm, two metal servo horns and four Ø 4 set rings as well as some mounting material like screws and nuts.
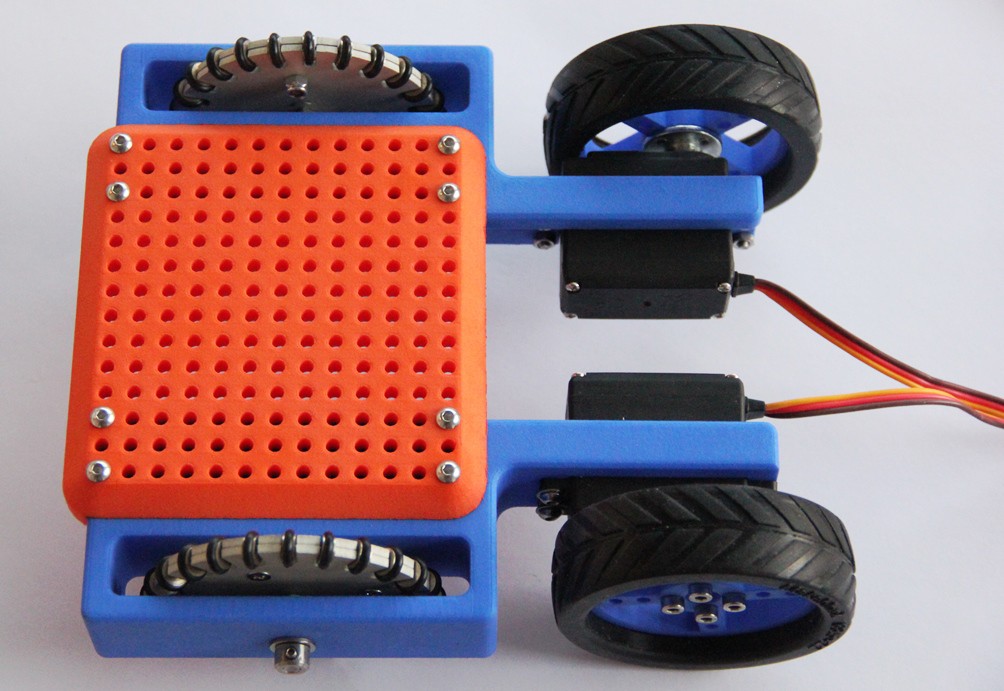
Fig. 5 Robot base

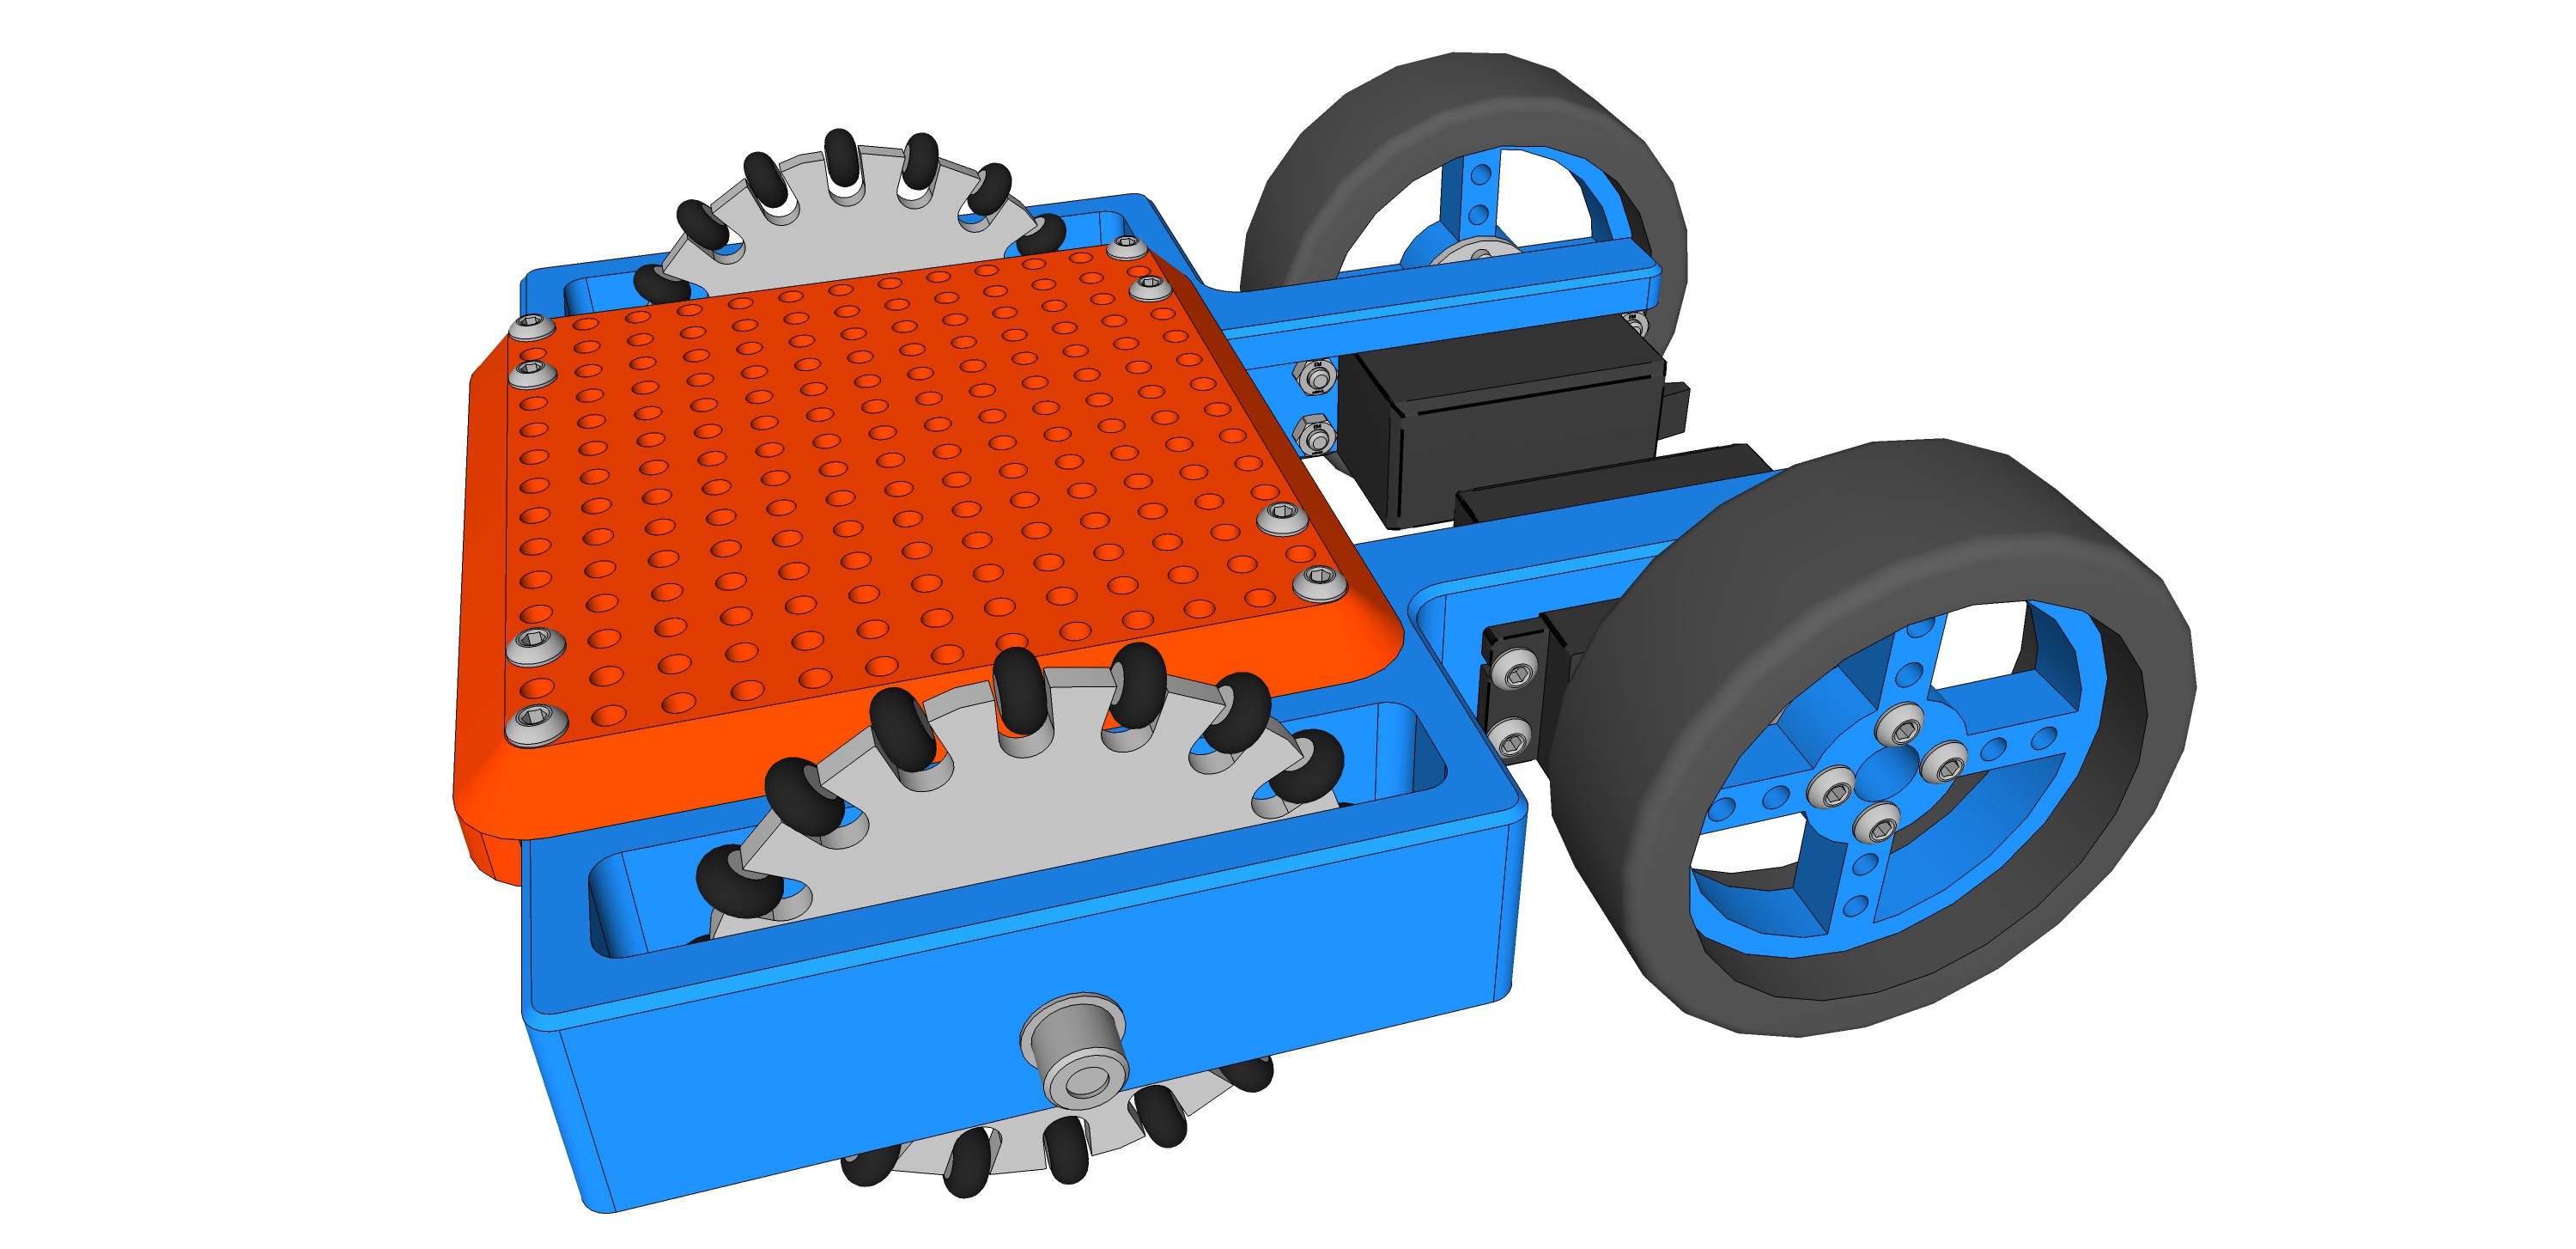
Fig. 6 CAD model of robot base

The TCS3200 color sensor is very suitable to introduce the k-nearest neighbors algorithm to students. I will explain the algorithm in a later log in detail. For now I just show the 3-D printed housing of the sensor. The two half-shell parts of the housing are just glued together using two-component epoxy, no screw bosses.

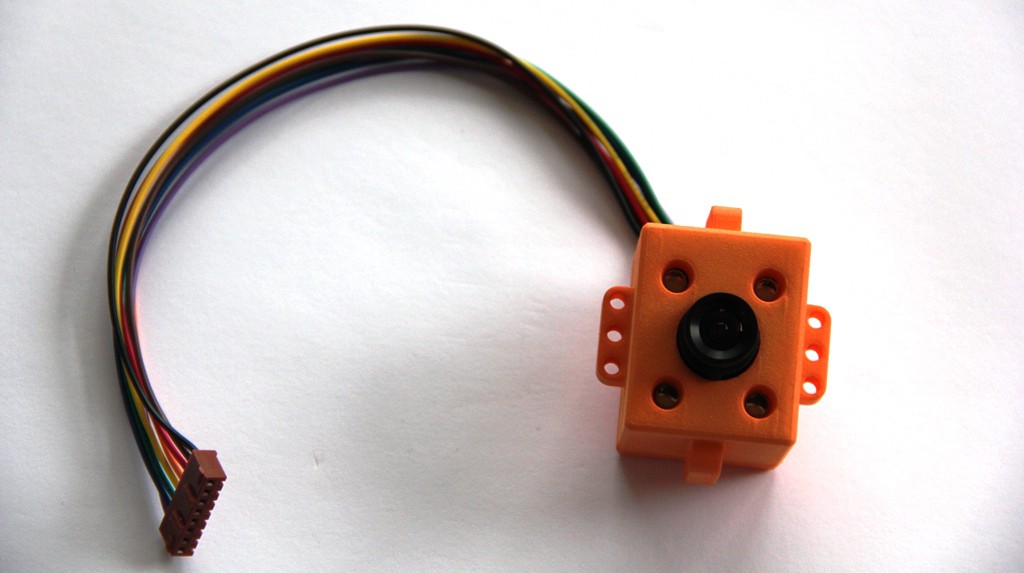
Fig. 7 TCS3200 color sensor with a collimator lens and four white LED's mounted in a 3-D printed shell

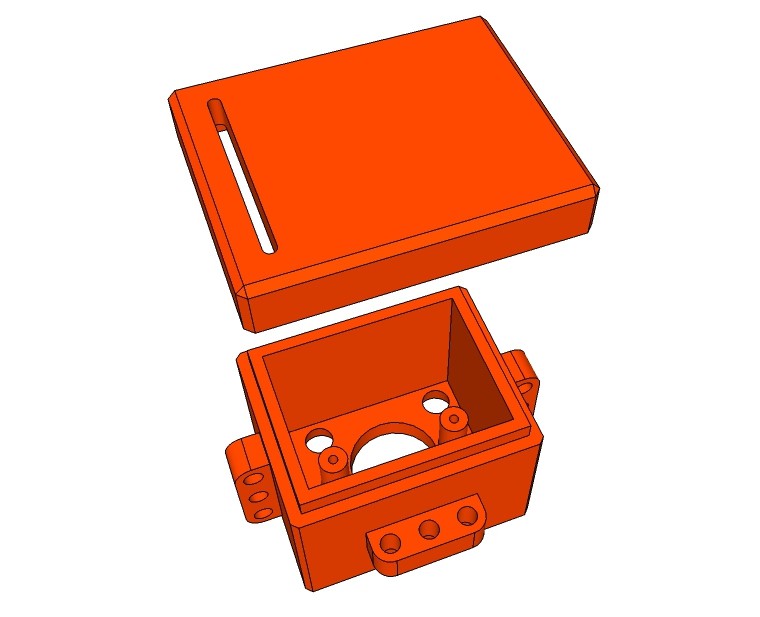
Fig. 8 CAD model of color sensor housing

I did some further work at the shield as well, 3-D printed an extension knob for the micro joystick.

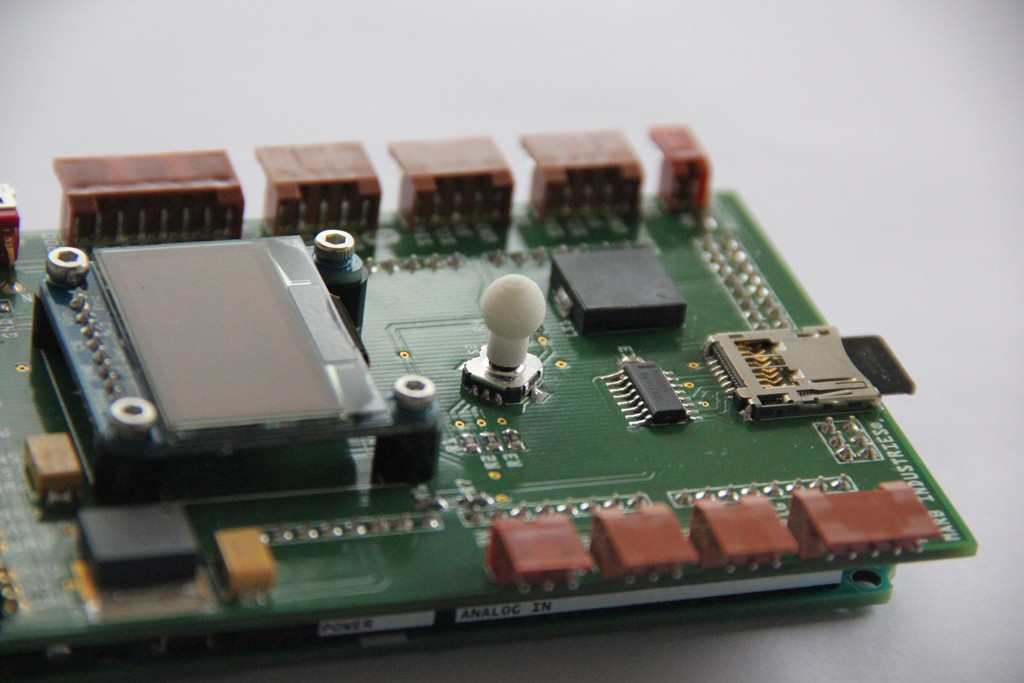
Fig. 9 Extension knob for the micro joystick

A tactile push button is most of the time the simplest digital sensor on a robot, but often quite useful, e.g. as a bumper sensor. The bumper sensor on AR3 consists of two half-shell parts, a plunger with a screw-on option and a momentary tactile push button switch, 12 x 12mm, 4 Pin DIP. Next figure reveals the construction. Again, the half-shell parts are just glued together after the inner components were assembled.

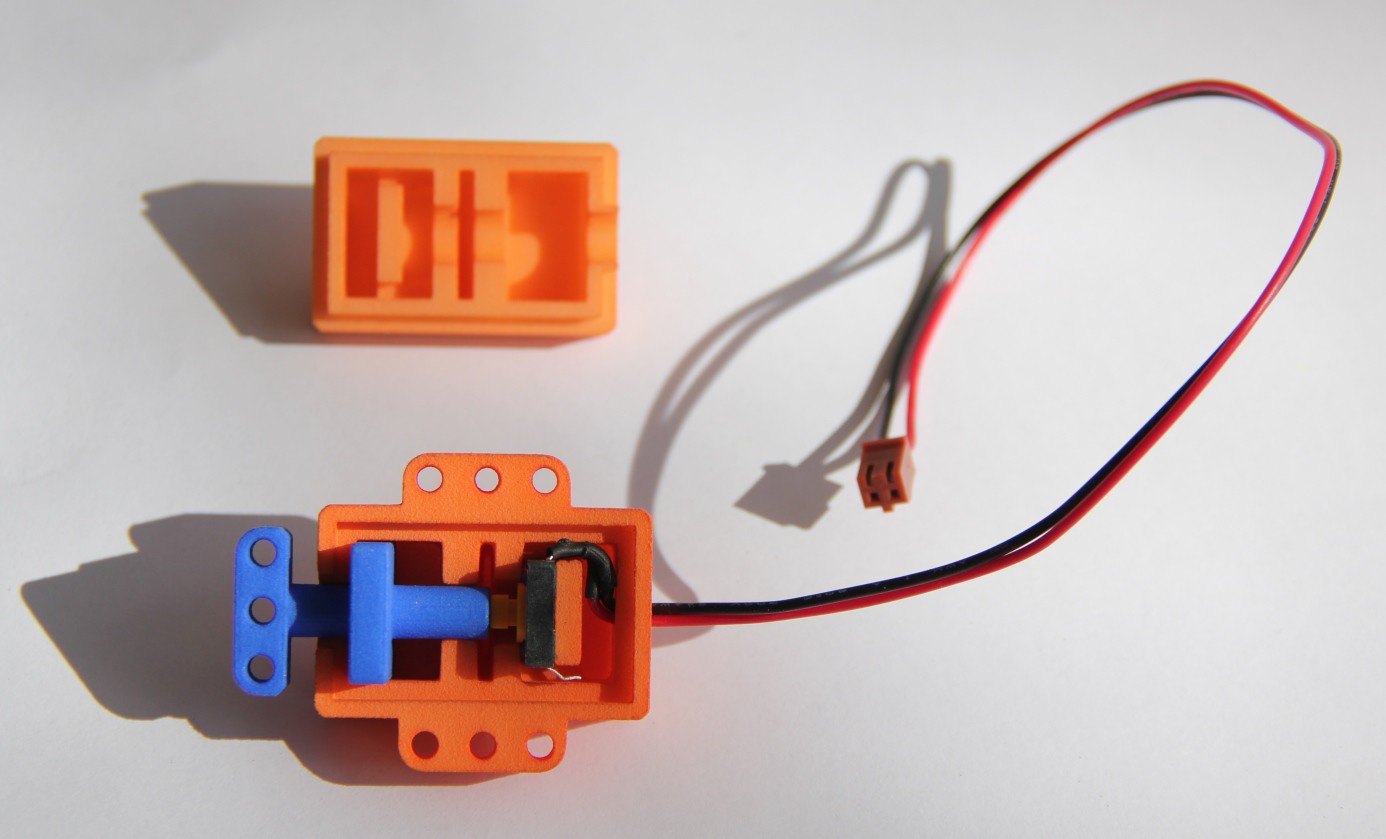
Fig. 10 Construction of the bumper sensor

A robot needs a gripper to grab...

Read more »

h - 4.03 kB - 03/08/2019 at 12:05

Download

  • TCS3200 color sensor with k-Nearest Neighbor classification algorithm

    M. Bindhammer03/03/2019 at 14:14 0 comments

    The k-NN (k-nearest neighbors) algorithm is among the simplest of all machine learning algorithms. We will use this algorithm to classify the color of a new object. As our training set of learned colors will only contain one sample per color, k = 1, and the object is simply assigned to the class of that single nearest neighbor. We will work in a 3-dimensional Euclidean space ℝ3. The x-axis represents the ratio of the clear channel frequency to the red channel frequency, the y-axis the ratio of the clear channel frequency to the green channel frequency and the z-axis the ratio of the clear channel frequency to the blue channel frequency (see TCS3200 data sheet for more details).

    The image below illustrates the 3-dimensional Euclidean space, the trained colors (white, orange, yellow, red, green and blue point) and a new sample (black point), which color needs to be classified. The black lines are the so called Euclidean distances from the new sample point to every trained color point. All we need to do is to find the smallest distance.

    Fig. 1 Euclidean distances of RGB values

    In general, for an n-dimensional Euclidean space ℝn, the Euclidean distance between two points

    and

    is given by

    Trouble shooting:

    • Colored objects shall be non glossy
    • Best work colored paper post-it notes (or sticky notes) with a large surface area of at least 8100 square millimeters
    • Always keep the same distance from the color sensor resp. collimator lens to the object
    • Fix the distance of the collimator lens to the TCS3200 color sensor itself by using Loctite or other glue or a small screw. The distance itself is unproblematic

    Machine learning code:

    #include <SPI.h>
    #include <Wire.h>
    #include <Servo.h>
    #include <Adafruit_GFX.h>
    #include <Adafruit_SSD1306.h>
    #include "musical_notes.h"
    #define SCREEN_WIDTH 128 /* OLED display width */
    #define SCREEN_HEIGHT 64 /* OLED display height */
    
    /* Declaration for an SSD1306 display connected to I2C (SDA, SCL, reset pin) */
    #define OLED_RESET 9 /* Reset pin */
    Adafruit_SSD1306 display(SCREEN_WIDTH, SCREEN_HEIGHT, &Wire, OLED_RESET);
    
    byte LED = 8, S0 = 7, S1 = 6, S2 = 5, S3 = 4, OUT = 3;
    char* color[] = {"white", "orange", "yellow", "red", "green", "blue", "out of range"};
    char point[] = "Point color sensor to";
    char object[] = " object";
    char submit[] = "Press the push buttonif it's done";
    int learned_colors[3][6];
    int PercentageRed, PercentageGreen, PercentageBlue;
    float OutOfRange;
    int switchPin = 23;
    int debounce = 200;
    /* Speaker connected to digital pin 26 */
    int speakerPin = 26;
    
    void setup() {
      Serial.begin(9600);
      /* Init OLED */
      display.begin(SSD1306_SWITCHCAPVCC, 0x3D);
      /* Clear the buffer */
      display.clearDisplay();
      TCS3200_Setup();
      pinMode(switchPin, INPUT);
      pinMode(speakerPin, OUTPUT); 
    }
    
    void loop() {
      learning_mode();
      while(1) {
        new_sample();
        classify();
      }
    }
    
    void TCS3200_Setup() {
      pinMode(S0,OUTPUT);
      pinMode(S1,OUTPUT);
      pinMode(S2,OUTPUT);
      pinMode(S3,OUTPUT);
      pinMode(LED,OUTPUT);
      pinMode(OUT,INPUT);
    }
    
    void TCS3200_On() {
      digitalWrite(LED,HIGH); // switch LED on
      digitalWrite(S0,HIGH); // output frequency scaling (100%)
      digitalWrite(S1,HIGH);
      delay(5);
    }
    
    void TCS3200_Off() {
      digitalWrite(LED,LOW); // switch LED off
      digitalWrite(S0,LOW); // power off sensor
      digitalWrite(S1,LOW);
    }
    
    void NoFilter() {
      digitalWrite(S2,HIGH); // select no filter
      digitalWrite(S3,LOW);
      delay(5);
    }
    
    void RedFilter() {
      digitalWrite(S2,LOW); // select red filter
      digitalWrite(S3,LOW);
      delay(5);
    }
    
    void GreenFilter() {
      digitalWrite(S2,HIGH); // select green filter
      digitalWrite(S3,HIGH);
      delay(5);
    }
    
    void BlueFilter() {
      digitalWrite(S2,LOW); // select blue filter
      digitalWrite(S3,HIGH);
      delay(5);
    }
    
    void input() {
      while (1) {
        if(digitalRead(switchPin) == 1) {
          squeak();
          break;
        }
      }
    }
    
    void GetColor() {
      float FrequencyClear, FrequencyRed, FrequencyGreen, FrequencyBlue;
      TCS3200_On();
      NoFilter();
      FrequencyClear = float(pulseIn(OUT,LOW,...
    Read more »

View project log

Enjoy this project?

Share

Discussions

Similar Projects

Does this project spark your interest?

Become a member to follow this project and never miss any updates