 Daren Schwenke
Finished up modeling the parts.
The petals:
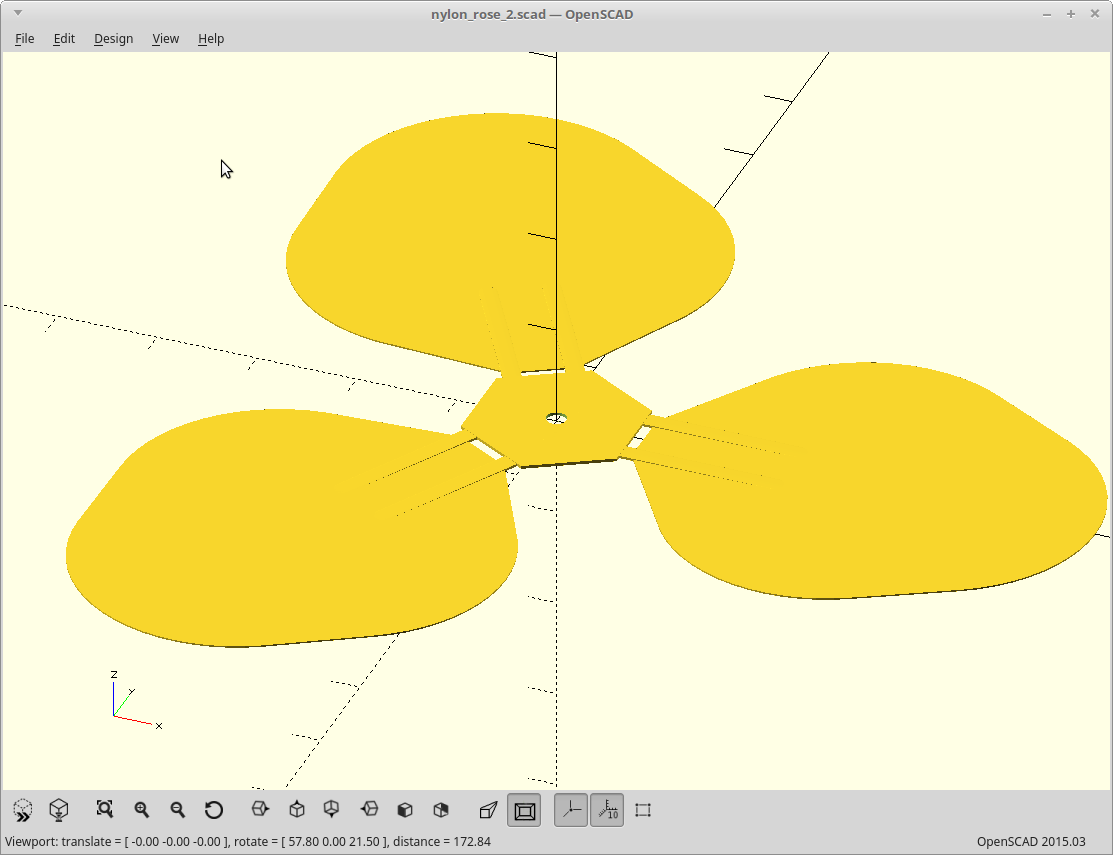
Heat formed nylon over a chandelier light bulb to give the flat print a two dimensional curve. The little raised bits form springs which extend the petals.
The base:
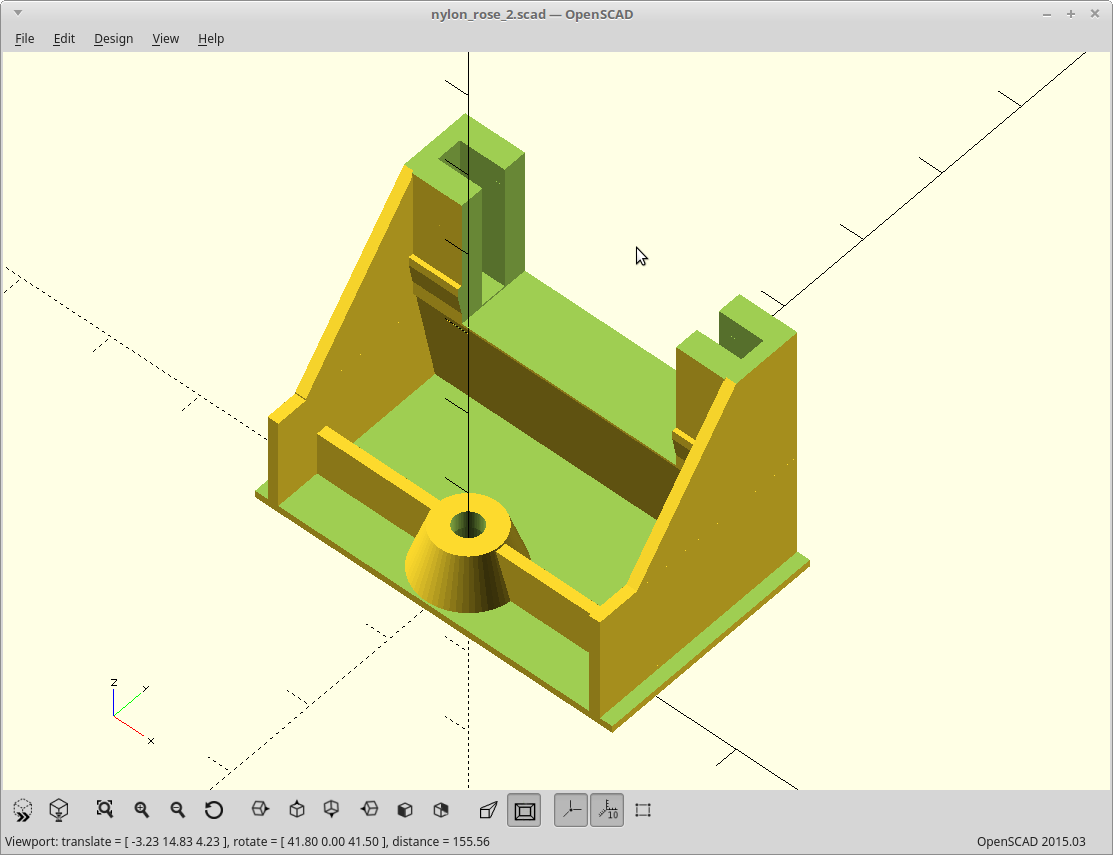
I ditched the fully 3D printed base for a smaller one, doing just what is needed.
The two vertical slots hold a 9g servo, with the servo arm then being biased at the correct distance to provide the required travel/torque. Torque is going to be close... I should probably spec a bigger servo, but I got the 9g ones on-hand.
The raised hub part will get a Dotstar module epoxied to it to light the bottom of the stem.
Printing the whole thing was wasting a ton of filament as something about it kept causing the print to 'catch' very near the end. I gave up and printed the bit I need. I'll put it inside a spray painted cup, and save 4 hours.
The stem:

Center channel contains the magnet wire used to light the petals and leaves, and also the connecting rod to pull the rose closed. The two 'pockets' are sized for holding Dotstar modules to light up the corresponding leaves.
Originally printed as two sections to be joined which required 'brim' to stay on the bed, and the cleanup really sucked. This one prints flat, can still be heat formed.... and thanks to the little square bits at the end does not need 'brim' to stay on the bed.
The leaves:
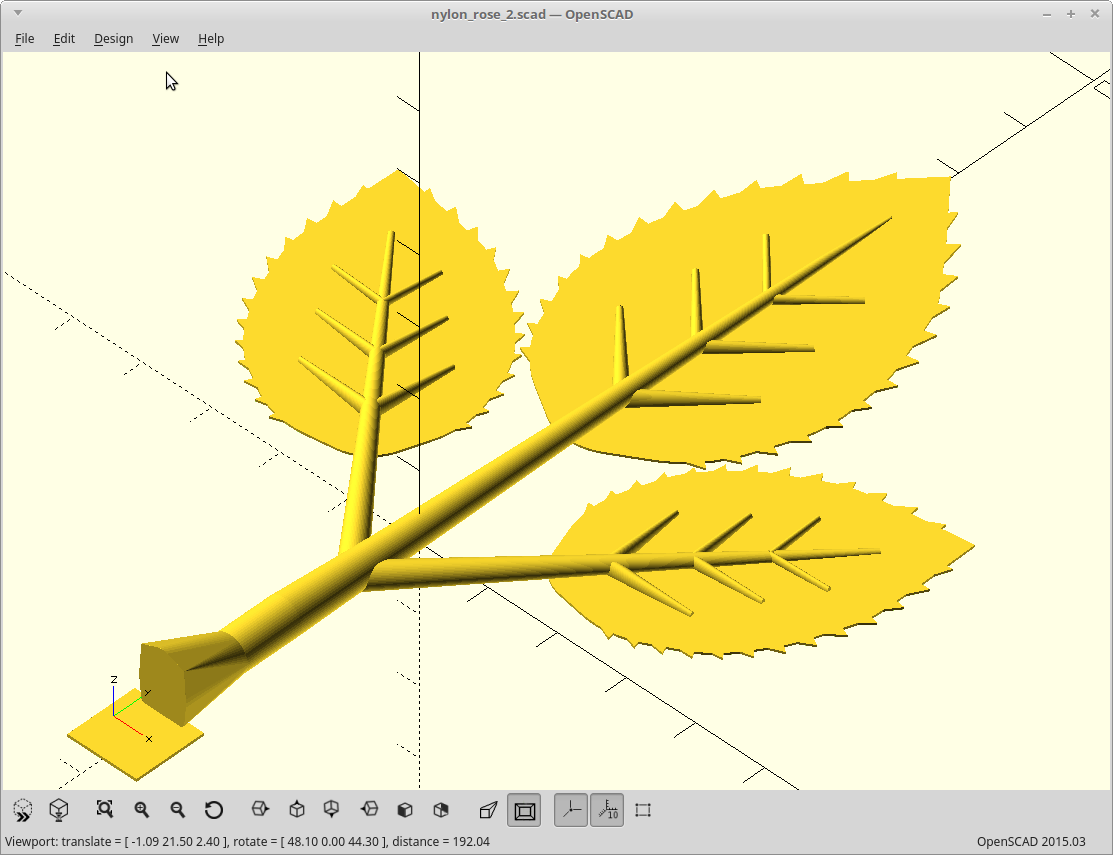
An exercise in the worst examples of recursive programming, but it does work and isn't terribly slow to render.
Printed flat, then heat formed to a more natural shape after printing. Magnet wire will be glued to the bottom of the center leaf to provide the touch interface.
Mates with the stem over the Dotstar pockets and will be epoxied onto them. The flat 90 degree interface for the embedded Dotstar modules combined with the epoxy should help to maximize the 'light pipe' effect. Will be printed hot, solid, and over-extruded, also to maximize the 'light pipe' effect of my clear PLA.
The bulb:
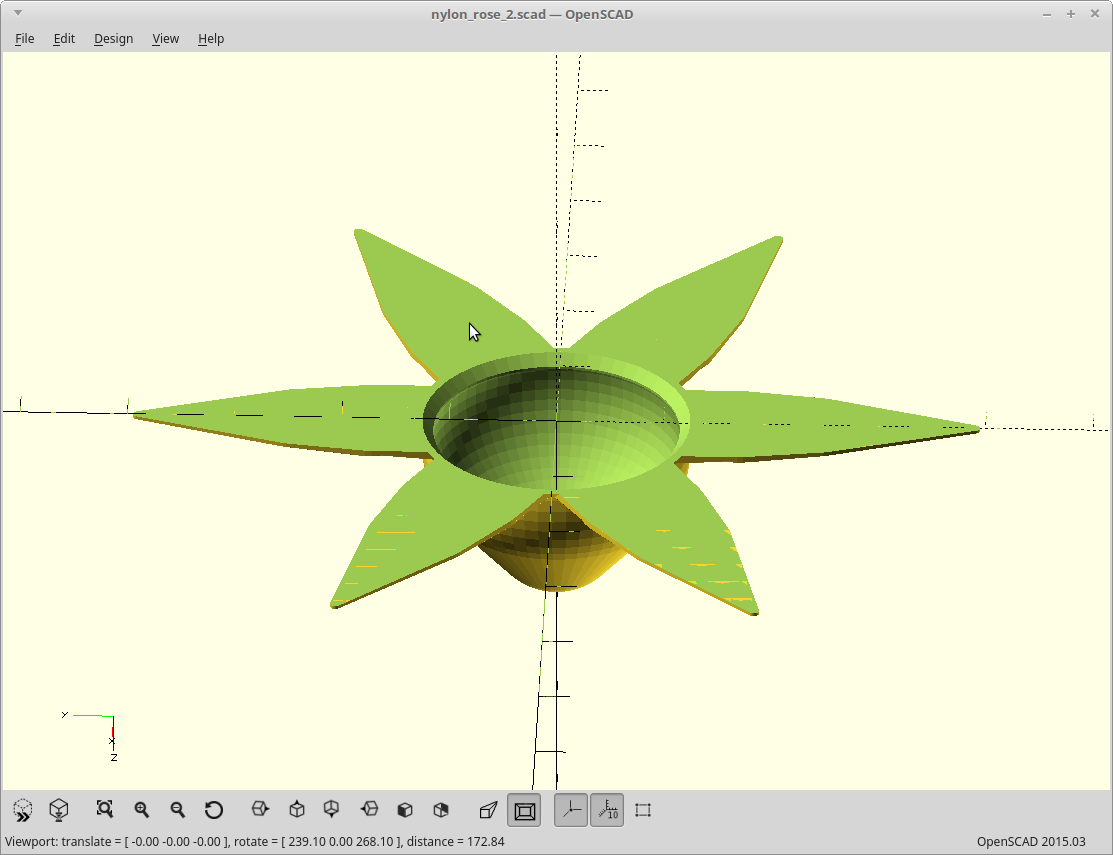
Optimized to lower the 'cost of closing' to where a 9g servo can probably handle it, but still allow me to have ~18 intermeshing petals folding. The petals are pulled inside the cylindrical area to close them. The force required is a still a bit high for a 9g servo, but I think I can offset that with a spring in the base as it is all biased in one direction. We will see.
The star shaped leaf bits here are meant to be heat formed, and vary in thickness in a calculated way so that applying heat causes them to curve just like a normal rose bud. :)
Other:
The random 'square bits' at the ends of some of the parts were added to maintain bed adhesion without needing to resort to 'brim'. Printing these parts with brim, sucked. Works.
Discussions
Become a Hackaday.io Member
Create an account to leave a comment. Already have an account? Log In.