 Plasmode
The dual channel serial device, 68681 and EPROM are added in stage 3. It would be very desirable to build on stage 2 serial bootstrap feature to test the hardware added in stage 3. Alas, the board was not designed with that in mind and the amount of rewiring is too onerous. The revised Tiny030 will have jumper configuration that preserves the serial bootstrap function as more devices are added. This would enhance the board testing capability and help with development of the permanent EPROM bootstrap software. With current hardware it is easiest to just dismantle the stage 2 hardware and add the 68681 and EPROM and get them working. All the efforts in stage 2 are not lost, however. We've found out that RAM/68030/CPLD are working correctly in stage 2, so if problems are encountered in stage 3, we can concentrate our efforts on the hardware that are added, i.e., EPROM and 68681.
Picture below shows the stage 3 hardware configuration. The EPROM and 68681 sockets are added to the pc board. A zero-insertion-force socket is installed in EPROM's location to facilitate changing out EPROM. A 3.6864MHz crystal is added as baud rate generator for 68681. a 27K resistor is added across the crystal oscillator to bias it for oscillation. I use this opportunity to install the voltage supervisor and change the CPU clock to 22MHz.
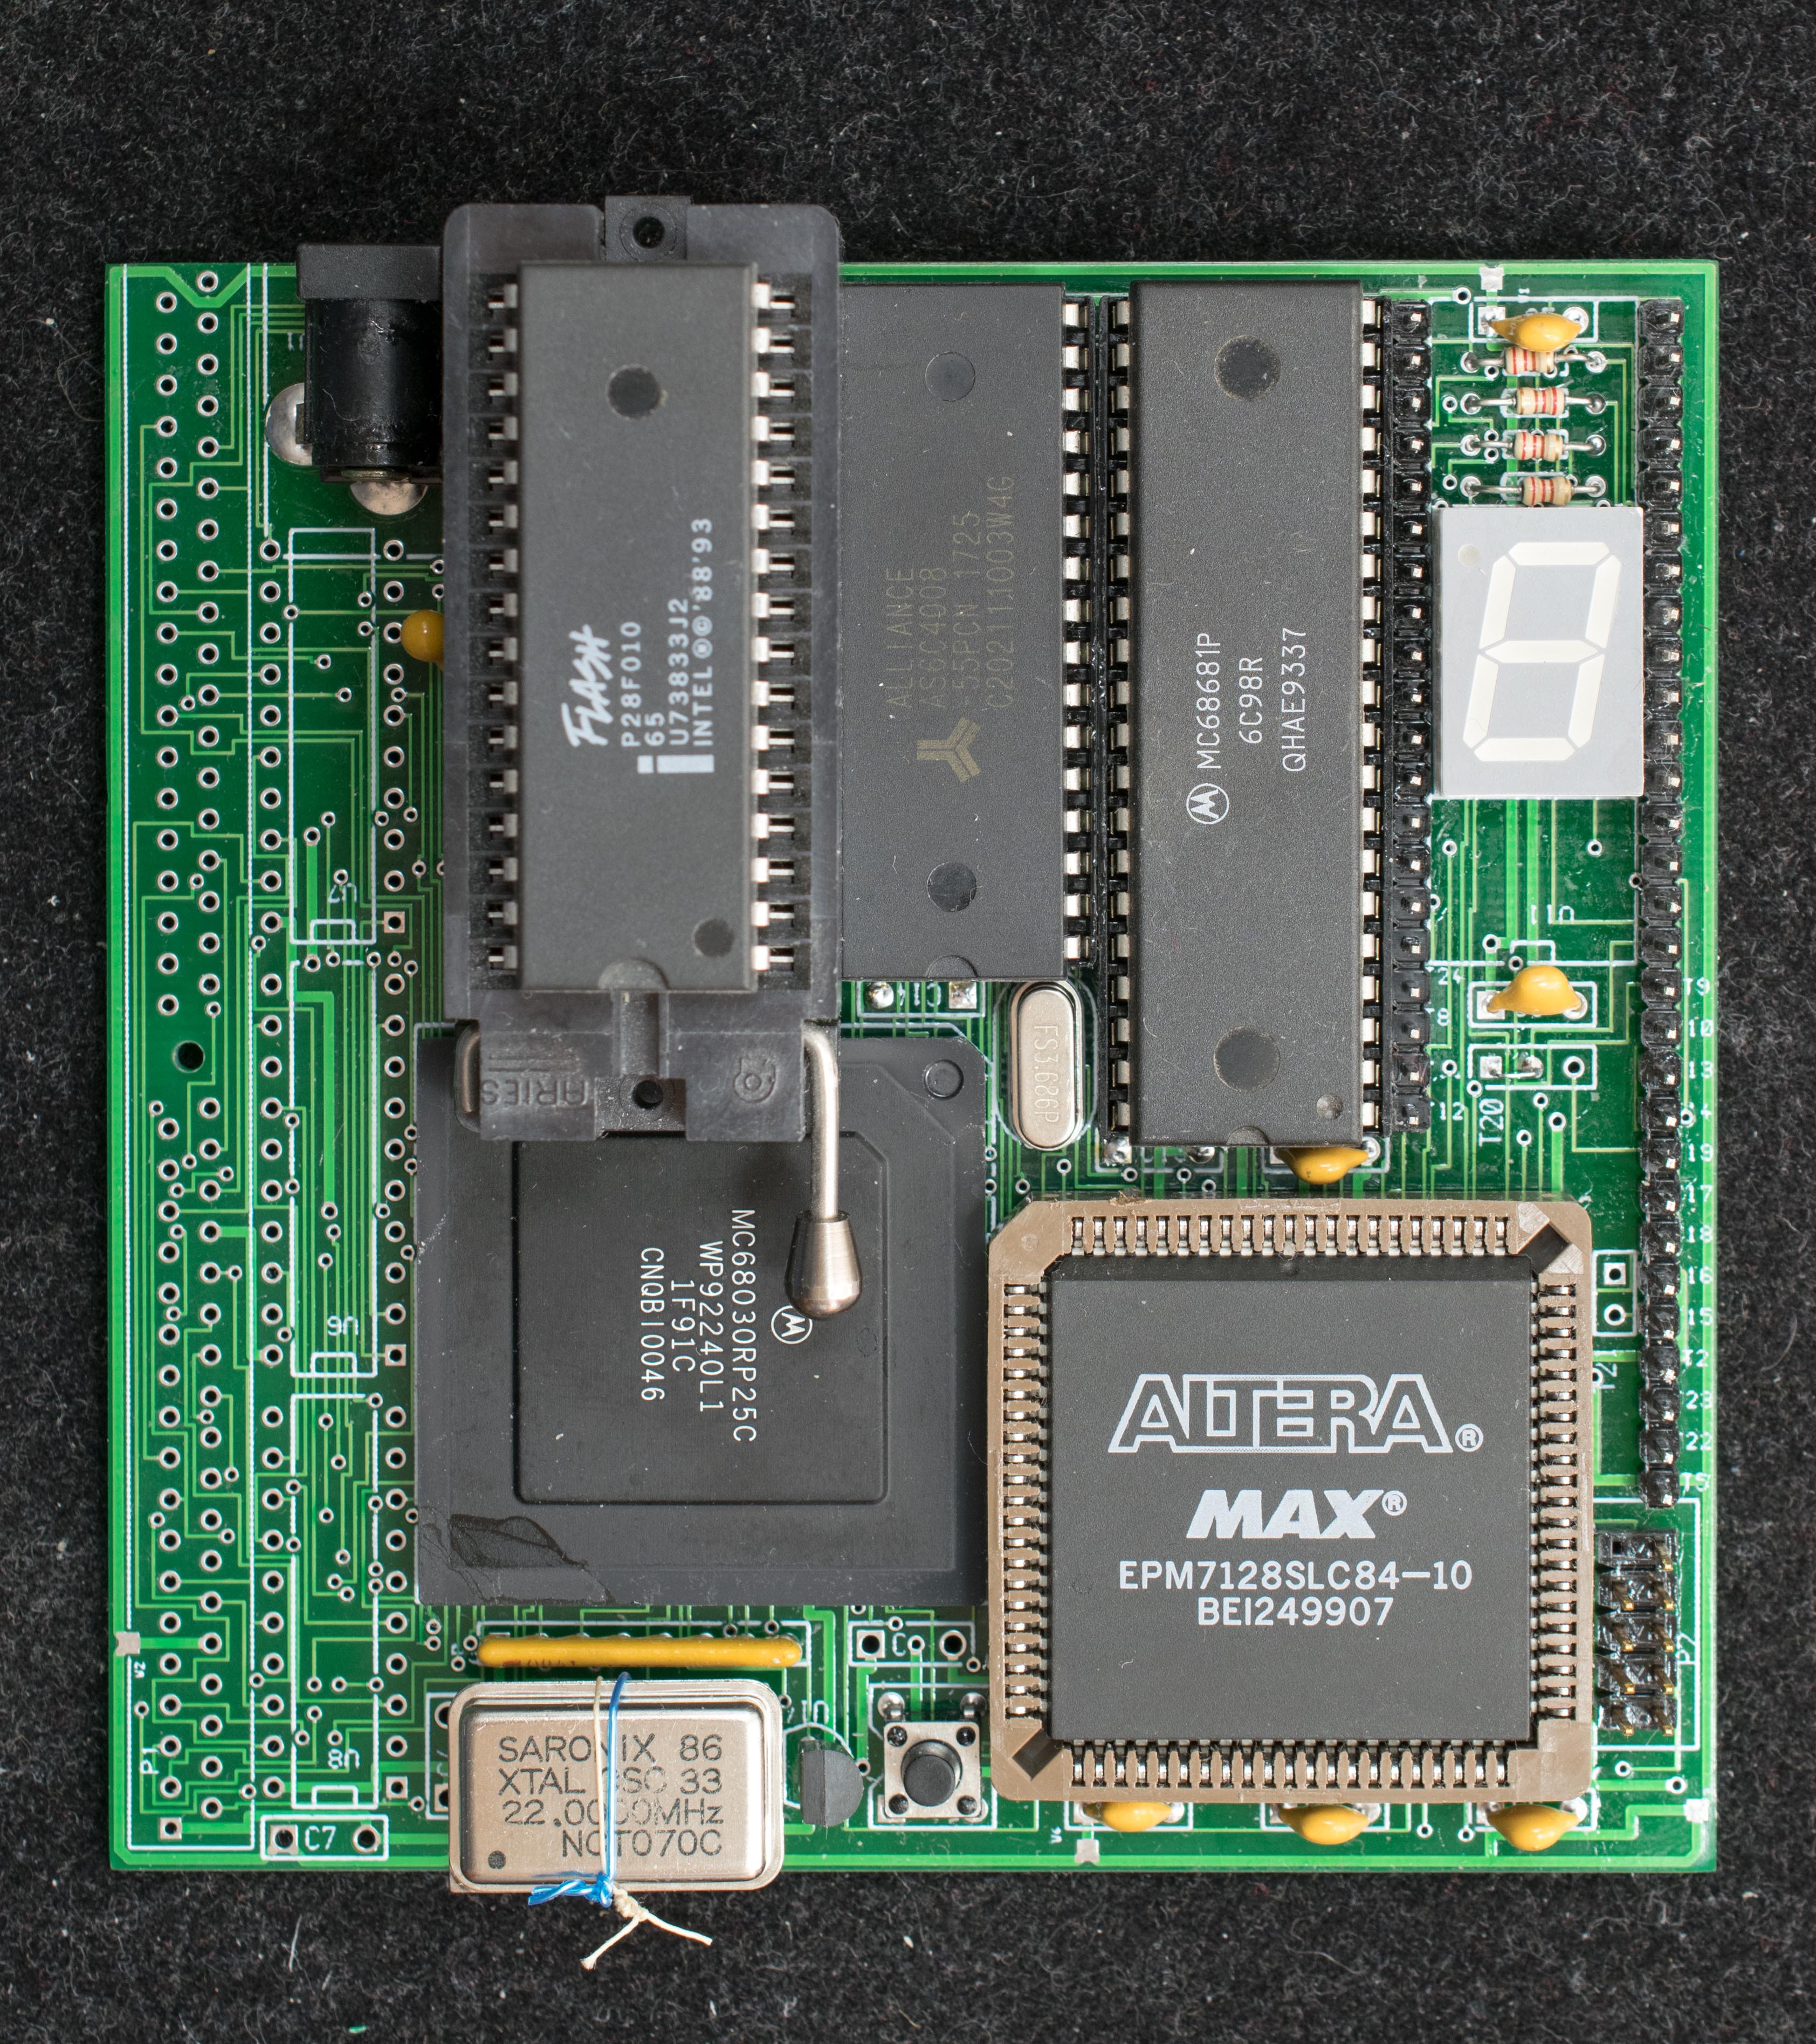
The stage 3 CPLD equations are revised significantly. The serial bootstrap function is no longer required; the EPROM is added to the memory map. The chip select and interrupt signals of 68681 are added. This is now the memory map of stage 3 Tiny030
- EPROM 0x0-0x7FFFF
- RAM 0x80000-0xFFFFF
- 68681 0x100000-0x17FFFF
- Refer to 68681 data sheet for register mapping
Stage 3 hardware is powered up and CPLD updated. It is now ready for firmware and software.
Discussions
Become a Hackaday.io Member
Create an account to leave a comment. Already have an account? Log In.