 vaibhav sharma
Story
In earlier blogs, we have gone through different cloud platforms like Azure , Ubidots, ThingSpeak , Losant etc. We have been using the MQTT protocol for sending the sensor data to the cloud in almost all the cloud platform. For more information on MQTT, its advantages and benefits over HTTP protocol you can refer to this blog.
In this blog, we will zoom into yet another and most familiar cloud platform Amazon Web Services. Many of you might be familiar with AWS aka Amazon Web Services and the cloud functionality provided by AWS. It has been the core of web development for many years. With the increasing scale of IoT applications, AWS has come up with the solution of AWSIoT. AWSIoT is a reliable solution for hosting our IoT applications.
By following this blog:
- You will be able to set up AWS account for your IoT application
- You will be able to connect the ESP32 to AWS IoT core
- Send and receive messages using MQTT and HTTP protocol
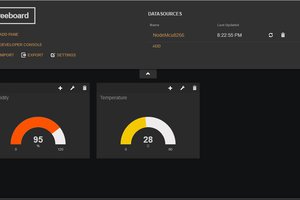
- Visualize the sent data in AWS
Setting Up AWS Account
Setting Up AWS account is fairly easy. You just need to upload a couple of certificates, attach policies to it, Register the device and start receiving the sensor data messages in AWS.
To set up the AWS account follow this tutorial .
Wireless Vibration and Temperature Sensors
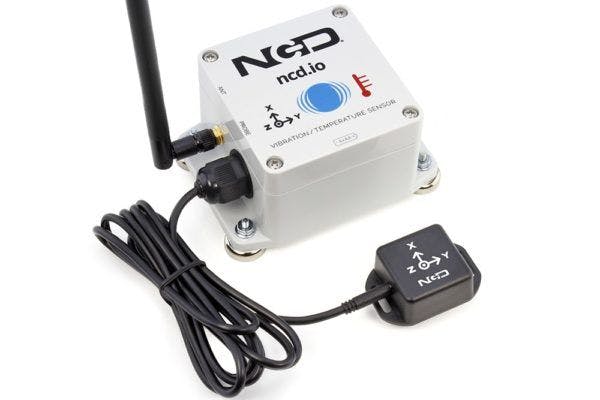
This is a Long Range Industrial IoT wireless vibration and temperature sensor , boasting up to a 2 Mile range using a wireless mesh networking architecture. Incorporating a 16-bit Vibration and Temperature sensor, this sensor transmits highly accurate vibration data at user-defined intervals. It has the following features :
- Industrial Grade 3-axis Vibration Sensor with ±32g Range
- Calculates RMS, MAX, and MIN g Vibration
- Noise Removal using Low-pass Filter
- Frequency Range (Bandwidth) up to 12,800 Hz
- Sample Rate up to 25,600Hz
- Encrypted Communication with 2 Mile Wireless Range
- Operating Temperature Range -40 to +85 °C
- Wall-Mounted or Magnet Mounted IP65 Rated EnclosureExample Software for Visual Studio and LabVIEW
- Vibration Sensor with External Probe Option
- Up to 500,000 Transmissions from 4 AA BatteriesMany Gateway and Modem Options Available
ESP32 AWS Firmware
To connect to AWS and to start sending the data go through the following steps
- Download the AWS library from the following Github repository
- clone the repo and place the AWS_IOT file to the library folder of the Arduino directory
git clone https://github.com/ExploreEmbedded/Hornbill-Examples.gitNow let's go through the code:
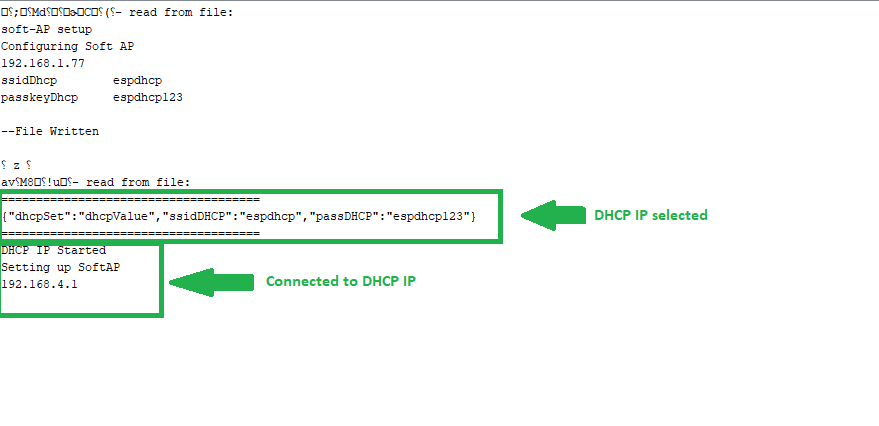
- In this application, we have made use of a captive portal to save the WiFi credentials and to hover through the IP settings. For the detailed introduction on the captive portal, you can go through the following blog .
- The captive portal gives us the option to choose between Static and DHCP settings. Just enter the credentials like Static IP, Subnet Mask, gateway and the Wireless Sensor Gateway will get configured on that IP.
- A webpage is being hosted where a list showing available WiFi networks and there RSSI. Select the WiFi network and password and enter submit. The credentials will be saved in the EEPROM and the IP setting will be saved in the SPIFFS. More on this can be found in this blog.
Getting the Sensor Data From Wireless Vibration and Temperature Sensor
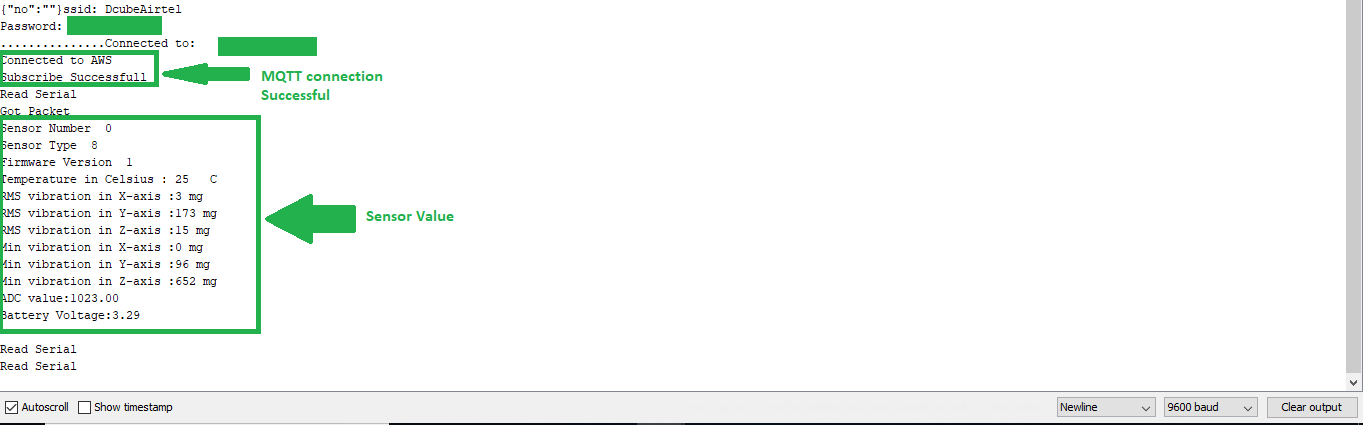
We are getting a 54-byte frame from the Wireless Temperature and Vibration Sensors. This frame is manipulated to get the actual temperature and Vibration data.
ESP32 has three UARTs available for the Serial use
- RX0 GPIO 3, TX0 GPIO 1
- RX1 GPIO9, TX1 GPIO 10
- RX2 GPIO 16, TX2 GPIO 17
and 3 hardware Serial ports
- Serial
- Serial1
- Serial2
First, initialize Hardware Serial header file. Here we will be using RX2 and TX2 aka. GPIO 16 and GPIO 17 pins of the ESP32 board to get the serial data.
#include <HardwareSerial.h>
# define RXD2 16
# define TXD2 17
Serial2.begin(115200, SERIAL_8N1, RXD2, TXD2); // pins 16 rx2, 17 tx2, 19200 bps, 8 bits...
Read more »
 Mr. Sarful hassan
 Lutetium
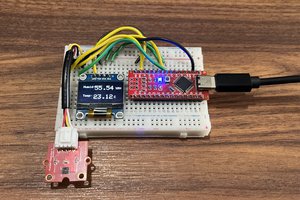
 ElectroBoy
 Manoj kumar