 David Boucher
Unless you have a very good memory, it's useful for the keys on a keyboard to be labelled in some way. The usual way that this is done on a professionally produced keyboard is by printing or laser etching on to the keycap, but these methods are out of my reach and in any case, I'm not using keycaps, just the bare switches. What I have done is put the key marking just above the relevant key and this means that I can print a strip of markings for each row on a normal inkjet or laser printer.

I needed a good way to lay out these strips, so I tried a number of different graphics packages to see what worked best. I eventually found that the best graphic package for this was a spreadsheet.
Yes, that most abused piece of office productivity software is now a keyboard labelling tool in addition to being a database, project planner, form designer and all the other things that it gets used for.
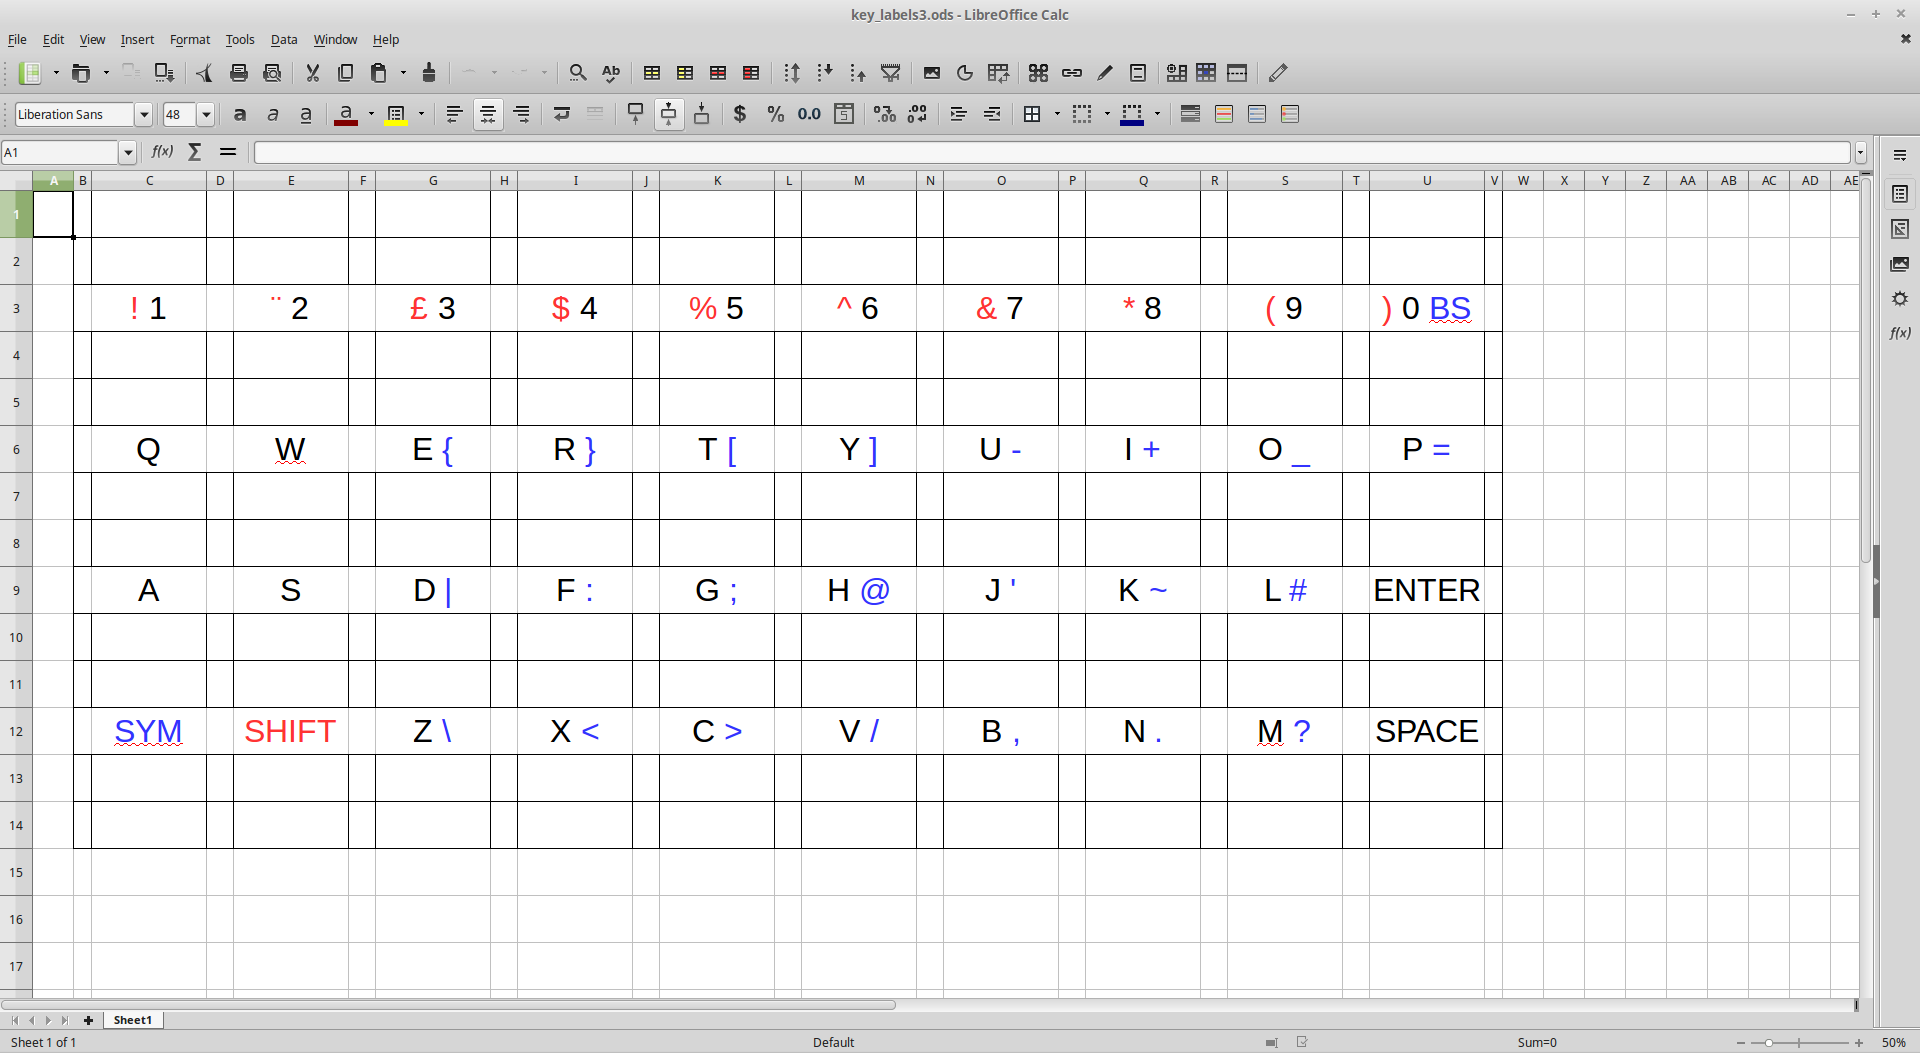
Above is the spreadsheet in LibreOffice Calc. Each key is represented by a single cell and I'm using different colours to indicate the normal and modified key functions. The B and V columns are small overhangs to allow the strip to be positioned correctly in the 3D printed part. If you don't have access to a 3D printer, you could print these on to label paper and stick them directly on to the perfboard.
To get enough accuracy, I had to specify the cell sizes to be ten times their actual size and change the print setting to print at 10% size. When printed correctly, the strip should be 77mm long.
The spreadsheet is available for download. I also plan to do a more flexible version at some point where you enter the number of rows and columns and the marking for each key on one sheet and then run a macro which produces a second sheet which you print.
Discussions
Become a Hackaday.io Member
Create an account to leave a comment. Already have an account? Log In.