 Zapp
ZappWhat's better than a blinky badge? A blinky badge that can hack!
This post is an extension of hyr0n's post on all the wonderful things you can do with the FT2232H. It is also quite advanced as it will require you compile code and do some soldering. But the journey is worth it.
This writeup is timely, just as I was able to make the SWD interface work successfully, Joe Grand tweeted this:
TOP SECRET! This year's #DEFCON 27 Badge uses an @NXP KL27 ARM Cortex-M0+ (among other things). For most efficient hacking, use an LPC-Link2, @TagConnect TC2050-IDC-NL-050-ALL (normal orientation), and 1.8V-compatible level translator or USB-to-Serial adapter. pic.twitter.com/Ene68B8JjI
— Joe Grand (@joegrand) August 1, 2019
In theory the technique below will work on the official DC27 badge although it is written to work with NRF52 targets.
Note this log was adapted from: https://www.allaboutcircuits.com/technical-articles/getting-started-with-openocd-using-ft2232h-adapter-for-swd-debugging/

Pre-requesites
- An FT2232 device, preferably one of our badges.
- A suitable linux build environment (git, make, etc)
- arm-none-eabi-gdb (and related) tools
- Appropriate connector for target device
- SWD 10-pin 1.27mm pitch (Da Bomb badge)
- Tagconnect 2050 (AND!XOR / DEF CON 27)
- Wires, flux, solder, and a steady hand
- Adapter from target connector to badge / FT2232 + jumper wires

Hardware
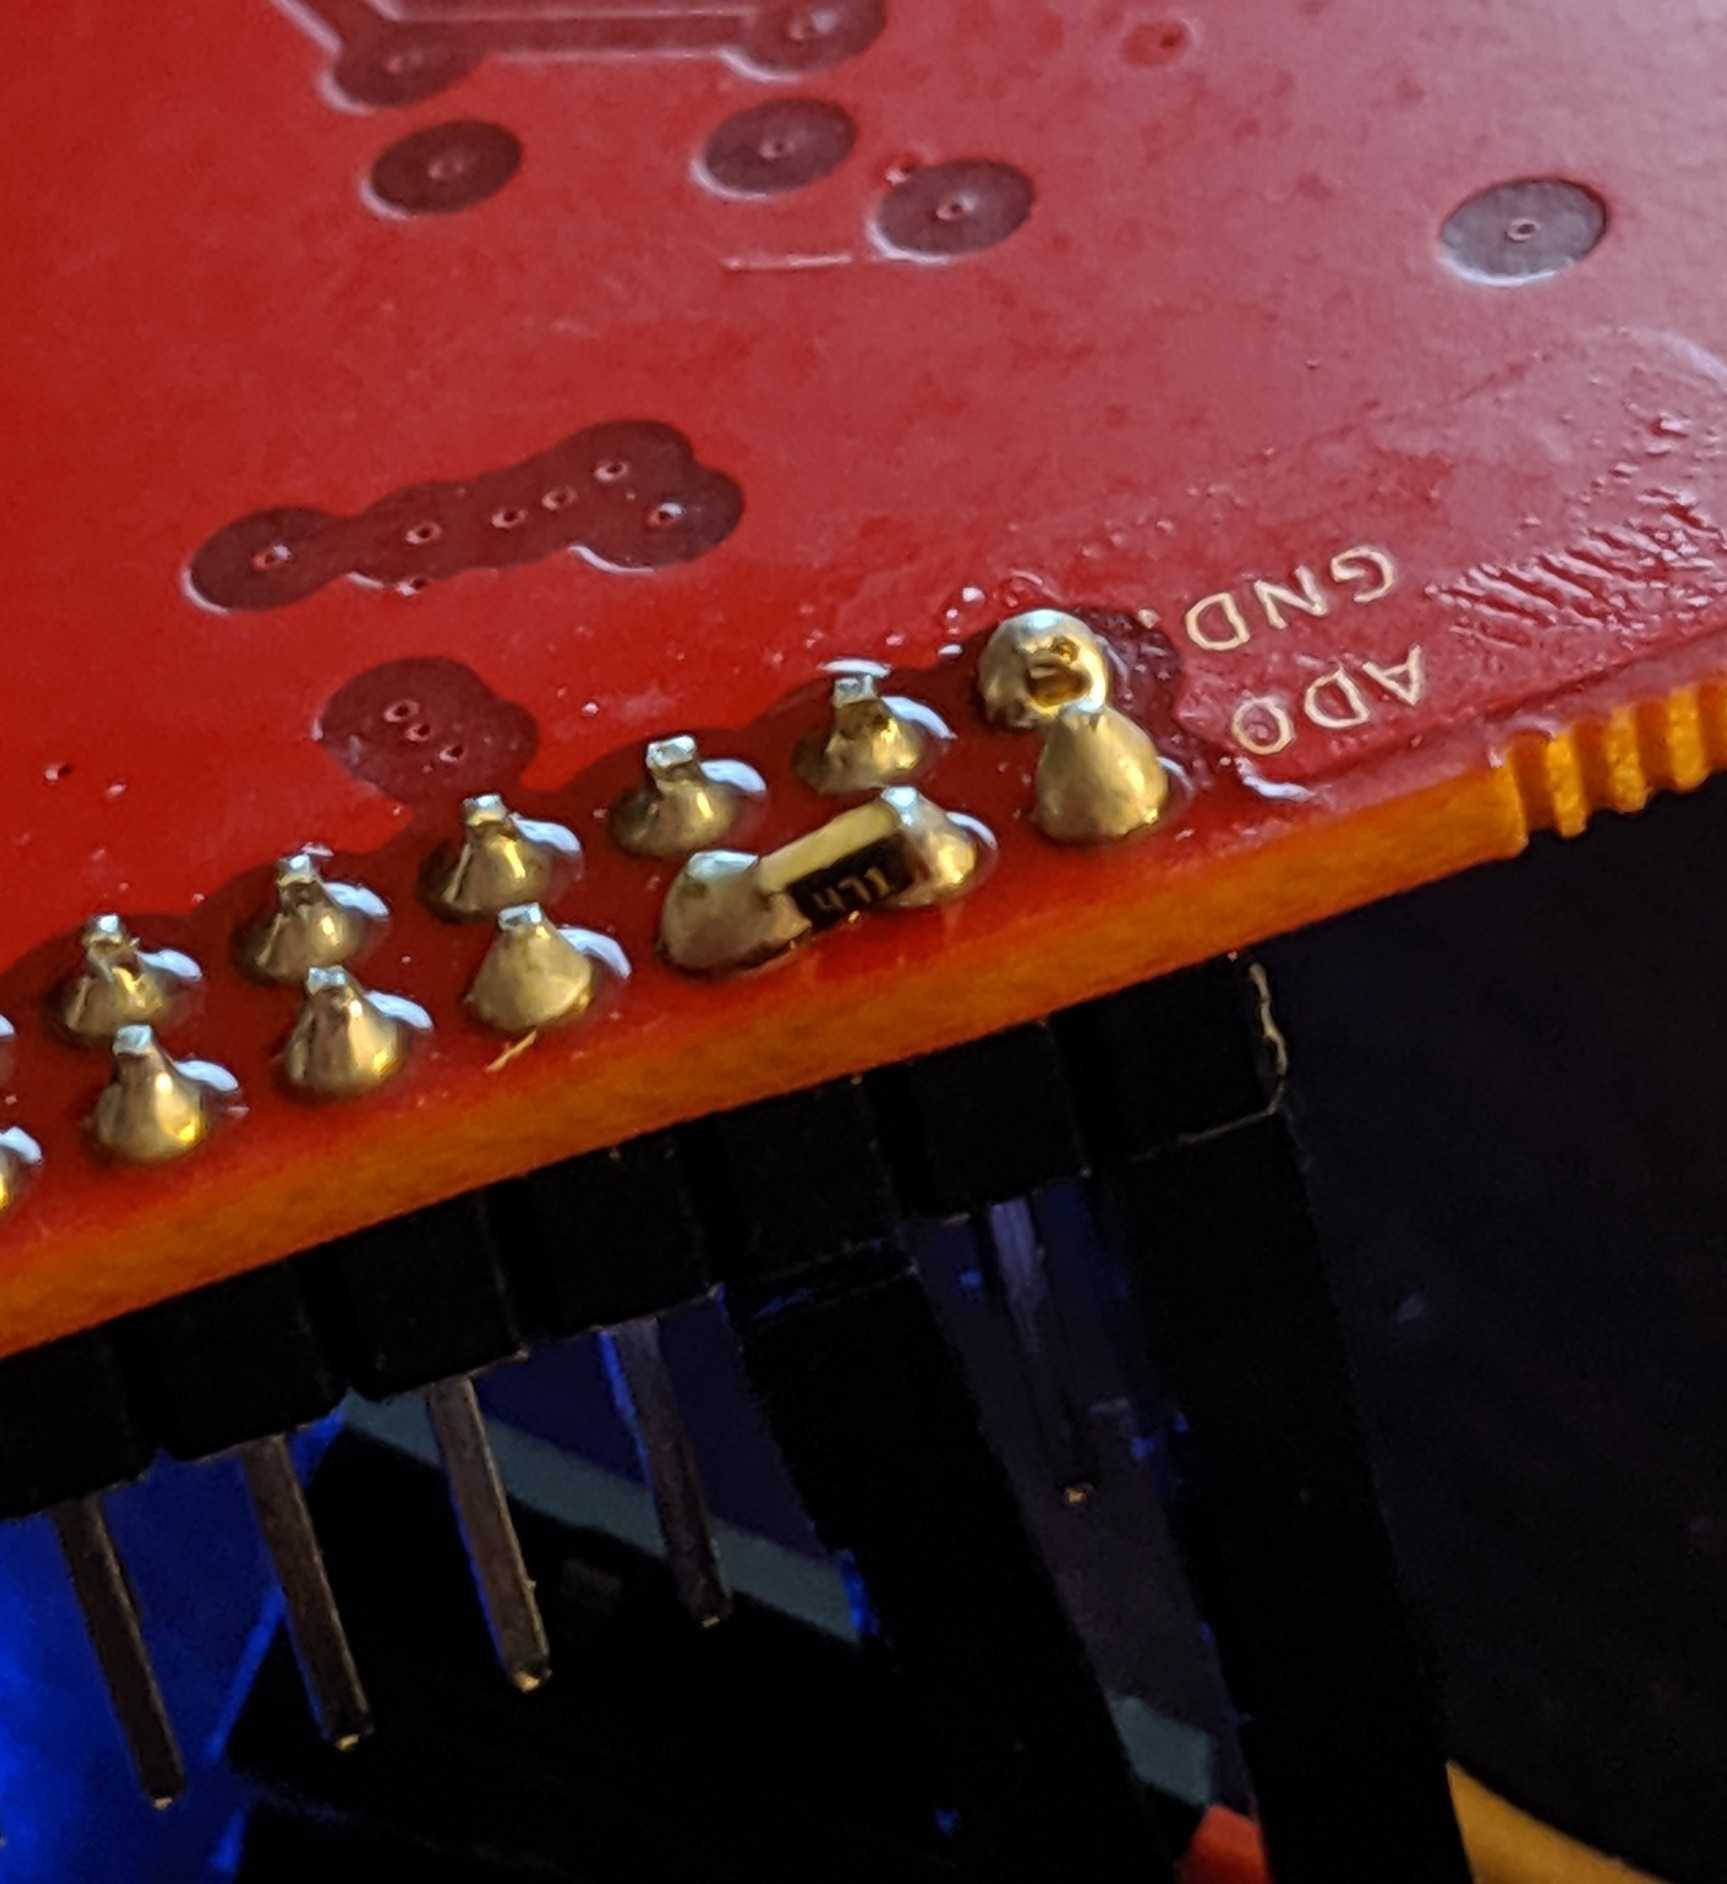
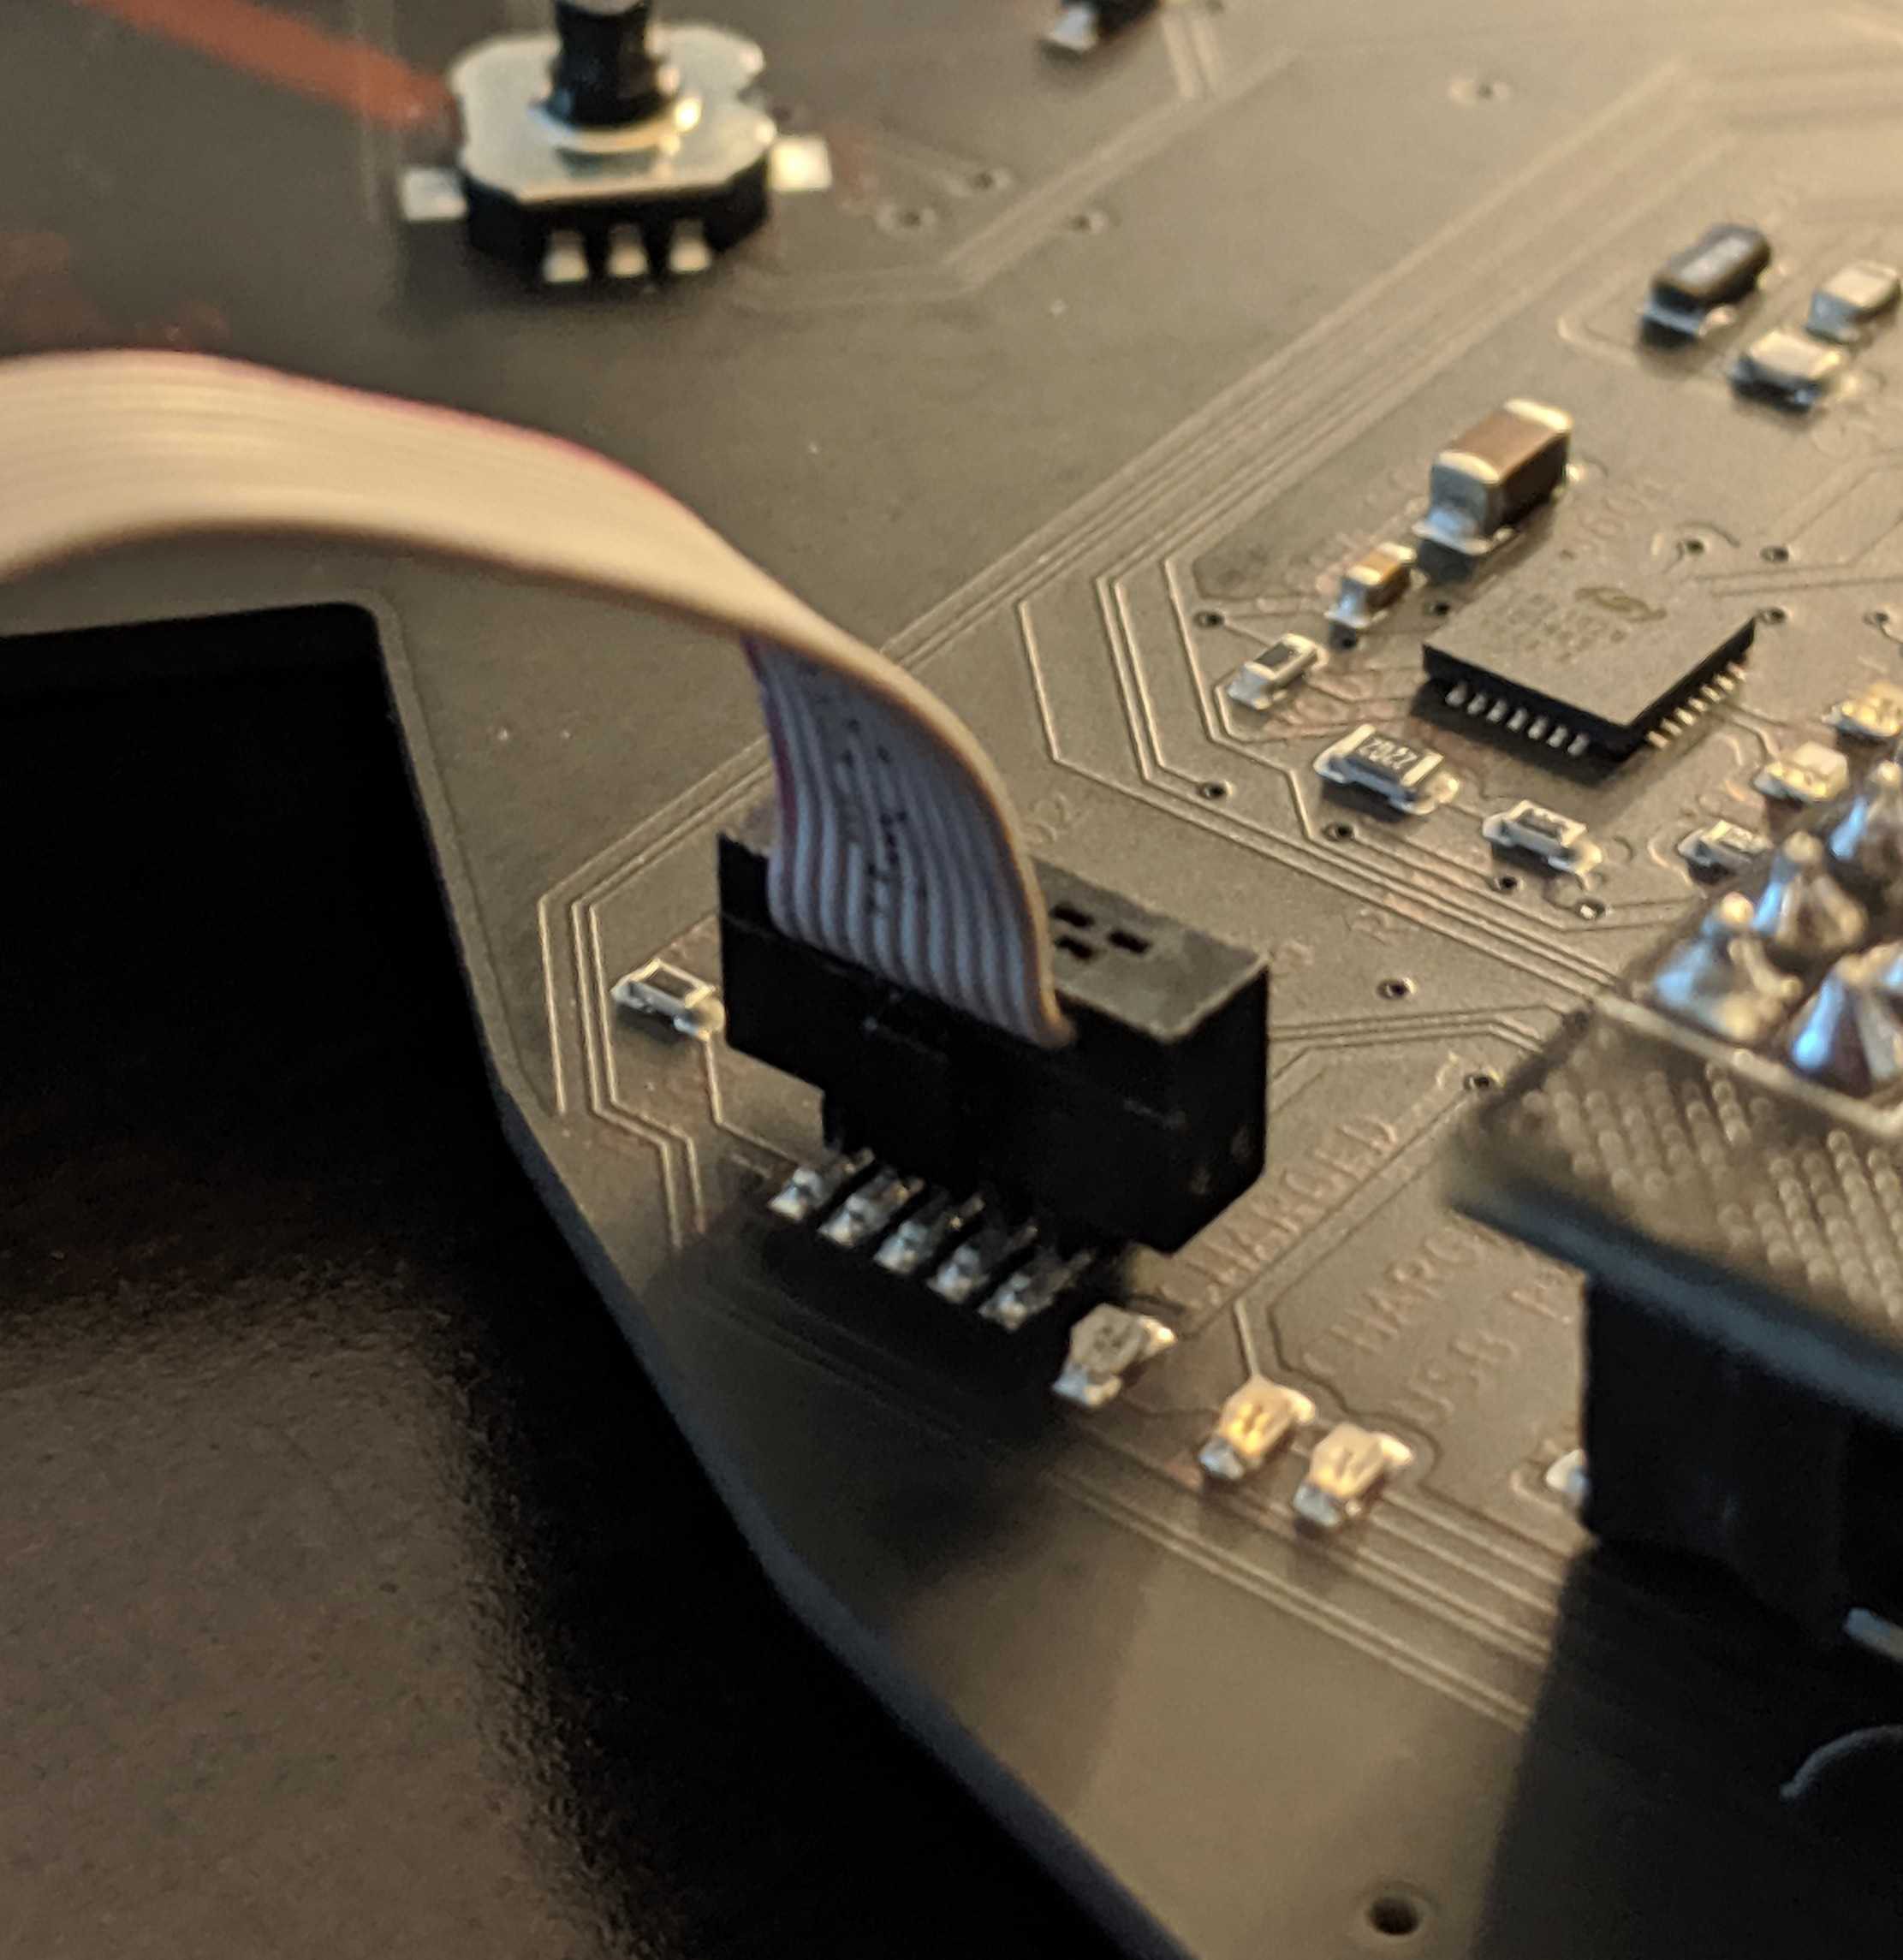
Our badge has a dual channel FT2232. Channel A is broken out adjacent to the device.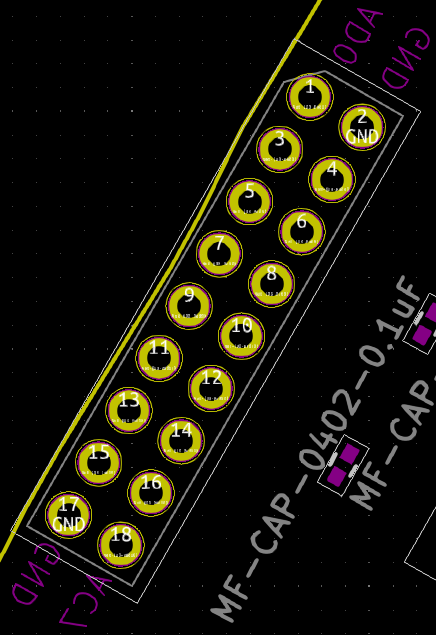
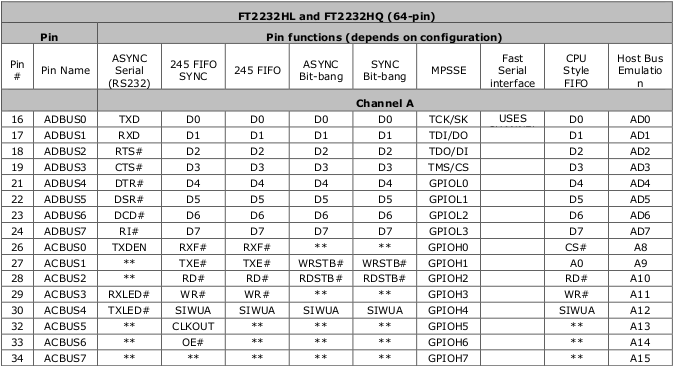
 The best way, in our opinion, is to slap a 470 ohm 0805 resistor between ADBUS1 and ADBUS2.
 Not so bad yet.
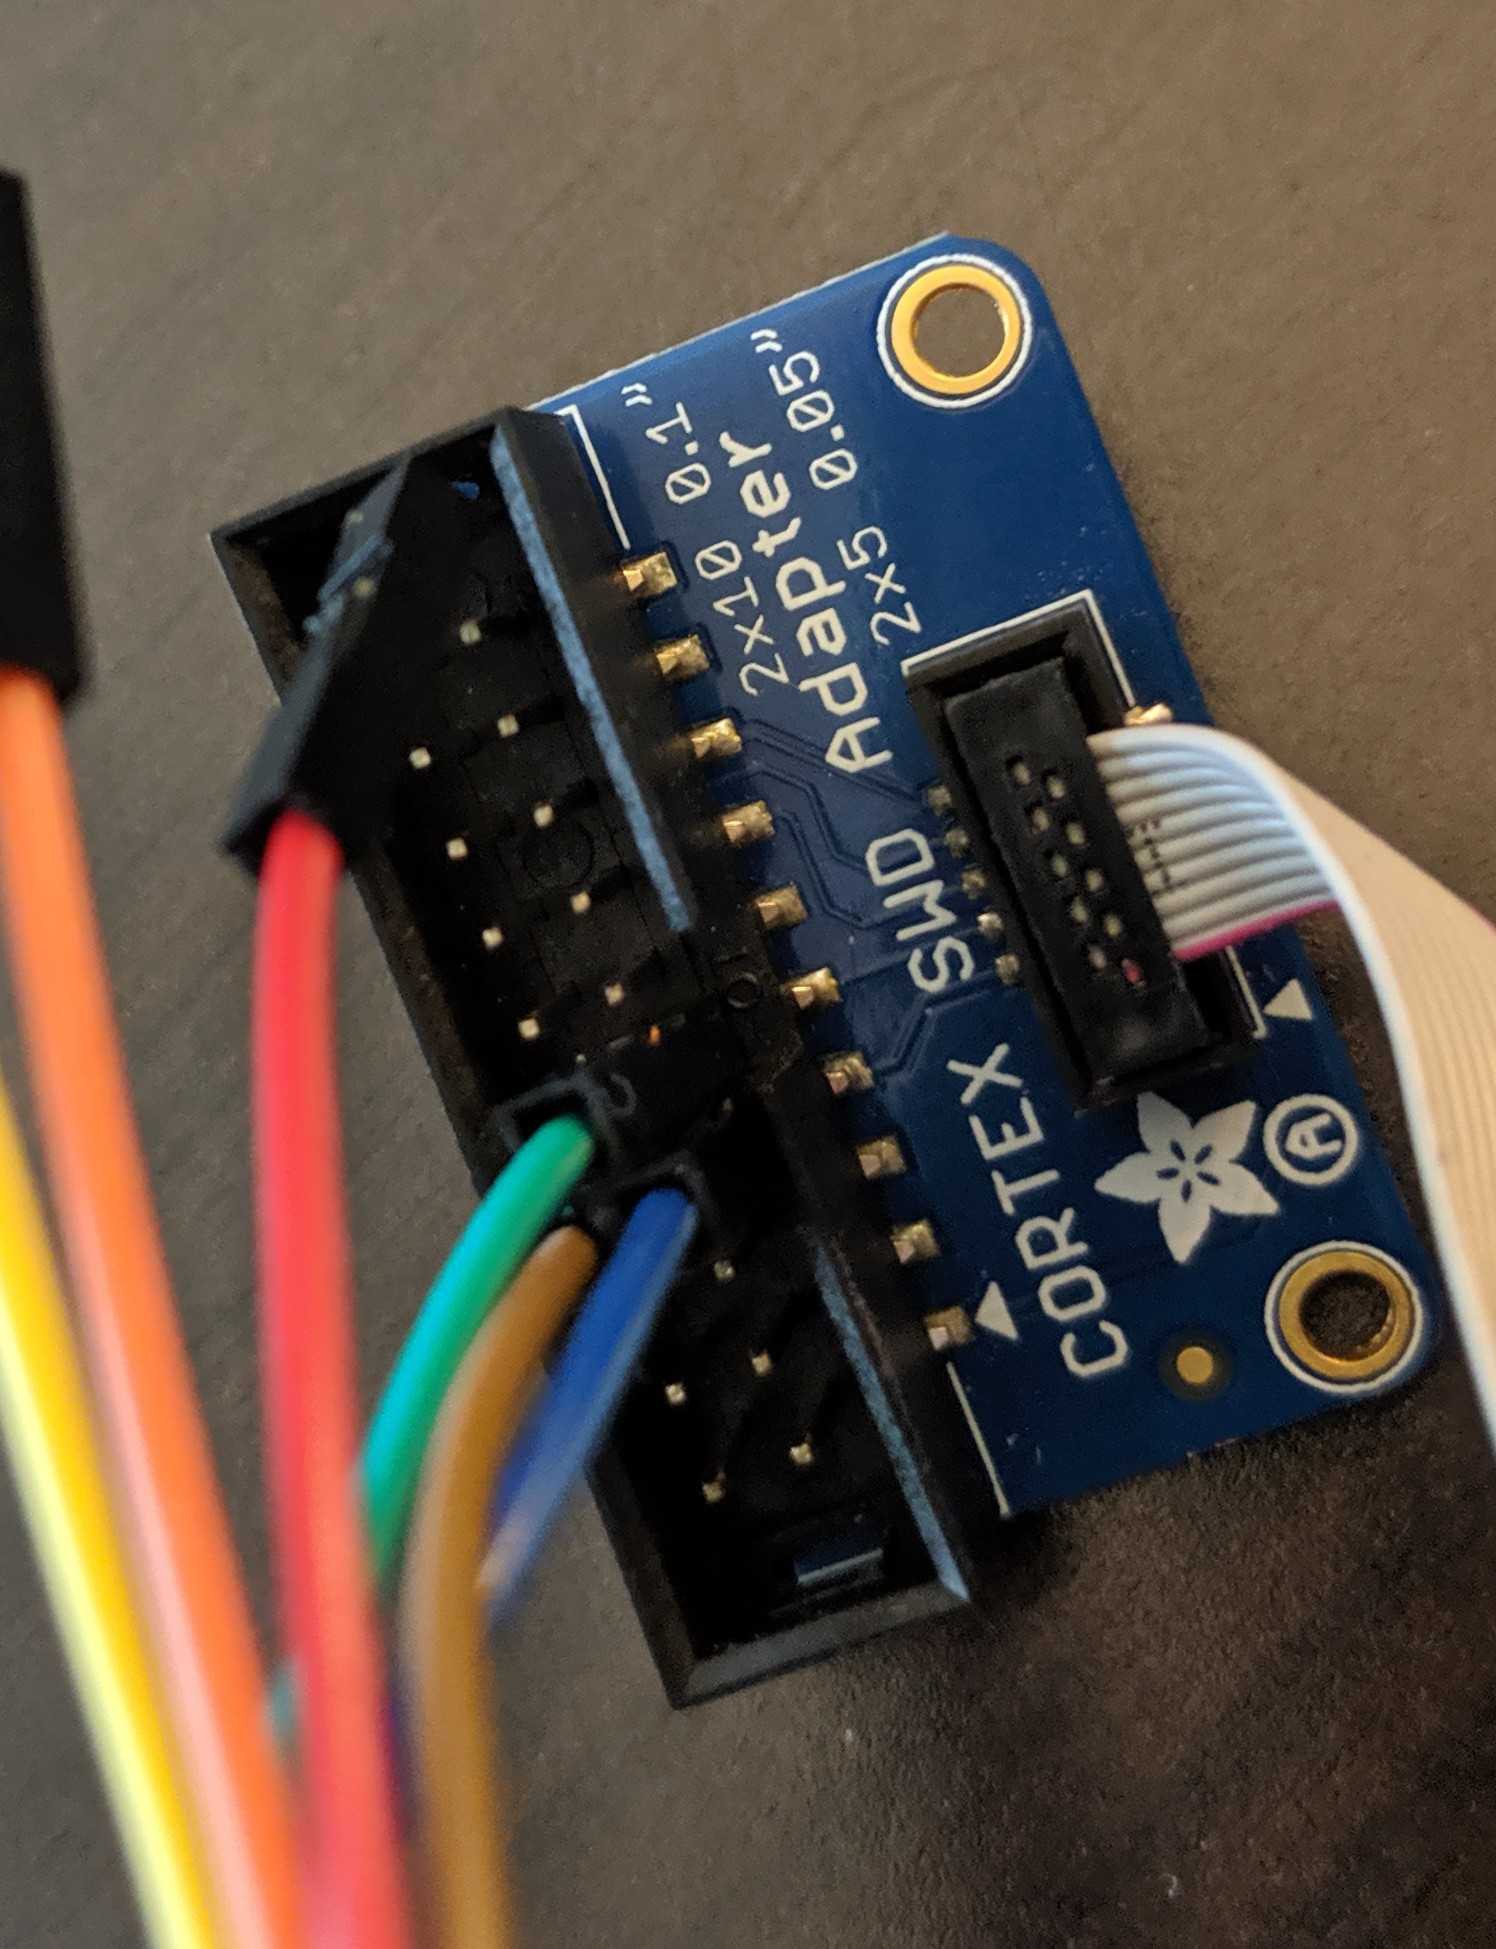
Next step is to connect to the target. Refer to the FTDI to Target diagram. TDI(ADBUS1) and TDO(ADBUS2) pins are connected via a resistor then to SWDIO. Using your adapter or amazing electrical skills connect to the target device. We'll leave this one to you but for reference this is how we connected from the badge to Da Bomb badge using an Adafruit JTAG 20 pin to SWD 10 pin adapter YMMV.
BADGE: TDO(ADBUS2) <==> Adapter: TMS <==> Da Bomb: SWDIO
BADGE: TCK(ADBUS0)<==> Adapter: TCK <==> Da Bomb: SWCLK
BADGE: GND <==> Adapter: GND <==> Da Bomb: GND

![]() Software
Software
 Software
I won't be going into the ARM tools in detail those are for other tutorials. But if you really must know I posted some resources here: GDB SWD Tutorial
The key to making this all work is OpenOCD. Unfortunately binaries distributed with Ubuntu and other Linux distributions are lacking. Therefore we must compile our own. Just like the good ol' days on your parents' computer with your Slackware distribution.

The Zylin distribution of OpenOCD seems to be well maintained but does not post binaries.
First step, clone the repo:
$ git clone http://openocd.zylin.com/openocd
Next, bootstrap the environment. This will find unmet dependencies that need to be installed. I'll leave that to you.
$ cd openocd
$ ./bootstrap
+ aclocal
+ libtoolize --automake --copy
+ autoconf
+ autoheader
+ automake --gnu --add-missing --copy
Makefile.am:46: warning: wildcard $(srcdir: non-POSIX variable name
Makefile.am:46: (probably a GNU make extension)
Setting up submodules
Generating build system...
Bootstrap complete. Quick build instructions:
./configure ....
Now the important part, configuring the build.
$ ./configure \
    --enable-aice \
    --enable-amtjtagaccel \
    --enable-armjtagew \
    --enable-cmsis-dap \
    --enable-dummy \
    --enable-ftdi \
    --enable-gw16012 \
    --enable-jlink \
    --enable-jtag_vpi \
    --enable-opendous \
    --enable-openjtag_ftdi \
    --enable-osbdm \
    --enable-legacy-ft2232_libftdi \
    --enable-parport \
    --disable-parport-ppdev \
    --enable-parport-giveio \
    --enable-presto_libftdi \
    --enable-remote-bitbang \
    --enable-rlink \
    --enable-stlink \
    --enable-ti-icdi \
    --enable-ulink \
    --enable-usb-blaster-2 \
    --enable-usb_blaster_libftdi \
    --enable-usbprog \
    --enable-vsllink
This will enable common interfaces and targets. By default OpenOCD does not compile with support for NRF52 or FTDI. Note you may have dependencies issues to resolve before continuing.
Finally build OpenOCD. Install is optional.
$ make
$ sudo make install
By default binaries are placed in openocd/src while interface and target scripts are in openocd/tcl. If you opted to install OpenOCD the binary ends up in /usr/local/bin/openocd and the interface and target scripts will go into /usr/local/share/openocd/scripts.
Getting to GDB
Now the fun bit...

Create a file called ocd. Copy the following into the file.
interface ftdi
transport select swd
ftdi_vid_pid 0x0403 0x6010
ftdi_channel 0
ftdi_layout_init 0x0018 0x05fb
ftdi_layout_signal SWD_EN -data 0
ftdi_layout_signal nSRST -data 0x0010
NOTE: This command targets and NRF52 which is used by various badge groups including AND!XOR, DaBomb, DC801, and DCZIA. OpenOCD supports a wide range of targets, select a different target script for other targets.
The DC27 badge is using the NXP KL27. Using OpenOCD with it should be as simple as changing the target to target/klx.cfg. YMMV.
From the current directory, run the following.
$ openocd -f ocd -f target/nrf52.cfg
Open On-Chip Debugger 0.10.0+dev-00922-g7a93c9e0 (2019-07-31-19:20)
Licensed under GNU GPL v2
For bug reports, read
    http://openocd.org/doc/doxygen/bugs.html
Info : FTDI SWD mode enabled
Info : Listening on port 6666 for tcl connections
Info : Listening on port 4444 for telnet connections
Info : clock speed 1000 kHz
Info : SWD DPIDR 0x2ba01477
Info : nrf52.cpu: hardware has 6 breakpoints, 4 watchpoints
Info : Listening on port 3333 for gdb connections
If successful you will have a GDB instance listening on port 3333. Now connect to it:
$ arm-none-eabi-gdb -ex "target extended-remote localhost:3333"
GNU gdb (GNU Tools for Arm Embedded Processors 7-2018-q3-update) 8.1.0.20180315-git
Copyright (C) 2018 Free Software Foundation, Inc.
License GPLv3+: GNU GPL version 3 or later <http://gnu.org/licenses/gpl.html>
This is free software: you are free to change and redistribute it.
There is NO WARRANTY, to the extent permitted by law.  Type "show copying"
and "show warranty" for details.
This GDB was configured as "--host=x86_64-pc-linux-gnu --target=arm-none-eabi".
Type "show configuration" for configuration details.
For bug reporting instructions, please see:
<http://www.gnu.org/software/gdb/bugs/>.
Find the GDB manual and other documentation resources online at:
<http://www.gnu.org/software/gdb/documentation/>.
For help, type "help".
Type "apropos word" to search for commands related to "word".
Remote debugging using localhost:3333
warning: No executable has been specified and target does not support
determining executable automatically.  Try using the "file" command.
0x0002868e in ?? ()
(gdb)
Enjoy and hack all the things!
Discussions
Become a Hackaday.io Member
Create an account to leave a comment. Already have an account? Log In.