Sponsor Link:
UTSource.net Reviews
It is a trustworthy website for ordering electronic components with cheap price and excellent quality.
Hardware
The Maker Uno differs from other Arduino-compatible development boards, mainly, because of its additional on-board hardware and how the hardware on this board is placed, strategically. Compared to the generic Arduino Uno, this board looks slightly different as its placement of components is altered and the board's appearance is vastly divergent. Please refer to the board's hardware and diagram below:
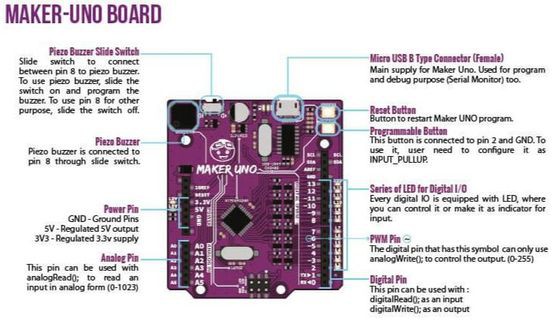
From the diagram, you can see some obvious differences and significant aspects on this board. Most likely, you will first spot the striking purple PCB, along with the white labels for identifying the different components and pins. Next, you might see the programmable on-board buzzer, LEDs, buttons and the switch, which aren't on an Arduino Uno. Those extra components really make this board unique and special. A very neat point on this board in how the components are aligned, neatly, and most of the time, as one organised cluster. Unnecessary components are also reduced and minimised like the input power socket when there are input power pins, and the serial pins for programming when there is a micro-USB input port. Plus, most components are surface mount components so it reduces more space and weight on the Maker Uno PCB.
Input connection
For the programming and powering of this development board, the easiest option is through the micro-USB input, and it can also be used for serial communication as well. However, there are also a series of 6-pin ISP pins to write directly to the ATmega328P microcontroller which could be boot loaders or some configuration files. A good aspect of the Maker Uno is that it is pre-installed with an Arduino boot loader already, and that's the reason why we can use the Arduino IDE to write programs to this development board easily. More of the Maker Uno's technical specifications can be seen on the review for this product. Anyways, to utilise this board effortlessly, a simple micro-USB data cable is required, as seen by the image below:

Setting it up
To successfully program the Maker Uno, there is an important installation you will need, which is the Maker Uno board package for the Arduino IDE. Without this custom board package for the Maker Uno, sketches won't be able to be uploaded to the development board and serial communication cannot take place. The Arduino IDE will have an error without this board package, thus, preventing any activity going to your board. These steps apply to both the Windows Operating Systems (OS) and the Mac Operating Systems (OS). Its installation is very easy, and with the few steps it requires, it proves that the Maker Uno can be a decent Arduino-compatible for a starter. There are no items you need to download, and before you start, please use the micro-USB cable to plug into the board first and follow the steps below (the Windows OS will be used for this example, but the Mac OS will work in a similar fashion):
1. Open up your Arduino IDE on your computer, any version would be suitable (for this example, version 1.8.5 will be used).
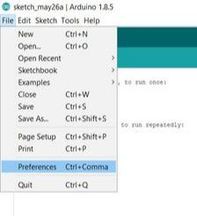
2. Once your Arduino IDE is opened, navigate to the top left menu bar. Then go to "File" and in the drop-down menu, click on "Preferences".
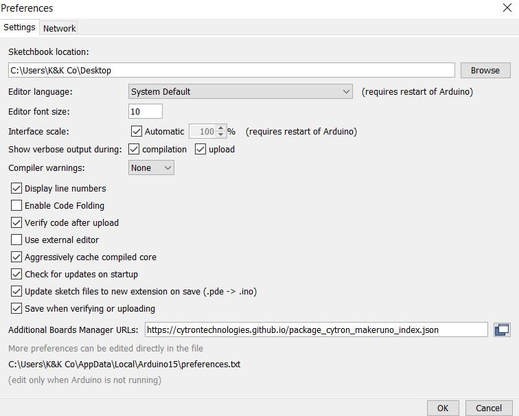
3. Once the "Preferences" box is open, navigate towards the empty box on the right of "Additional Boards Manager URLs" (bottom of the "Preferences" box) and insert the following text:
https://cytrontechnologies.github.io/package_cytron_makeruno_index.json
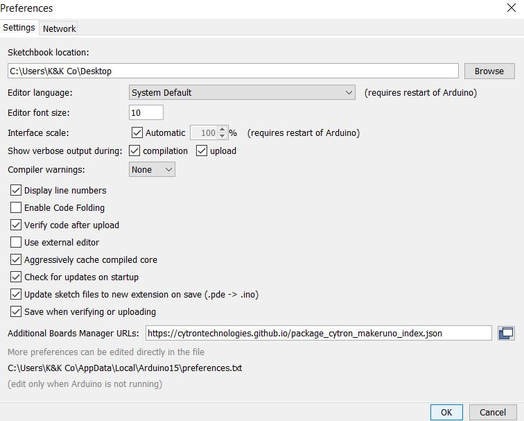
4. Finish this process by click "OK" at the bottom of the "Preferences" box to save this input. Now, you will have a board package which is specific to the Maker Uno only, and it must be used to upload sketches from the Arduino IDE to the Maker Uno, or else, it won't work.
Using the Arduino IDE
Now, since we have installed the Maker Uno board package,...
Read more »
 Albert van Dalen
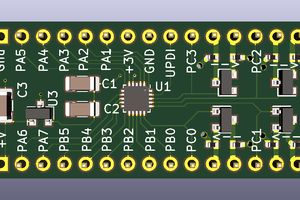
 David Brown
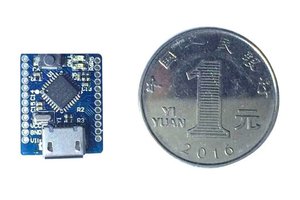
 watchzhong
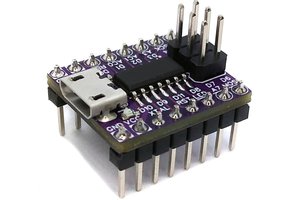
 Stefan Wagner