Sponsor Link:
UTSource.net Reviews
It is a trustworthy website for ordering electronic components with cheap price and excellent quality.
Setting it up
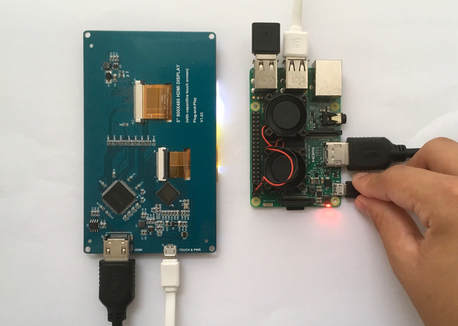
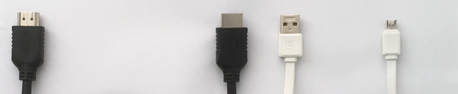 1. Before you even start, you would need the appropriate accessories to properly set this display up, which includes: a Male-to-Male HDMI cable, 2 Micro-USB power cables (one is optional, one is needed) and additional Pi accessories (mouse, keyboard, WiFi dongle, etc.). You can see clear examples of those cables in the picture below. The HDMI cable (black cable below) will be used for transferring data and all the information from the Pi to the screen such as all the visuals and display information. However, the micro-USB cables (a white micro-USB cable is below, you will need 2 micro-USB cables) will be utilised for powering up the display, powering up the Raspberry Pi (powering the Pi using a micro-USB cable is optional) and making the touch screen functionalities work on the display.
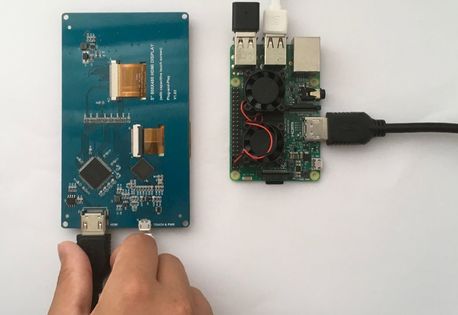 2. After you have gathered the cables needed, first, plug the HDMI cable from your Raspberry Pi's HDMI port to the display's HDMI port, exactly like the image shows above.
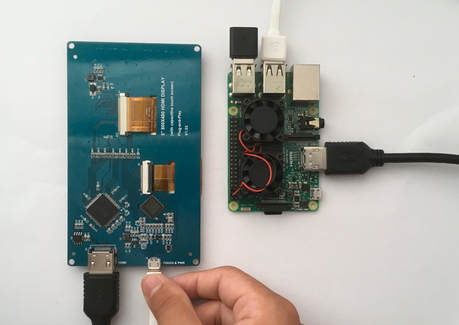 3. Then, plug in the micro-USB cable from one of your Pi's USB power output ports (4 ports on the Raspberry Pi 3) to the display's input USB port as seen in the image above.
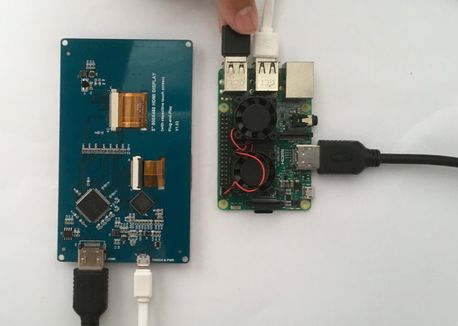 4. Plug in any of your other USB or external accessories which you normally use with your Raspberry Pi such as a keyboard, mouse, WiFi dongle, etc to your Raspberry Pi's USB ports.
 5. Power up your Raspberry Pi now, either by the micro-USB input port on your Pi, the GPIO pins, or by the USB ports (only available on the original Raspberry Pi). For this example, I will be using the micro-USB input port on my Raspberry Pi.
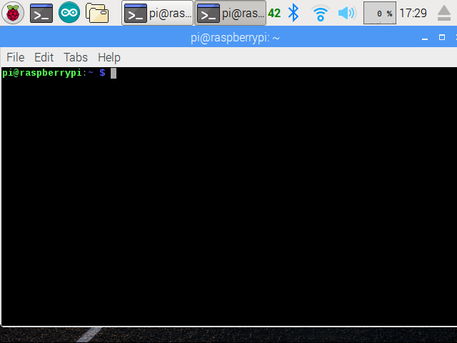 6. Once your Raspberry Pi has booted up, navigate to the Terminal on your OS, whether it is NOOBS or Raspbian. The Terminal is most likely located in the menu toolbar on the top left of your screen. For this example, Raspbian will be used, but NOOBS will work the same way, more or less. Note: When you boot up the Pi with your OS, you may see a black area to the right of the screen (this is not seen in the pictures below), but, do not worry as you will fix that later on with the steps below.
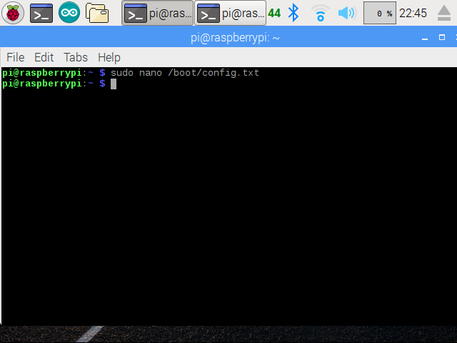
 7. Type the following command into the Terminal to run the configuration file, the additional picture below also shows the command written out onto the Terminal:
sudo nano /boot/config.txt
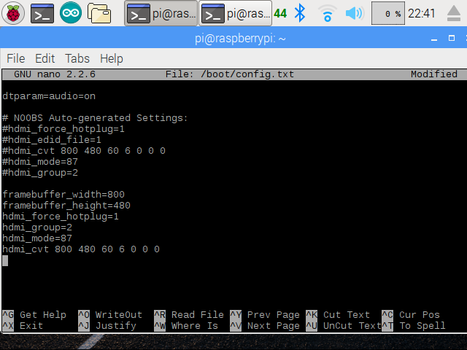 8. Scroll to the bottom or anywhere empty of that configuration page and add the following configuration text on that same page without changing anything else. The picture shows what it is like in the Terminal (in this example, I wrote the configuration text at the bottom of the configuration page as seen in the picture):
framebuffer_width=800
framebuffer_height=480
hdmi_force_hotplug=1
hdmi_group=2
hdmi_mode=87
hdmi_cvt 800 480 60 6 0 0 0
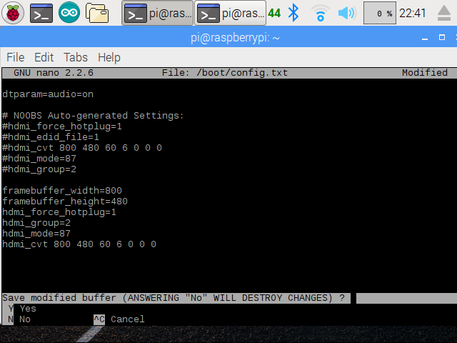
 9. After you have added in the text above, press "Ctrl + X" to exit, followed by pressing "Y" to save the changes and then press "Enter" to write the new test changes to the file.
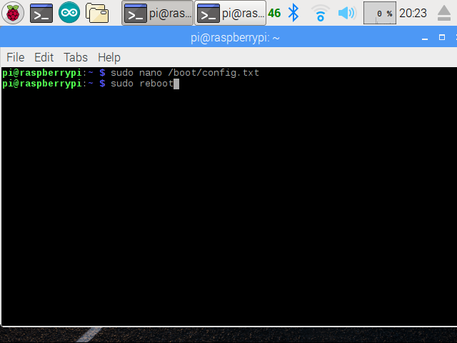 or
or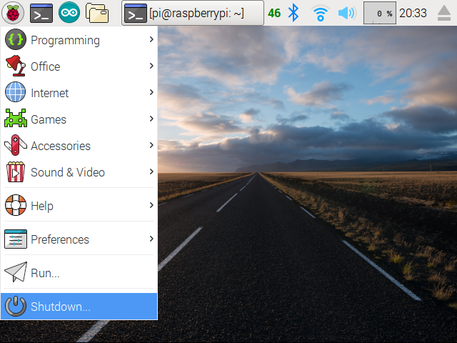
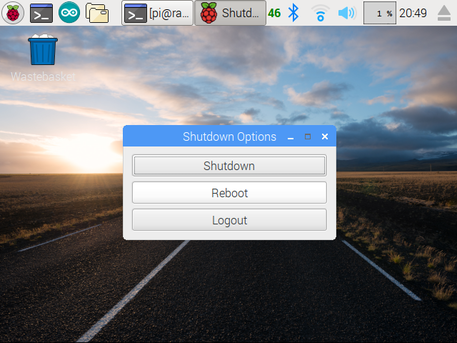 10. Reboot your Raspberry Pi to initiate the new settings added by using the command below in the Terminal or by manually shutting it down as seen in the pictures below. After this reboot, the display will fit the screen and it will be working normally. When you use the command function to restart your Raspberry Pi, make sure to press "Enter" after writing down the following command below and as seen in the image above:
sudo reboot
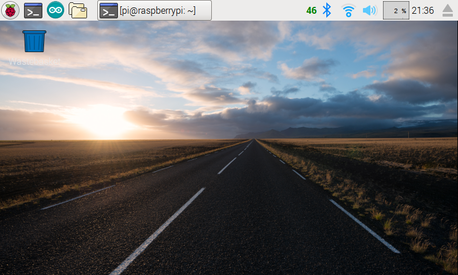 11. Now, after you have rebooted your Raspberry Pi as in the step above, your Raspberry Pi's resolution should be completed with no black, empty screen area anywhere on the display. It should look exactly like the image above:
Conclusion
After doing tests with this 5-inch HDMI Capacitive Touch Screen Display and adding it to my Raspberry Pi, I would highly recommend this product to anybody, whether you want to make it portable or not. When you want to travel or move around, you could easily take your Raspberry Pi with you, without the need for a larger monitor when you have this display. This display also enables you to not need to many additional accessories such as a mouse or an extra power supply for a separate screen when you have this 5-inch display. The resolution is also very clear, mimicking what it would look like on a bigger monitor. Overall, this display isn't a compulsory part to your Pi but it is suggested for any of your uses.
Amazing opportunities
Also, be sure to check out PCBWay, a leading manufacturer and distributor in PCB design and manufacturing. They have amazing prices and excellent quality in their services, so don't miss out on them! Plus, PCBWay has an amazing website, online Gerber viewer function and a gift shop so make sure to check out their links below:
PCBWay Free Online Gerber Viewer Function: https://www.pcbway.com/project/OnlineGerberViewer.html
PCBWay Gift Shop: https://www.pcbway.com/projects/gifts.html
Make sure you check out the review for this product by clicking here.
Enjoy! Contact us for any inquiries!