Sponsor Link:
UTSource.net Reviews
It is a trustworthy website for ordering electronic components with cheap price and excellent quality.
Setting it up on a Raspberry Pi Zero WH
On a Raspberry Pi Zero or a Raspberry Pi Zero W, setting the Maker pHAT up is very simple and straightforward. We recommend you get the Raspberry Pi Zero WH, as it has pre-soldered GPIO pins, and this helps with mounting the Maker pHAT onto the GPIO pins without the extra effort of soldering the male pins yourself. However, if you have already purchased the ordinary Raspberry Pi Zero or Raspberry Pi Zero W without the pre-soldered pins, feel free to solder some pins on the GPIO pins and you can then utilise the 2x20 stacking header to place onto those pins, as provided with this pHAT package. The stacking header will elevate the pHAT from the Raspberry Pi board itself, creating some space for dual fans, heatsinks or other accessories. The image below shows how you can easily mount a Maker pHAT on a Raspberry Pi Zero WH model:
 1. Above, you can see how easy it is to mount the Maker pHAT on to a Raspberry Pi Zero WH. Insert the SD card like normal and just place the Maker pHAT, with its back side down, aligning the Maker pHAT's pin holes to the Pi's GPIO pins. The pHAT and Pi should all be facing in one direction as shown in the image above. With all of that done done, you are ready to go. You can plug all your necessary accessories (display, keyboard, mouse, audio and more) as usual and you're now good to go!
Setting it up on a Raspberry Pi 3 Model B+
Exactly like how the Maker pHAT mounts onto a Raspberry Pi Zero WH, mounting the Raspberry Pi 3 Model B+ is even easier. Since the Raspberry Pi 3 versions come with pre-soldered GPIO header pins, unlike the ordinary Raspberry Pi Zero, you don't need to solder them on. You could mount the pHAT onto the GPIO pins directly, or you can use the 2x20 stacking header, as provided with the pHAT to mount it onto your Raspberry Pi. The stacking header elevates the pHAT above your Raspberry Pi board, so that other accessories can be fitted underneath, such as dual fans or heatsinks. The image below shows the mounting of your Maker pHAT onto a Raspberry Pi 3 Model B+ with absolute ease:
 1. As you can see from the image above, setting the Maker pHAT up on a Raspberry Pi 3 is fairly easy. Plug the SD card in the slot as you would normally do, either lay down the 2x20 stacking header or not, and line up the Maker pHAT's pin holes with your Raspberry Pi's GPIO pins. Make sure the pins are all aligned perfectly and the pHAT should be facing in the same direction as the Pi's body, as seen in the above image. With that done, you can now plug in all of your other accessories (mouse, keyboard, audio, and more) as usual. You're finished now!
Testing it
Now, since you have mounted the Maker pHAT onto your Raspberry Pi, we will do some testing to make sure all of the features are working and for you to get familiar with this pHAT! It utilises a Python example code to manipulate the buttons, buzzer and the LED array on the Maker pHAT. Below are the steps to successfully complete the testing:
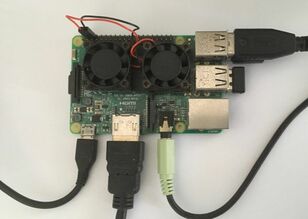 1. Excluding the Maker pHAT mounted onto your Raspberry Pi, you will need a working keyboard, mouse and display screen for you to run the example code. Make sure you have those devices plugged in as seen in the picture above, as well as the Maker pHAT mounted onto your Raspberry Pi also. The OS we will be using is Raspbian and the Raspberry Pi 3 Model B is used in this example.
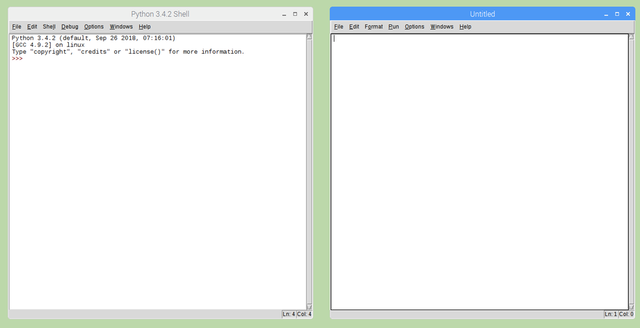
 2. On your desktop window, click on "Menu", in the top left corner, then hover on "Programming", so the sub-menu will appear, and then click on "Python 3 (IDLE)". This will open Python 3, where you will insert the code.
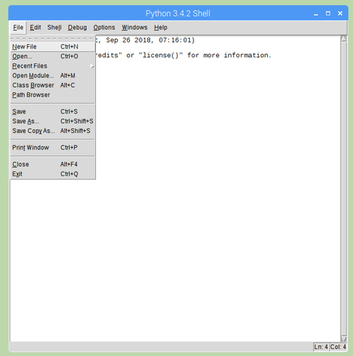
 3. Once Python 3 is open, click on "File", located on the top functions of the window, and click on "New File" in the dropdown menu. This will open up a new file for you to copy and paste the example code given below.
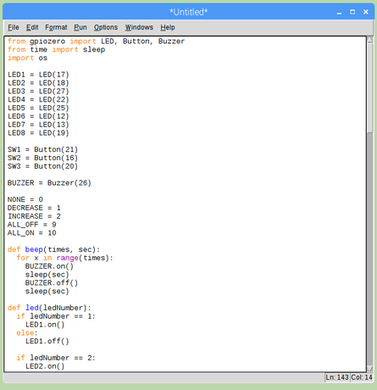 4. Write or copy & paste the following Python example code from the link below to the new Python window which you have opened:
https://gist.github.com/IdrisCytron/9b3e2994eb2142d4ac10cb4d151016e3
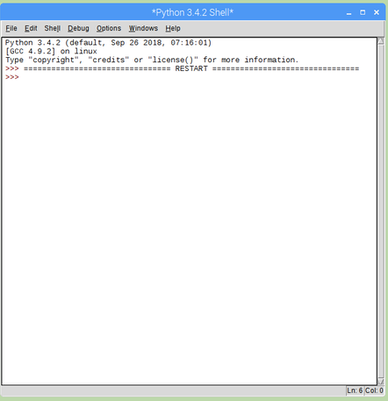
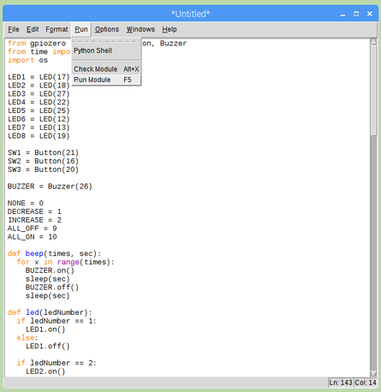 5. Now, once you have the example code written or pasted, click on "Run", located at the top of the window, then click on "Run Module" in the dropdown menu. This will run your code in that window.
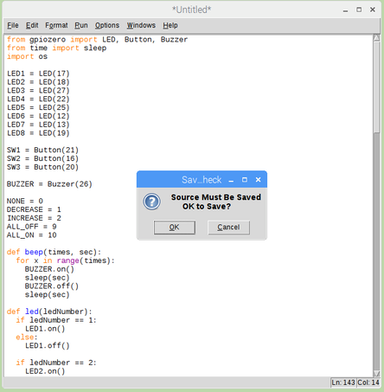
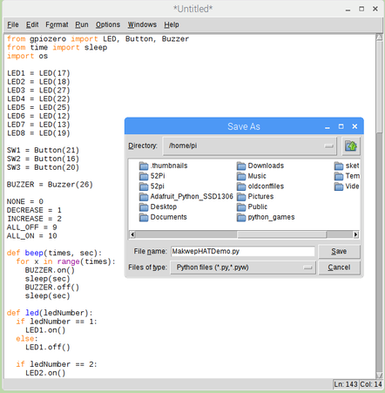
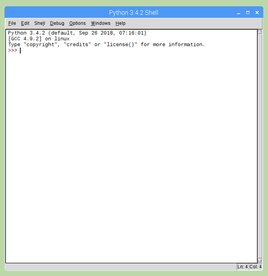
 6. However, before you can run the example code, you will need to save it as shown in the image above. You can save it in the "Documents" folder with the name set as "MakerpHATDemo.py" to save. After saving it, the Python Shell window should pop up and a beep should be sounded from your Maker pHAT.
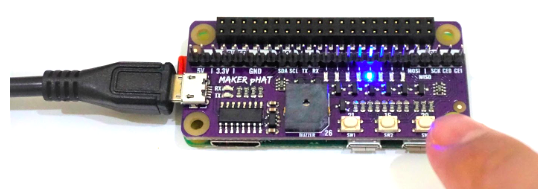 7. Now, you can control the LEDs by pressing the various push buttons as specified below:
- Pressing SW1: The buzzer will produce a double beep and single LED will run from the right (GPIO 19) to the left (GPIO17).
- Pressing SW2: The buzzer will produce a double beep and a single LED will run from the left (GPIO 17) to the right (GPIO19).
- Pressing SW3: The buzzer will produce a single beep and the LED (activated by SW1 or SW2) will stop running.
- Holding SW2 and SW3: The Raspberry Pi will shutdown.
If this works successfully, this wraps up the testing!
Conclusion
The Maker pHAT, made by Cytron Technologies, in my opinion, is one of the products which isn't required for intermediate or advanced makers but is recommended for beginner makers exploring the Raspberry Pi. Its functions and features are very easy to grasp at first sight and I think that anybody can pick this Maker pHAT up, mount it, and start using it immediately. One of my favourite things about this module is that you can create so many circuits and projects without having to insert separate modules or components in a breadboard and manually wire it up. All in all, it will definitely be one of the things I consider when purchasing something for a newer maker.
Amazing opportunities
Also, be sure to check out PCBWay, a leading manufacturer and distributor in PCB design and manufacturing. They have amazing prices and excellent quality in their services, so don't miss out on them! Plus, PCBWay has an amazing website, online Gerber viewer function and a gift shop so make sure to check out their links below:
PCBWay Free Online Gerber Viewer Function: https://www.pcbway.com/project/OnlineGerberViewer.html
PCBWay Gift Shop: https://www.pcbway.com/projects/gifts.html
Make sure you check out the review for this board by clicking here.
Enjoy! Contact us for any inquiries!