 matthewkleinmann
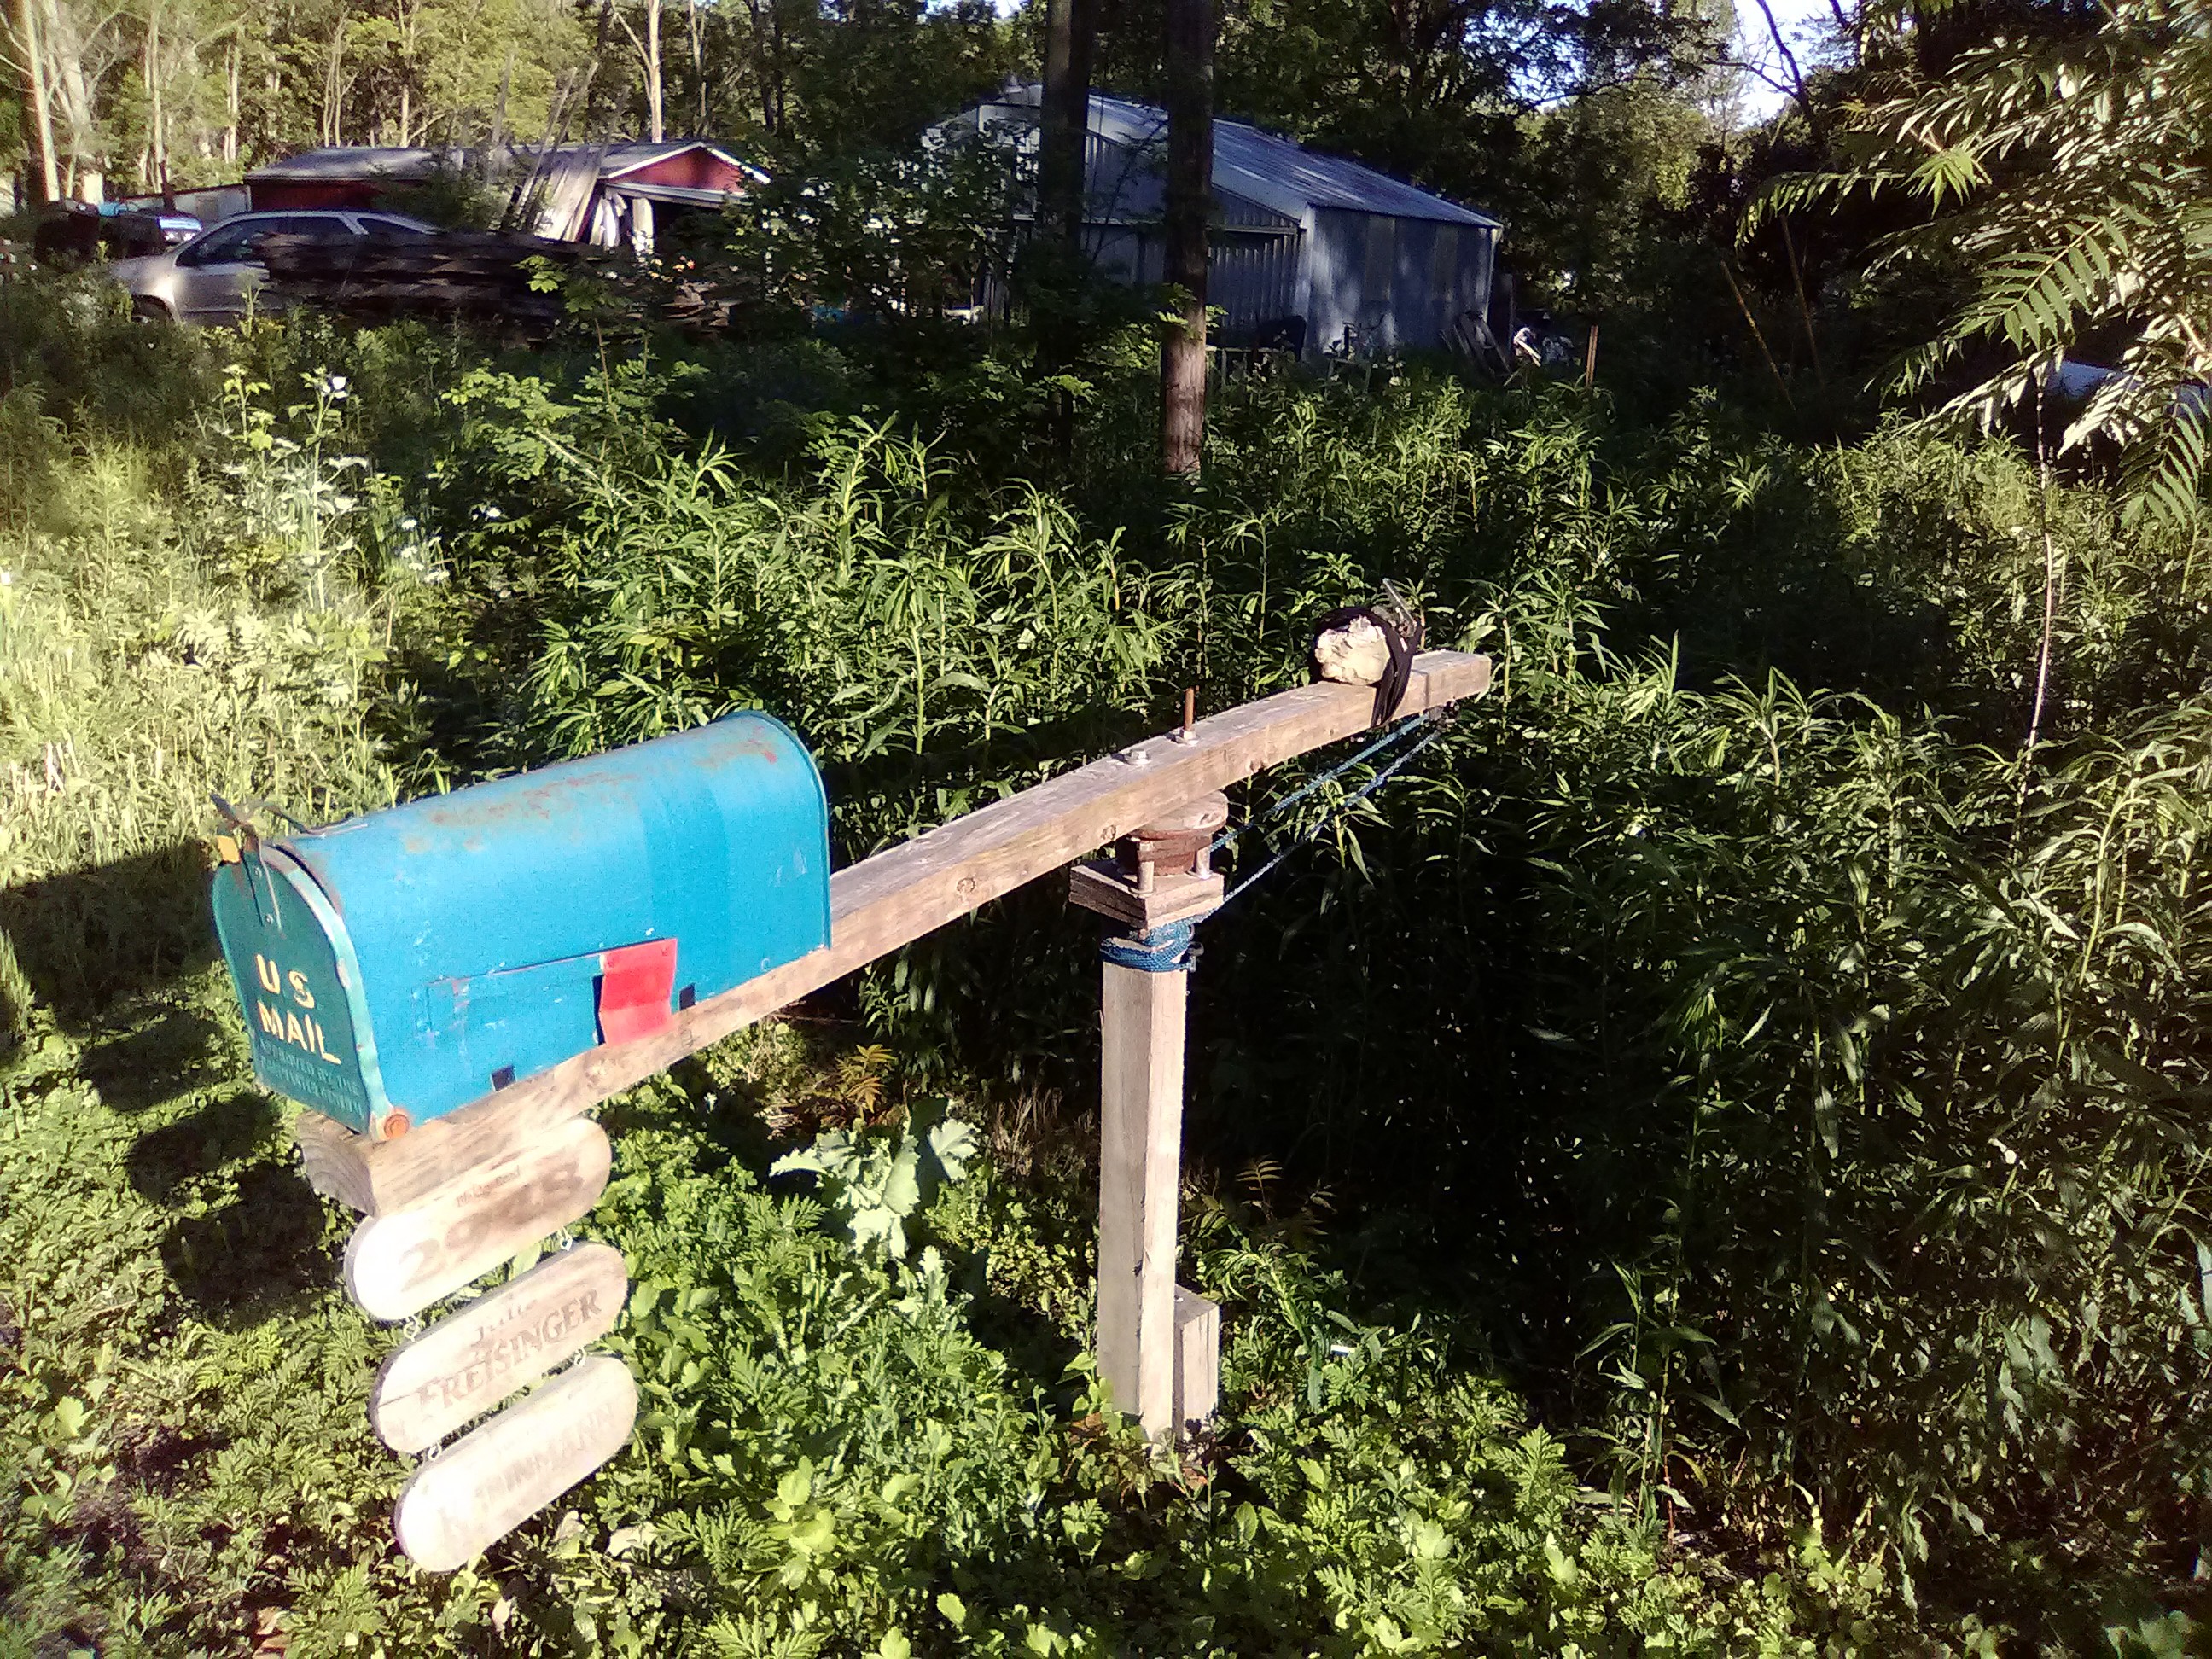
The first step was moving the pole for it back about 5 feet into our yard, and planting a new wooden pole. The pole for the hole is about 3 feet deep. The pole is white oak, salvaged from a pallet. If you follow my projects, almost all of the major pieces are salvaged. In this case the pole was about 3.5" square.
The rotating piece is an old car axle bearing assembly. I have a friend who is an auto mechanic so I can get used axle bearing and hub assemblies off the junk pile. I can often find ones that whined with a ton of car on them going 60 mph down the road but work just fine and dandy for my low speed, low load uses.
The one I chose for this project, pictures to follow, had I believe a cluster of 4 studs on one side and 5 holes on the other. The studs are held in place with friction and splines. You can hammer them out, but you want to be careful to back the assembly up so you are not pounding the bearing apart.
I looked carefully at the unit I had and one side of the bearing proper seemed to be sealed better than the other. I decided that the less sealed side was gong to be the down facing side. I sandwiched some slats from pallets together and make a roughly 5" x 5" square board about an inch think, and glued and screwed it together.
This fits on top of the pole, and is held in place with a few lag screws. Sadly, the hub of the bearing projected down past the flanges on the bottom. This required my cutting 4 spacers out of steel pipe about 1" long each. The bearing with the spacers sits in the center of the pole and 4 pieces of threaded rod project down through the spacers and through the wooden cap on top of the pole. Getting everything positioned was a bit tricky. I used threaded rod instead of machine screws for two reasons. One, and a big one, I had some kicking around. Second, it meant a lot less measuring. With machine crews only the last inch is threaded so you need to be able to measure the thickness of the plate on top of the pole, the length of the spacers, and the thickness of the bearing, and have enough threads sticking out to get a good bite on. The rod made this a lot easier. Actually the rod was almost necessary because as it turned out, the nuts I put on the end of the threaded rod just cleared the top of the bearing, and it is impossible to put machine hardware in the other way around. So I would have had to have put it together and figured out how much I needed to shave off each one and take them apart and grind each one down, and than re-assemble. Trust me if you do this the rod makes your life a lot easier. I almost wish I could say it was genius using it, but sadly it was just dub luck.
So, if all has went according to plan so far, you should now have a bearing that has 4 holes in the top that rotates on the pole. Cool. The end is in sight!

The next section was a bit of measuring and trial and error. It involves putting a 12' long oak 2x4 across the bearing, screwing the mail box all the way forward on one side and using a $1 store ratchet strap to hold a big assed rock to the other side. Ideally the rock should be a bit heavier than the mailbox. The idea is to slide the whole deal on top of the bearing until it balances and you want about 5 feet on the back end and about 7 feet on the front end. Once you have this, drill and lag the beam to the bearing from the bottom.
Now if everything is happy you should be able to give the mailbox a gentle push and have it spin around a few times effortlessly.
The final step is putting a screw eye on the bottom of the spinning arm, under the big rock, and putting at least one screw eye in the back of the post. I put one on each side. You get bungee cords and stretch them from the post mounted screw eye(s) to the one under the rock. Now when the mailbox moves, the bungees will pull it back to where it belongs. They are not super strong though, and this turns out to be a nice thing as the mailman can pull up to the box and pull the box right to them.
This is a silly project but for some reason I really like it. I even enjoy watching the box waver around in high winds. And if anything even bumps it now, it just effortlessly spins out of the way and than slowly returns.

Note the bungee cords wrapped around post to get the correct amount of tension. Again, trial and error.
---------------------------
After a couple of years the elastic in the bungees was about gone and the box started drifting in the wind. I did not feel like driving into town to get more bungees and the same thing would happen to them. The bungees turned into like a nylon rope that was still strong though. Hmmm.. A quick look at my junk pile and I came back with a screw eye and a 25 pound steel weight from a weight bench I picked off the side of the road. Now there is one top that goes from the back of the rotating arm, through a screw eye near the top of the vertical post and the weight is hung there by the rope. You move the arm, it lifts the weight, gravity pulls the weight down and the arm comes back to it's center position. Cool. Now there is no elastic to fail. When the rope fails I will use some thin aircraft cable I have but I have to find. Oddly enough the rope seems to be doing a good job of hanging in there.