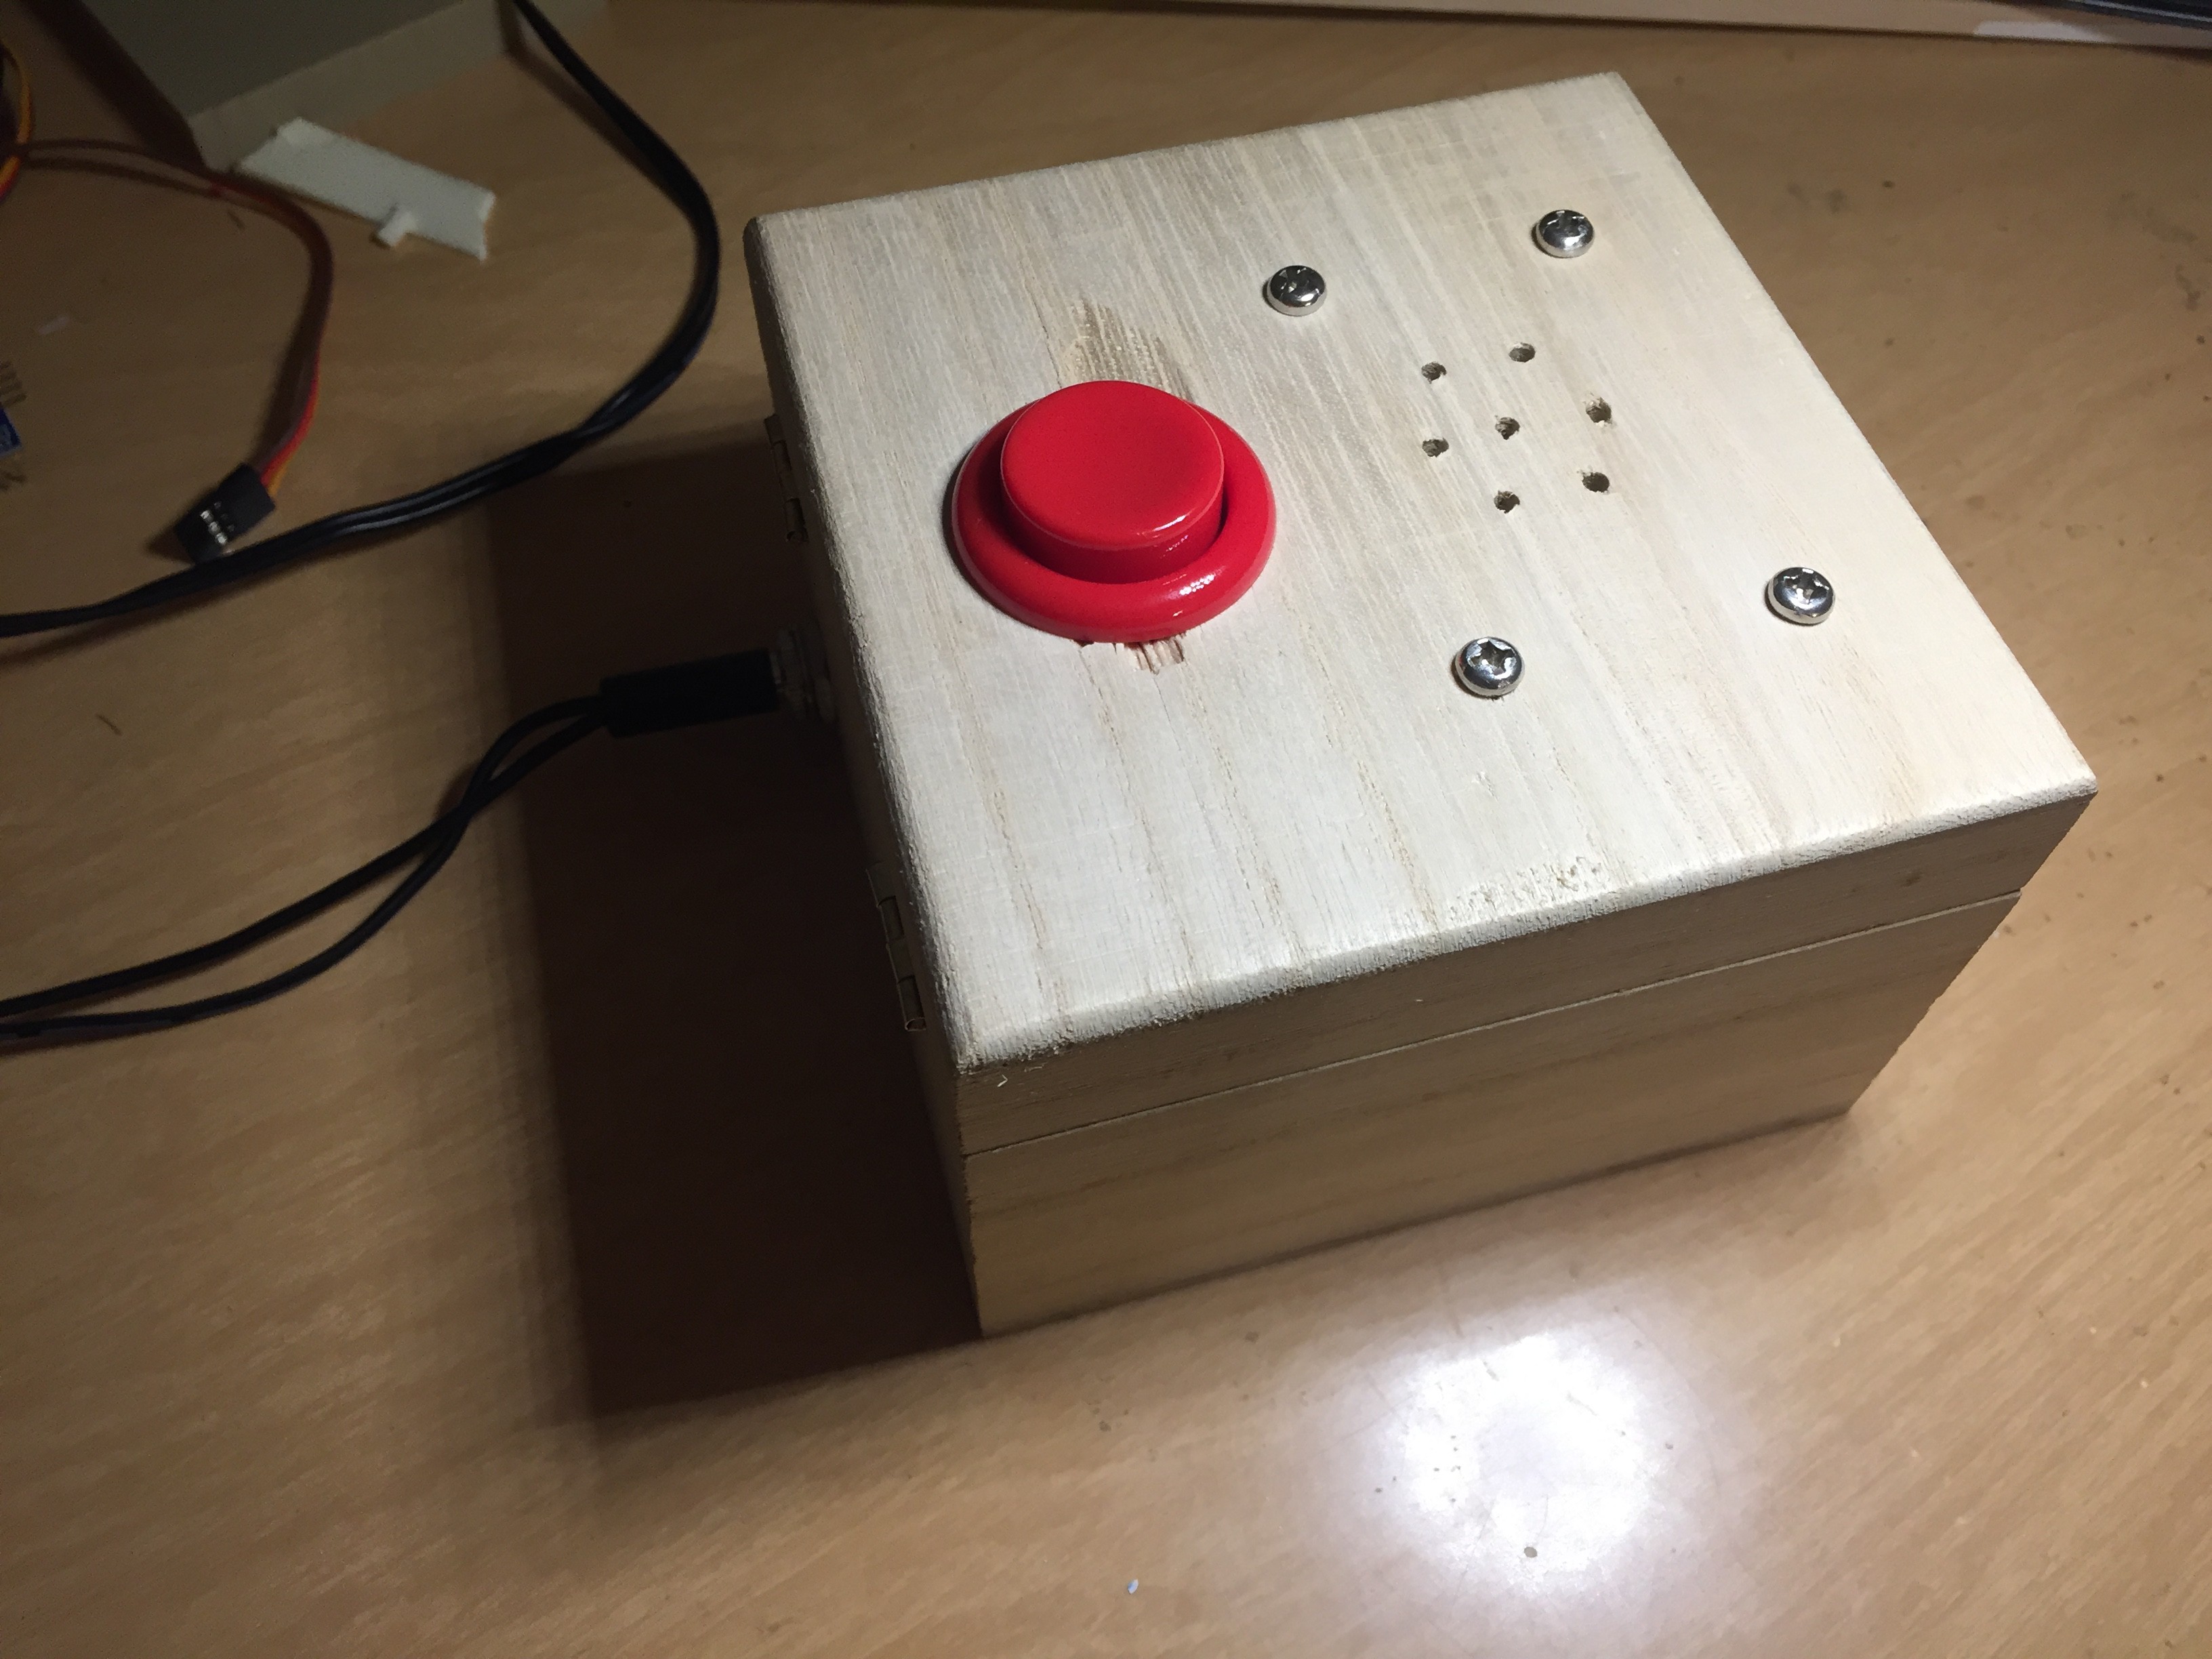
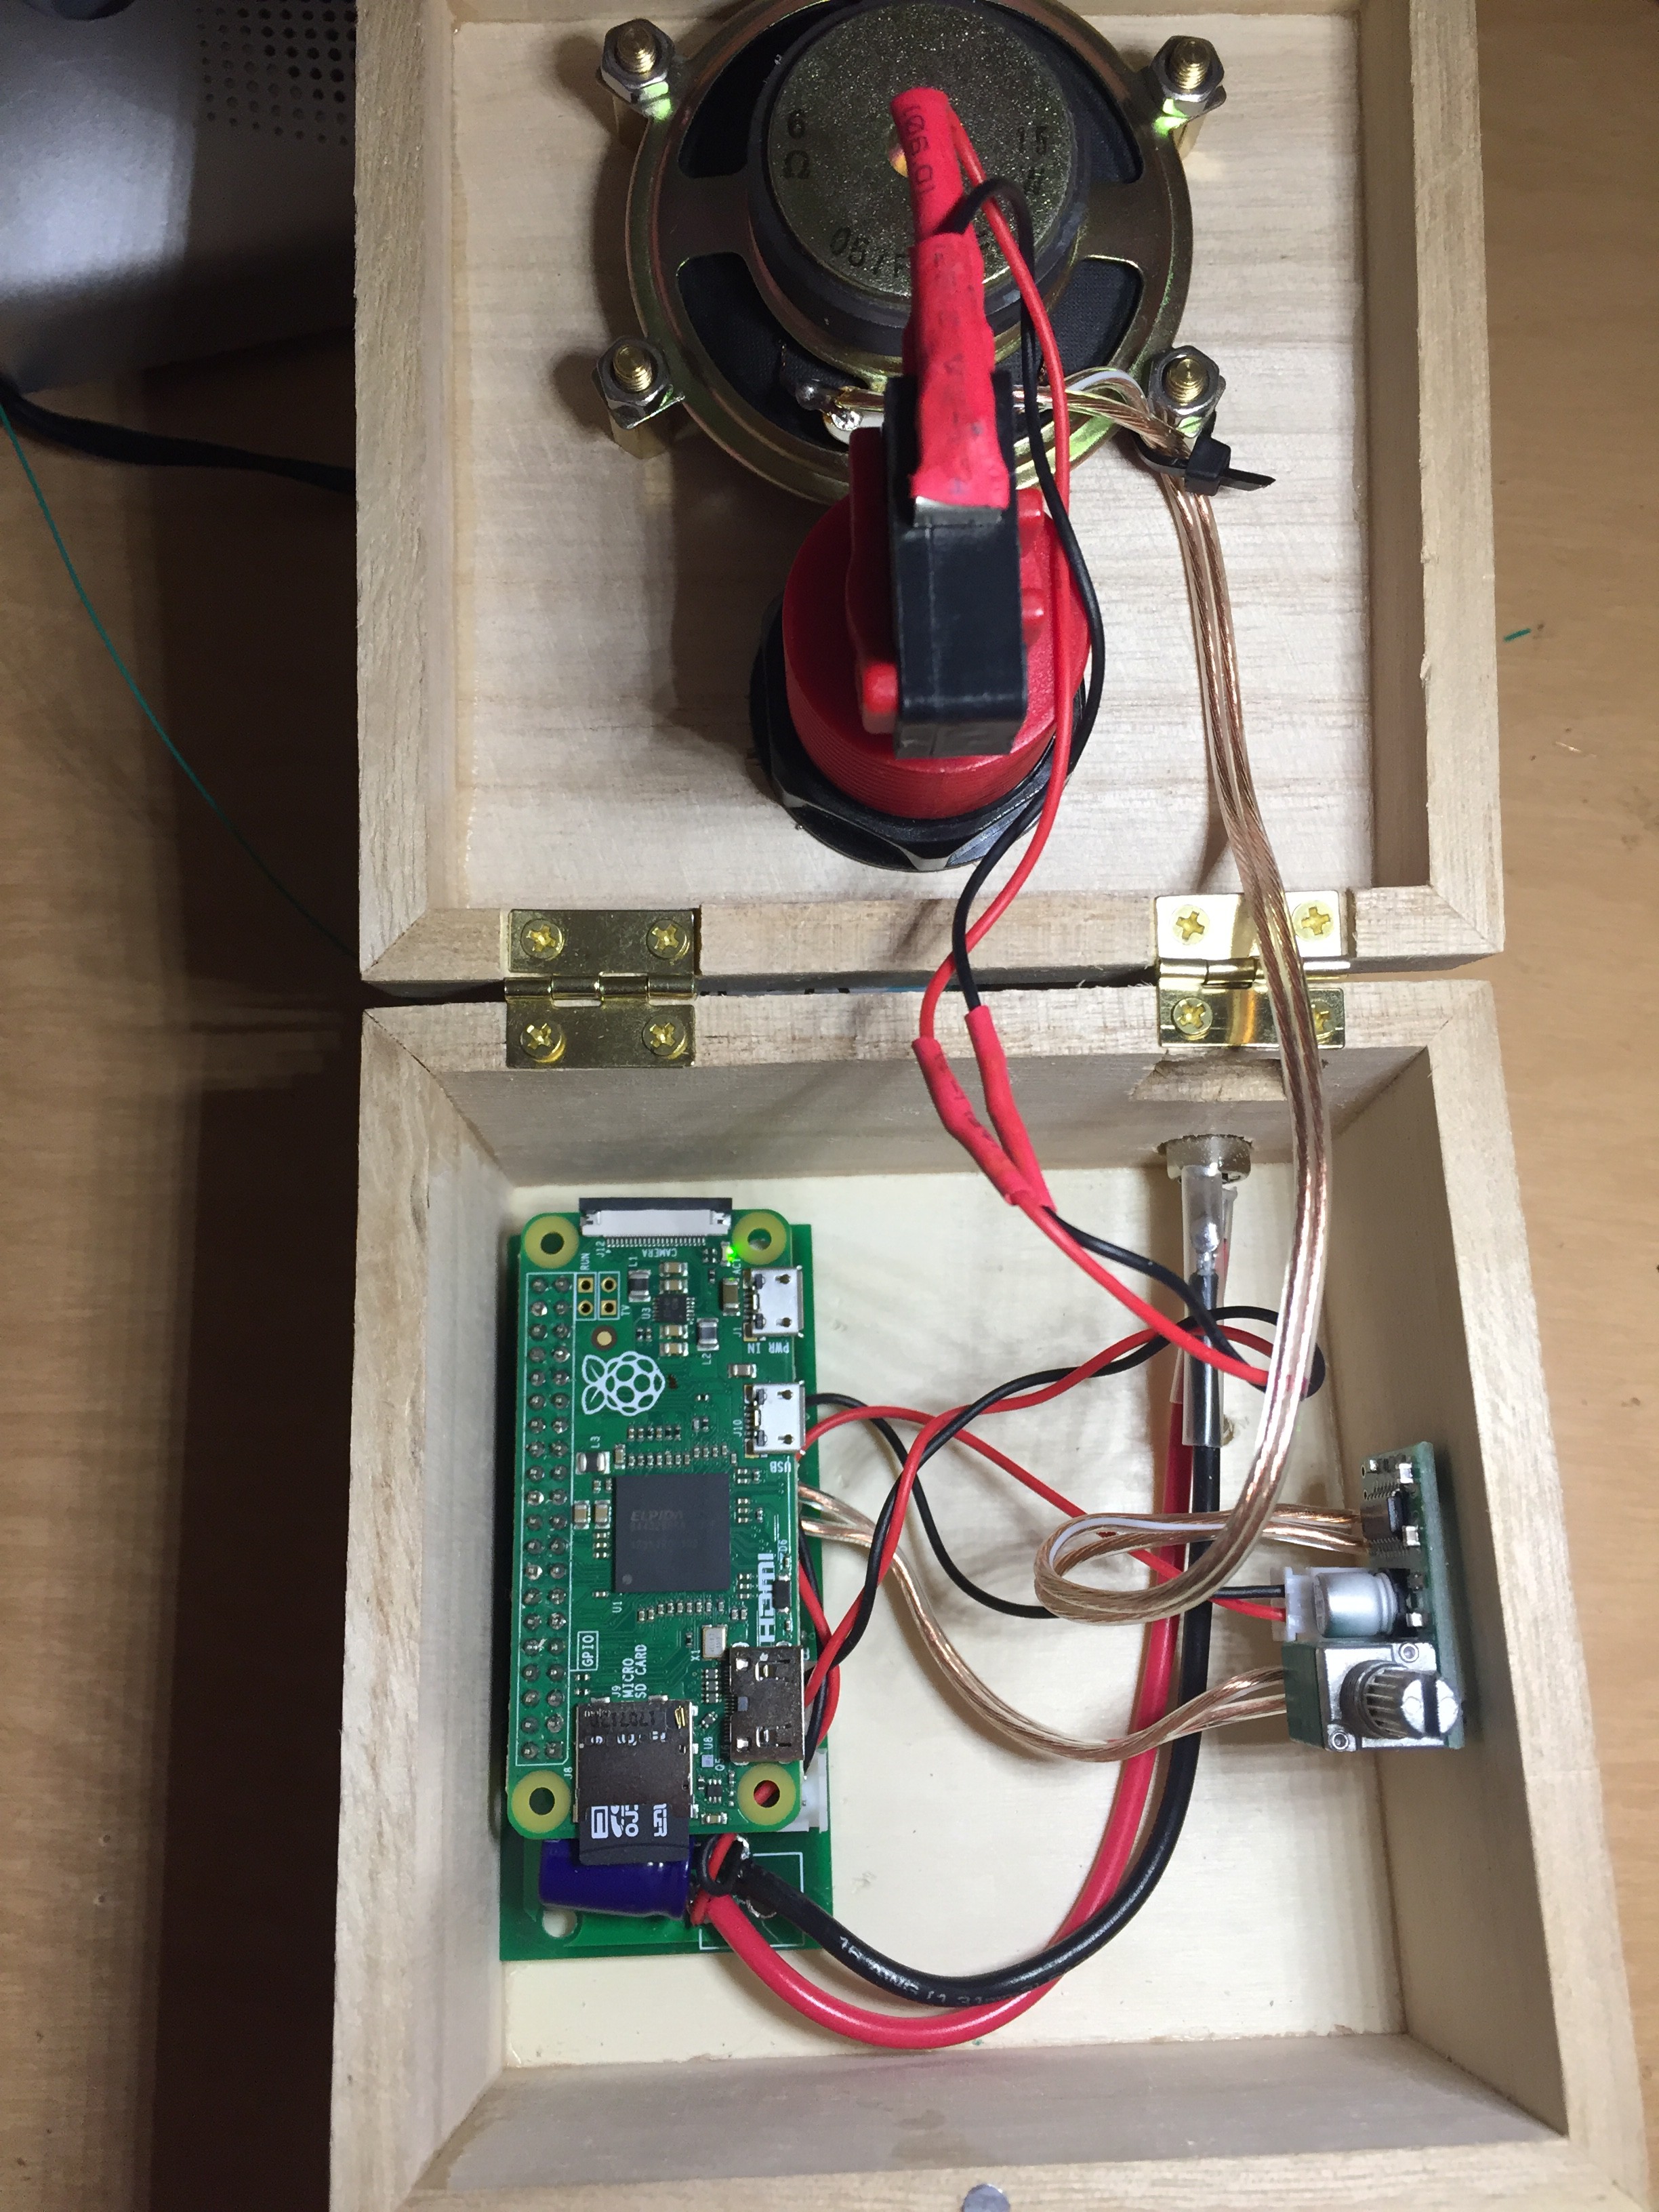
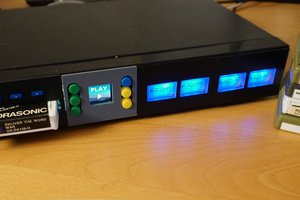
• Increasing the Output Power

    ehunck06/19/2019 at 03:29 0 comments

    I have gone through and soldered connectors in place so the device can be powered with an external 5v supply.  I added a speaker to the top of the box as well as a pushbutton.  The results can be seen below.

    This has worked okay, but the audio has been very quiet.  I realized that the sound level decreased when I removed the speakers from their original cases.  

    Looking at the specs for the LM386, I realized that I am at best getting less than 325 mW of output power through the speakers because I am driving the amplifier with a 5V supply.  I went ahead and bought a couple of 5V, 3W amplifier boards on Amazon.  I added this board between the output of the original board and the speaker.  In this process, I increased the software volume to 100% while I reduced the LM386 gain to 20x from 200x.  The volume is now substantially louder and is relatively clear.  I am still encountering a bit of clipping at the highest amplification settings.

    The internal setup of the box is seen below.  Components have been double-side taped into place.

    As an alternate option to using the Raspberry Pi Zero, I ordered an MP3 module.  This arrived and I tested it.  It works well and I began integrating it with an Arduino Mini so that I can still just play 1 song with a single start/stop button.  In the process, I damaged the module; so I am going to be continuing with the Raspberry Pi Zero for the time being.

  • Button Debounce Updates

    ehunck04/18/2019 at 04:12 0 comments

    This is just a comment on some testing that I was doing.  It seems that the previous method for debouncing this button, using following code did not work as desired.

    GPIO.add_event_detect(10, GPIO.RISING, callback=button_callback, bouncetime=200)
    

    I wanted to detect a rising edge pulse coming from my button indicating that the button had been released.  

    With the code above, a single button press ( HIGH to LOW then LOW to HIGH) could potentially trigger two button press events if the user paused for a second while the button is being pressed before releasing.  The behavior of the above "bouncetime" seems to prevent signal bounce from causing callbacks for the given time, but it does not necessarily capture the proper number of button presses.

    I found that others have noticed this as well on the internet.  A good Q&A link that has a great answer with code is linked here: Stack Exchange Raspberry Pi Link.

    I ended up just using the code that was selected as the answer in that article to implement my button debounce, and it works well.

  • Amplifier and Basic Code Setup

    ehunck04/10/2019 at 04:16 0 comments

    RPi Breakout Amplifier

    I received 5 of the RPi Zero breakout boards in the mail.  I only planned on populating a single one of the audio output channels  with the LM386 audio amplifier.  I added in RC filters on input and gain on the amplifier as necessary.  I set the output volume of the RPi to 85% to avoid clipping while still trying to maximize the volume.  I noticed there was some noise on the power supply I was using  around 1kHz that ended up being audible.  I threw a large 1000uF capacitor on the power supply input (what I had available in bulk capacitance), and the overall idle noise was significantly reduced.  

    The completed stack can be seen below. 

    I got a set of small computer speakers (without internal amplifiers) at a second-hand store.  I am using a single one of these for this project.  I am now need to make a small enclosure that will have a push button switch on it that will close the wires on one of the JST connectors.  The button triggers  the audio to start or stop.

    The python code running on the RPi is super simple.  It uses pygame to play a WAV file.  I run this code on startup.

    import time
    import RPi.GPIO as GPIO
    from pygame import mixer
    
    def button_callback(channel):
        print("button release")
        if mixer.music.get_busy():
            mixer.music.stop()
        else:
            mixer.music.load('my_audio.wav')
            mixer.music.set_volume(1.0)
            mixer.music.play()
    
    mixer.init()
    mixer.music.load('my_audio.wav')
    mixer.music.set_volume(1.0)
    GPIO.setwarnings(False) # Ignore warning for now
    GPIO.setmode(GPIO.BCM) # Use physical pin numbering
    GPIO.setup(10, GPIO.IN, pull_up_down=GPIO.PUD_UP) # Set pin 10 to be an input
    GPIO.add_event_detect(10,GPIO.RISING,callback=button_callback, bouncetime=200) 
    
    while True:
        time.sleep(5)
    GPIO.cleanup() # Clean up
    

    The line from the startup script that runs this code is below.  It sets the volume to 85%, changes the directory, and then executes the Python.

    (sleep 10; sudo amixer cset numid=1 85%; cd /home/pi/Documents/music_button/; python3 music_button.py)&

    Finally, a cool part was brought to my attention in the comments (see below).  I have ordered a DFPlayer Mini MP3 Player as a possible alternative to the RPi Zero setup.  This module is much cheaper and overall simpler setup.  I am continuing with my original plan until that module arrives in the mail.