For the Thor robot I need a debug display. A display with the sole purpose of controlling every single stepper motor independent or together.
But the first step is learn to program the Nextion display.
The whole intention is to make this UI ready for a industrial production environment in the end. The end-goal of this project is to scale it well.
So here we go... in pictures. The graphics are not artistically perfect yet.
The power on/off button is deceivingly complex to find a good solution. We are not dealing with a simple alarm clock but a machine that can kill its owner. ;-)
It is not the bitmap itself that is complex but the way to design the UI where safety is taken into account, use the UI elements wisely and none confusing for the operator.
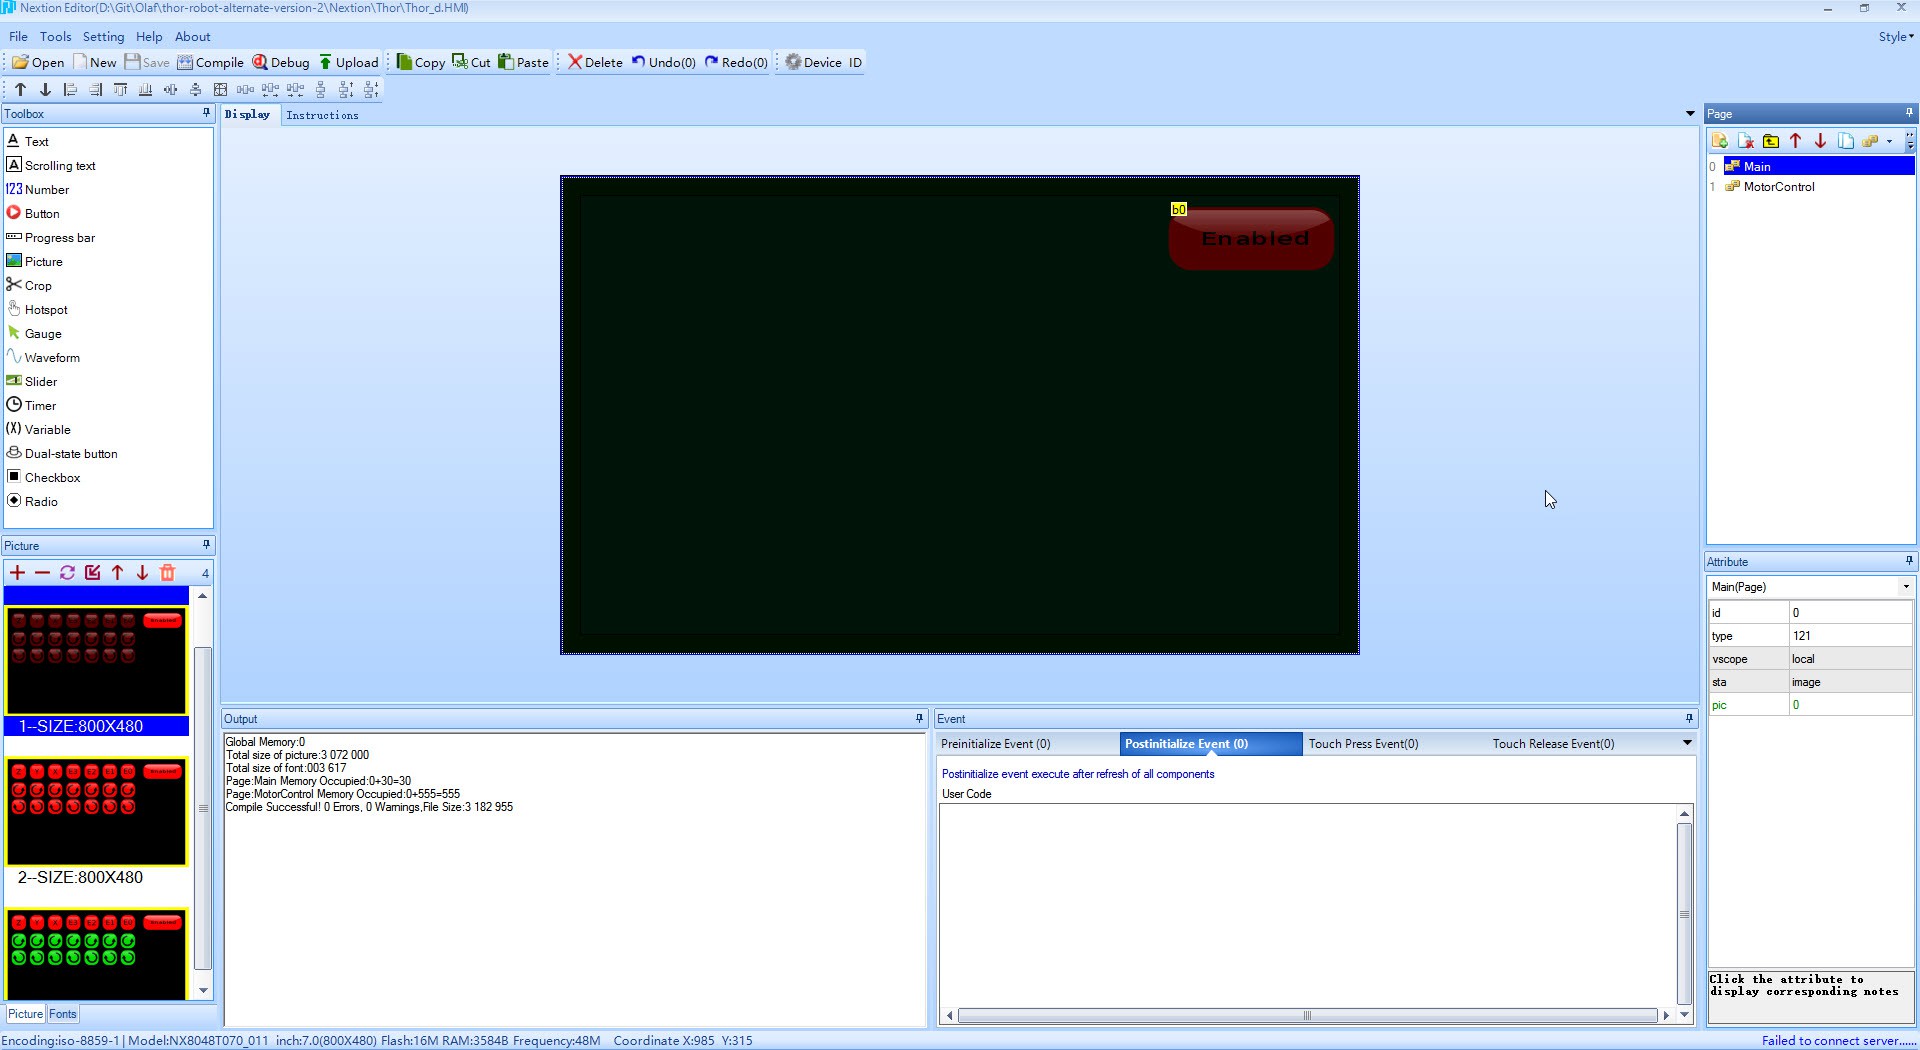
When the robot powers up I want a display that shows only one button that is in a disabled state.This becomes my main screen.
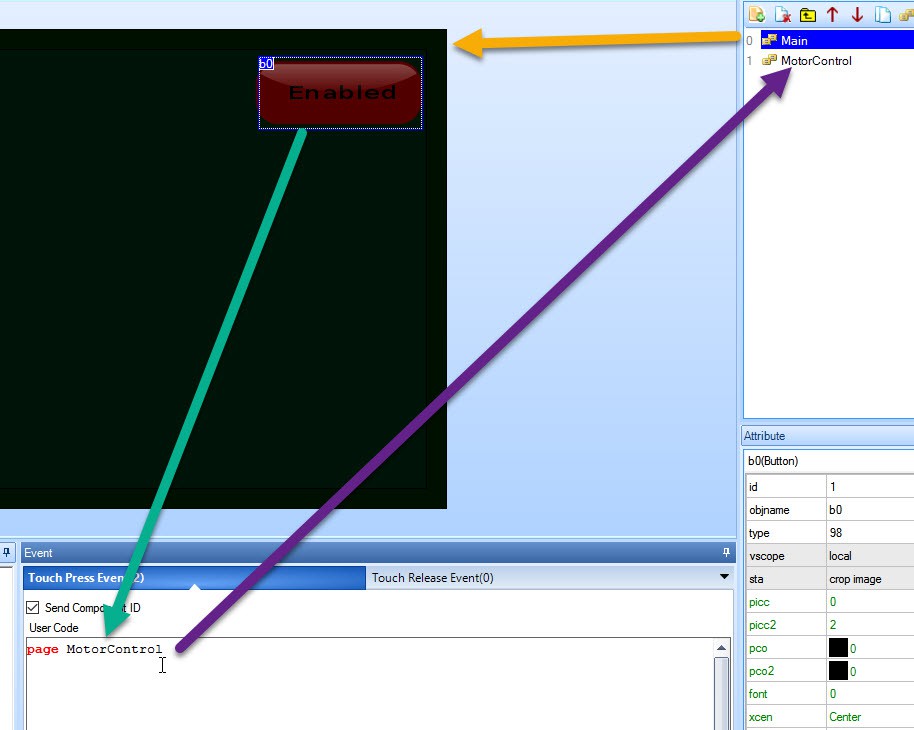 A second page is now added specific for motor control and when the button gets pressed the "MotorControl" page is loaded. That one has a active power button.
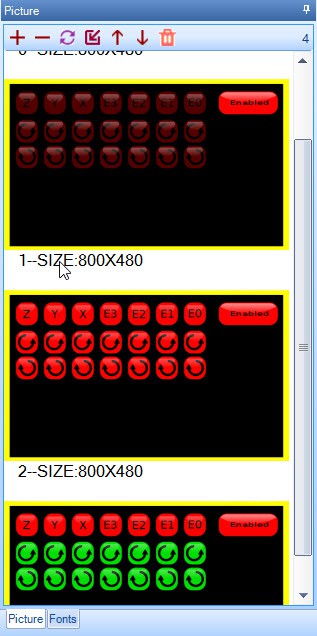
I loaded 3 different bitmaps. "1", "2" and "3" (=green buttons)
The intention is this. When I press the upper button, the rotating symbols for the 2 buttons below should lid up in red indicating that they are active and dangerous when you press it.
And when you actually press the rotating button then it should change color. In my case I have chosen green. I want a clear indication that the display actually responds to your button press. Whe you release it then it turns active red again.
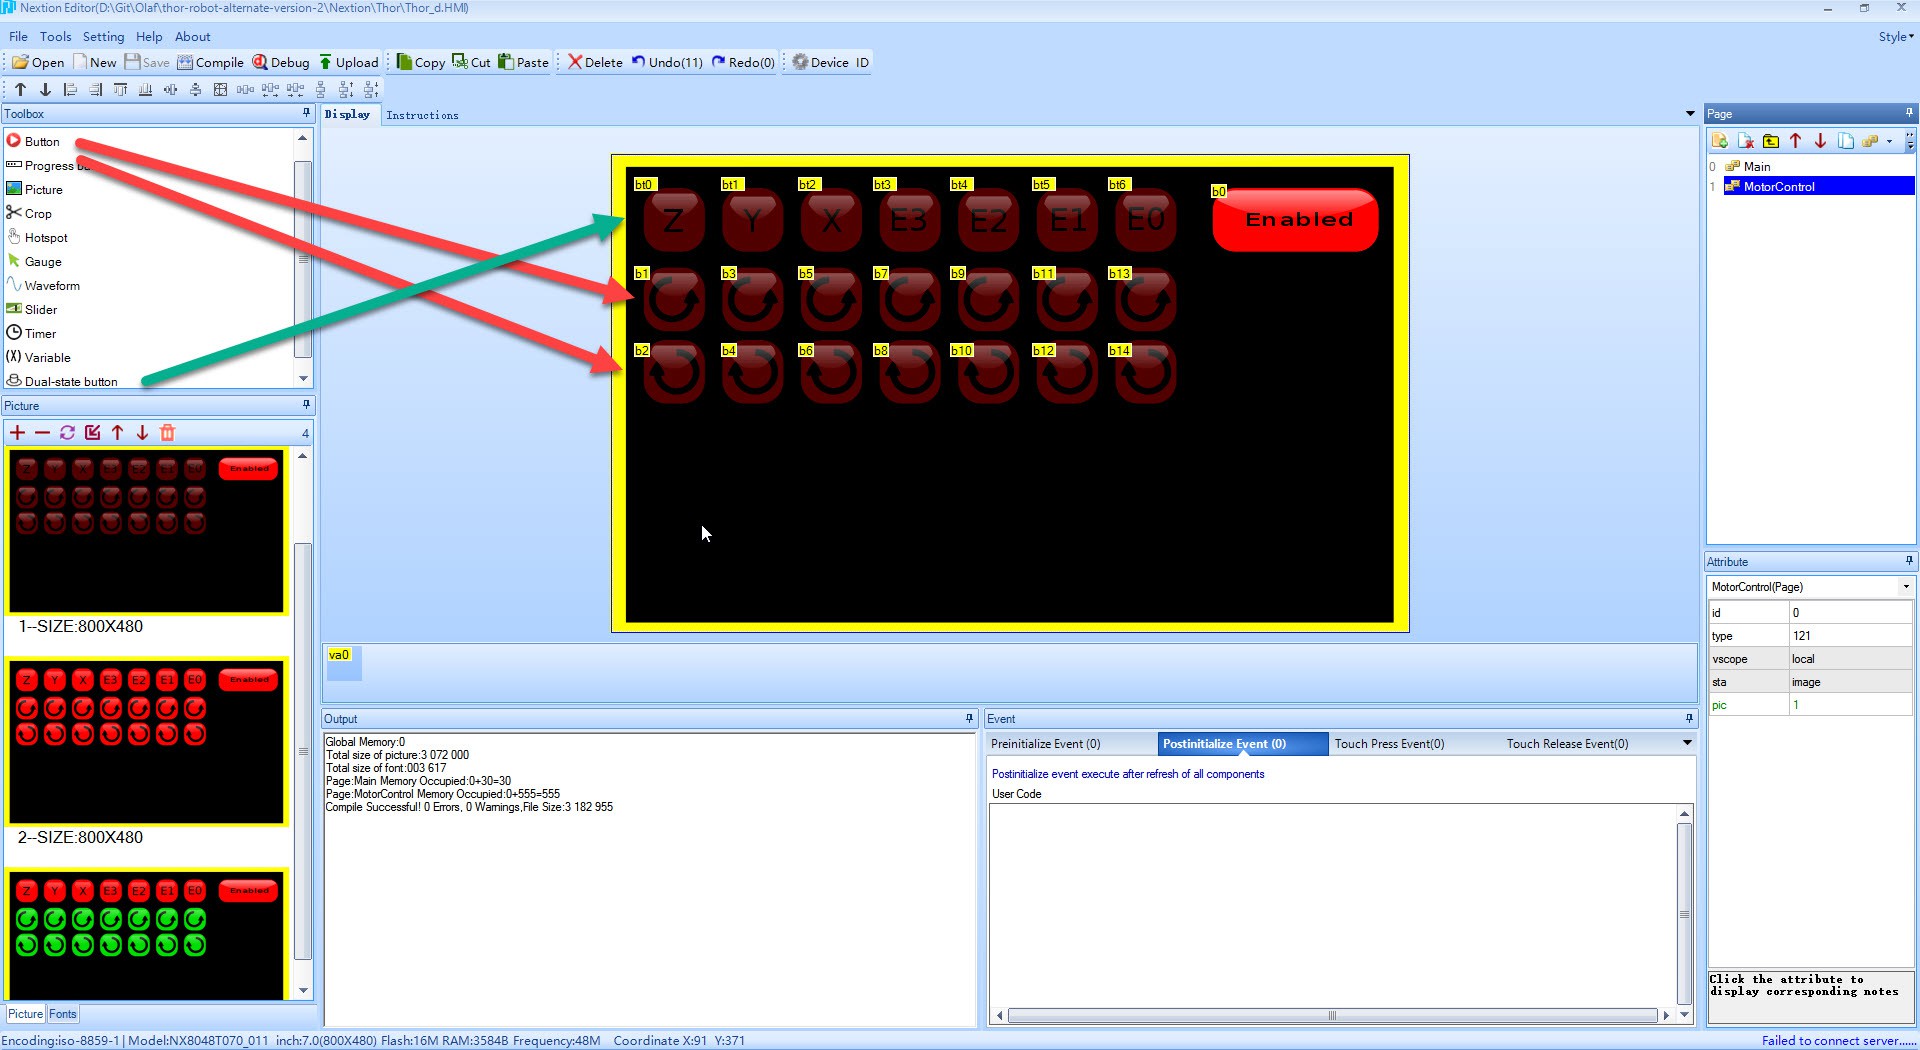
The upper buttons that enables the 2 rotating buttons in its row is chosen to be a dual state button. We use the Crop Image function so it crops the bitmap of the chosen layer onto the display
The dual state button means that it stays pressed when release it and have to press it again to get depressed.
The rotating buttons are normal buttons so they get depressed when you stop pressing.
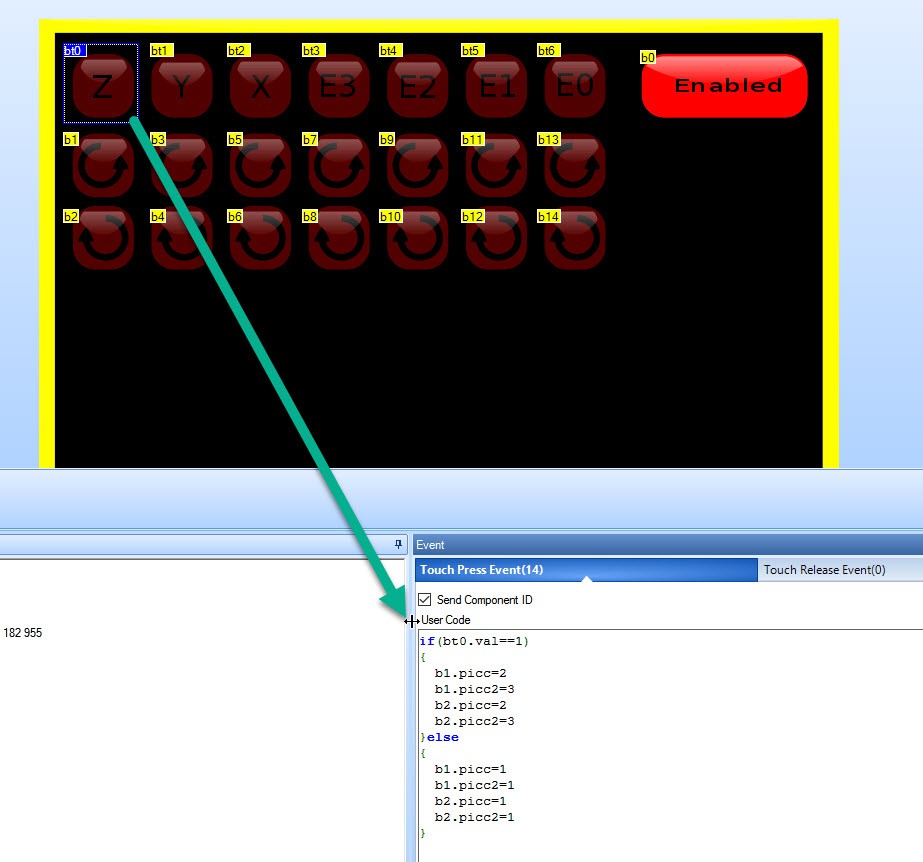
The code to execute when the dual state button gets pressed or depressed.
This code means that if the button is pressed, it will modify b1 and b2 deselcted state to layer 2 and selected state to layer 3 bitmap.
If not pressed then both the selected and deselected state are set to the same disable bitmap. I don't want to see it changing color when you press that region.
I also tried this code in the Touch Release Event, but then the changing buttons have a slow update. In the Touch Press event it reacts instantly.
Note: The "Send Component ID" is the command to send the event towards the Arduino. If you deselect this then no command is send and the Arduino is not aware.
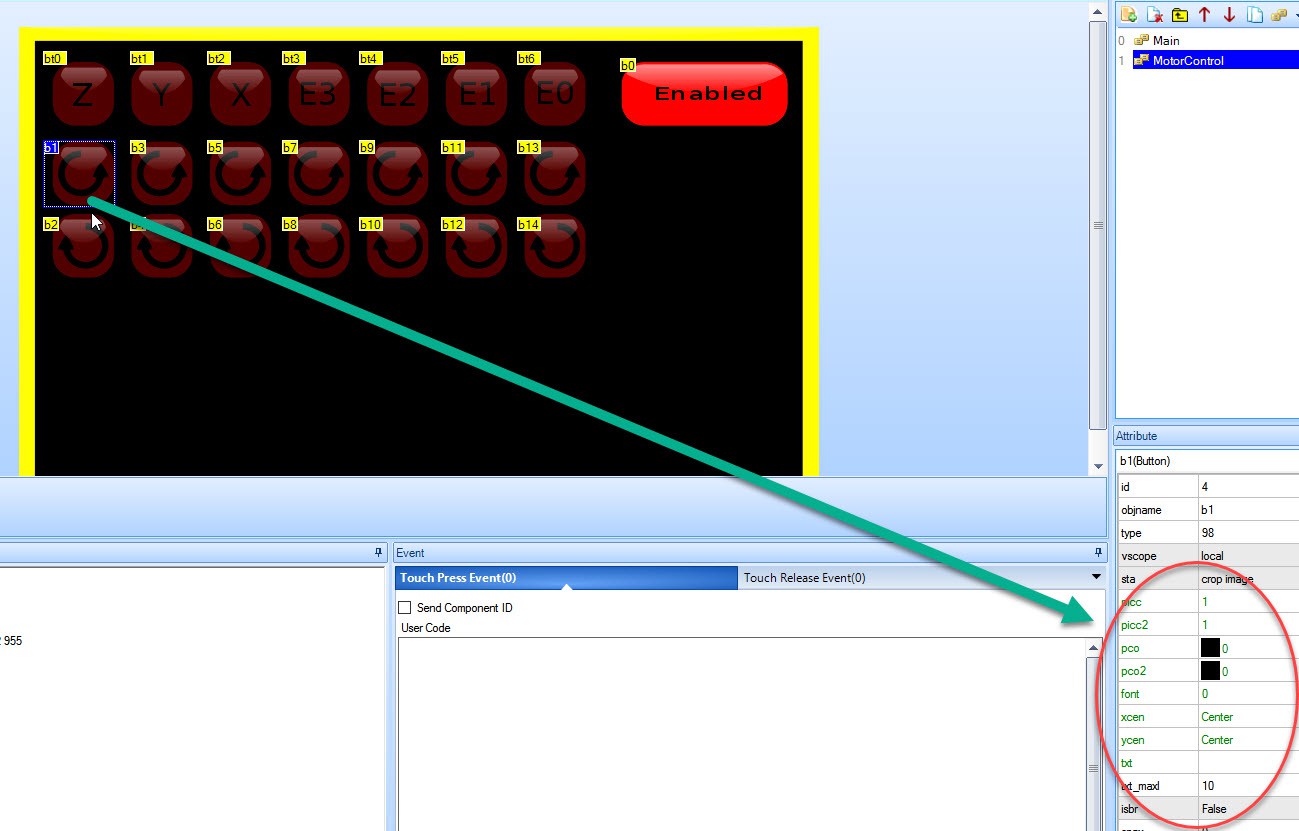
The Nextion display online help is not very helpful inn figuring out how to program it but the clue is i the property panel. Green properties fields seem to be modifiable through programming.
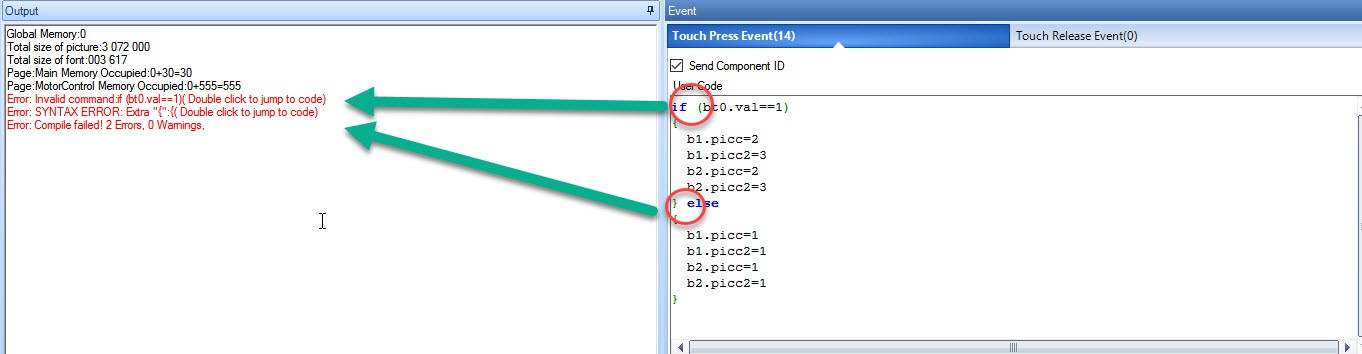
Warning, the Nextion editor appears to be beta. I had trouble understanding why I got this error and it turned out to be a simple spacing. remove it and it compiles. This is clearly an editor bug.
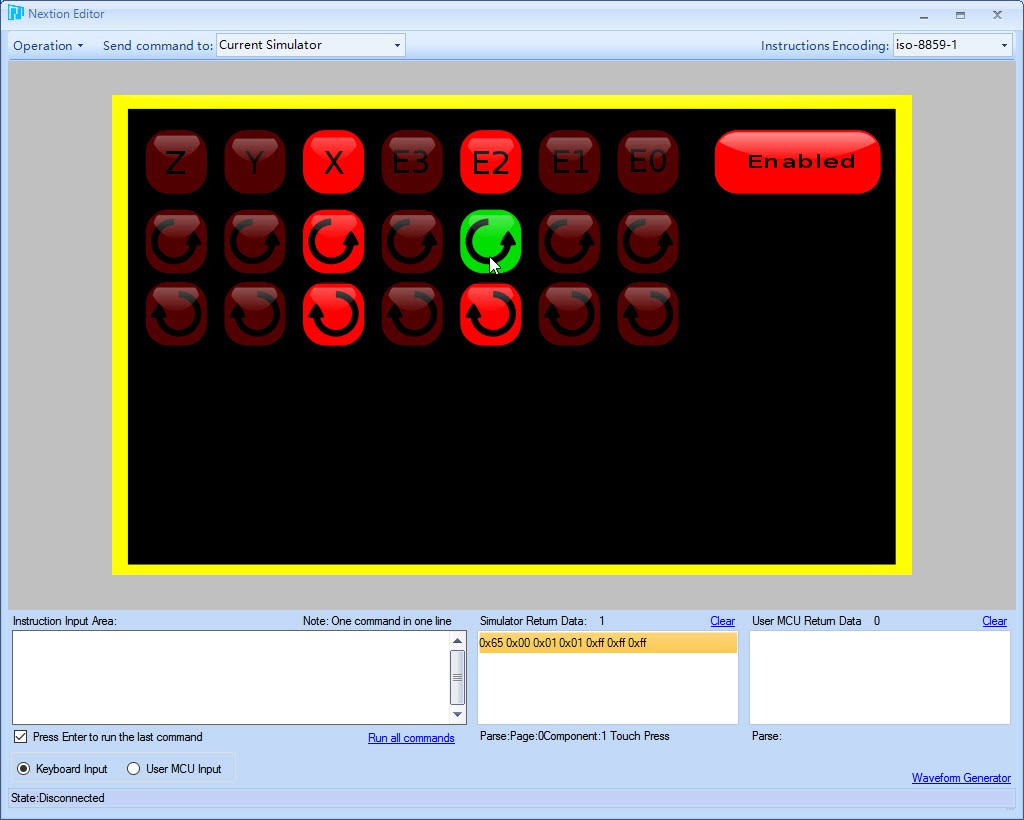
The final end-result to demonstrate how it should operate.
The green button is a pressed button, but it only changes green when the top button is active.
The top button will be hooked to the motor enable/disable. This controls if the motor is active or not.
The rotating arrow gives the direction how the motor will rotate and the duration will be the number of steps you execute by timer.
Note that the rotation does not represent the rotation of the Thor robot but of the motor direction only. The intention of this screen is to calibrate the motor and determine if they move in the correct direction in a testbed before assembly. You don't want the newly assembled robot to turn in the wrong direction caused by a wrongly connected connector.
This step will become vital when you develop your mathematics to control this robot. If you are 100% sure that the motor is connected correctly then the only conclusion will be that you math has a "-" when it needed a "+".
Discussions
Become a Hackaday.io Member
Create an account to leave a comment. Already have an account? Log In.
I really like this Nextion display. Right now I am figuring out how to have a good interaction between the display and the Thor controller. I had example code but want to simplify the Arduino code in such a way that it can handle these amount of buttons.
The end goal is not to control one motor at a time but simultaneously control them all 7 of them at the same time.
Are you sure? yes | no
Nice work. I didn’t have time to look at the Nextion editor. Right now I’am adding a my Nextion display to its case. I have also created a back cover for the Nextion display. I will share this in the next few days when I’m ready to create a log about it.
Are you sure? yes | no