 David.Larbi
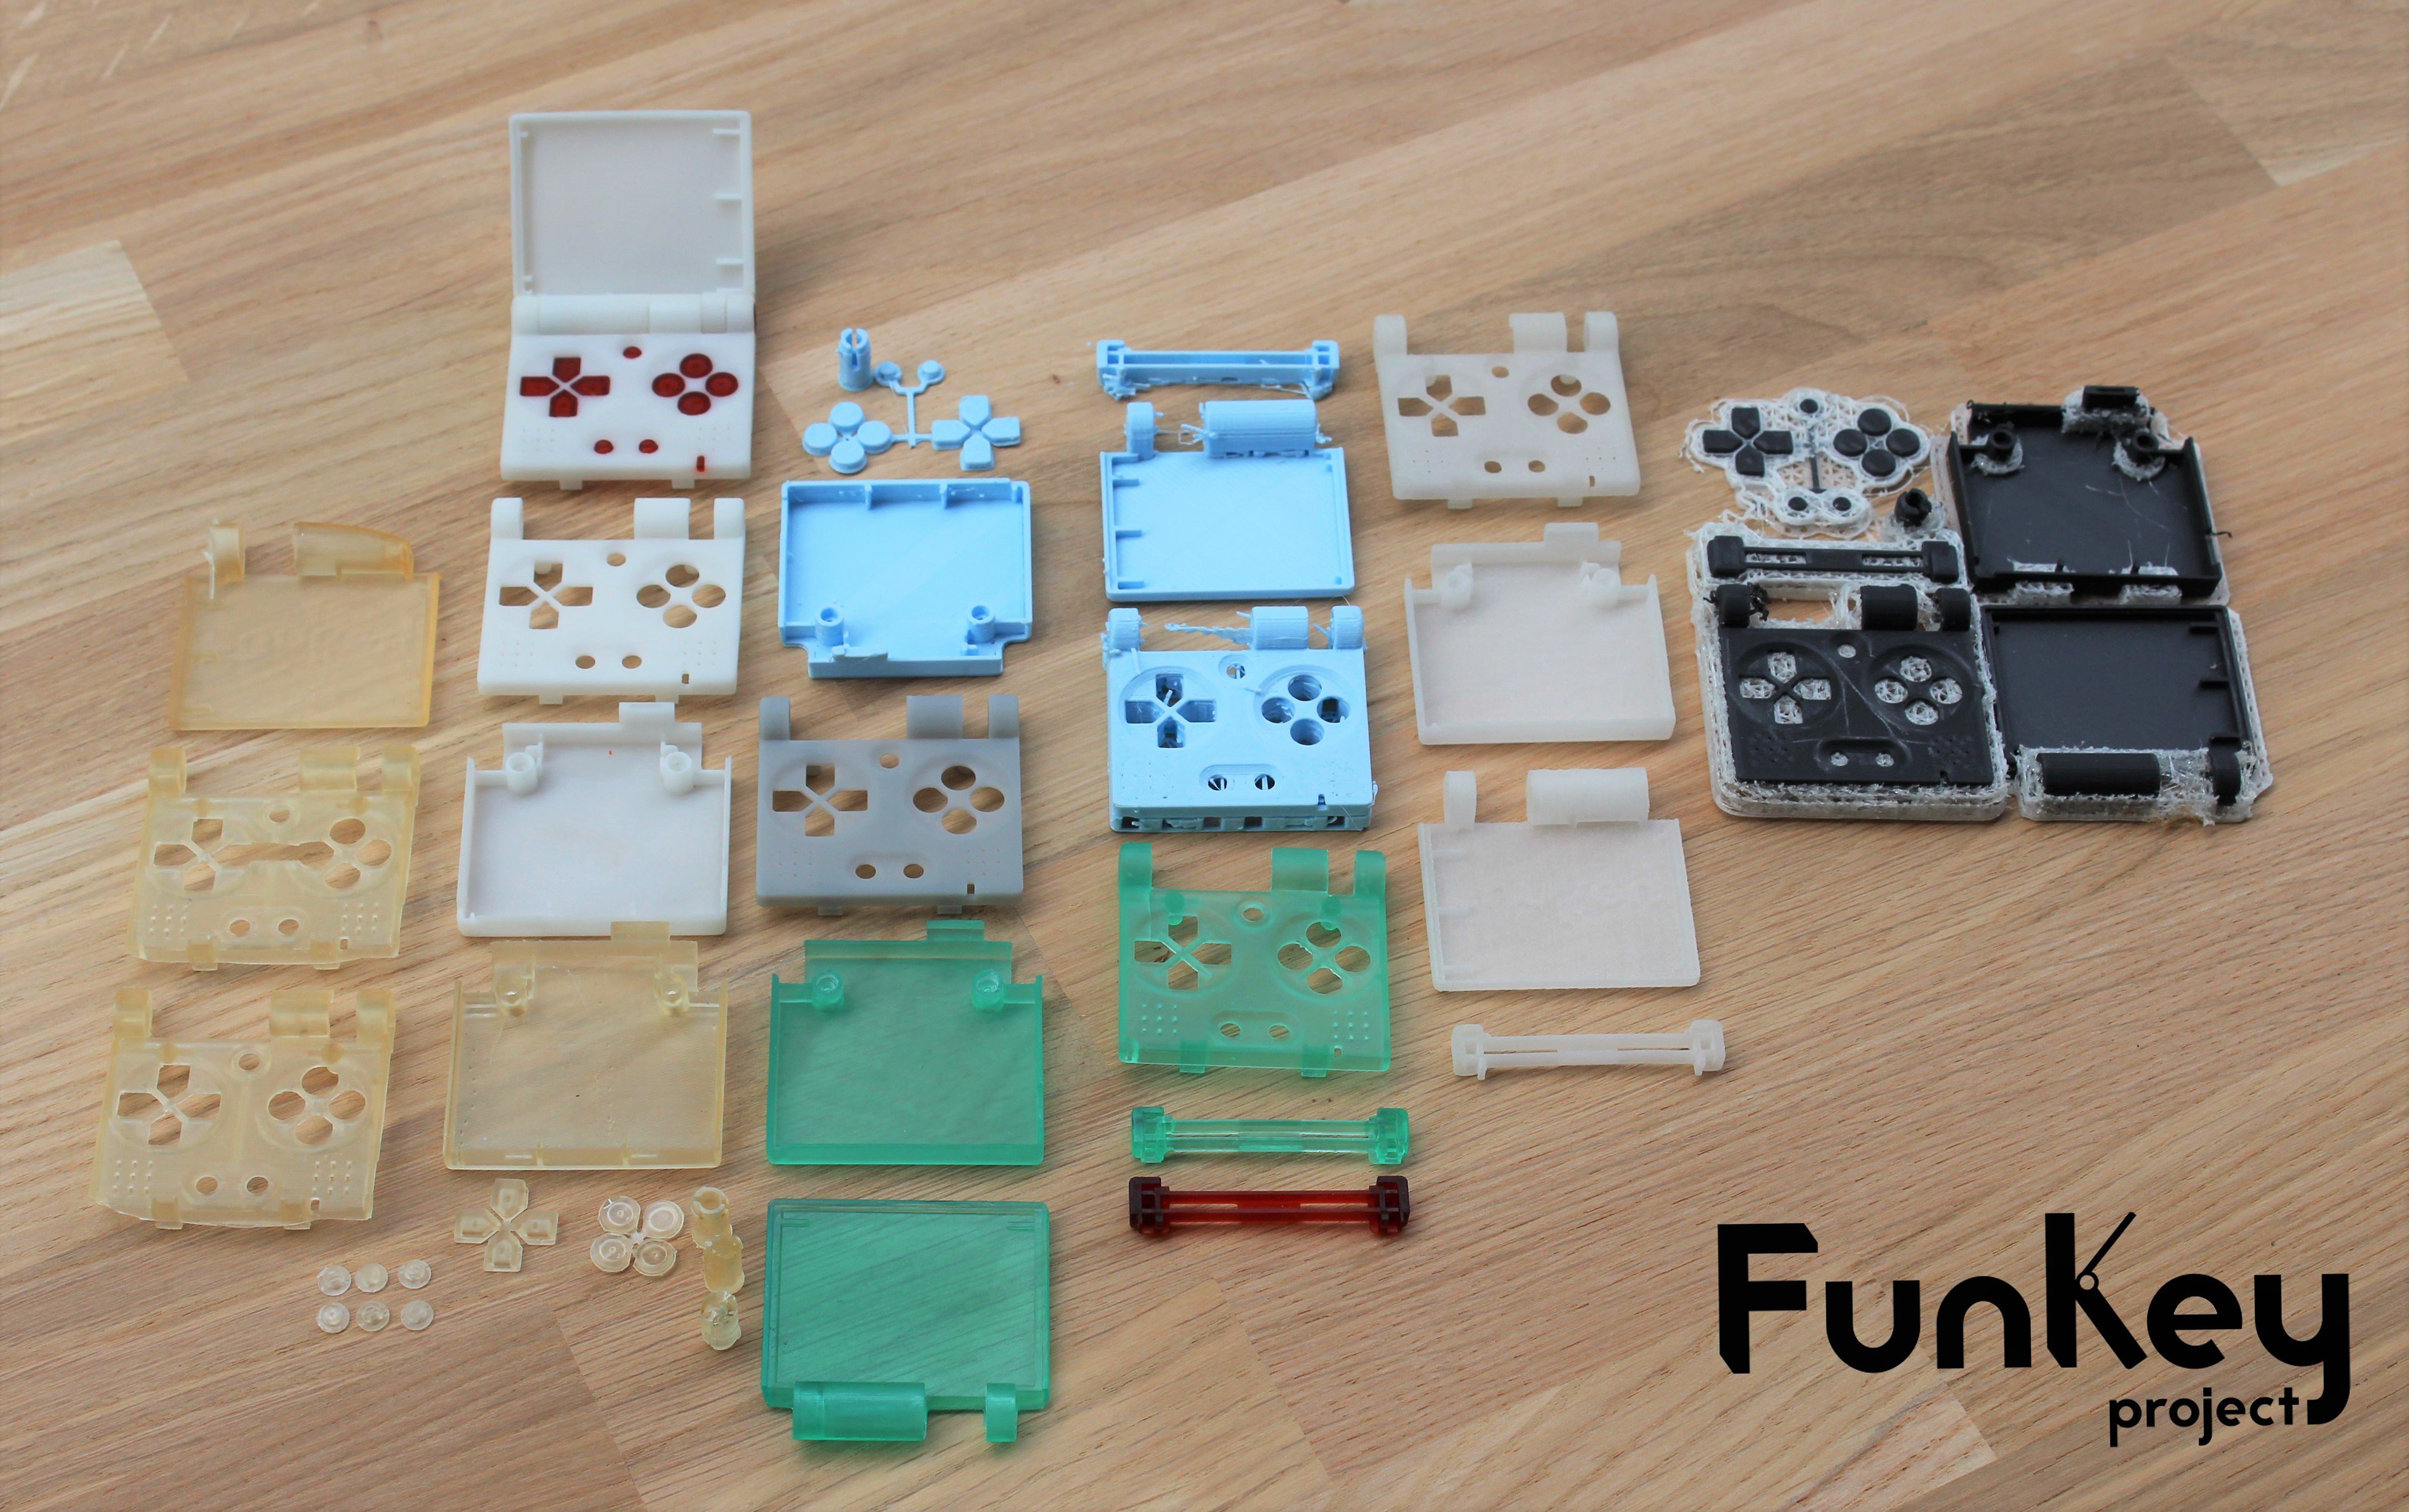
Introduction
FunKey's design has been completely rethought. It is now sturdier, slimmer, with an active hinge that puts no stress on the cables and most importantly thought for production. We have designed every component while thinking about the injection molding process, this means clearance angles, drawers for the mold and other things that will be explained in a dedicated log about the design.
Here instead we would like to take an unconventional path and start talking about the in-between process that is after the design and before the injection. Let's say your design for injection molding parts is done, how do you test it to assert its validity before investing thousands of dollars in a mold and go into production?
Nowadays, we are lucky to live in a world where 3D printing not only exists but has been vastly democratized to the masses. Just between our three group members we own about five different 3D printers (not all in the best of shapes but they still help making the point). In order to validate our design, then 3D printing is the right solution, but FunKey being what it is - that is to say very tiny - not all 3D printing technologies are adapted to our needs.
The question is, then, which type of 3D printing technology is the most adapted to our needs? We have tested the three principal ones: FDM, SLA and SLS and wanted to report our results in this log so that other makers can use this knowledge.
Brief description of the different 3D printing technologies we used
- FDM (Fused deposition modeling) which consists in building parts layer-by-layer from the bottom up by heating and extruding plastic filaments. It is by far the most common technology among hobbyists since great quality printers are now available for a few hundred dollards and the filament is relatively cheap ().
- SLS (Selective laser sintering) which sinters a powder by using a laser. Thiese printers are still way too expensive to be accessible to the mass market but it is possible to contract 3D printing companies to get prints for an affordable price.
- SLA (Stereolithography) and/or DLP (Direct Light Processing) which solidifies a liquid resin layer-by-layer by photopolymerisation. Formlabs has democratized this technology which was previously reserved to professionals (even if the printers are still relatively expensive compared to FDM ones as well as the material).
Comparison of the print results
The mechanical properties to consider for our prototype are the following:
- resistance
- precision
- surface finish
For the FunKey, we need a great precision for all the small details, a good surface finish and a sturdy case to resist the efforts on the hinge.
FDM
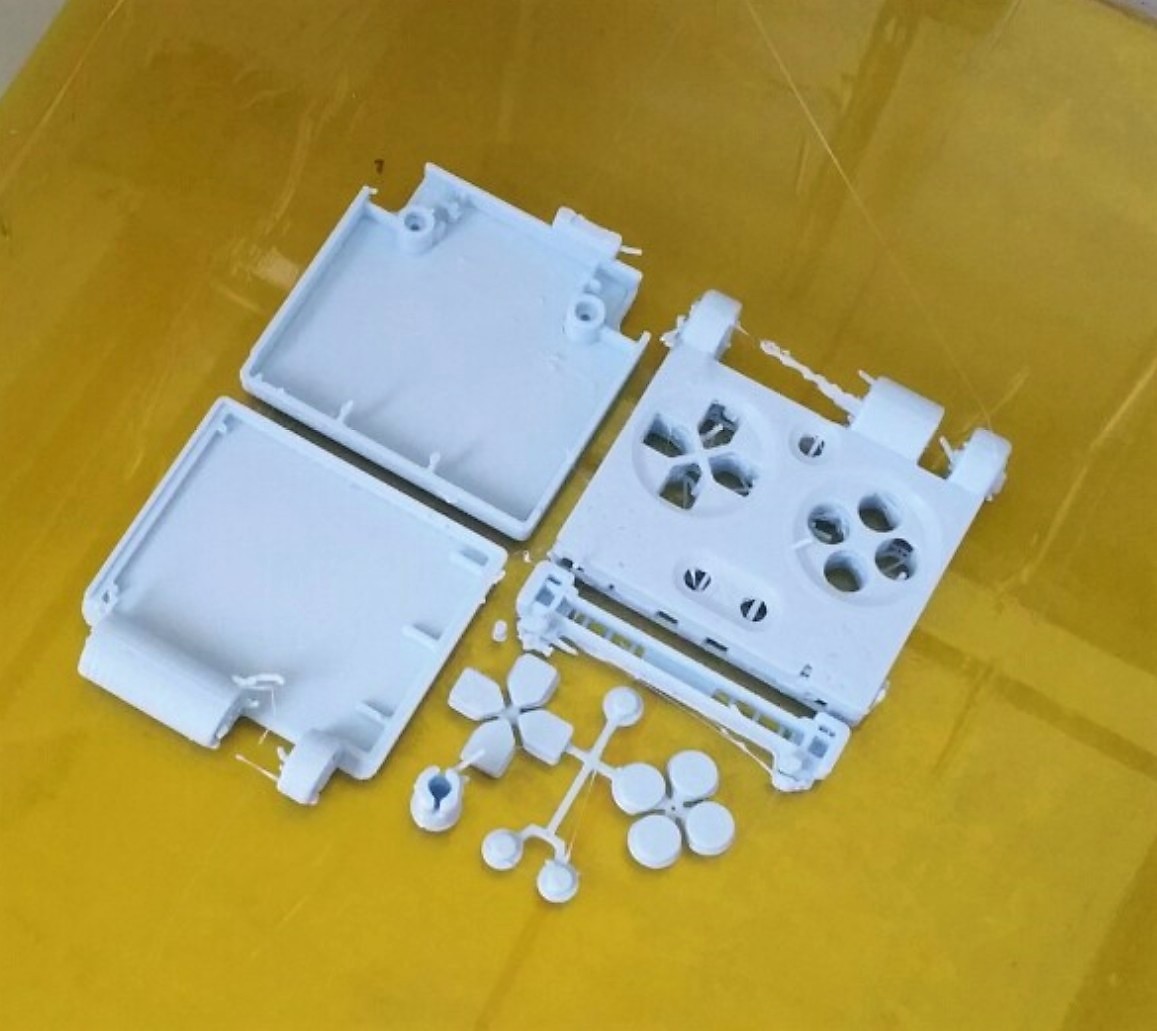
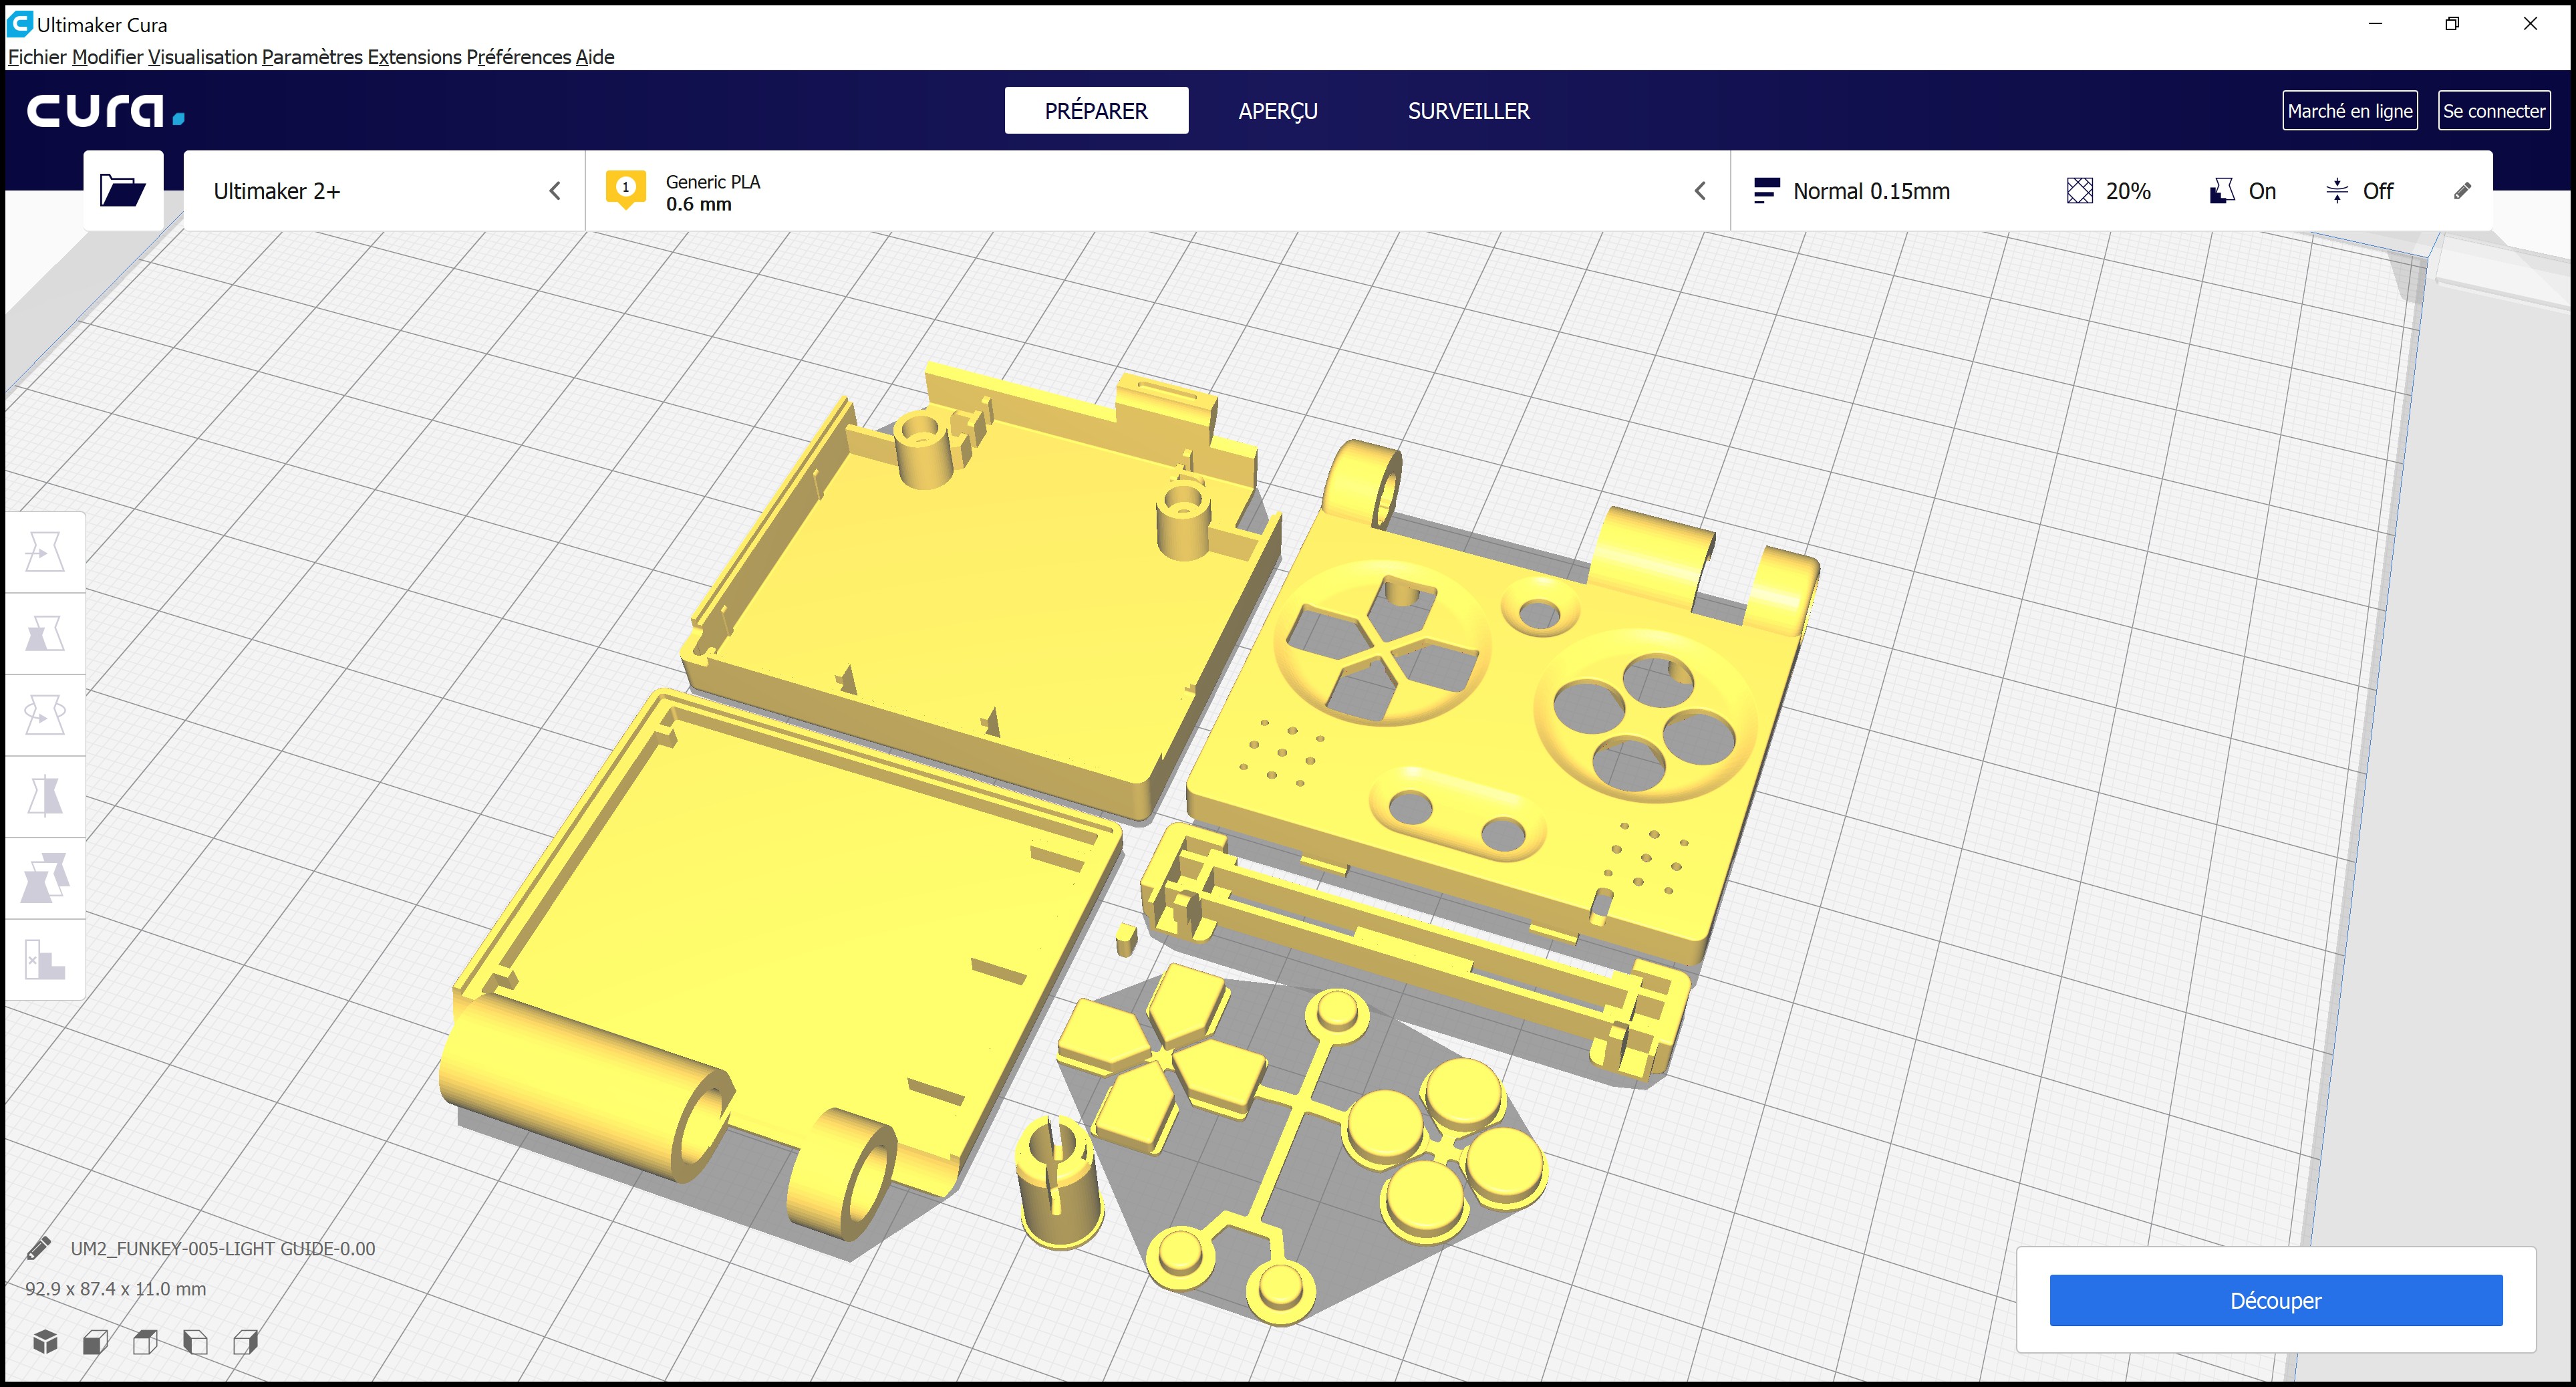
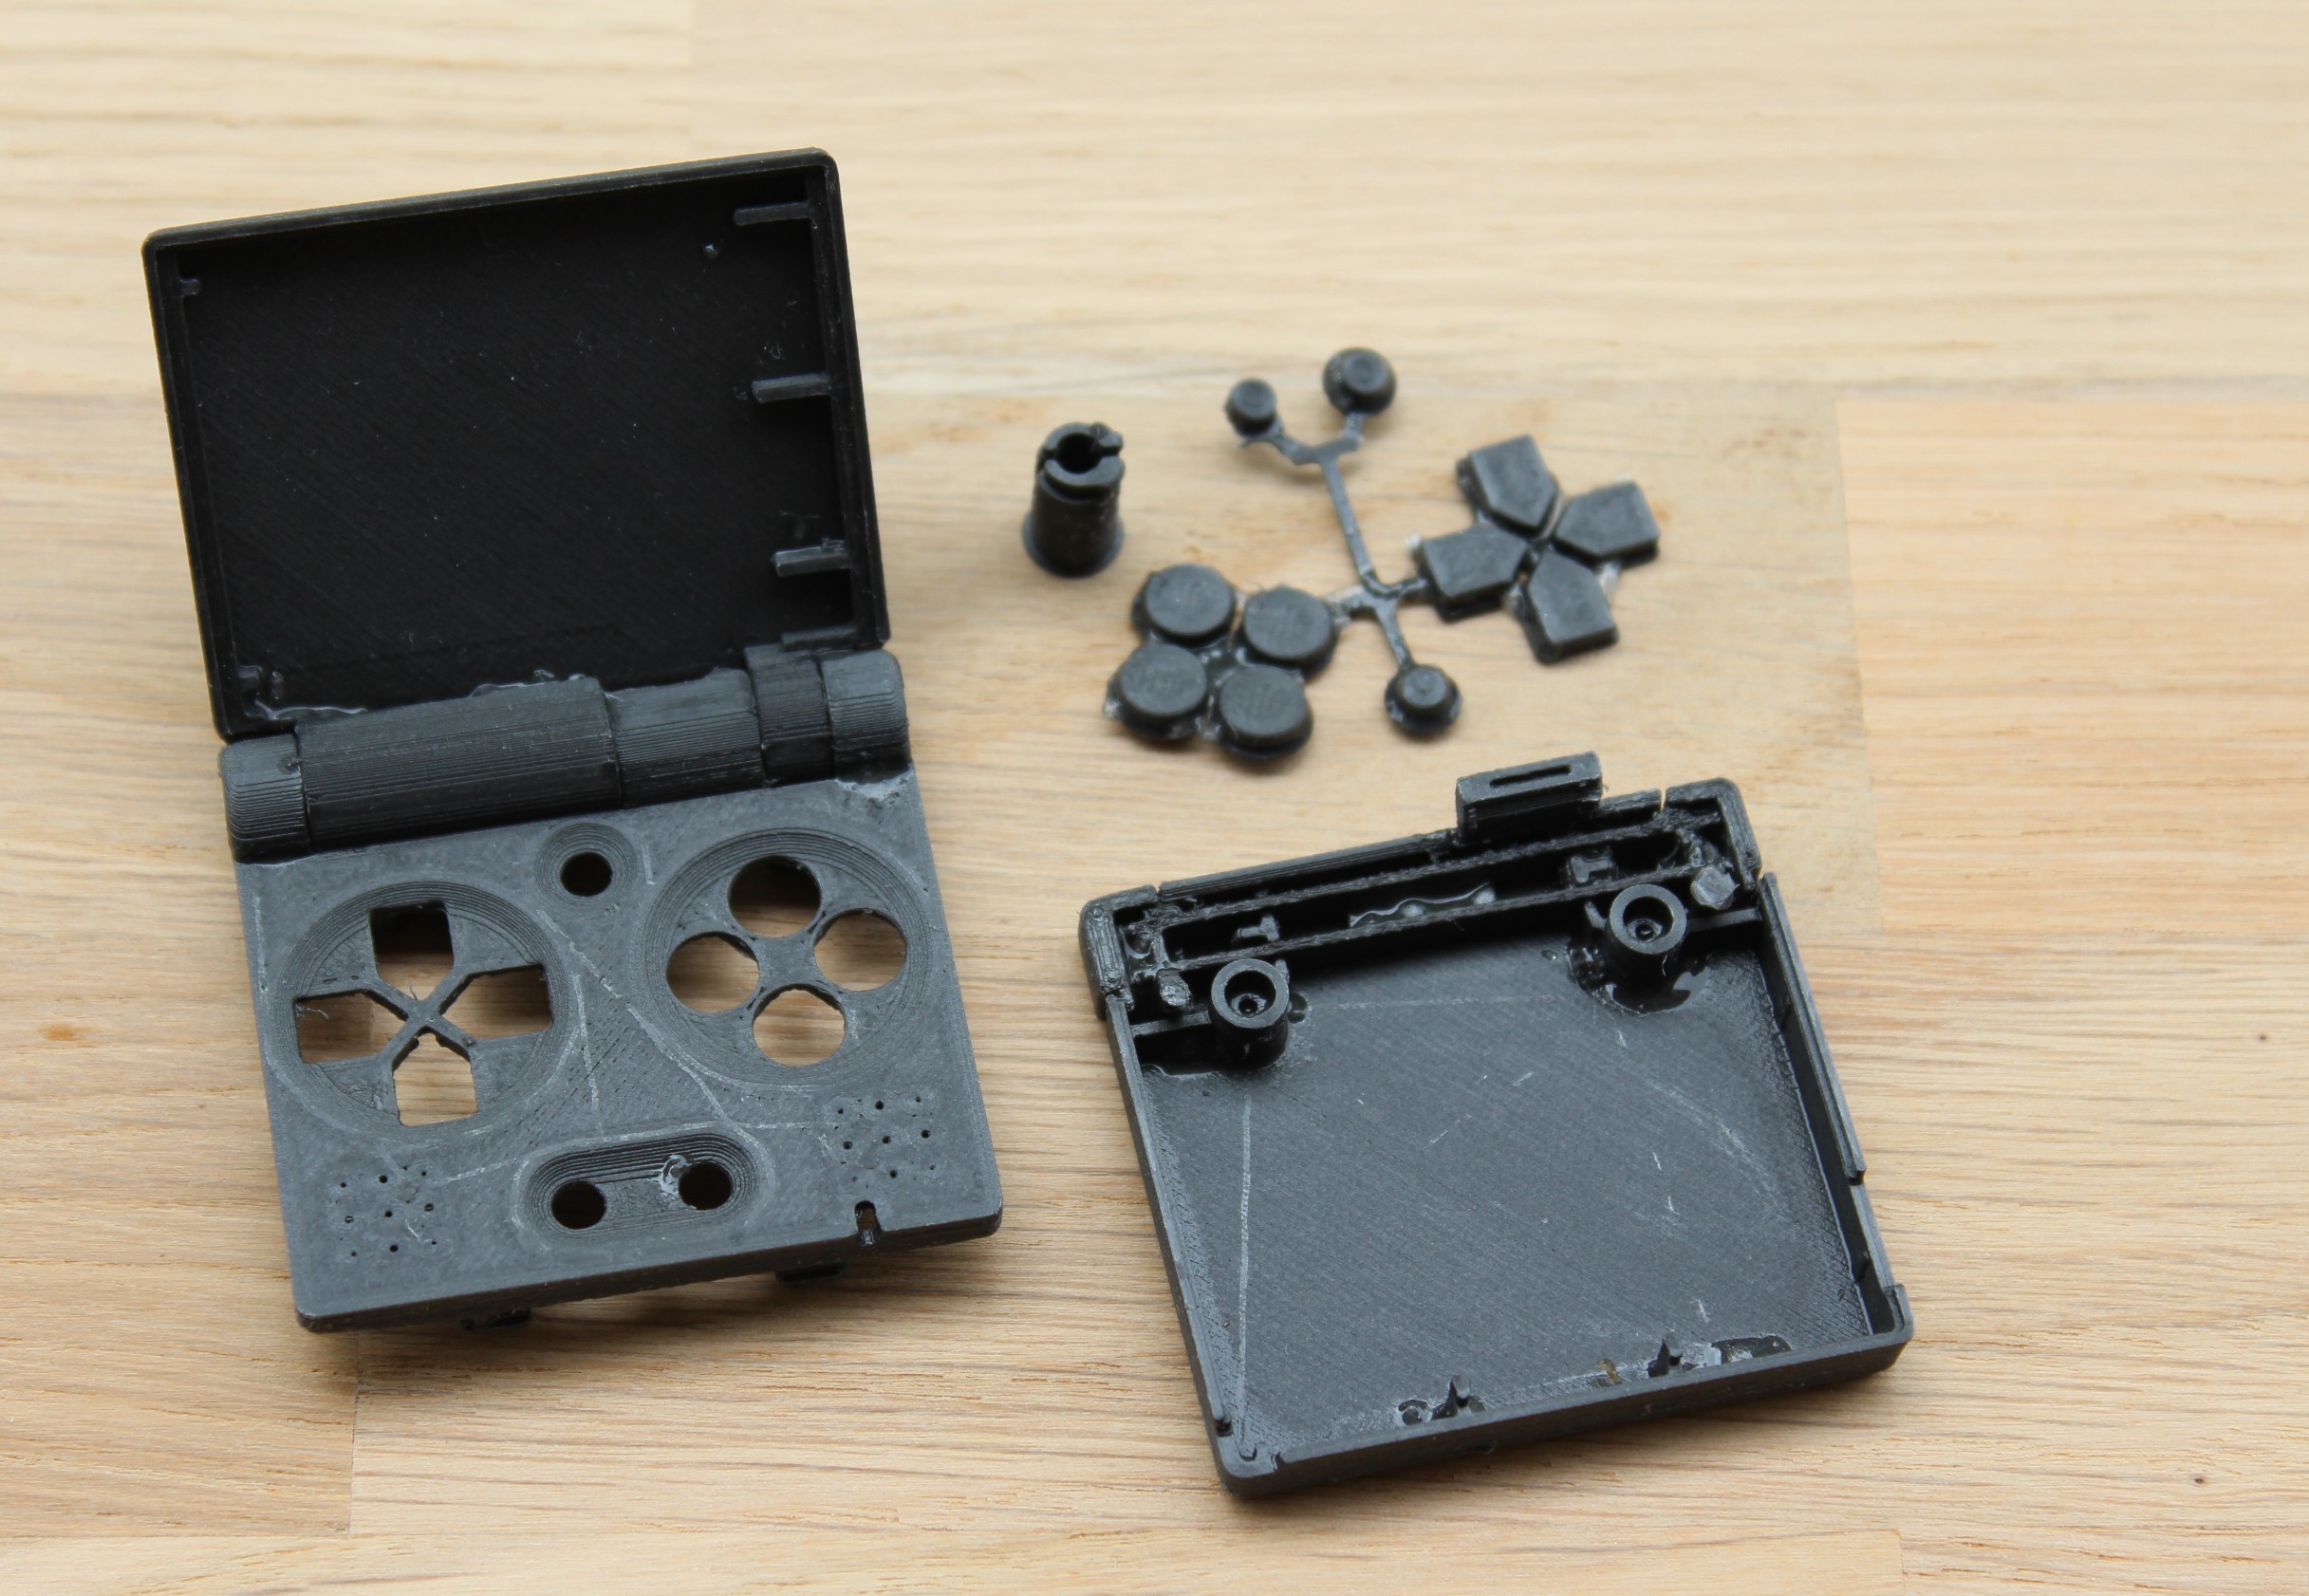
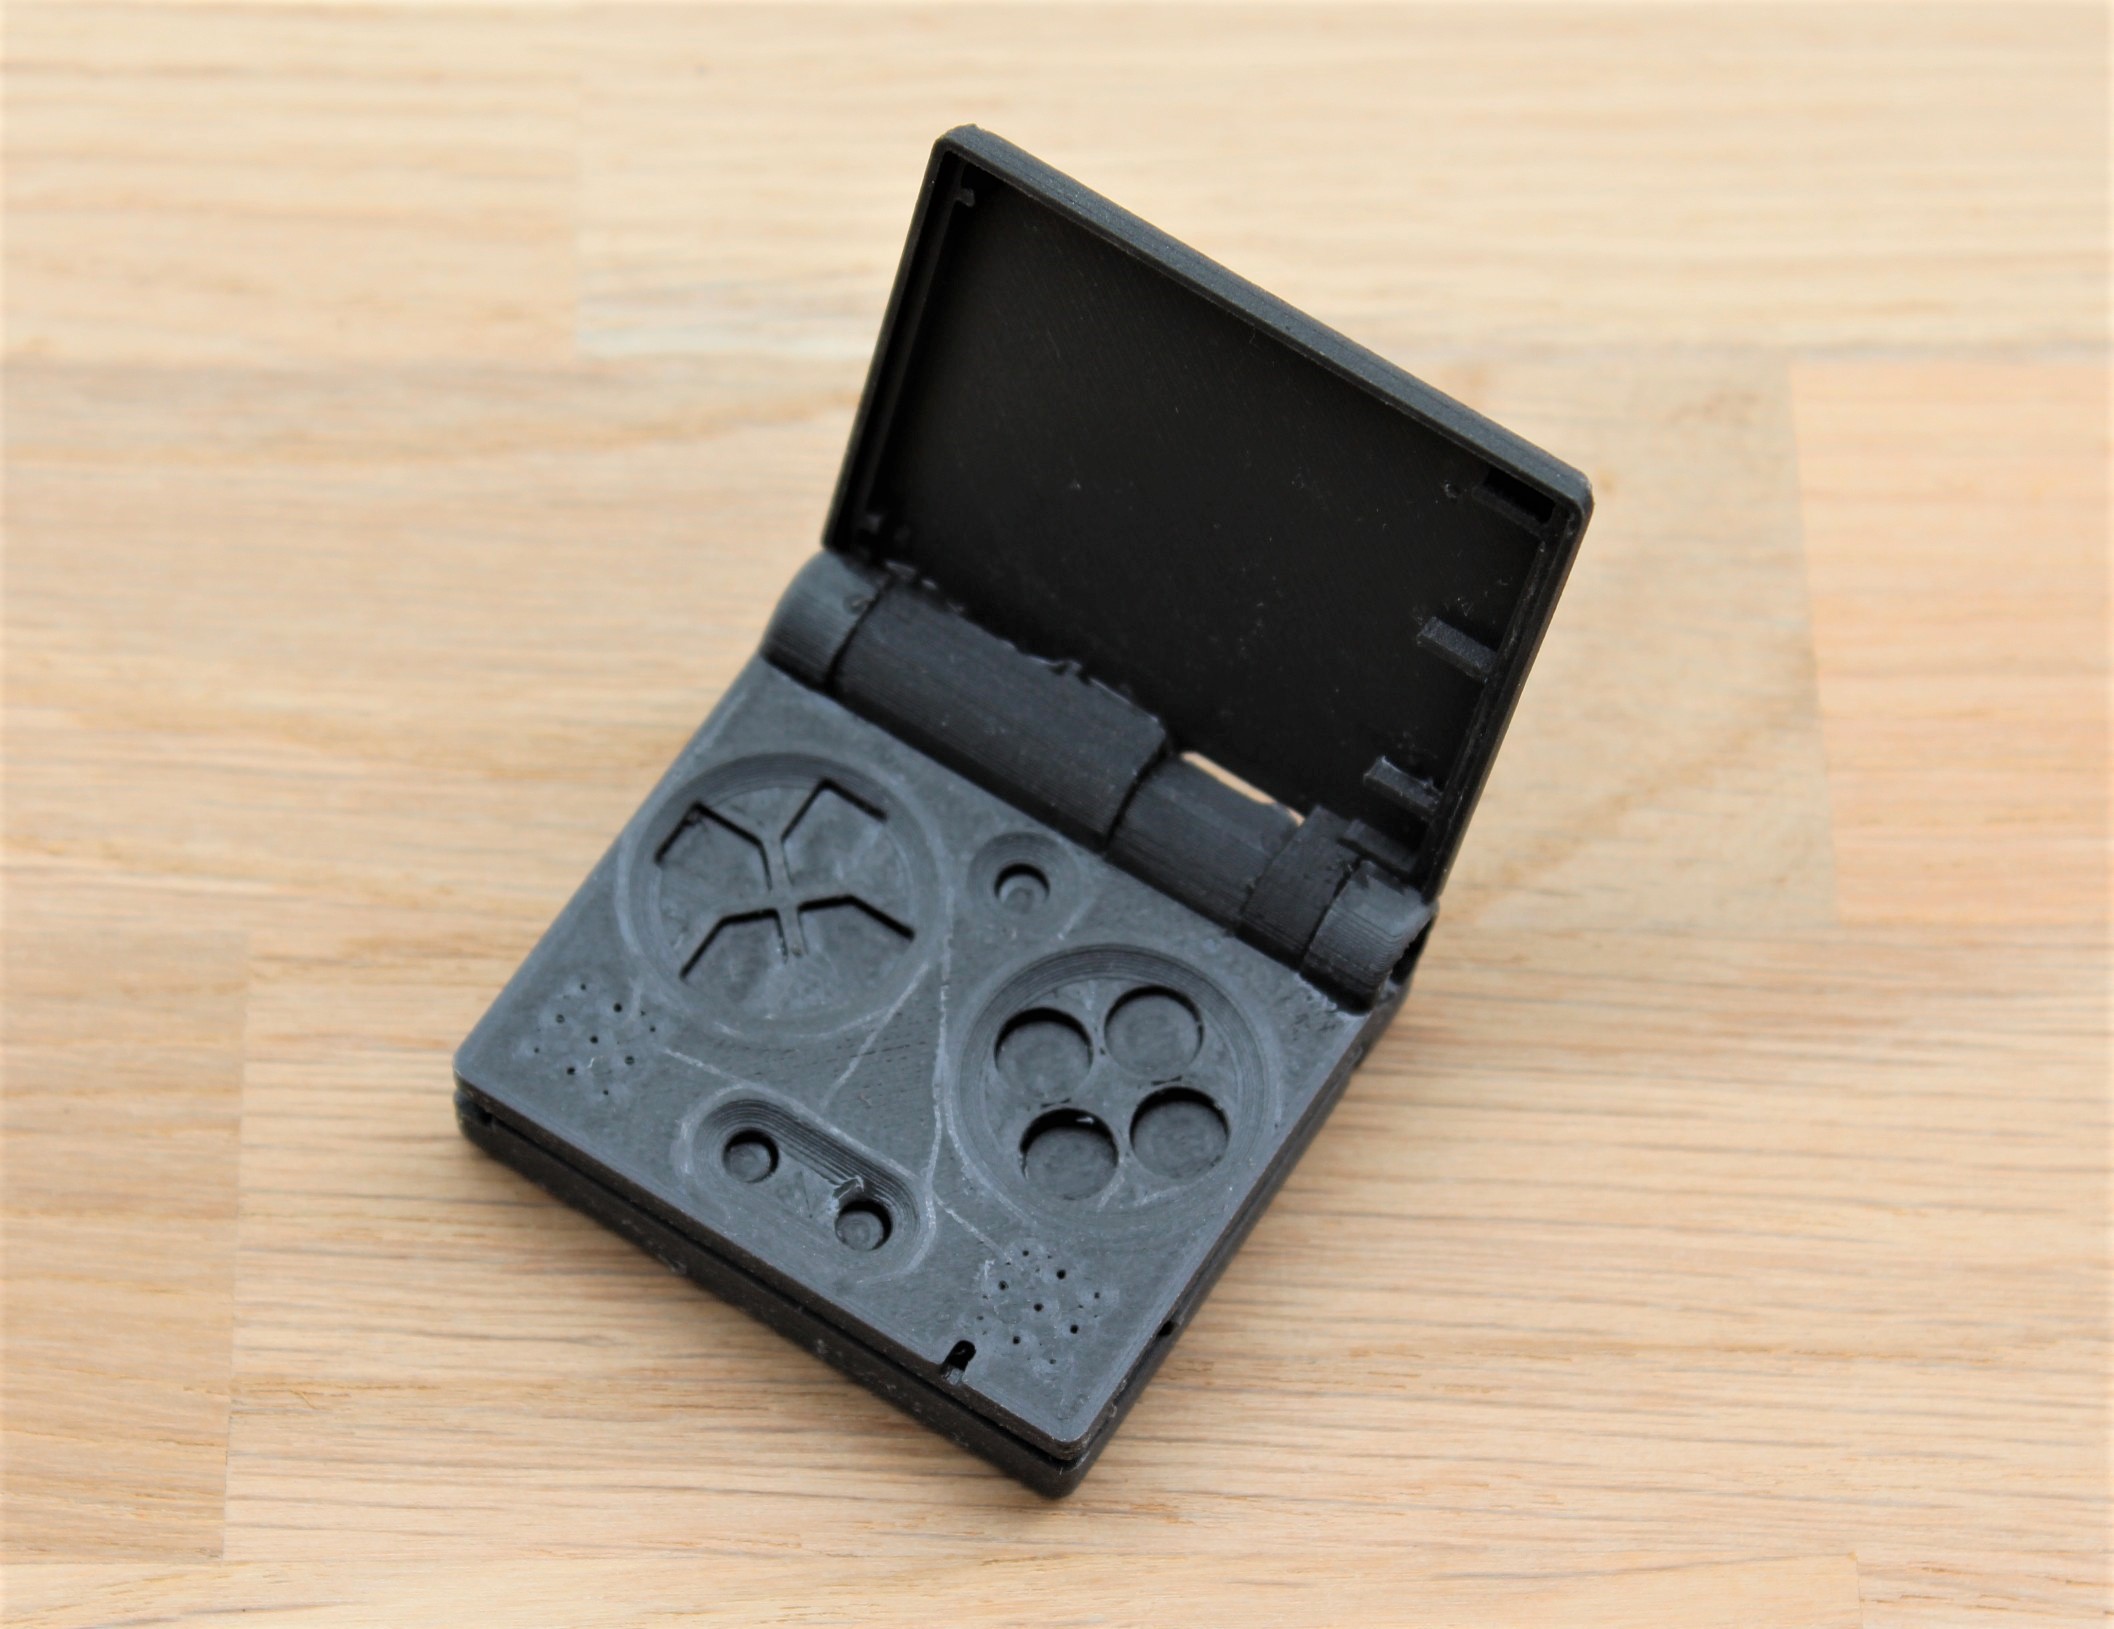
For this technology we have tried two prototypes, one printed with a common simple extrusion printer and the other with a double extrusion printer with a water-soluble material. The water-soluble material is used as support material and life-changing during the post processing of prints. You can see below the prints realised with an Ultimaker 2+, nozzle 0.6mm, layer height 0.15mm and PLA filament.

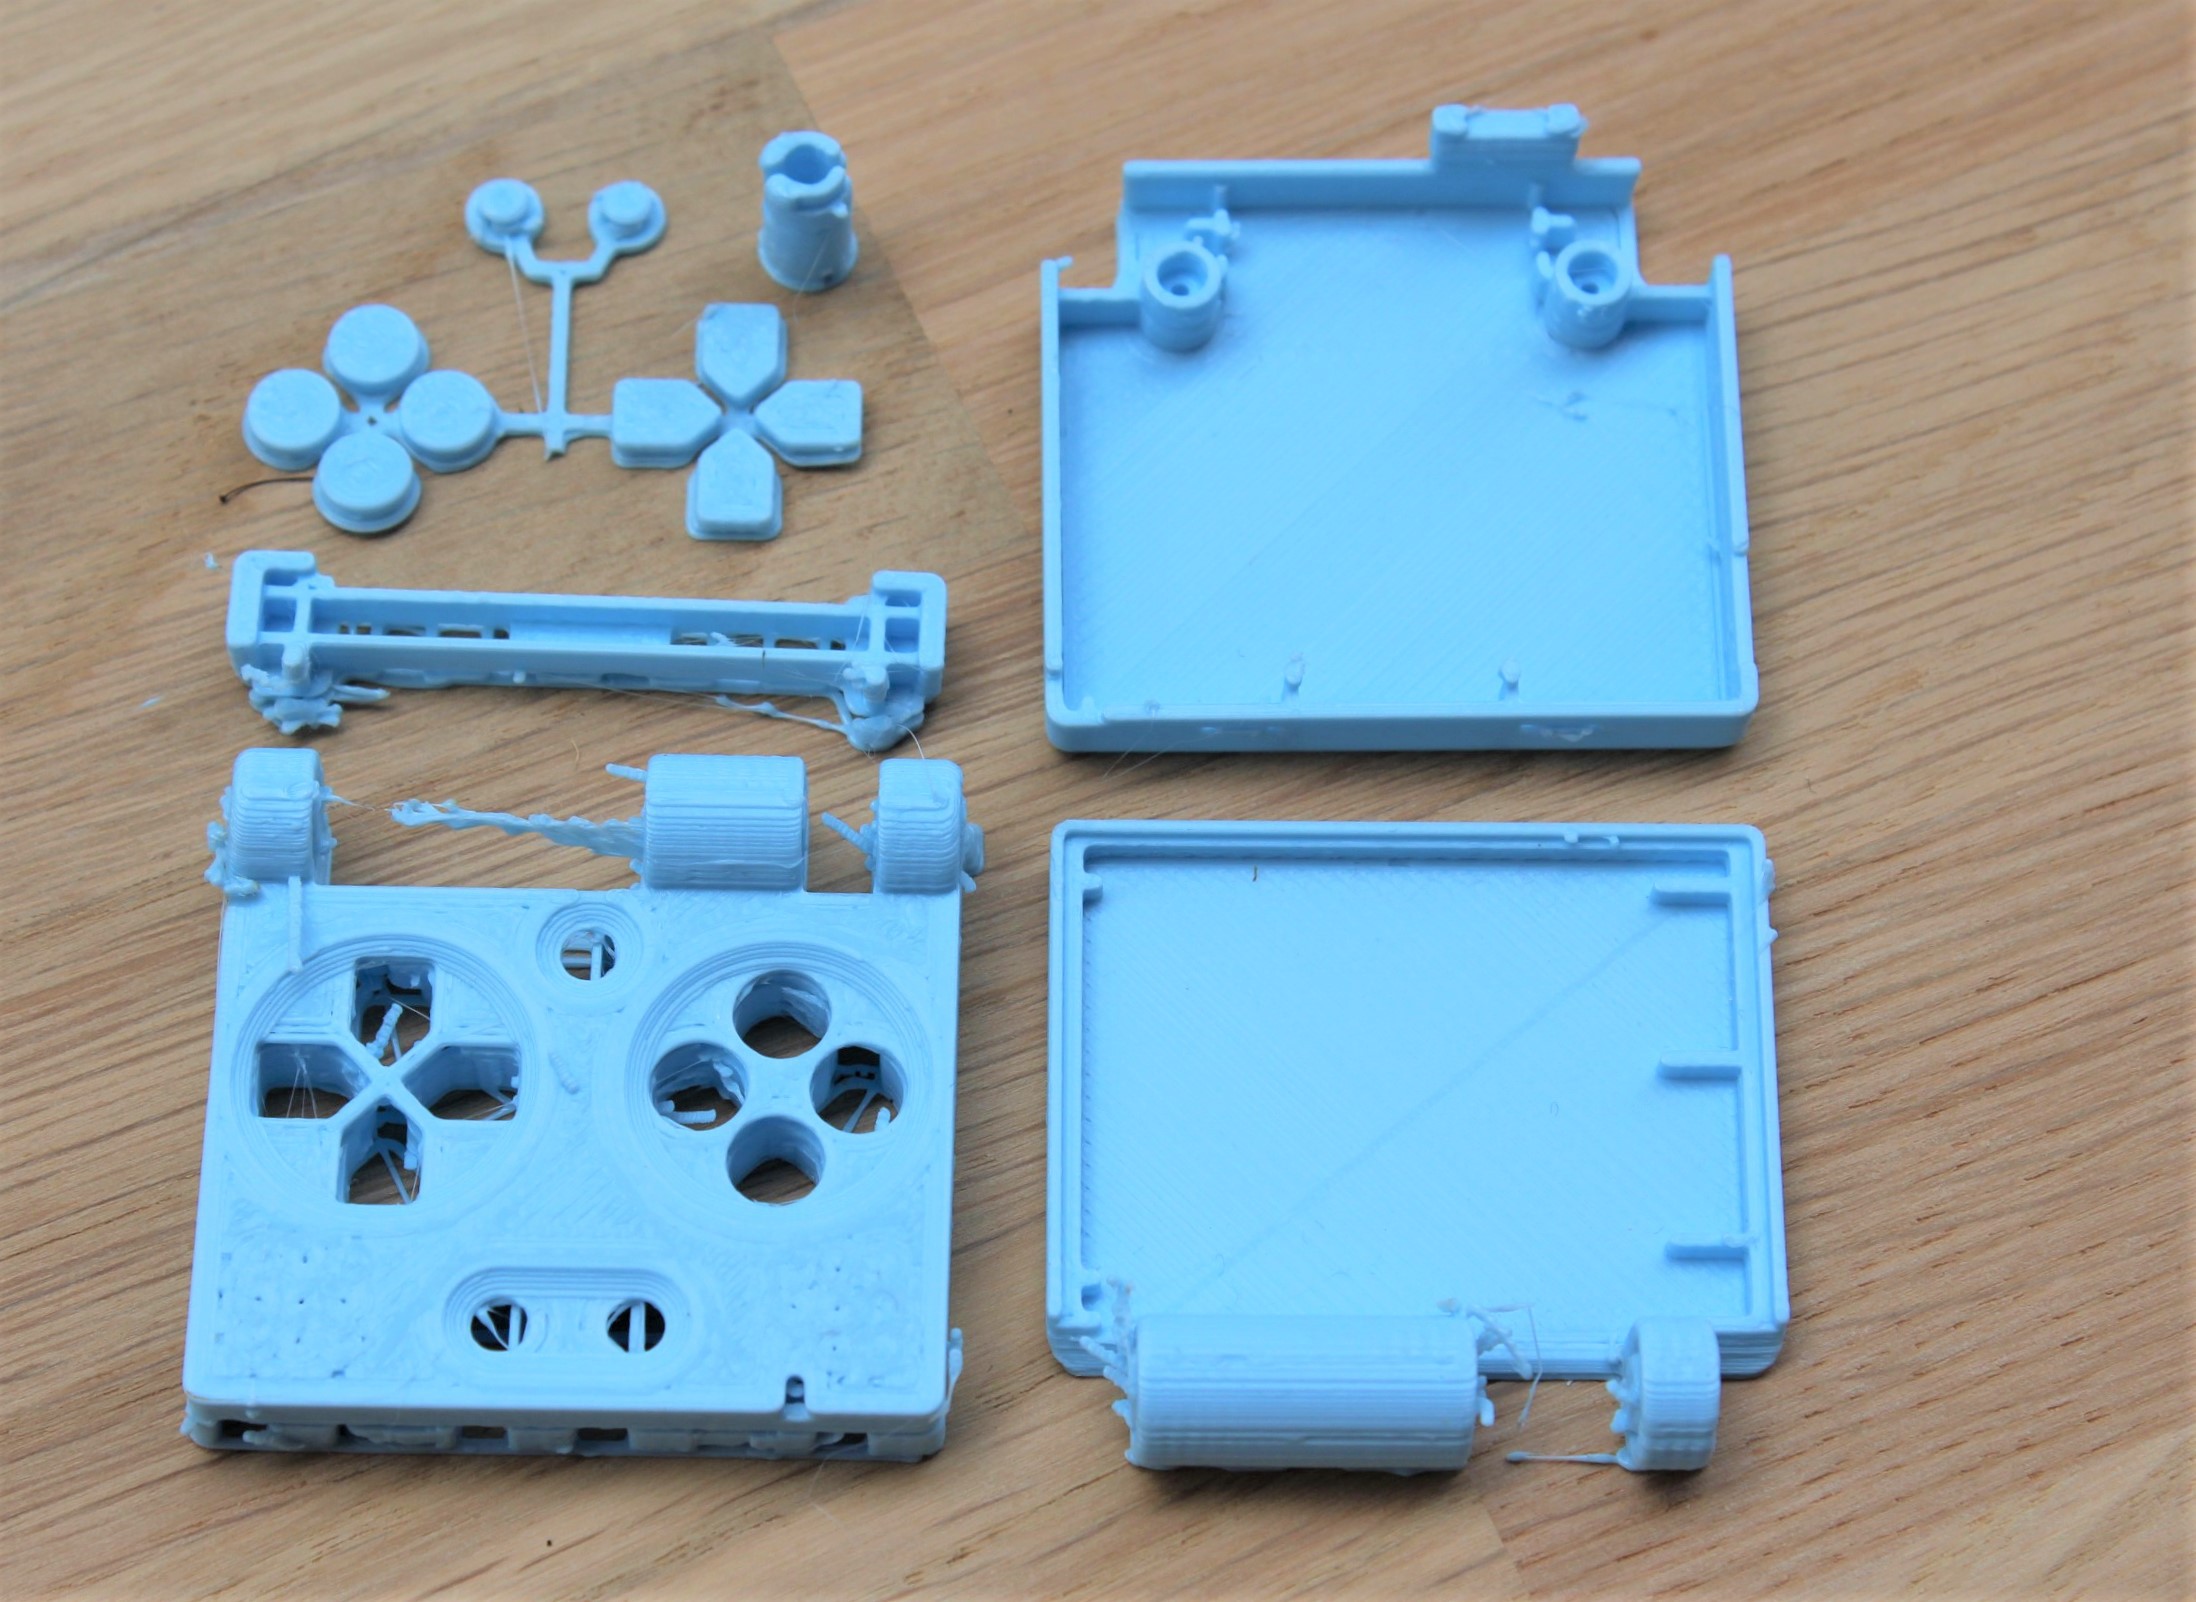
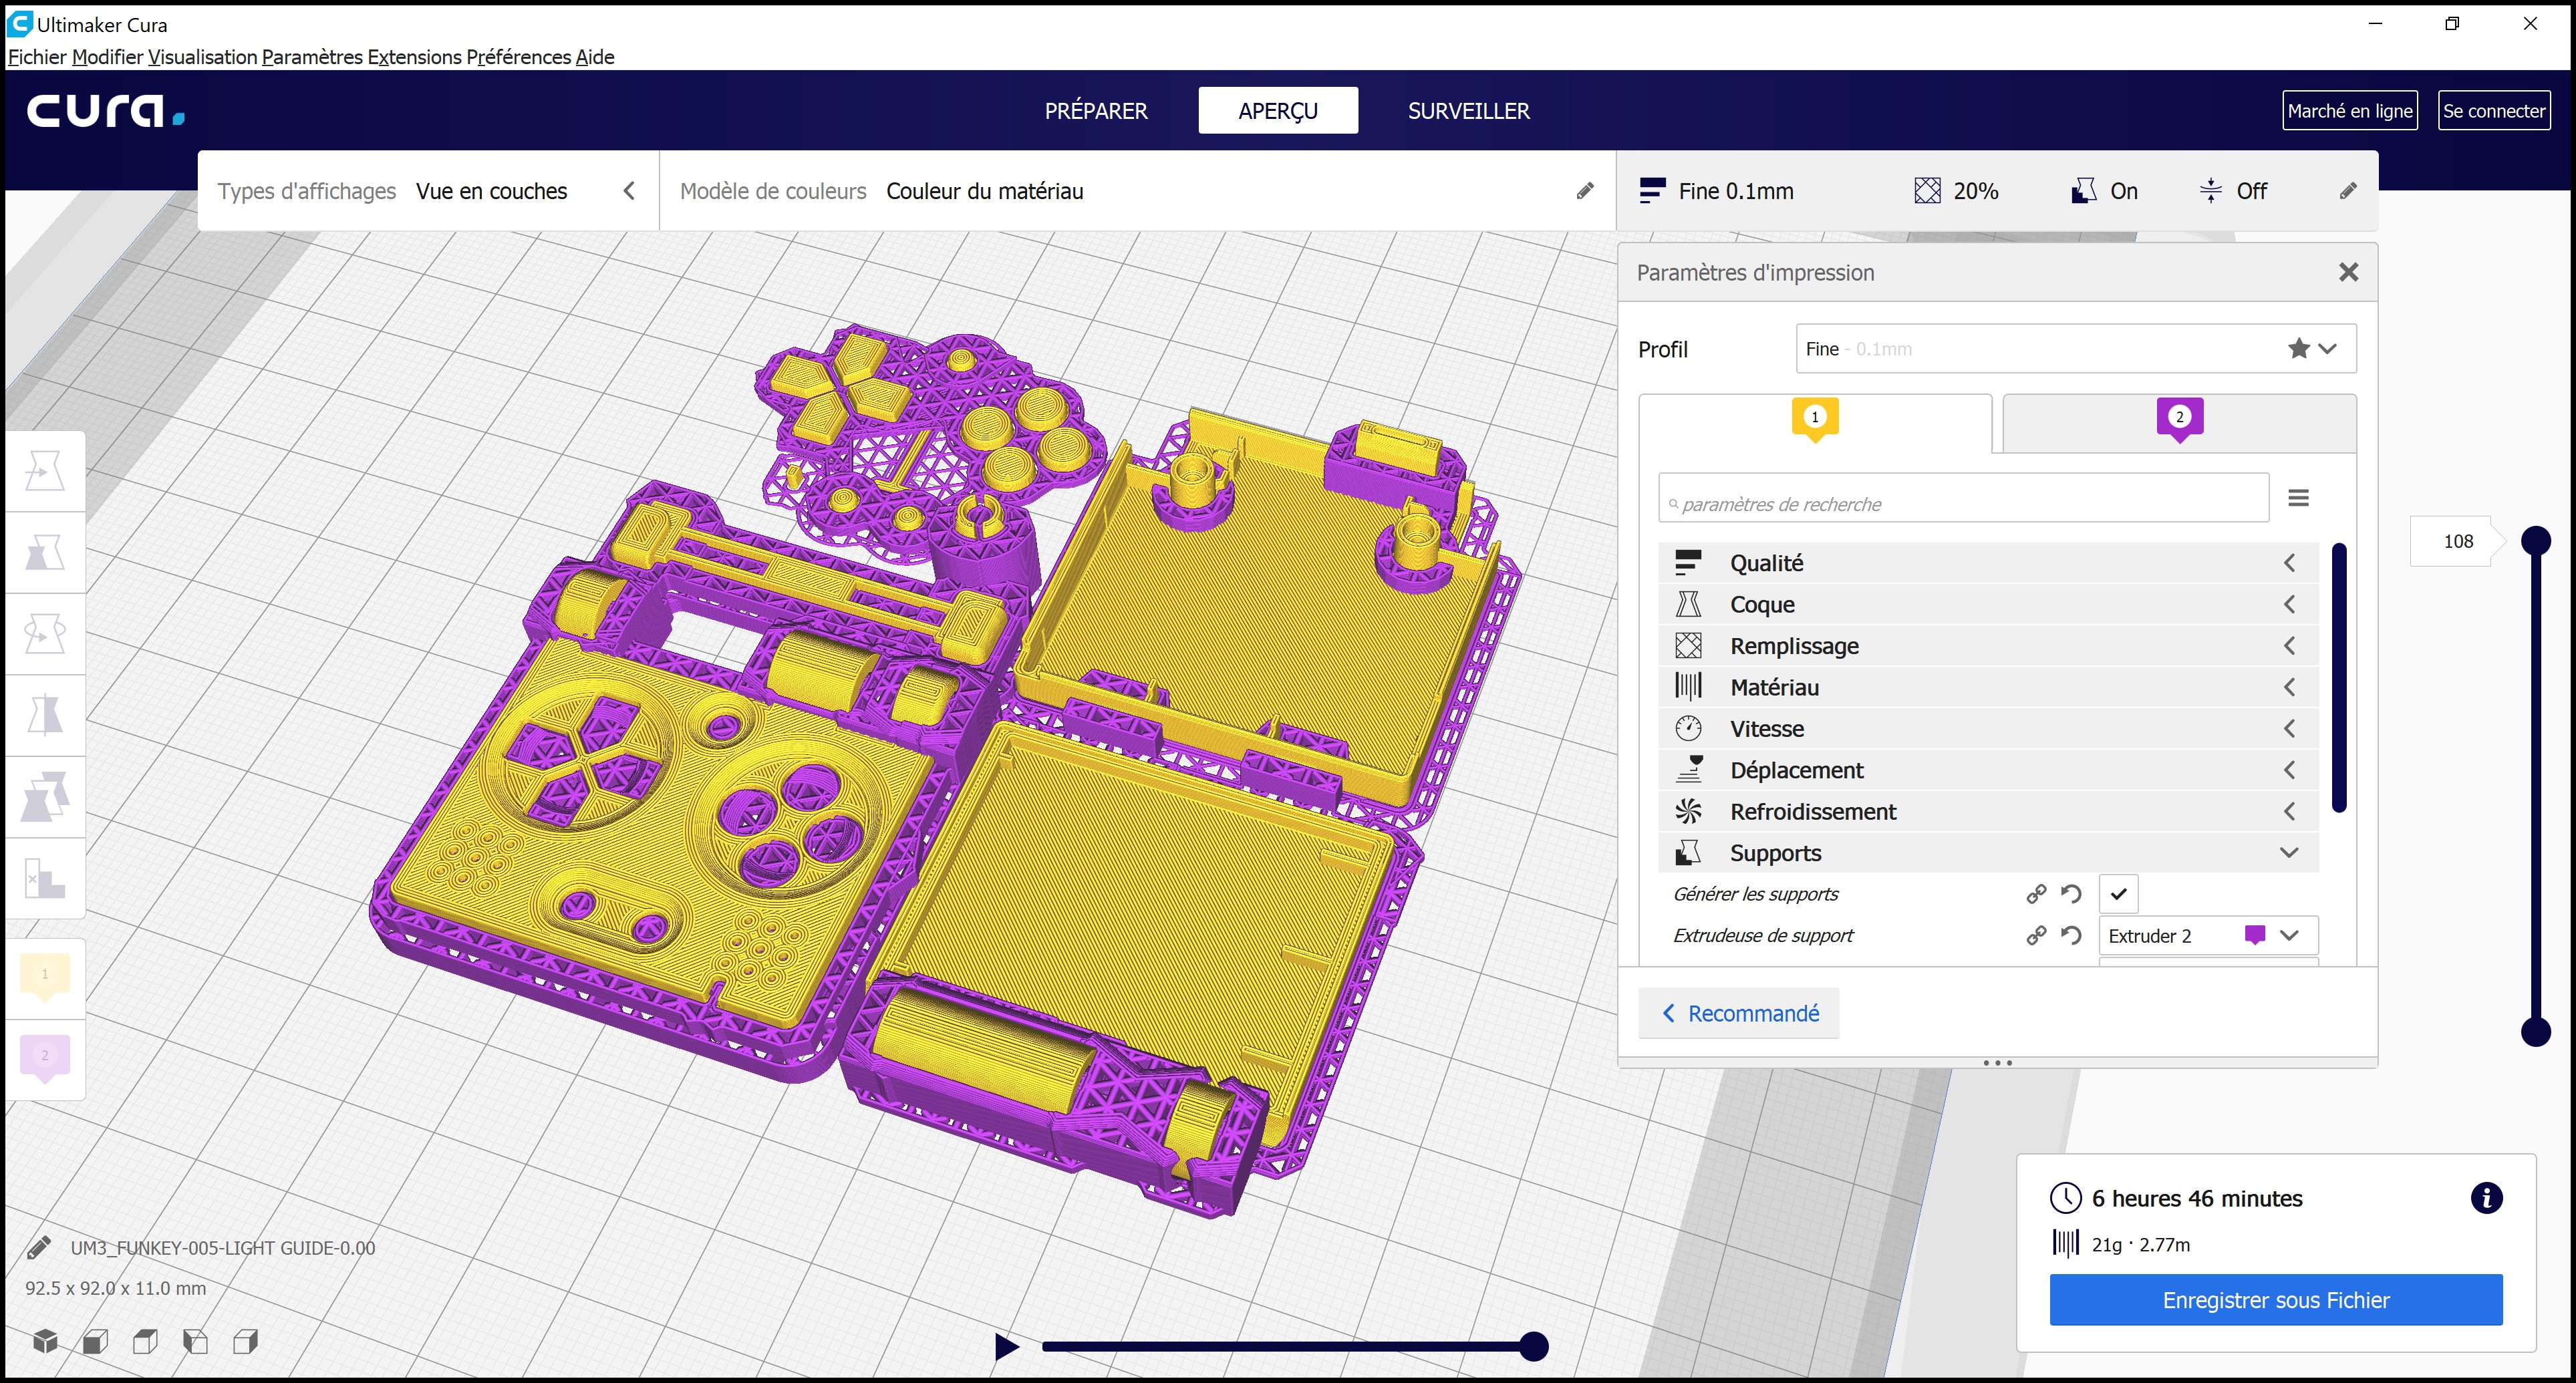
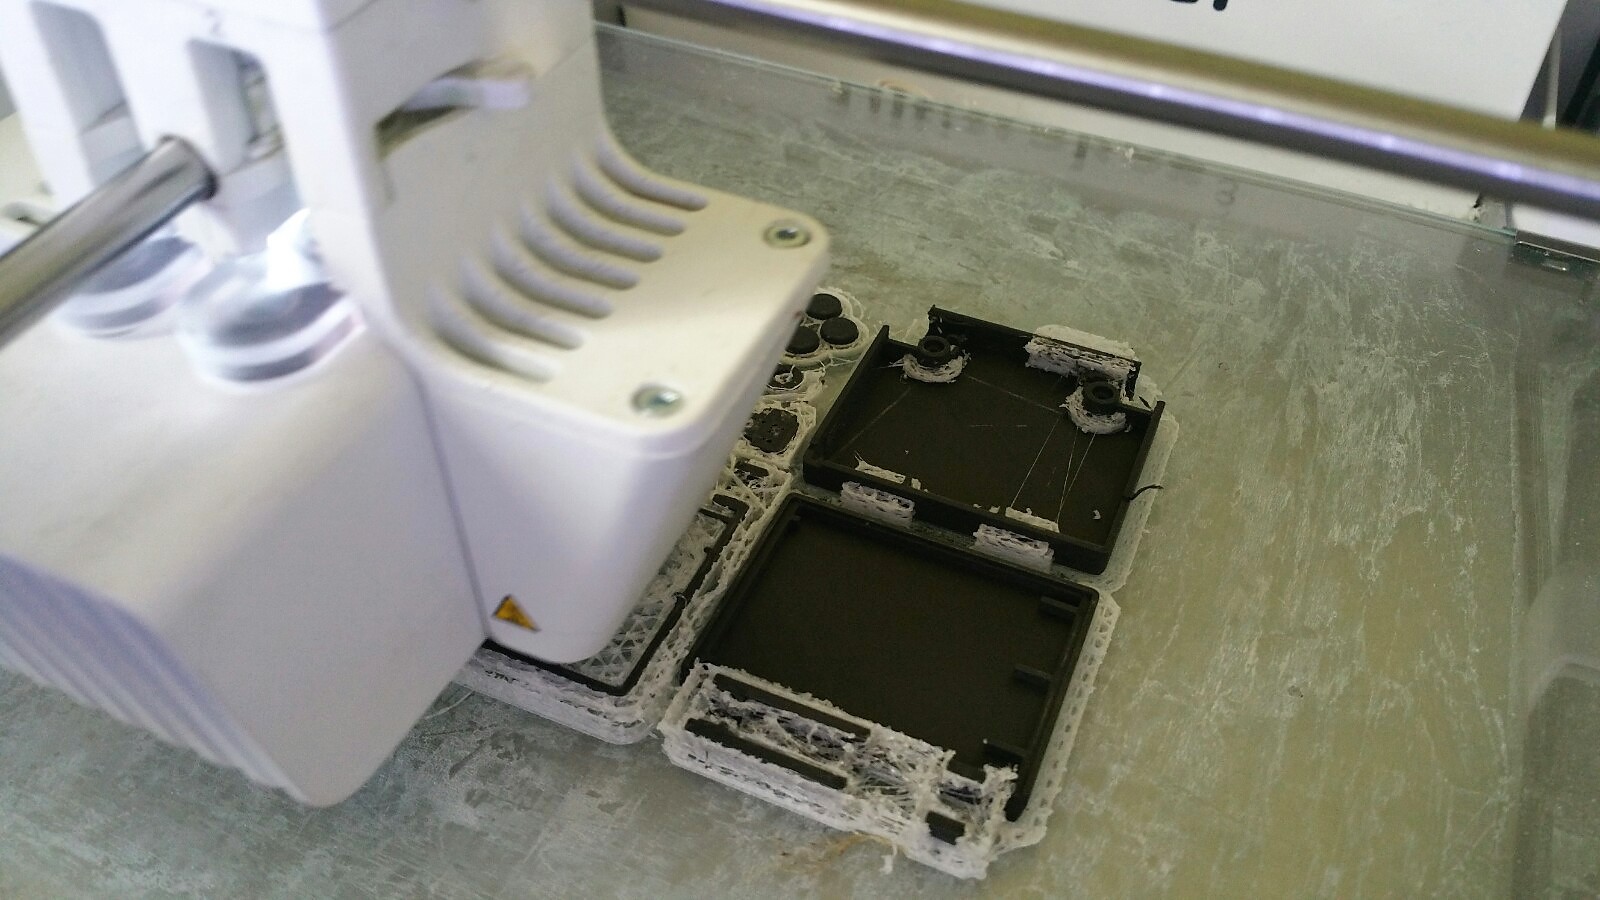
Below are the prints from an Ultimaker 3, nozzle 0.4mm, layer height 0.10 and double extrusion with standard PLA and water-soluble material.
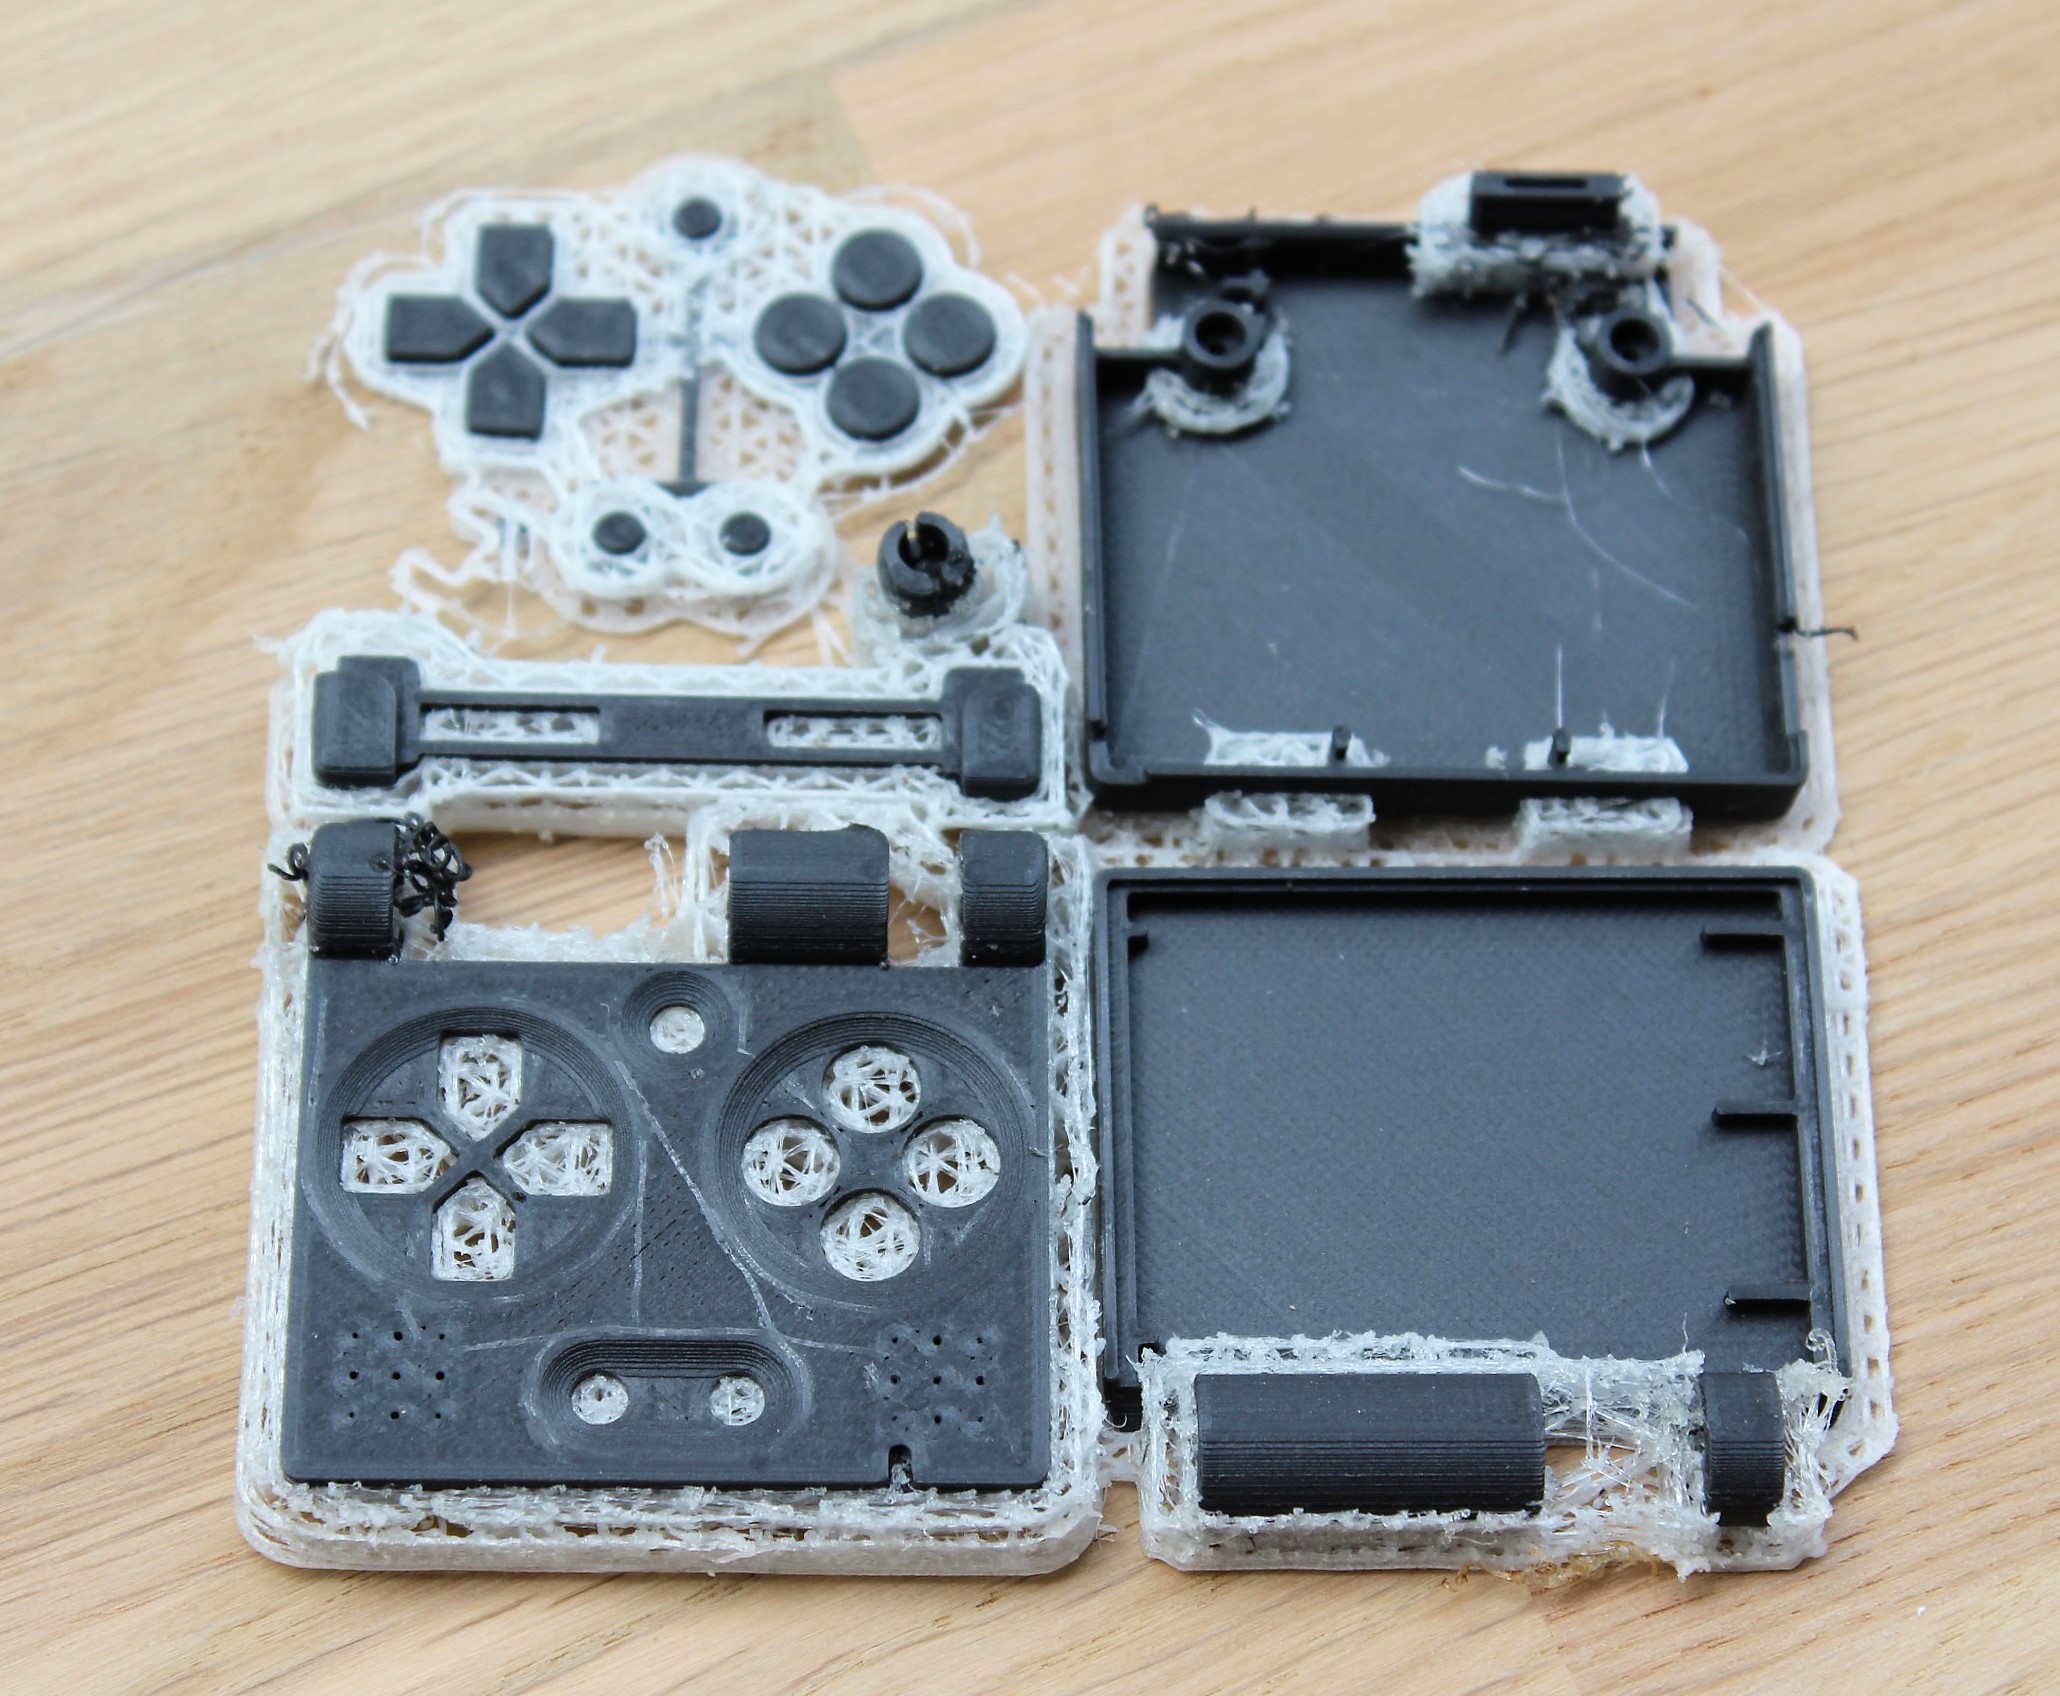
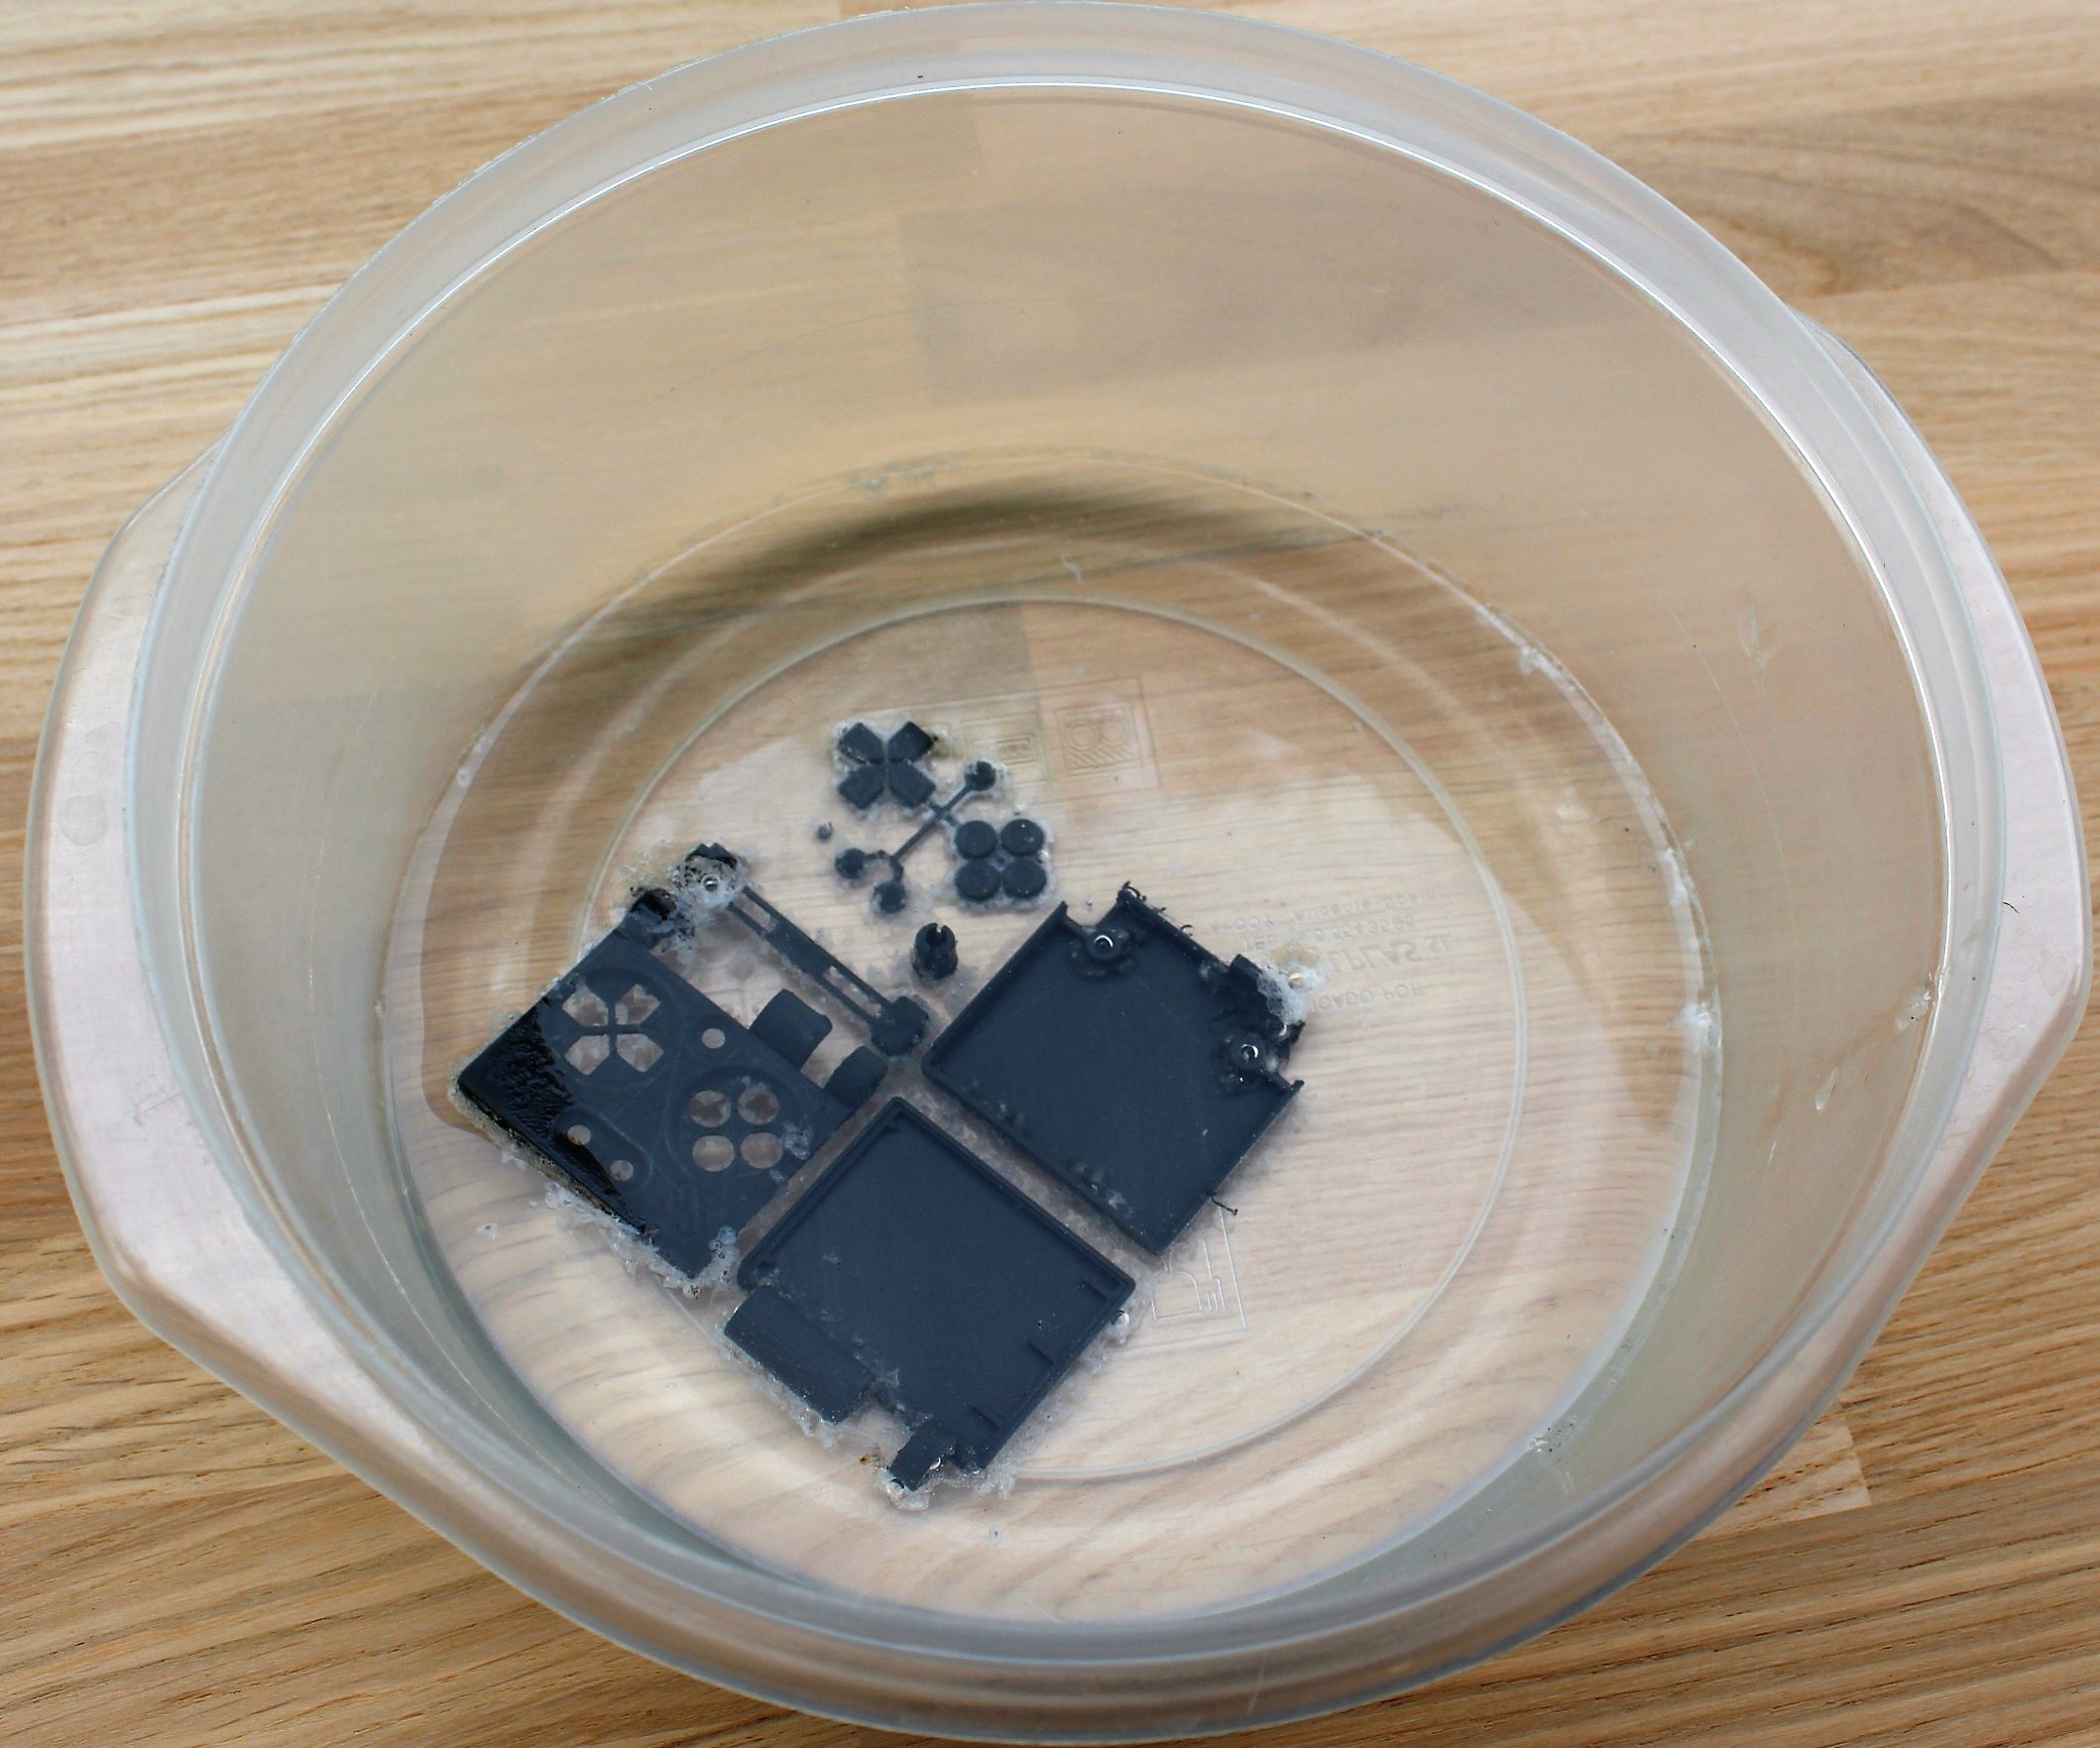
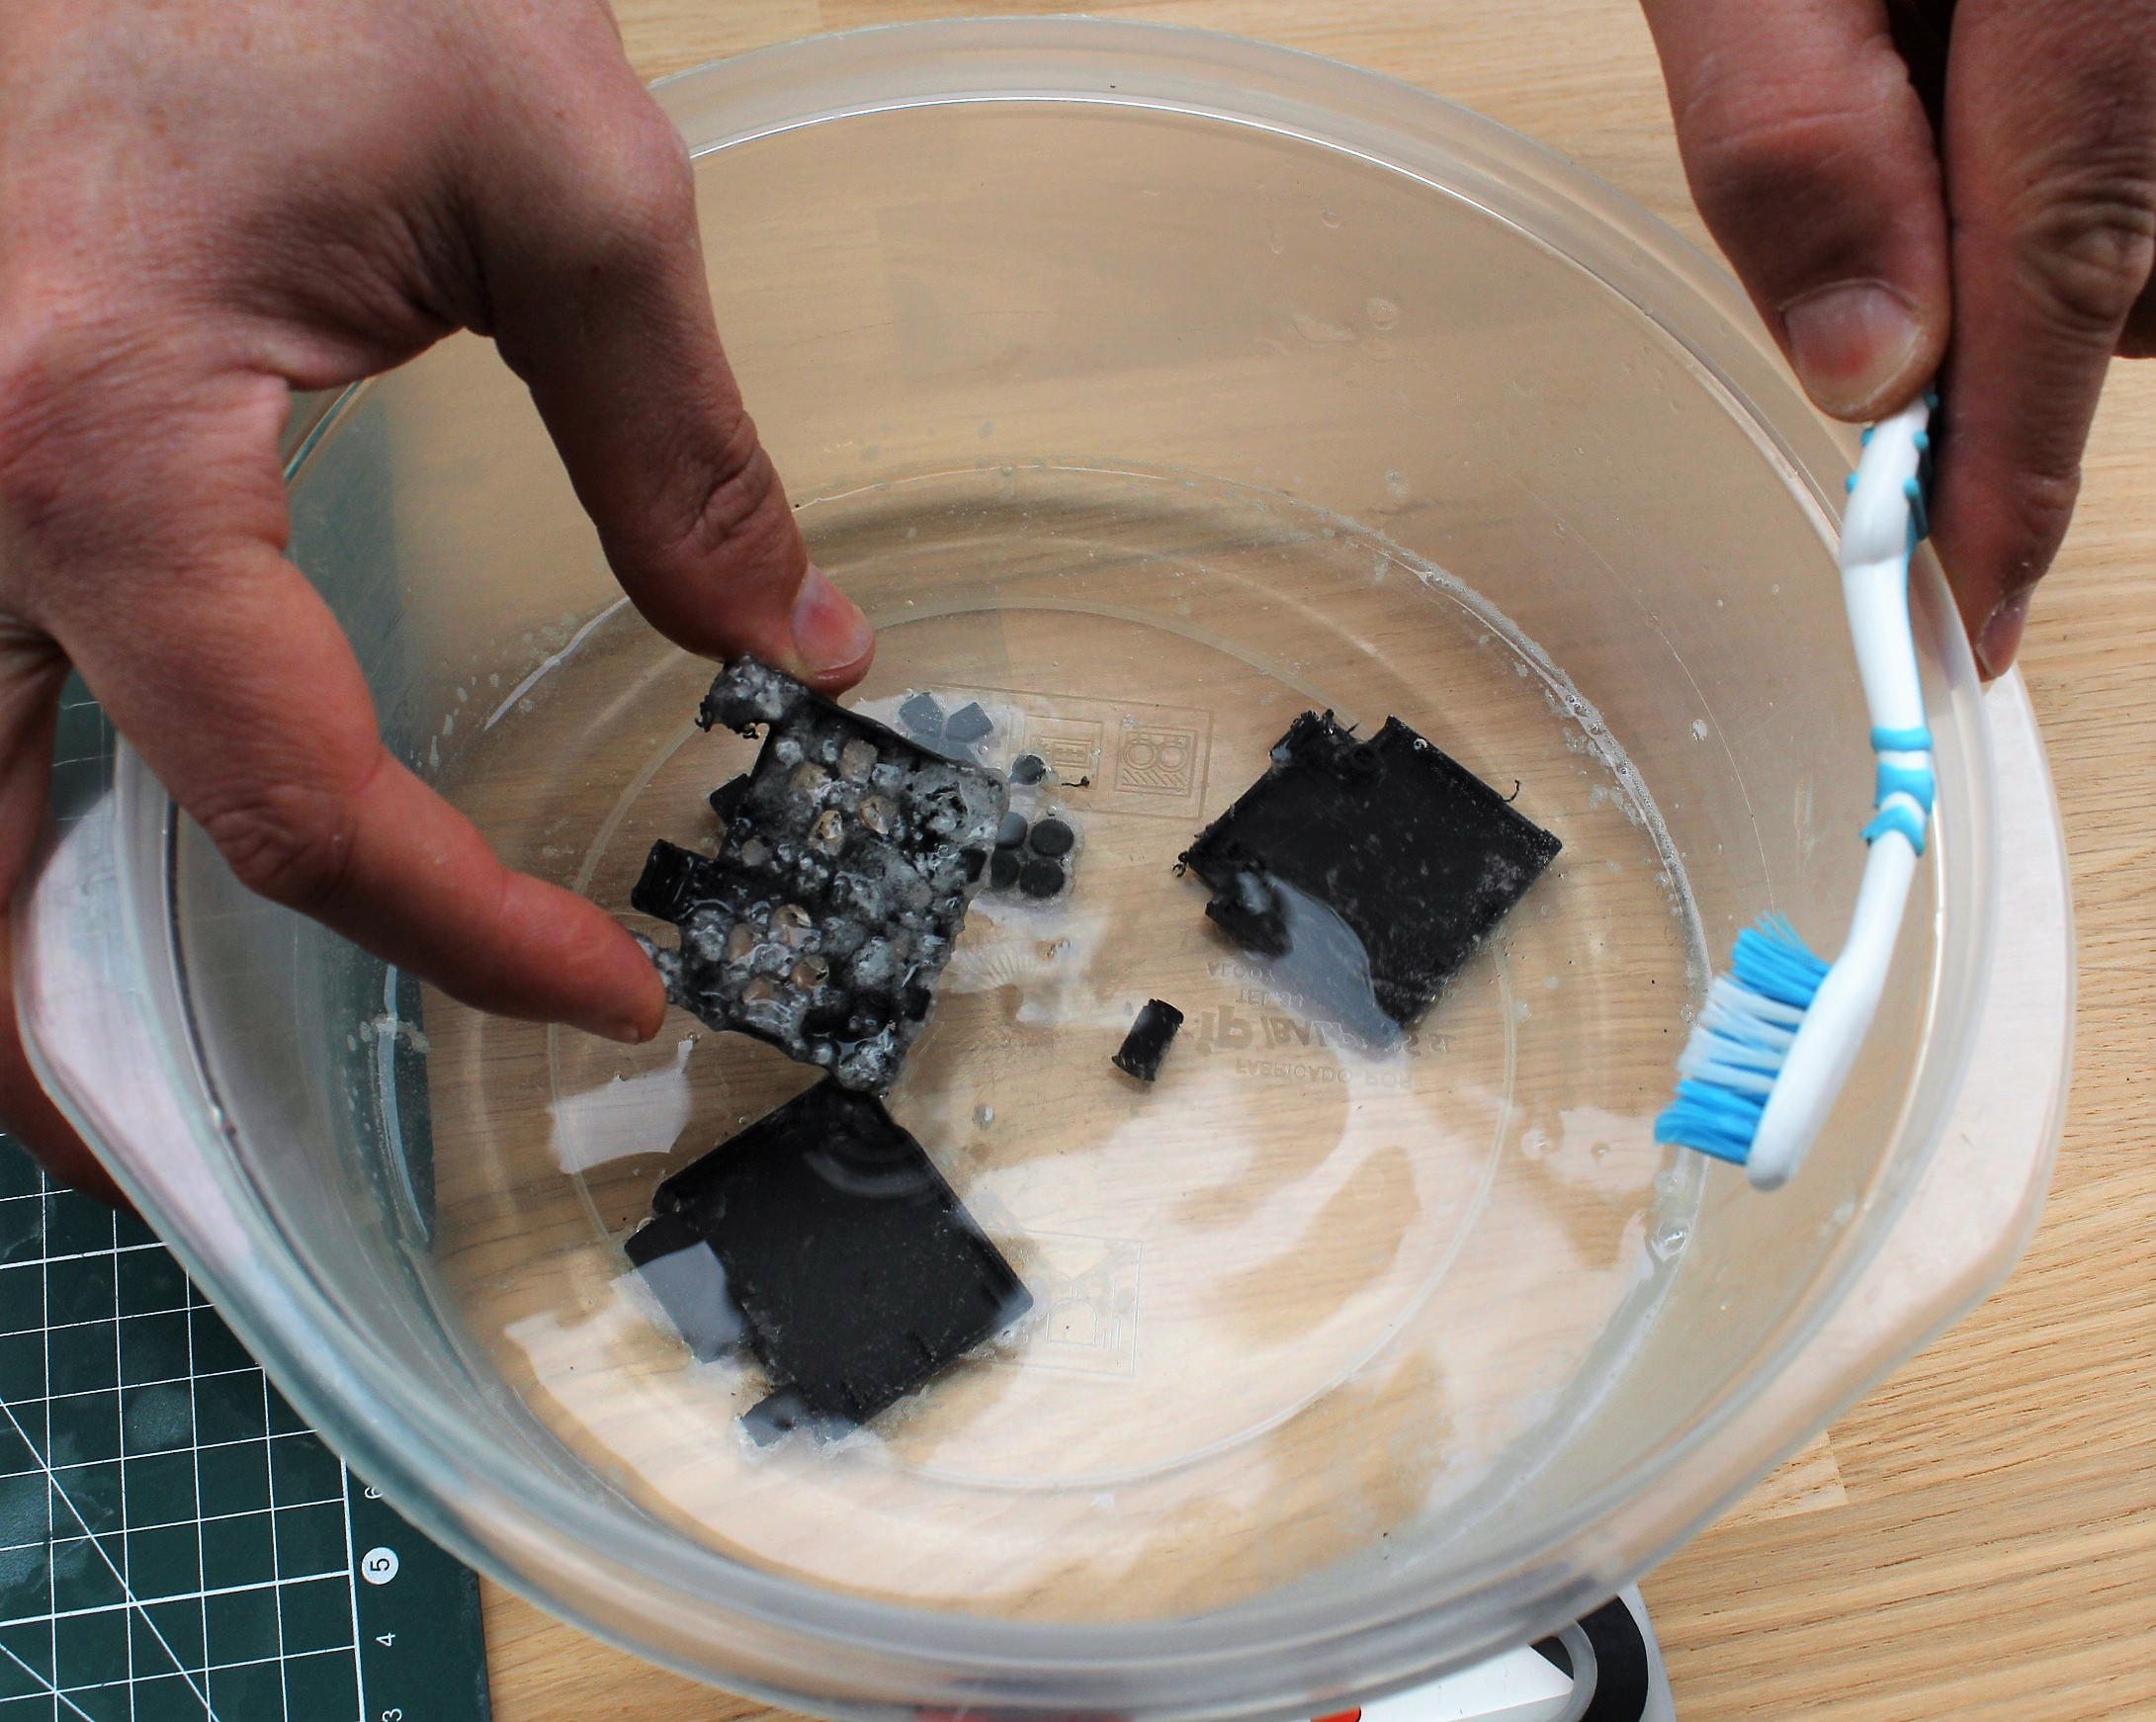
Here are the results after a one hour bath in cold water and some toothbrushing to remove the residues:
This technology (and the PLA used) is sturdy enough for our needs but, even if the printing params might not have been optimal, the surface finish and level of details are far from ideal. It is especially noticeable when we start putting together the different parts. The outer parts are ok but, even with soluble material, the inner parts needing supports material lack precision and surface finish.
SLS
With this technology we have chosen to go with PP (Polypropylene) among the variety of available materials such as PA12, PA+GF (Glass Filled), PP (Polypropylene), Alumide (Mix between PA powder & aluminum powder), TPU92 (Thermoplastic Polyurethane)...
Here is how the prints turned out with Polypropylene:
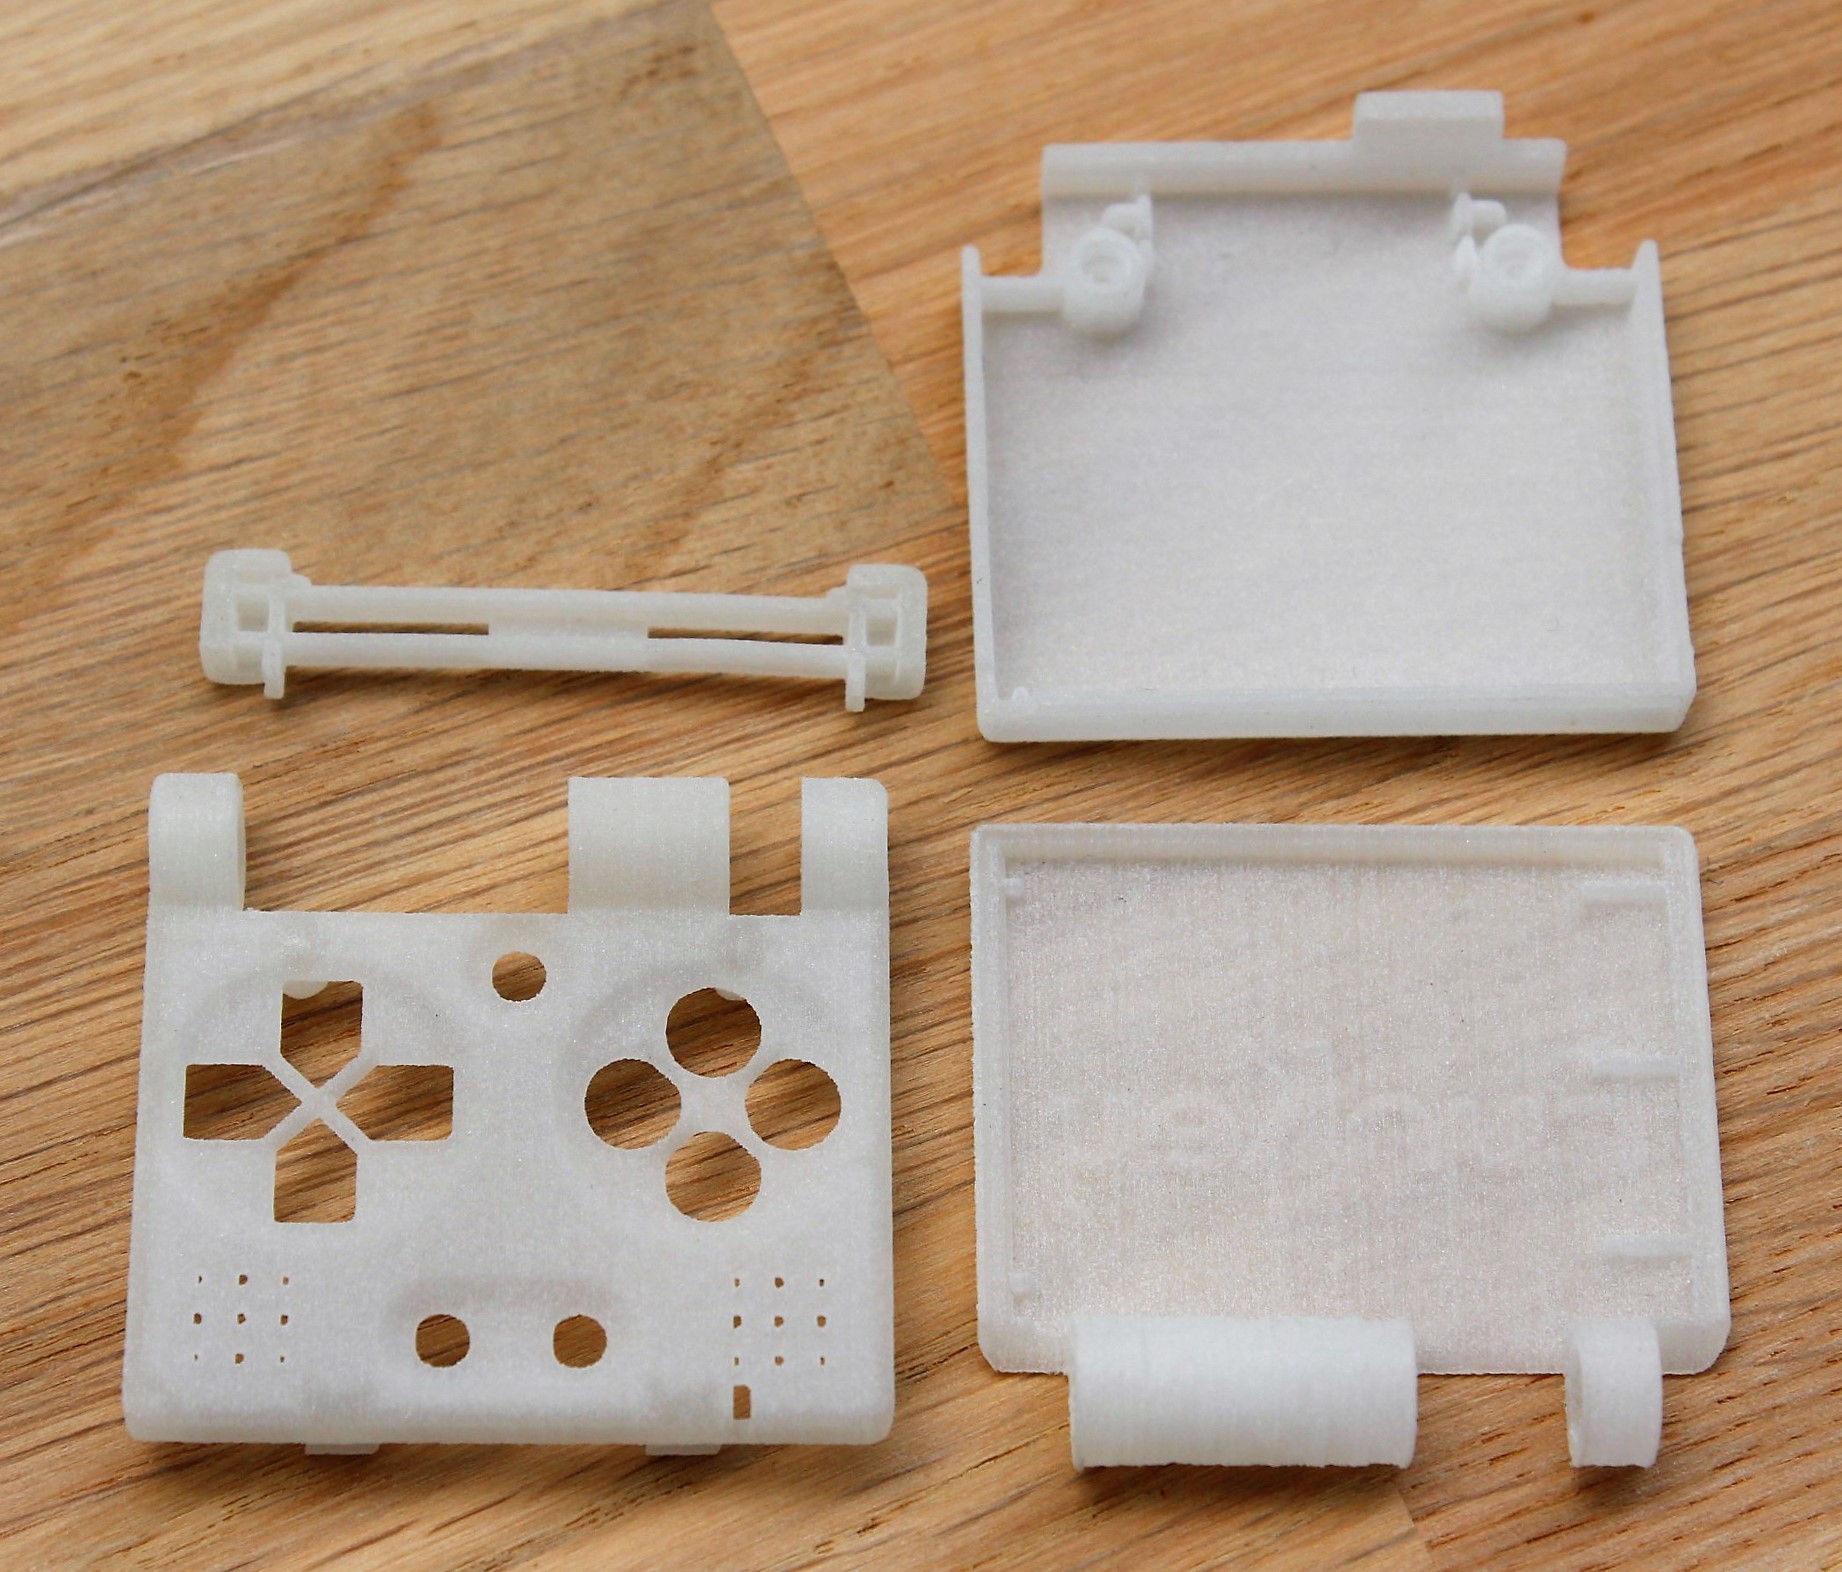
This time the inner parts of the casing were the same quality as the outer parts. As you can see this material is too elastic though. But if materials can be swiched for sturdier ones, precision still falls behind our needs. Besides, surface finish is not smooth and the porous material quickly tends to absorb dirt.
SLA
Different types of resin were tested with this technology:
- Somos® EvoLVe 128 ( white)
- Accura Xtreme (gray)
- R11 from Envisiontech (red transparent)
- ANYCUBIC resin (green transparent).
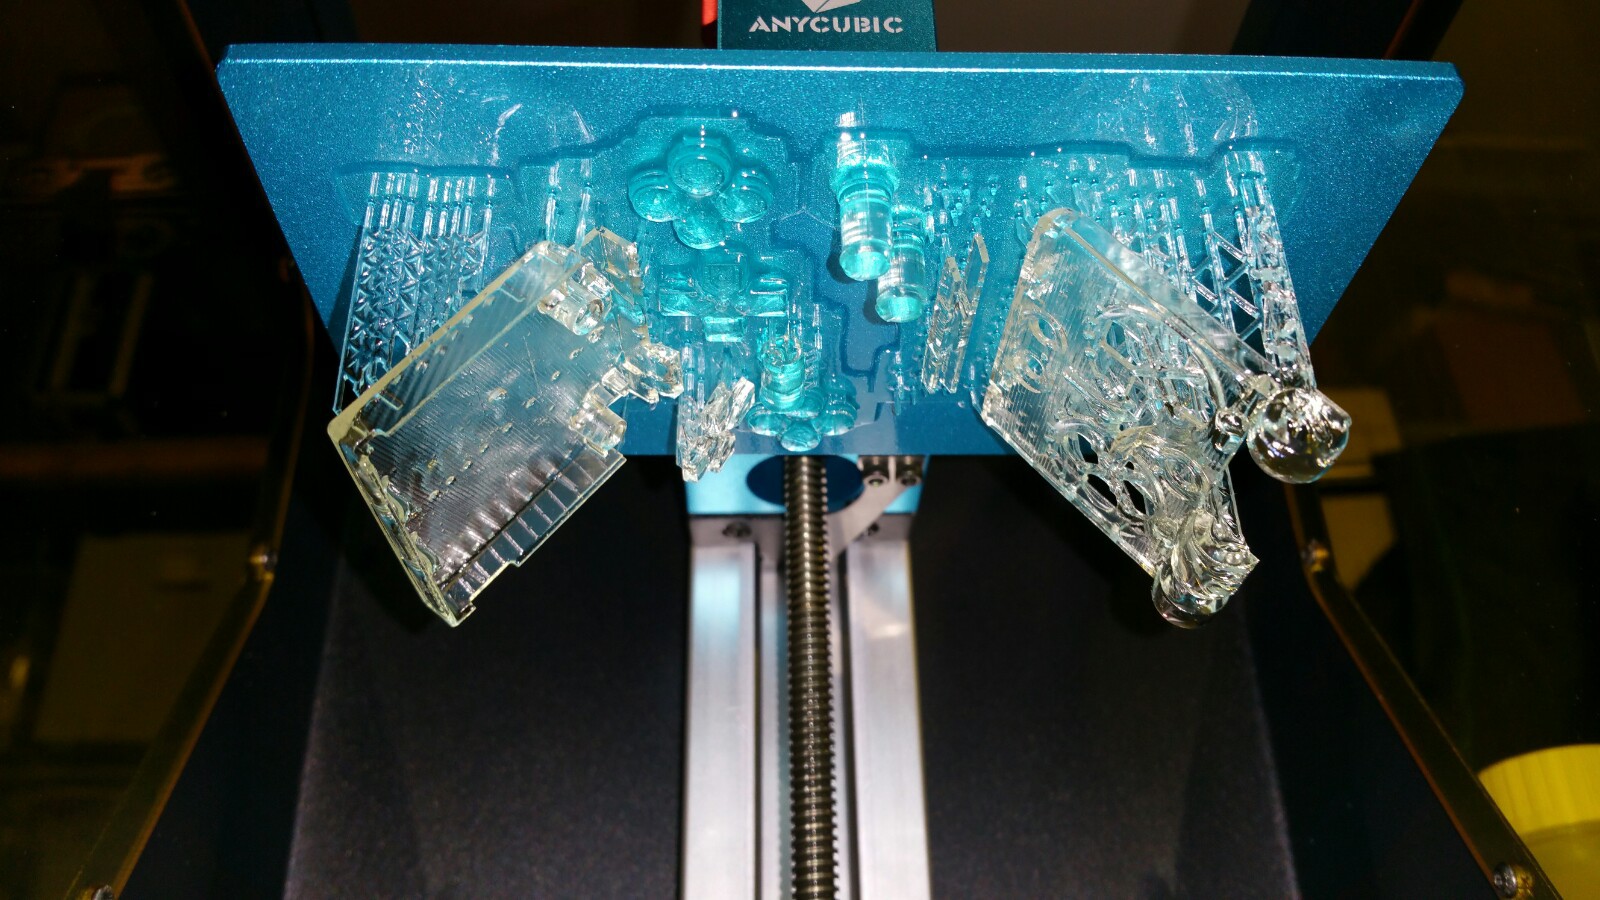
The biggest drawback with SLA printing would be that it is still very far from being as user friendly as FDM printers. Not only does the resin needs to be handled carefully in the first place but the post-processing treatments require one to not be afraid of a little chemistry. The prints must be cleaned with isopropanol alcohol, and after removal of the supports, they need to be strengthened with UVs. Also, the smell of all these products is not the greatest.
The results however are definitely worth it!

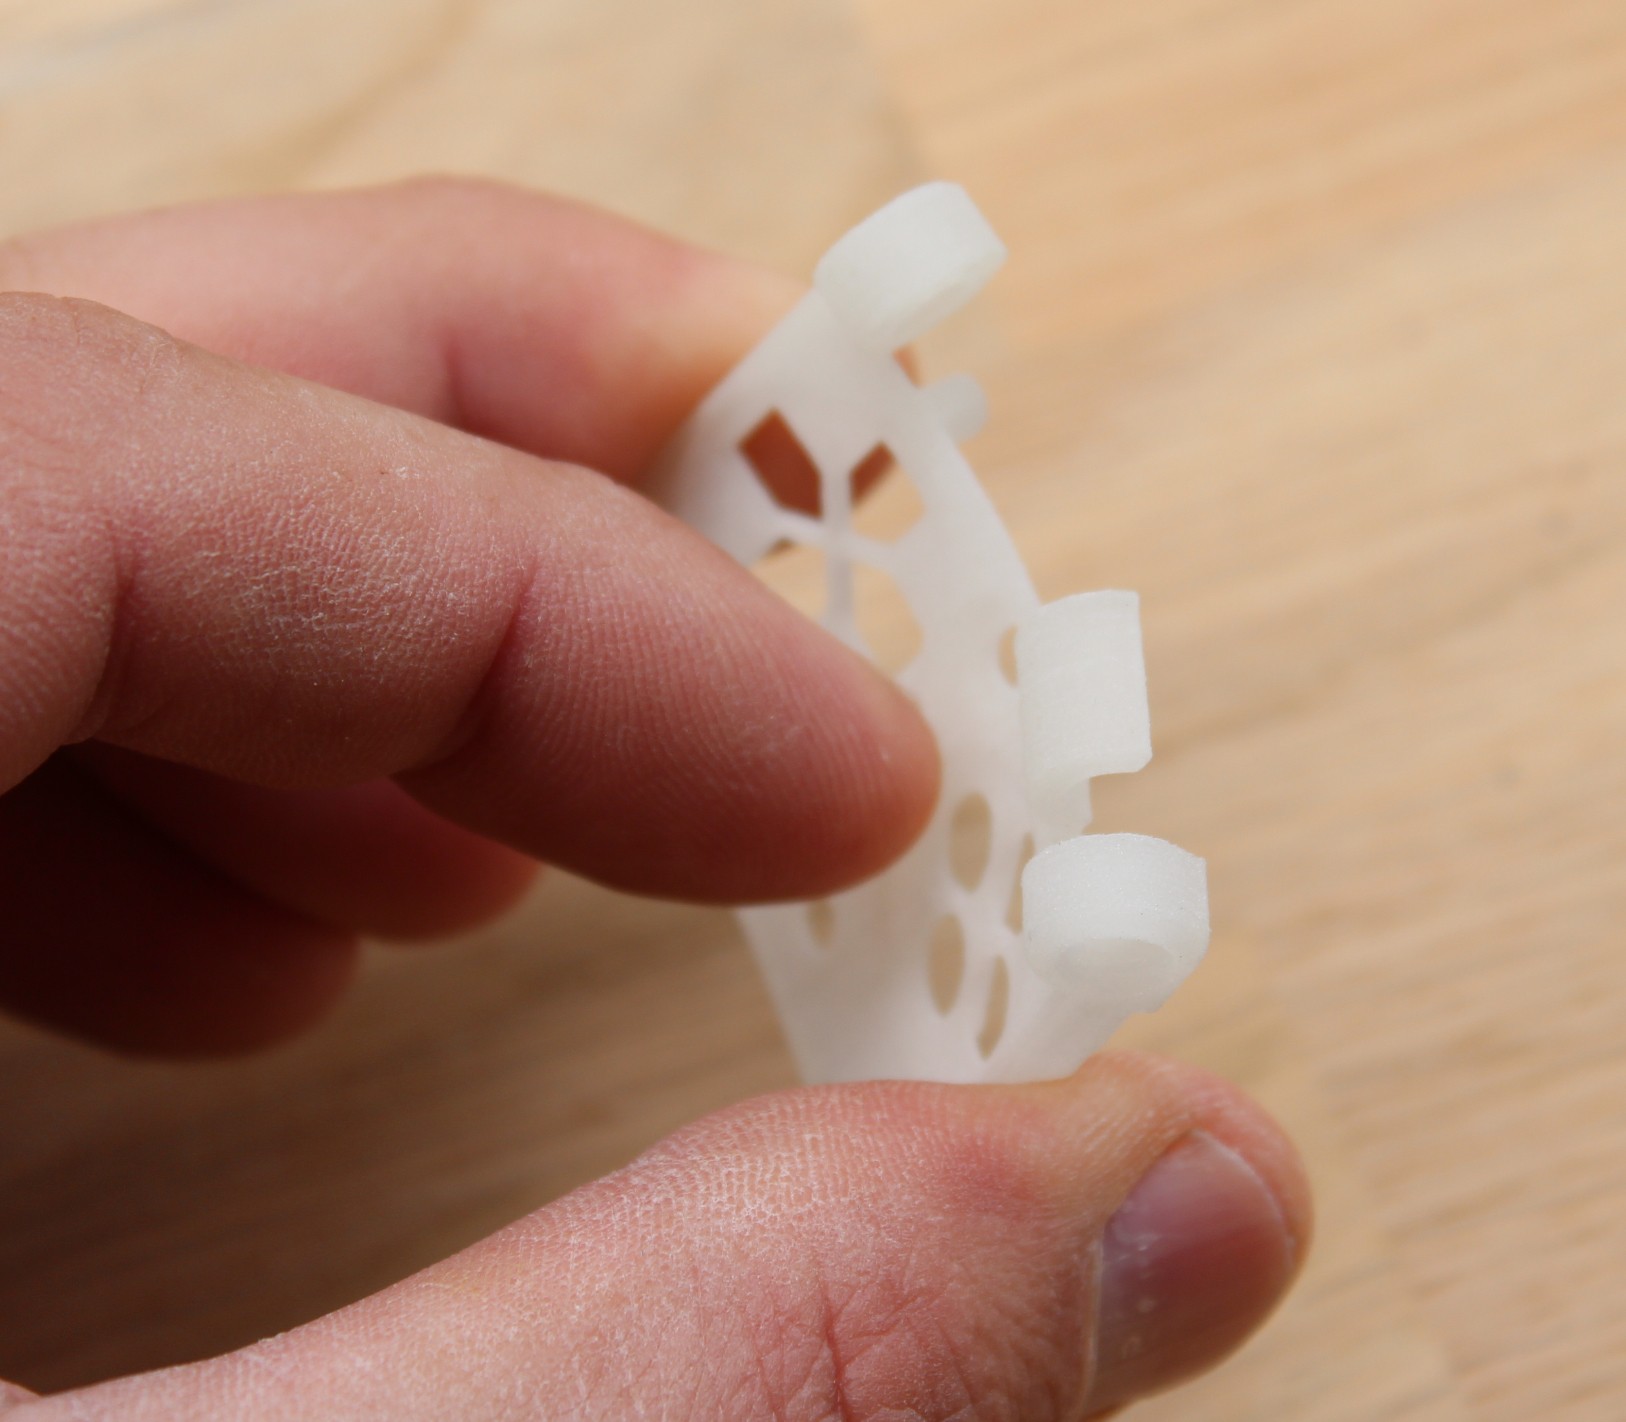
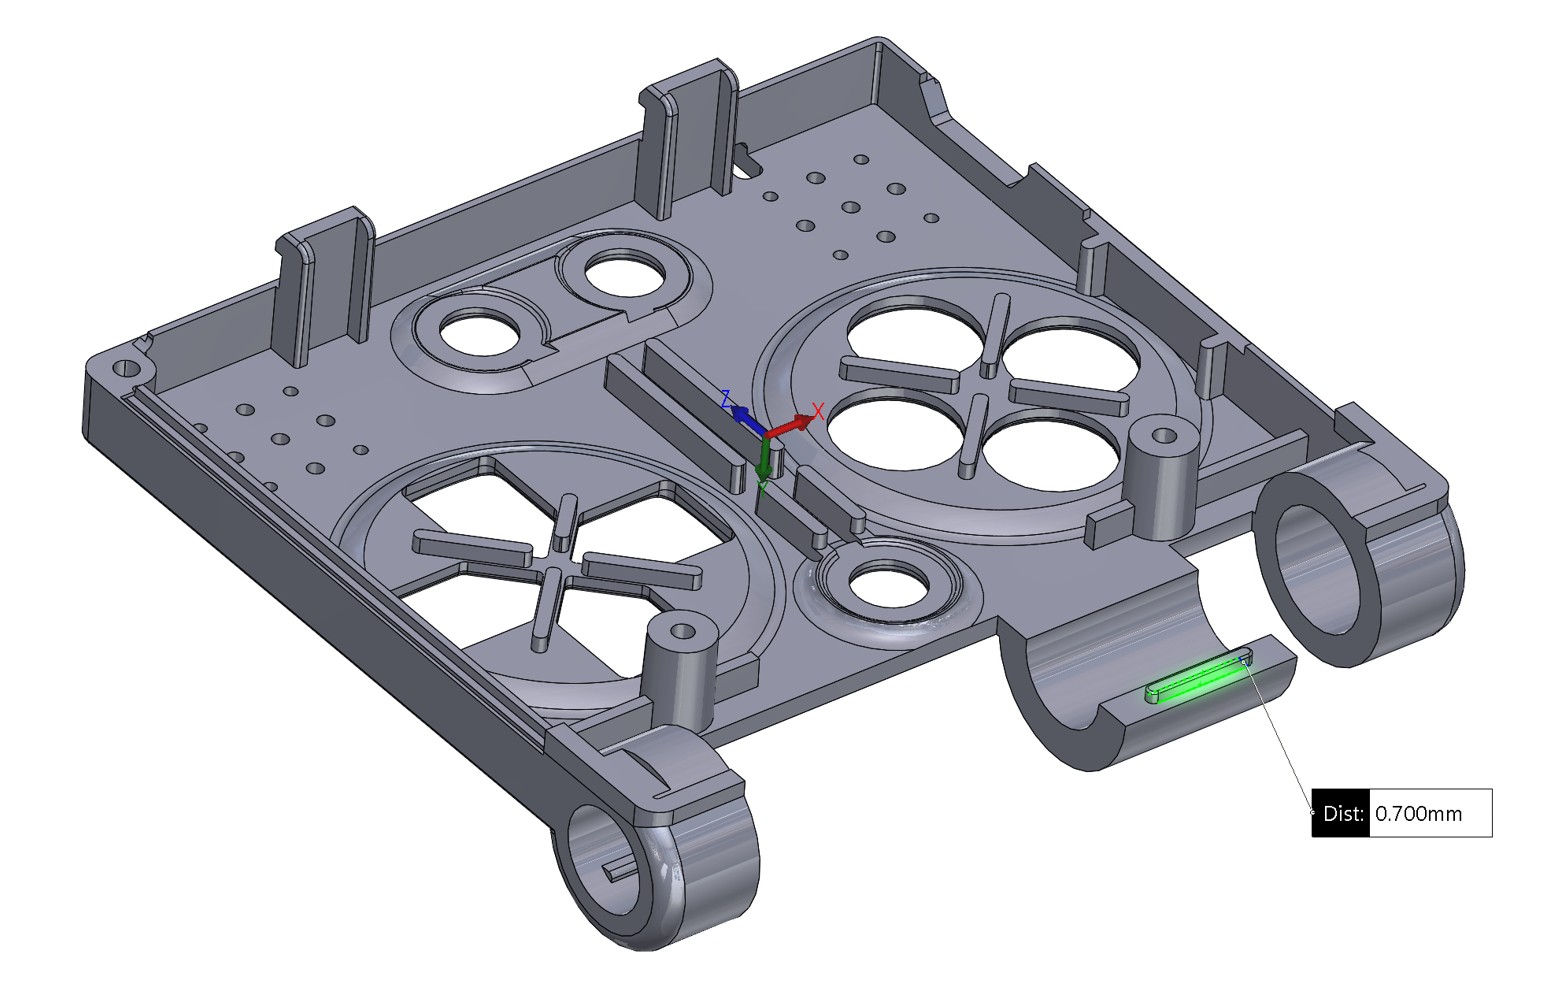
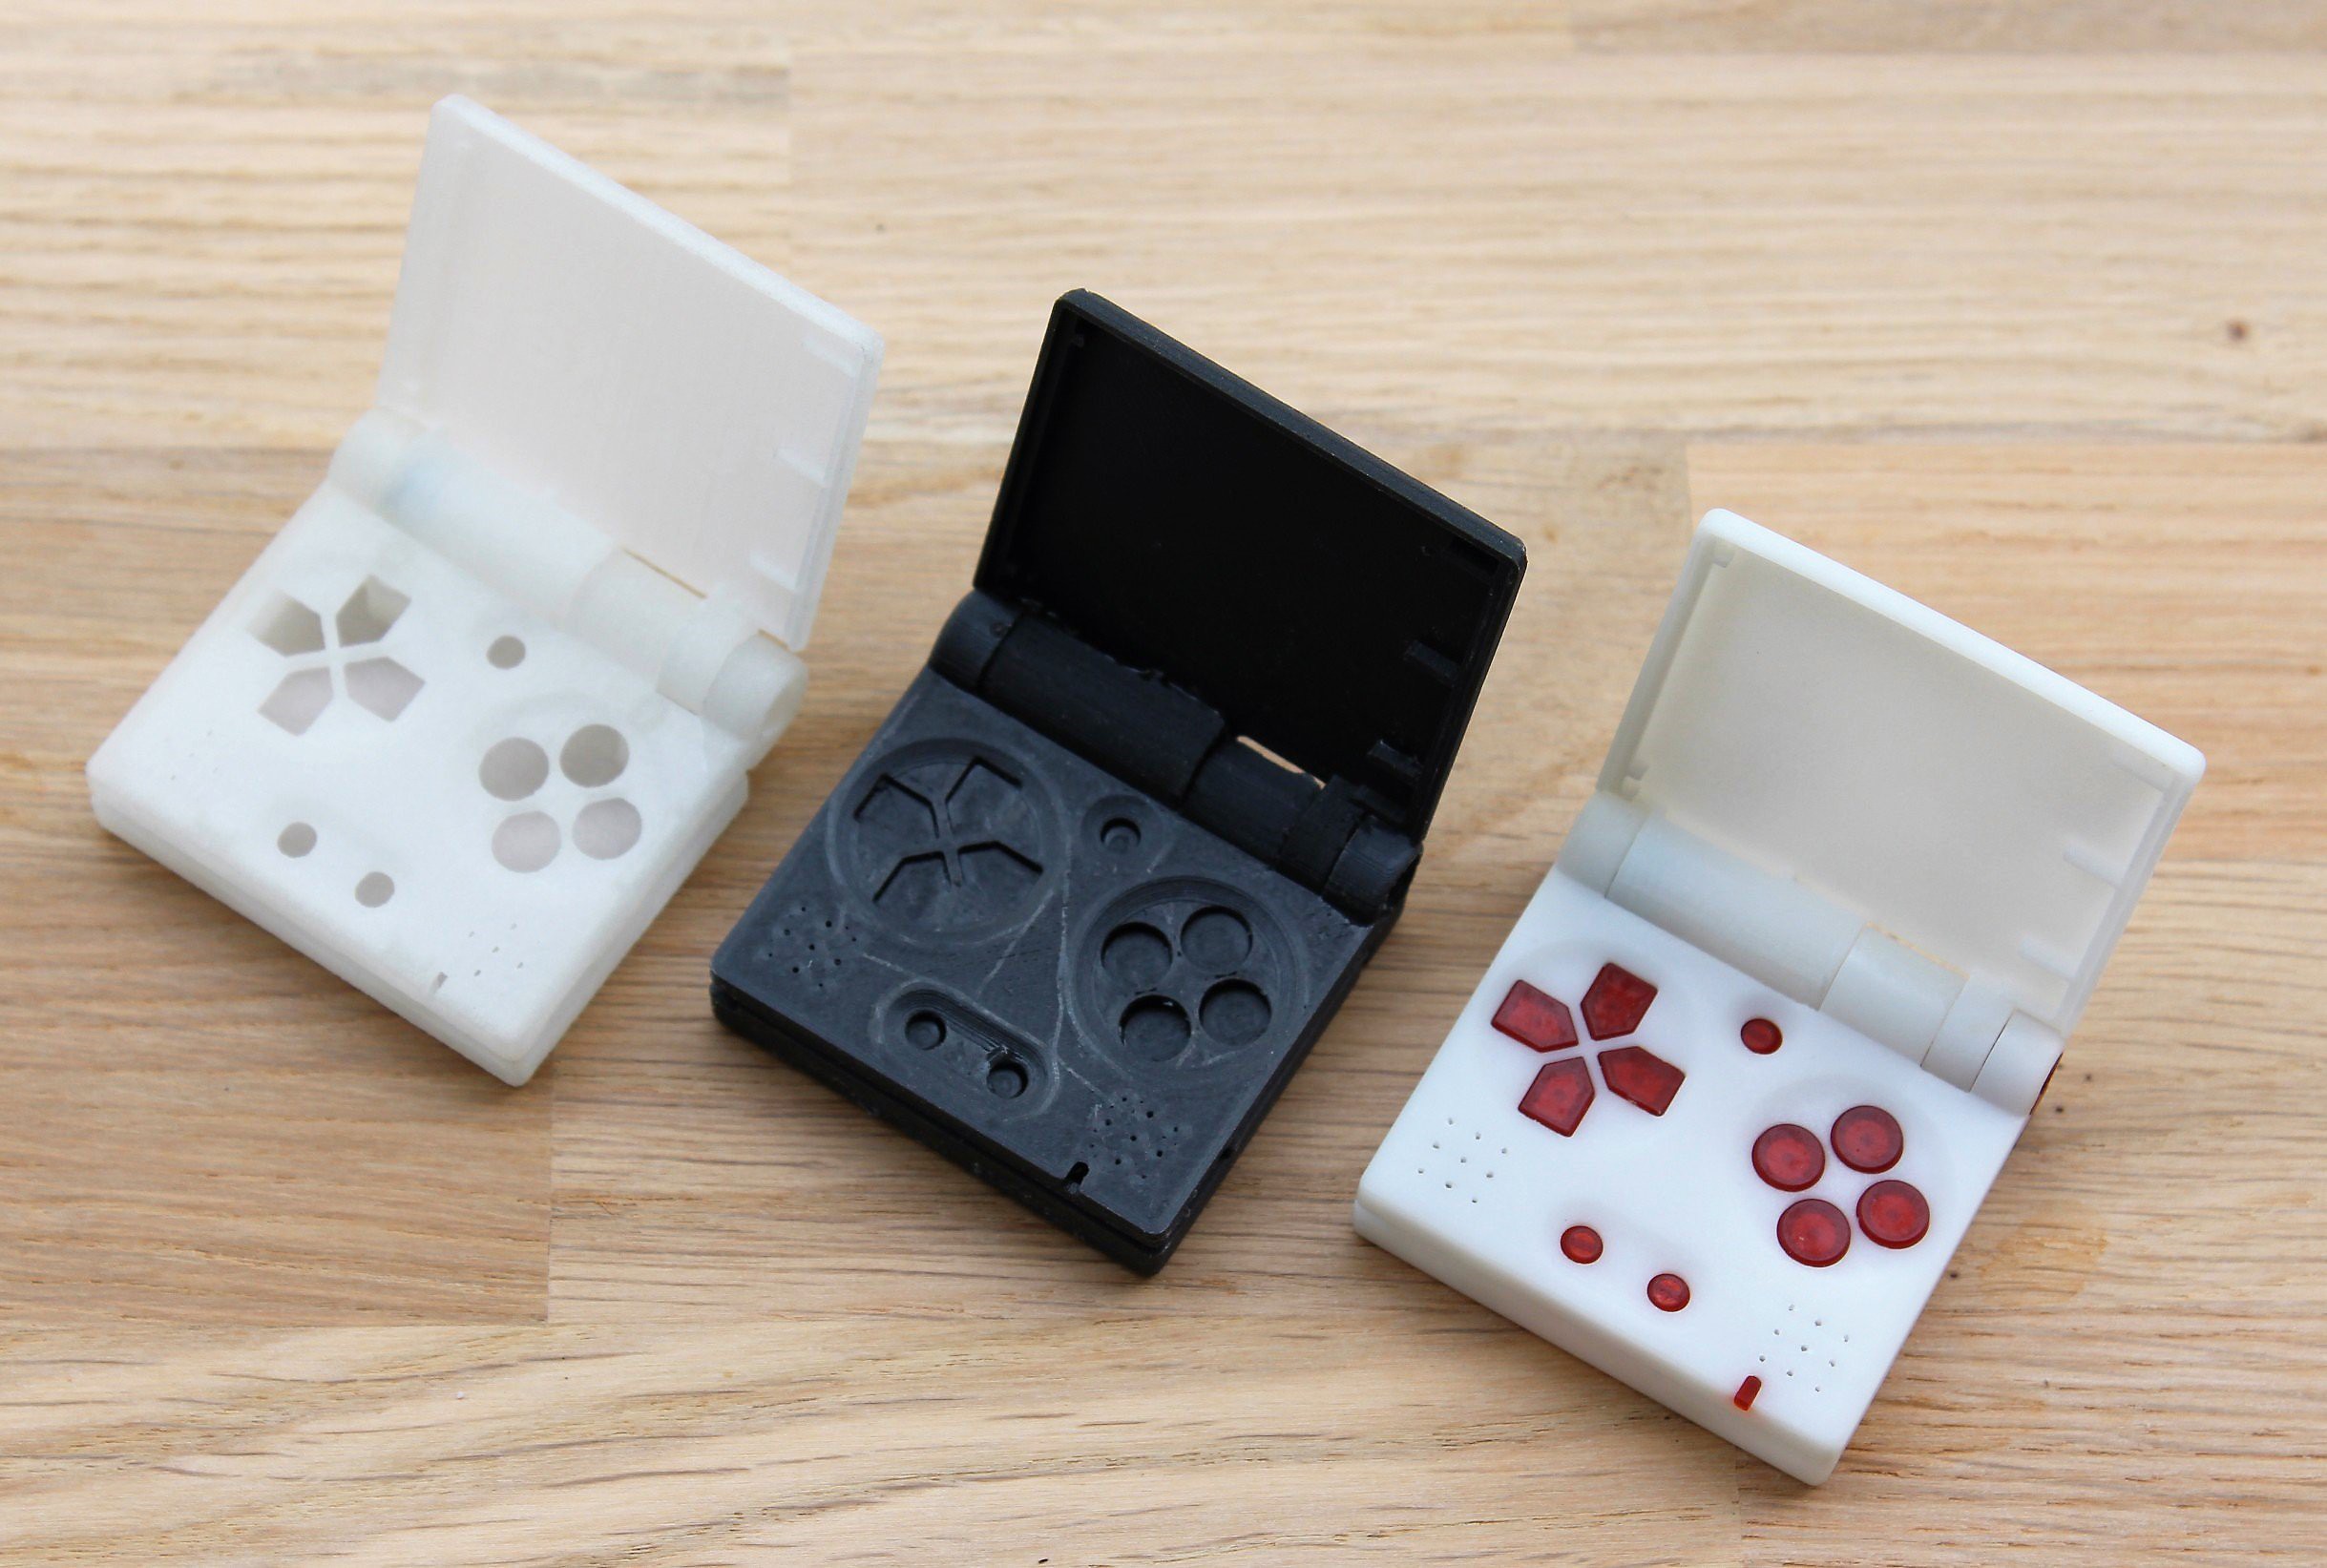
A great exemple of the kind of precision that can be achieved without a sweat by SLA technology would be the tiny plastic rib depicted in the image below.
It needs to be precisely 0.7mm wide and printed over a part that would need support with FDM technology.
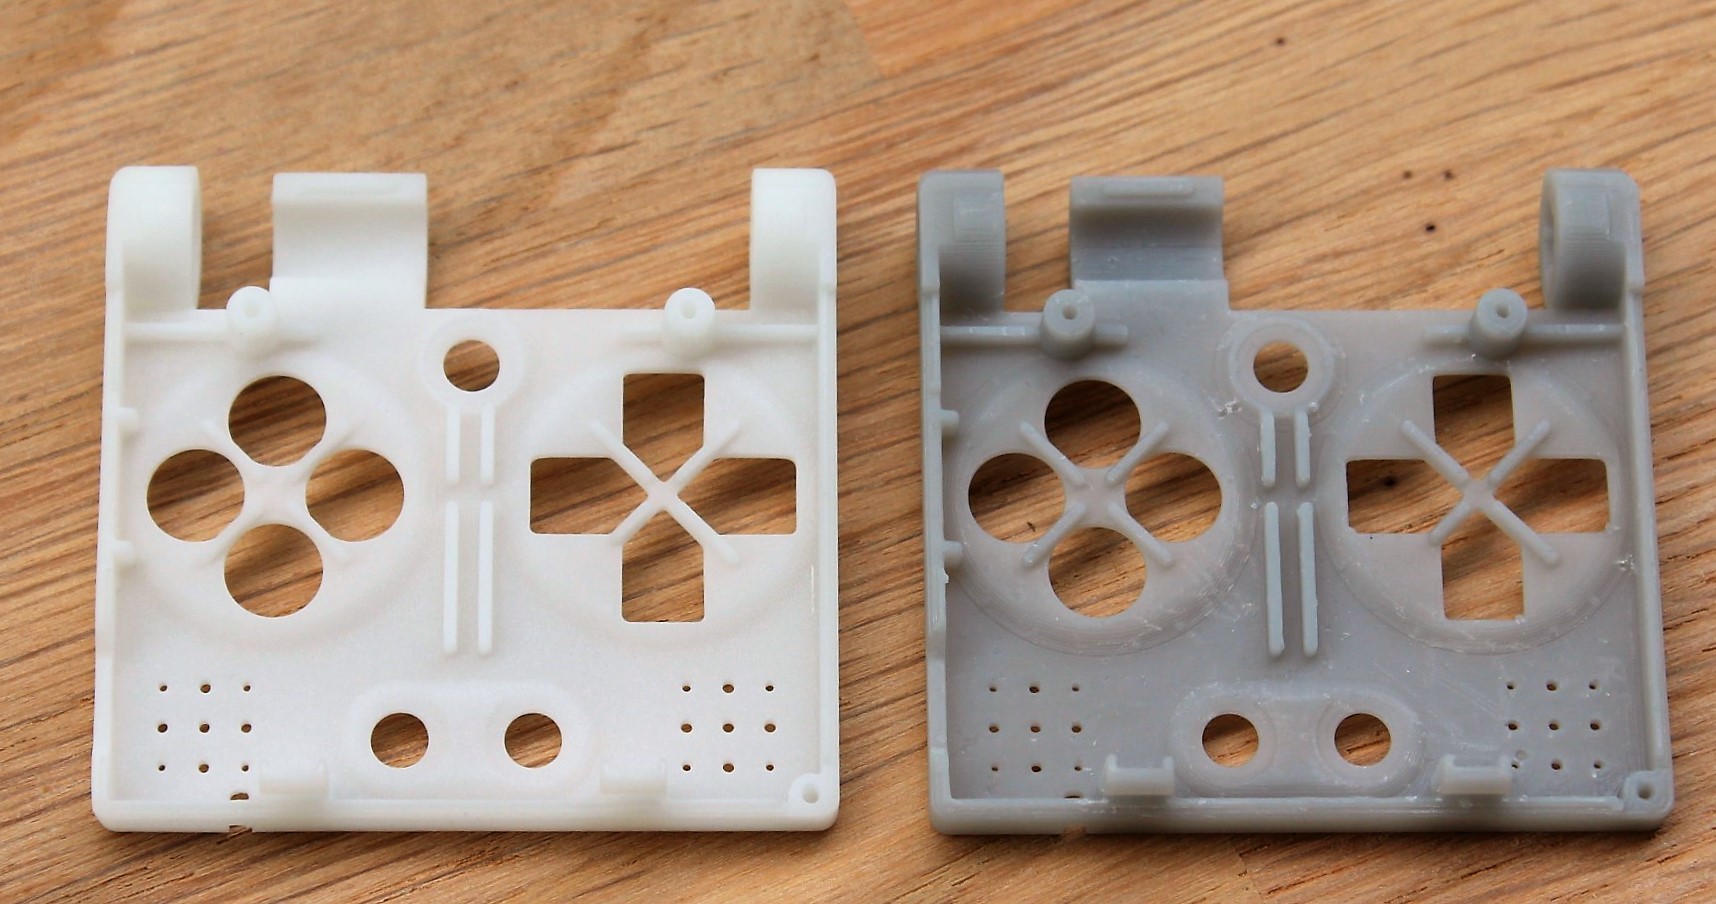
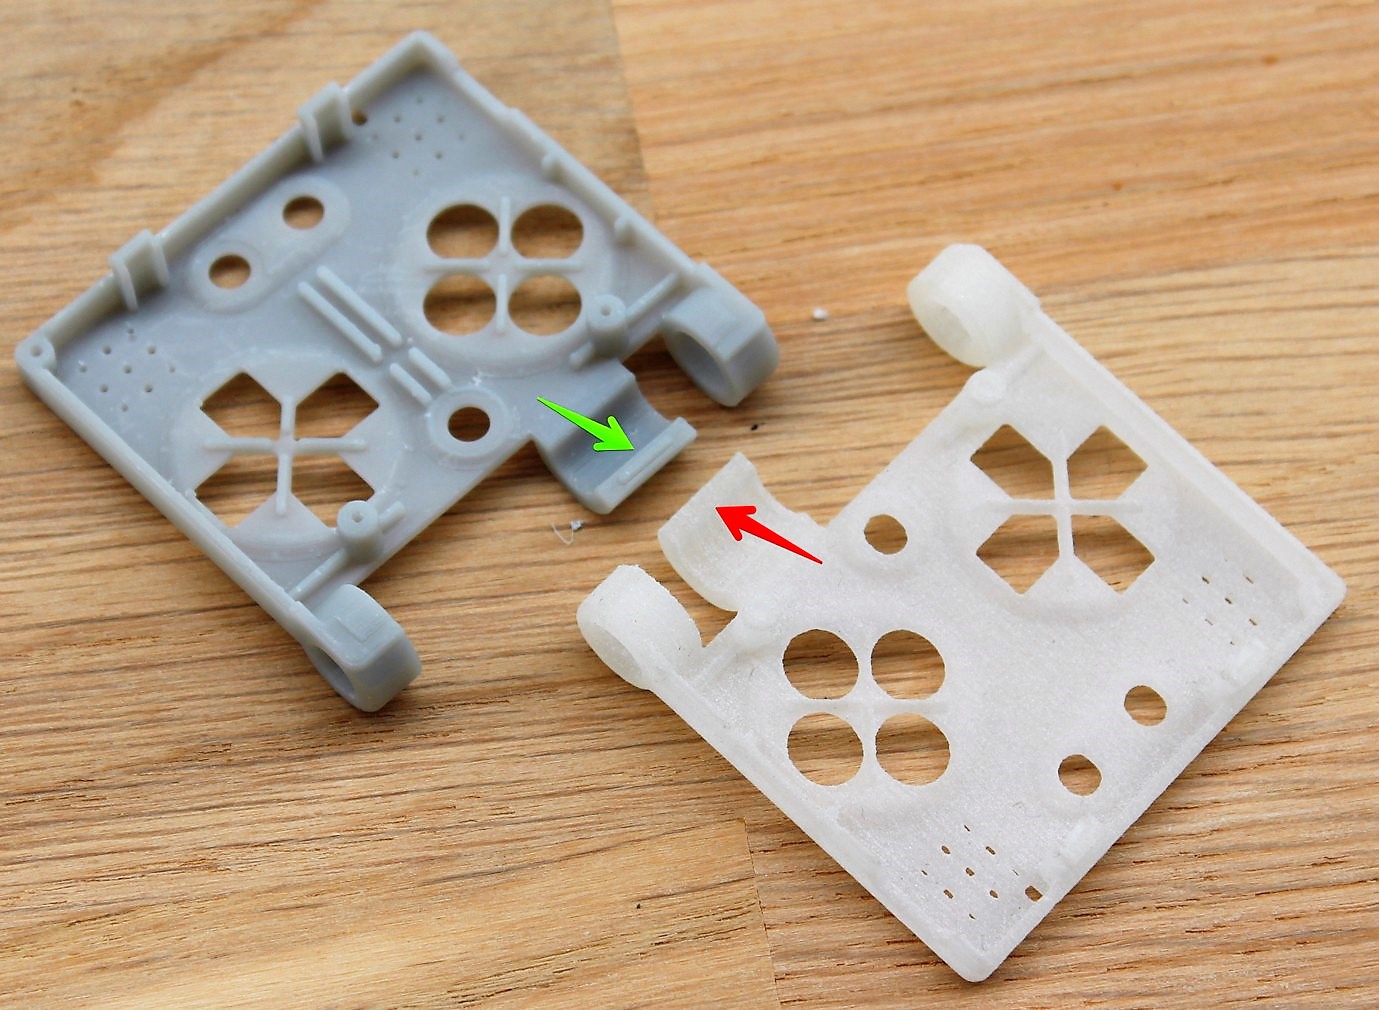
As can be seen in the picture below, only SLA achieves this level of precision (gray casing) with a very neat rib while even SLS (white casing) clearly falls behind.
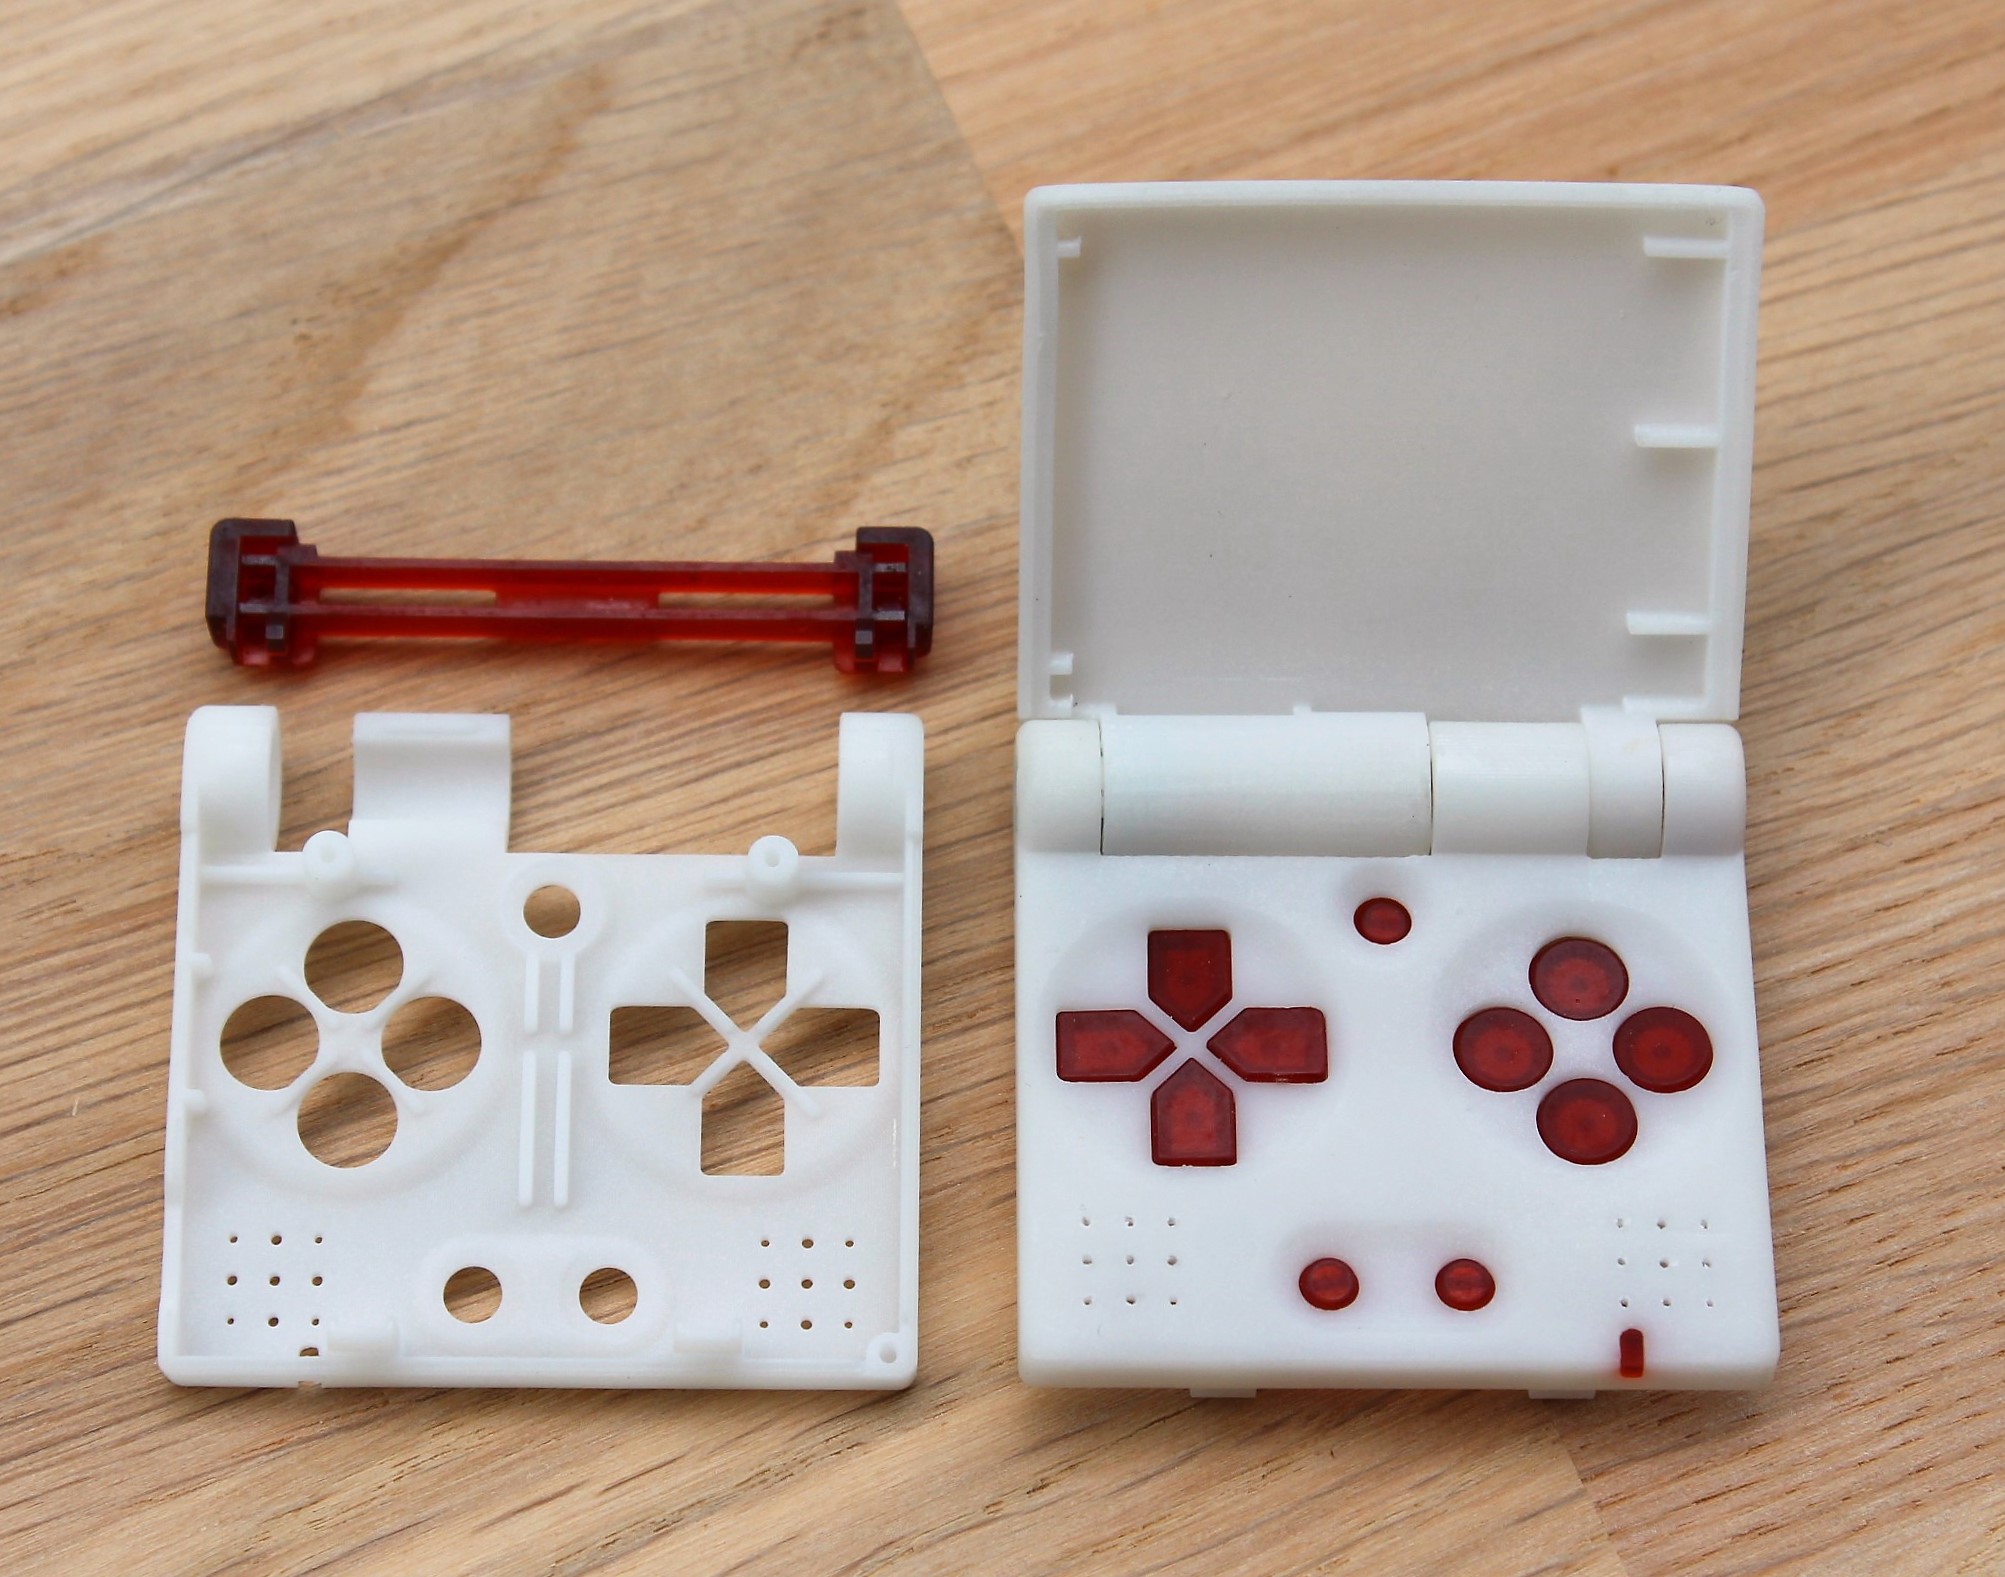
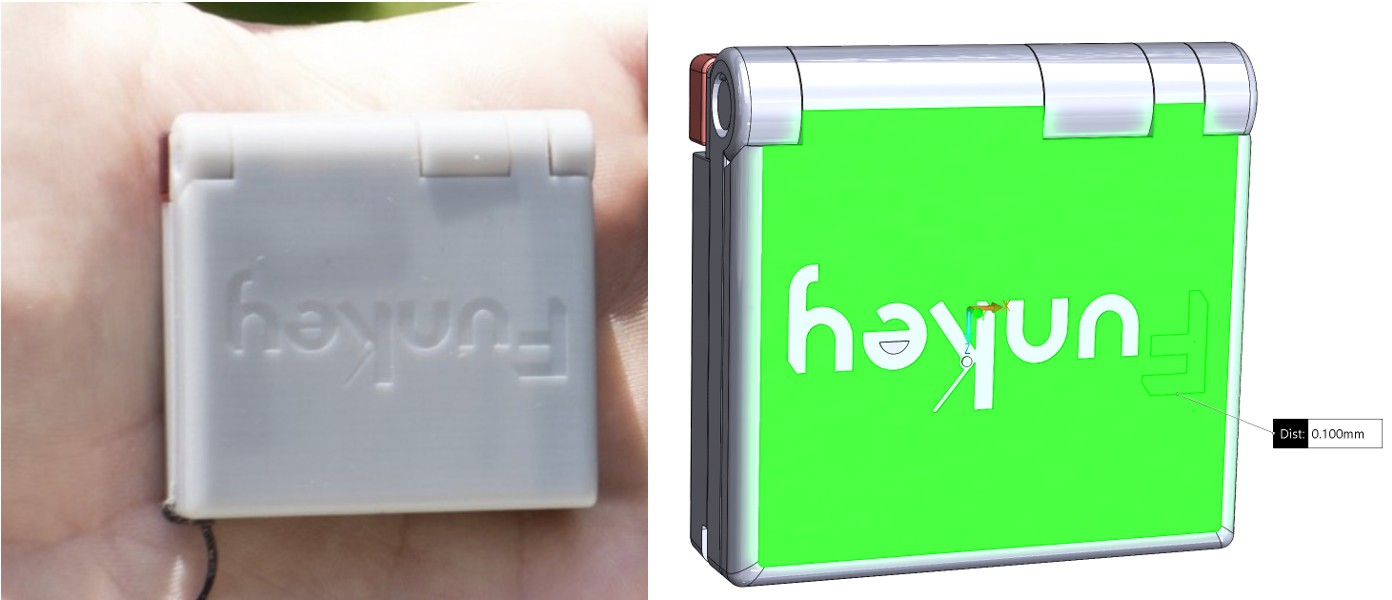
Here is another example of the kind of precision achieved with SLA: the FunKey logo is only extruded 0.1mm in the casing. As you can see it is not only clearly visible but also very neet on the SLA print. This is not the case with other technologies that printed the same STL file.
We noticed our SLA prints were quite fragile however, this material is a bit more breakable and one needs to be careful when assembling the parts, espacially with the screws. They need to be put gently not to break the shanks.
Precision: theory vs reality
Theoritically here is the precision that each technology can achive in average:
- FDM: ± 0,15 % (lower limit with standard nozzle at ± 0,2 mm), layer height: 0.05 to 0.3mm
- SLS: ± 0,3 % (lower limit ± 0,3 mm) / layer height: 0.12mm
- SLA: ± 0,2 % (lower limit ± 0,2 mm) / layer height: 0,05 to 0,2 mm
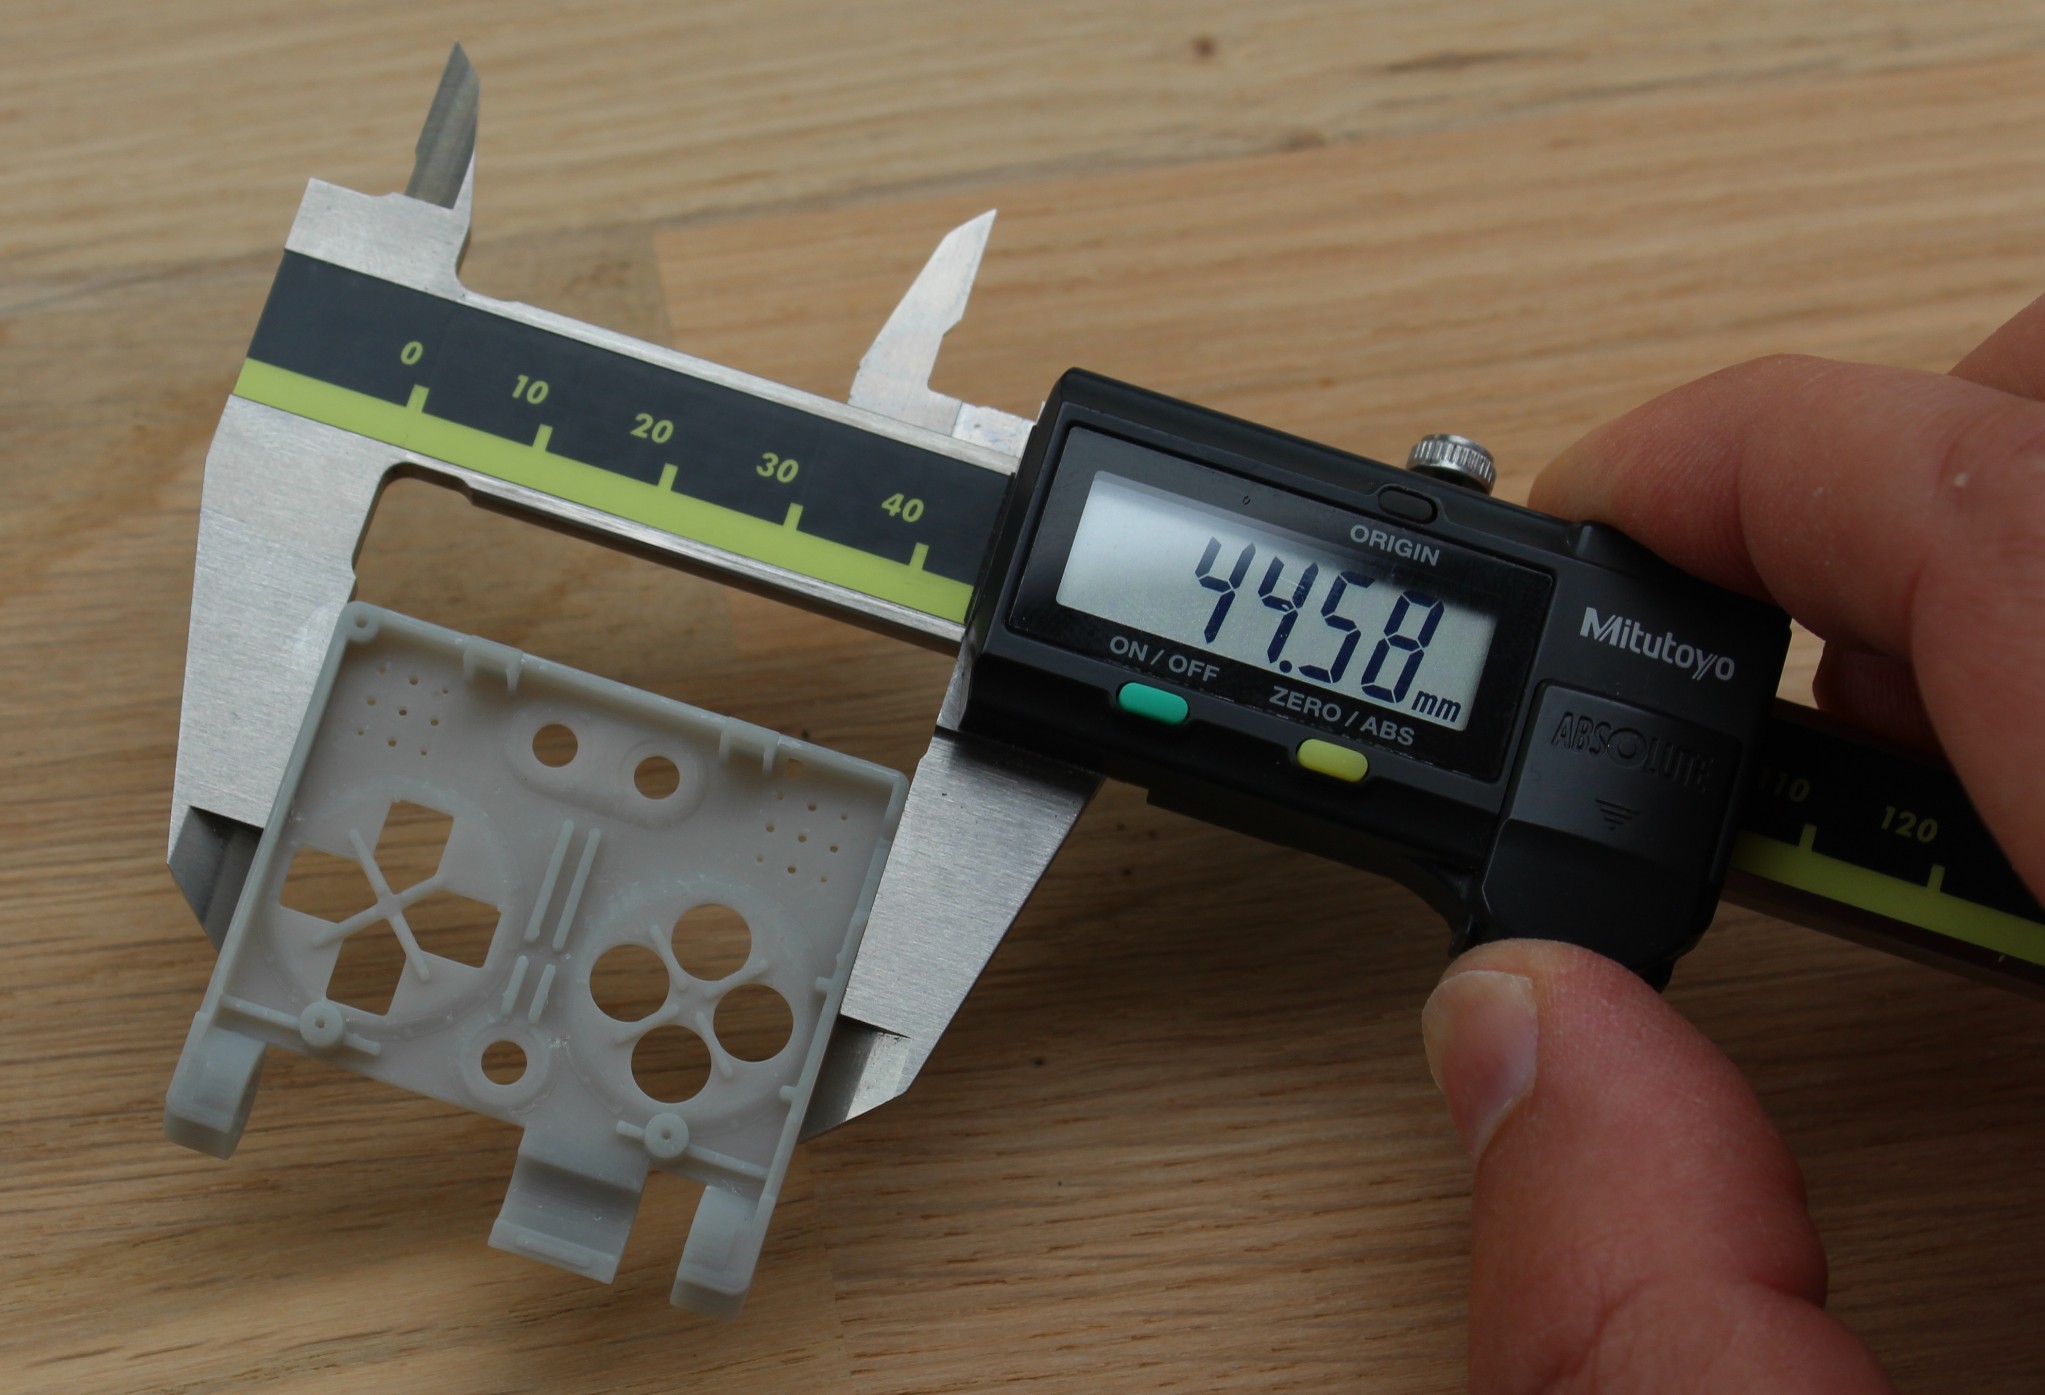
Below can be seen different measurements of the casing's width (theoritically 44,3mm)
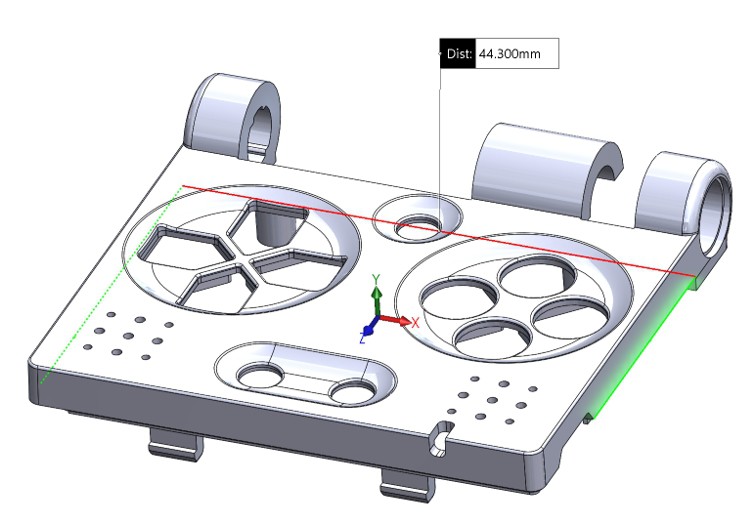
FDM :

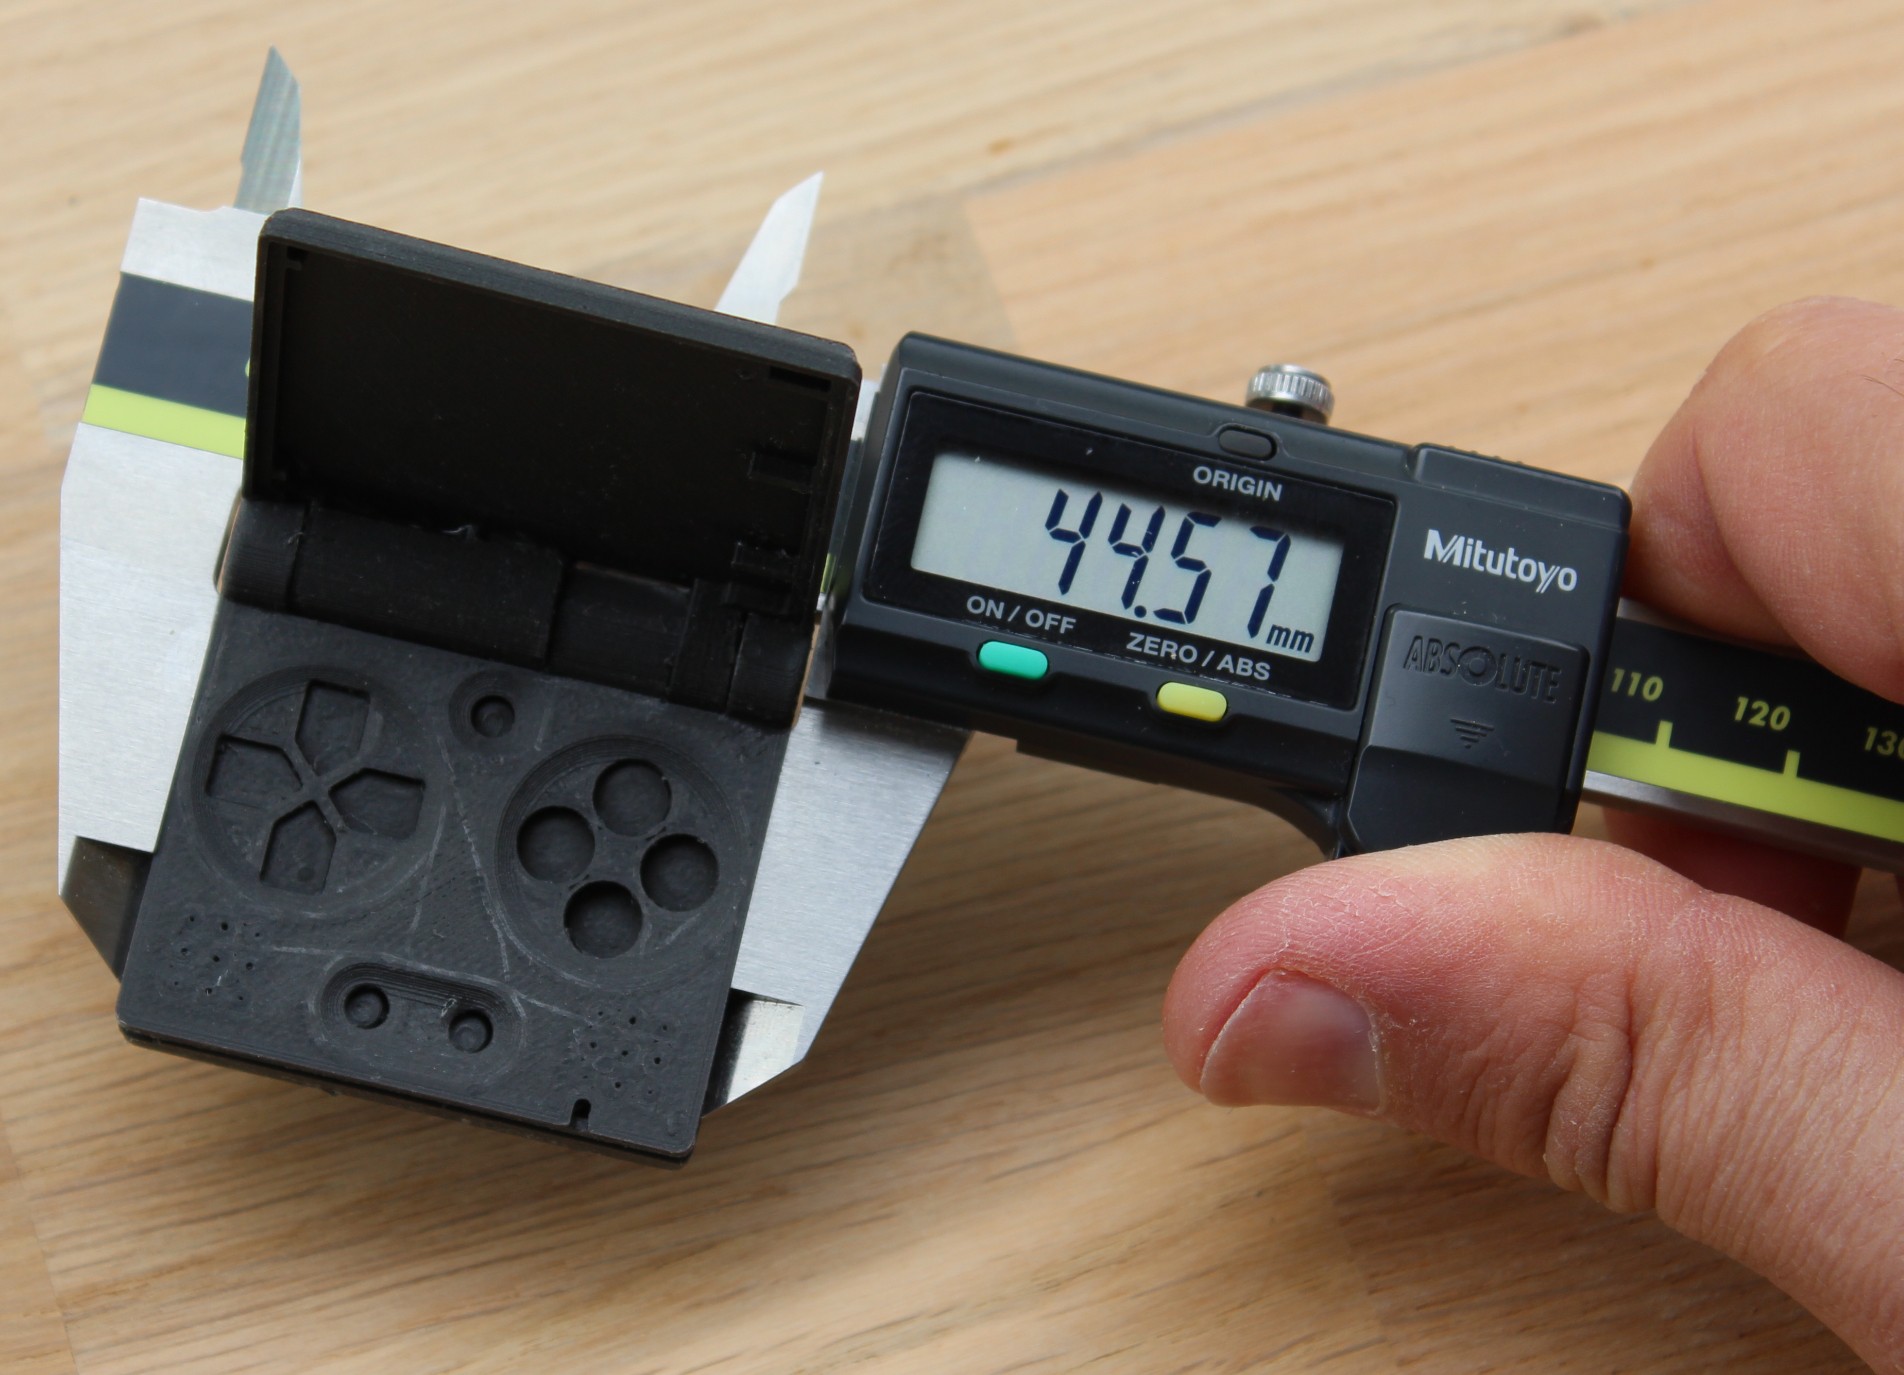
SLS :
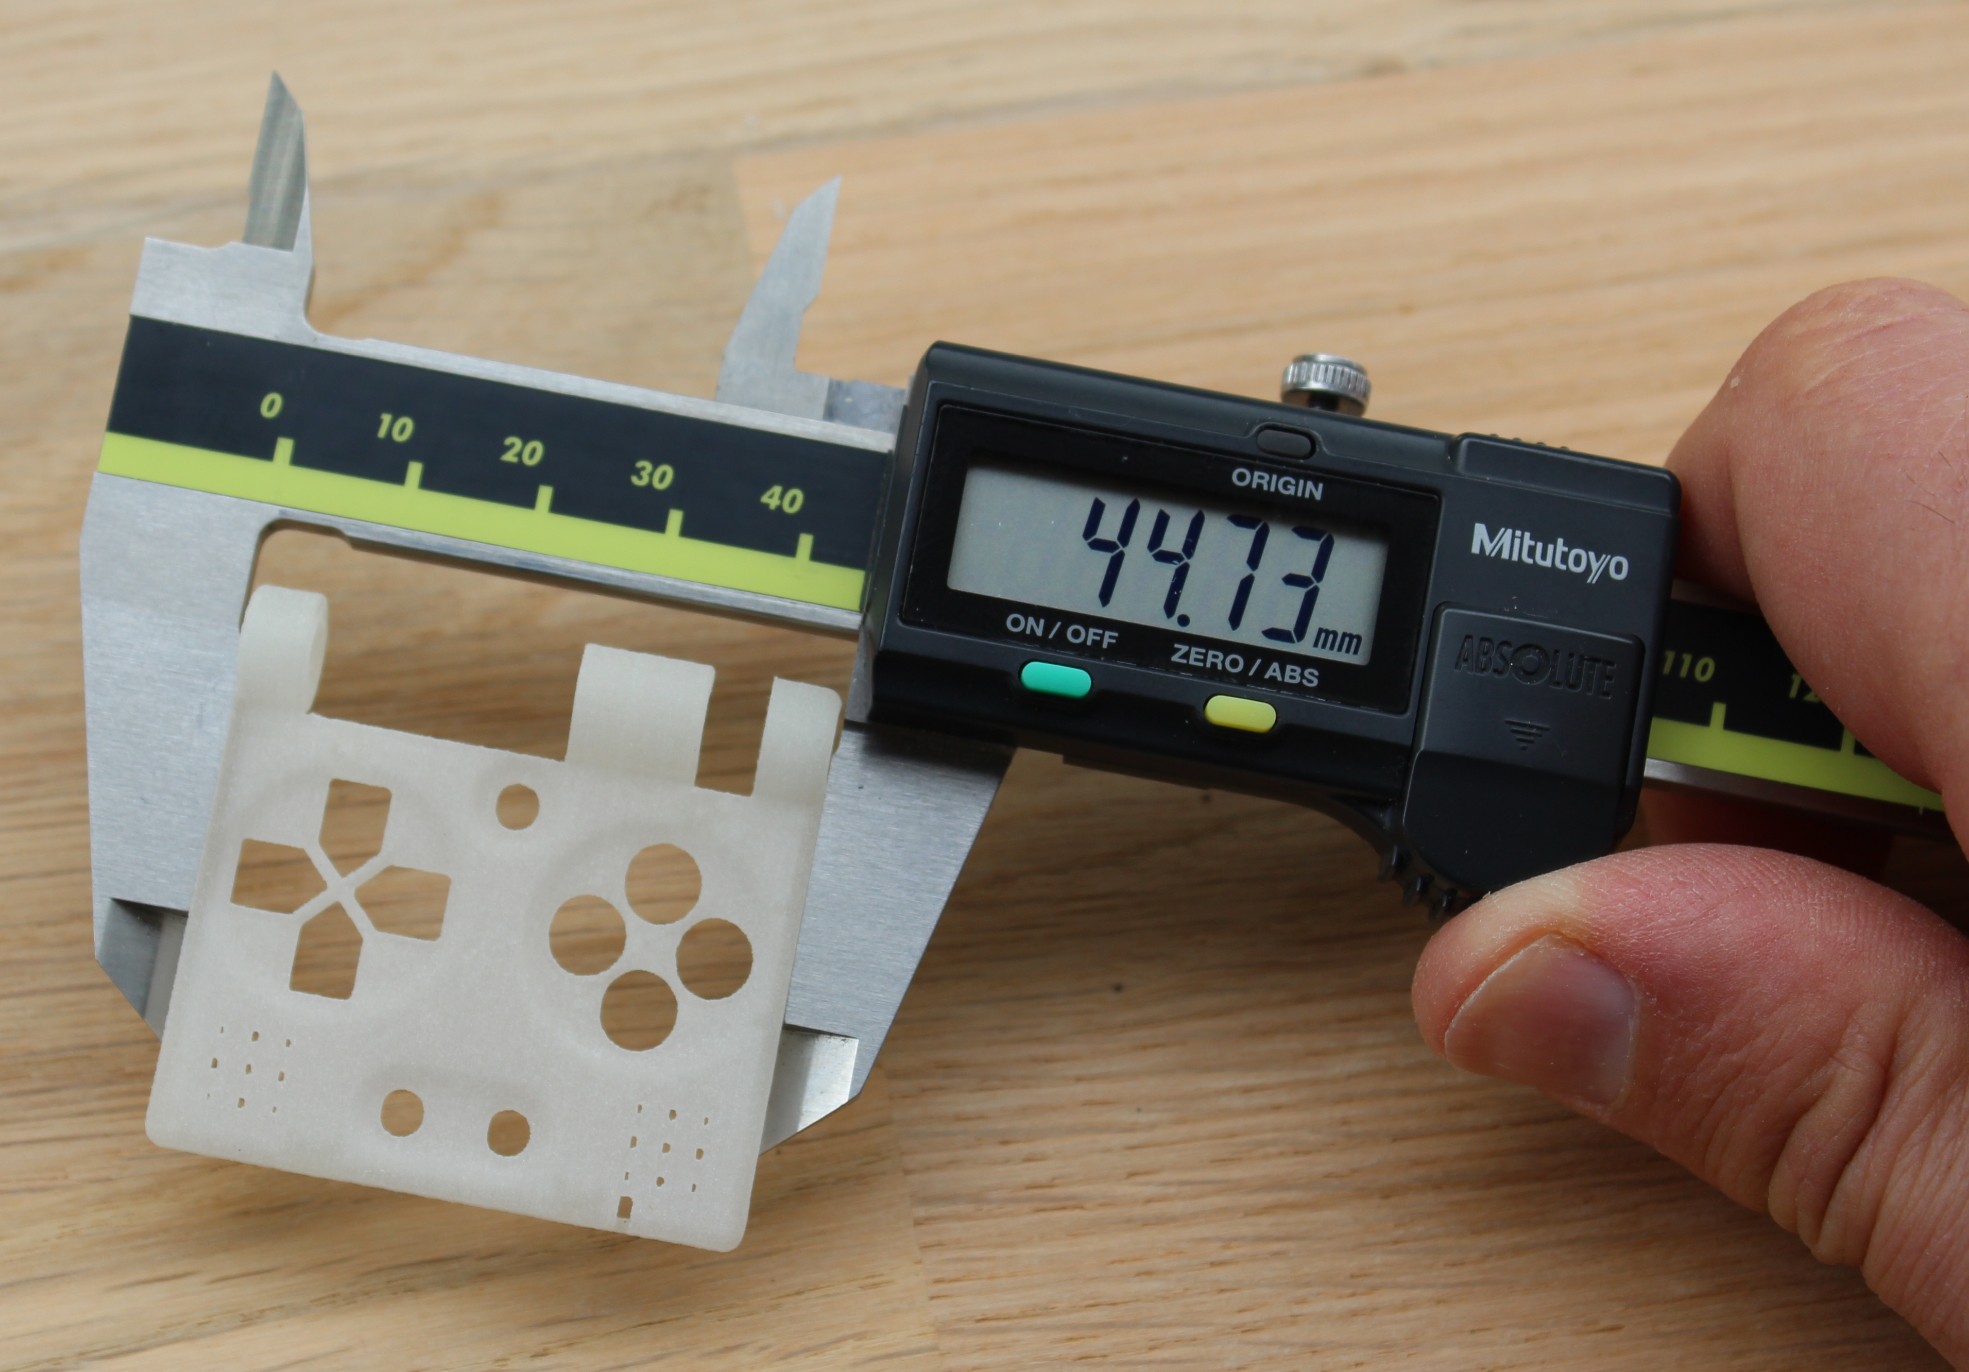
SLA :
Globally all three technologies are decent, it is the level of details that lacks for SLS and especially FDM compared to SLA.
Conclusion
This log does not pretend to be an extended research on 3D printing technologies but merely an attempt at finding the one best suited for trying out our prototype before production. Keeping this in mind we might not have set the very best parameters for FDM prints and they might be greatly improved, but our conclusion would be that in order to achieve the level of details FunKey needs, SLA technology is simply one step further regarding accuracy and surface finish.
We encourage anyone however to print Funkey with their own setups and tell us about the results. All the files are available here or on thingiverse and grabcad.
Thanks to the SLA prints we were able to validate our design choices regarding the integration of the electronic components, the new screen with its flex and the strength required to open/close the hinge. It also allowed us to see where our design could be improved, for example by decreasing the led brightness, reducing the logo's size, adding some matter to block the light from the display backlight, ... and some other things that we will detail in a dedicated log.
We are now working on fixing these small issues and printing new SLA versions to validate them and then be ready for injection molding (probably in ABS). We intend to show in a future log the design rules that were applied to conceive FunKey's plastic parts for injection molding (Draft angle, injector pin, injection gate, cavity, core…).
Discussions
Become a Hackaday.io Member
Create an account to leave a comment. Already have an account? Log In.
Excellent write-up!
Are you sure? yes | no
Thank you!
Are you sure? yes | no