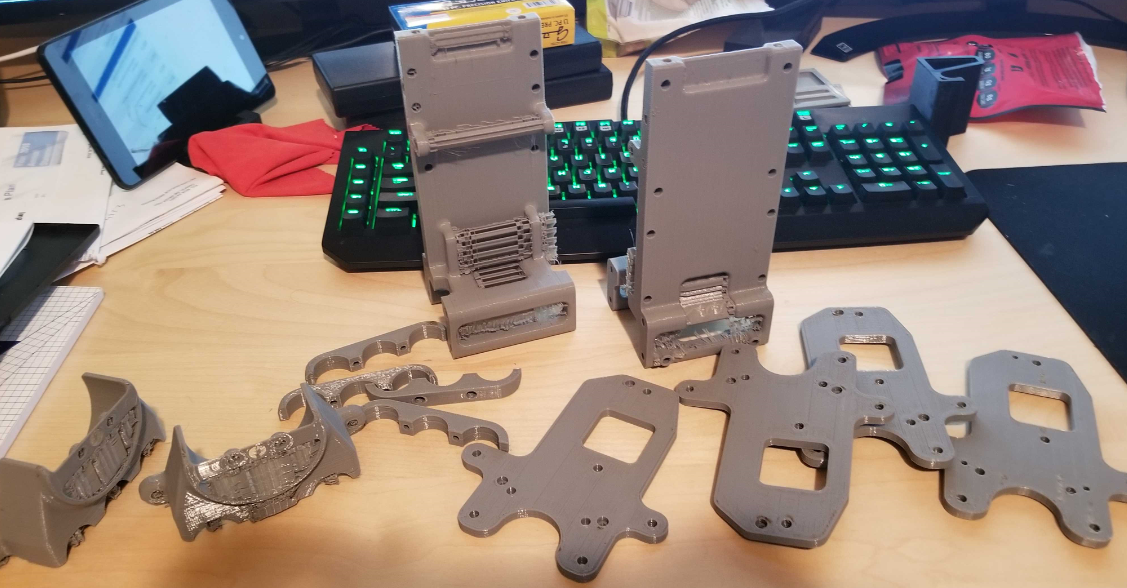
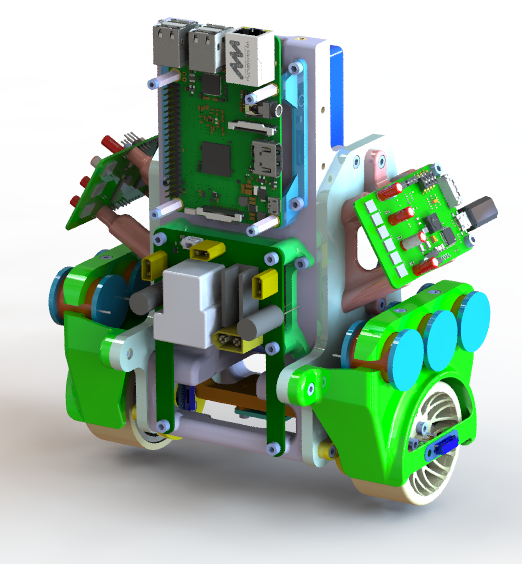
Close

New Bobble-Bot Chassis - A 3D Printing Story

A project log for Bobble-Bot

Demonstration robot for learning principles of real-time control using Raspberry Pi, RT Linux, and ROS.

jsookJSook 04/28/2019 at 16:450 Comments
BB2s We've spent the past month getting two new chassis built, color coordinated this time. Getting the first robot built, tested, and controllable took quite a while. The BB2 robot was designed, built, assembled, and disassembled more times than a sane person would care to count. After getting the mechanical design nailed down, it was a simple task to 3D print a couple fresh chassis - not.

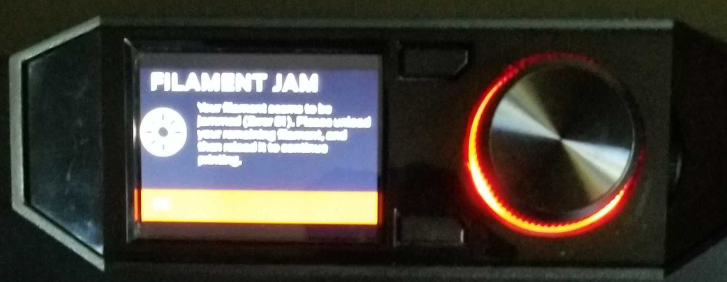
3D Printing has become the method of choice for manufacturing custom components on the cheap. I'm sure many of you have some experience 3D printing and probably own your own machines. Anyone that owns an entry level 3D printer quickly learns their temperament. Hobby level 3D printing technology has changed the world, allowing an ambitious soul to quickly turn their ideas into reality. When the machine is working, the user is blessed with the ability to manufacture virtually any geometry their imagination desires. Maker-heaven forbid the machine is in a bad mood, a 12 hour print can take a week (ask me how I know). 
The construction of BB2 is primarily based on 3D printing. A single bot takes approximately 24 hours of print time. With a few kilos of PLA in hand I started the printing process. Our Makerbot was having none of it. Constant under temperature conditions, filament jams, missed lines, and fan speed errors it would take a few weeks to get the issues under control.
The Makerbot Replicator+ used to manufacture the bots does have several hundred hours on it, turns out it was time for a significant overhaul. Adjusting the belt tensions helped with missing lines of parts, but didn't entirely solve the issues. To combat the under temperature issue I disabled the PLA cooling fan (relax, not the extruder cooling fan). The extruder was able to hold 215C, but a side-effect is that the parts were extremely stringy with poor surface finishes. Opening and cleaning the extruder helped with filament jams but didn't stop them completely. Another issue I noticed but wasn't able to easily solve was a failure of the Smart Extruder+'s proximity sensor. After wasting far too much time messing with the extruder I traded $200 to Amazon for a replacement. $200 well spent, heater problems were solved, surface finishes improved, overall reliability of the machine was back to something acceptable. I suspect the root cause of the extruder failure is a defective heating element. Before the machine changed it's mind back we printed around the clock until all the parts were completed. 
I spent another day post processing the parts, cleaning support material away from the larger parts and installing heat-set threaded inserts. Surprisingly, almost all the parts bolted right up save for a few issues with motor fitment. We're installing the electronics on the bots now, standby for another progress update! Coordinated bobbling coming soon.

Discussions