 deʃhipu
Over the weekend we were running some workshops using the #PewPew Standalone, and I brought the version 4 prototype along to show it to people. I carried it both in my pockets and in a box full of tools, and then it went through a lot of hands, including a couple of kids. This is a great sample of the kind of handling I expect from this device, so it was a nice wear-and-tear test. Unfortunately, the results are not very good.
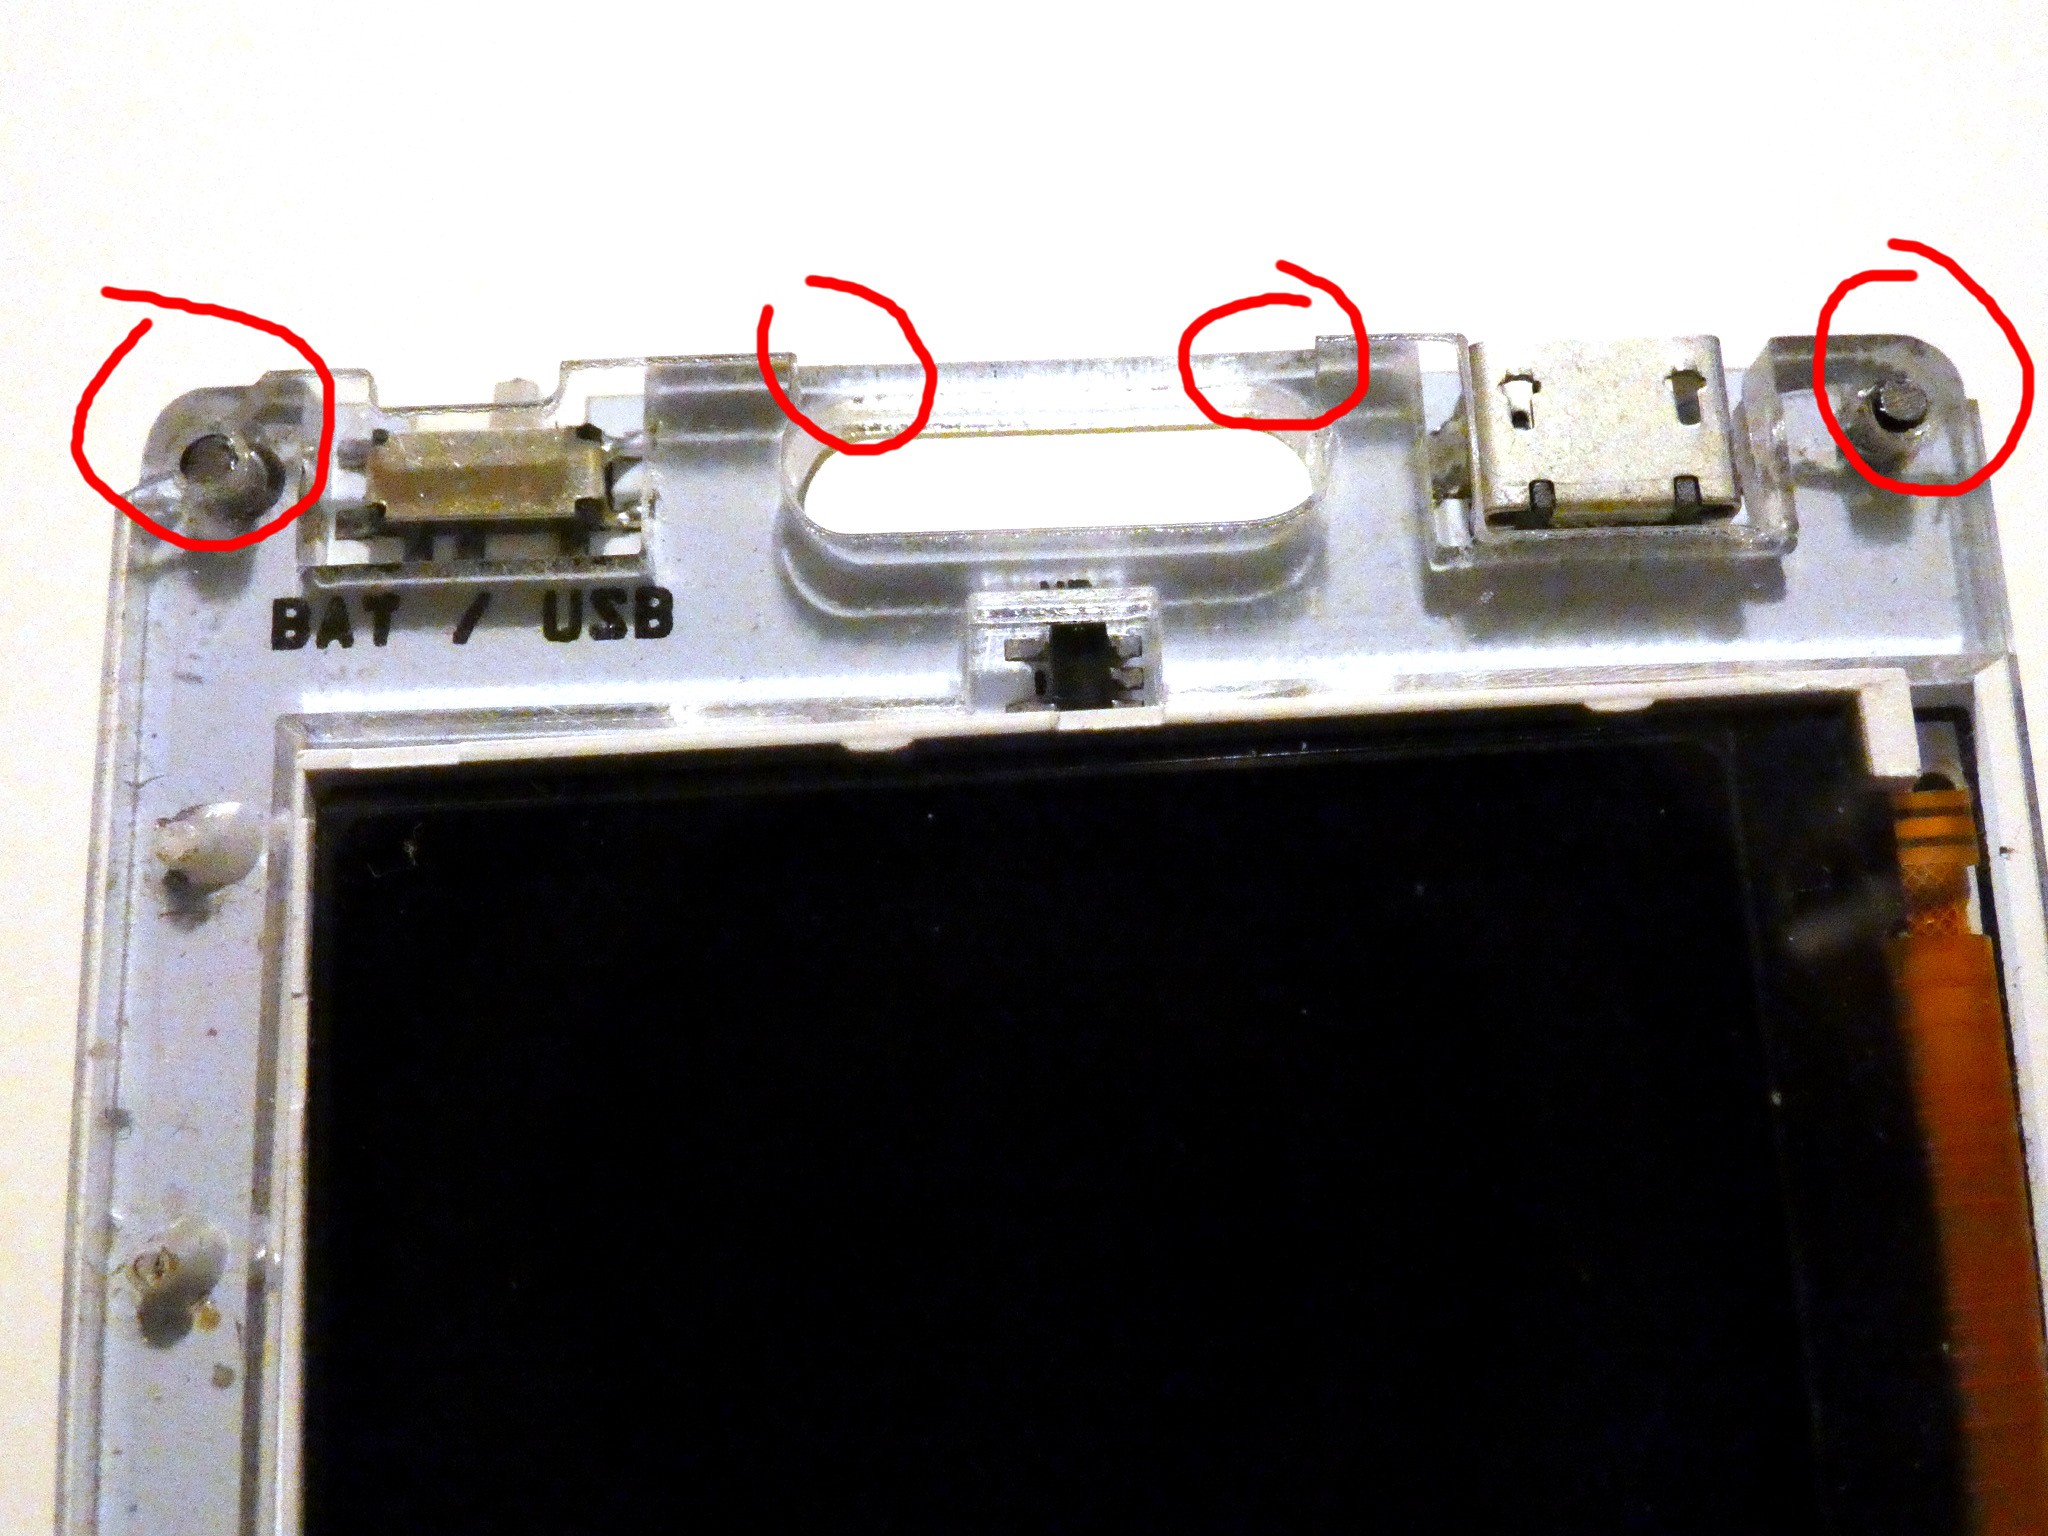
The 1mm thick acrylic cover is certainly a weak point. The two top corners broke away, and the two bottom ones are already cracked and ready to break as well. Also, the bar on top of the lanyard hole broke off.
I could move the holes further down and maybe a bit towards the center, to have more material there, but I think the whole idea of holding down a 1mm acrylic sheet with self-tapping screws like this is flawed. The top bar is not a problem — I can remove it completely from the top layer. But I think I need to come up with a better way of holding the two layers together (and then have the screws only hold the middle layer, which is 2.5mm and shows no signs of cracking).
Glue is an obvious option, of course, but I'm afraid it could work badly with the fact that the top plate is transparent, resulting in a surface with visible bubbles and/or clouding, which wouldn't be too nice to look at. A particularly interesting option would be to use an acrylic with pre-applied adhesive tape on it — also because then the tape could give me an additional 0.1mm of thickness that I need for the USB port.
Another option would be to forget the laser-cutting, and instead go for injection-molded case. I could then have the whole thing in one piece, with the exact dimensions I need, with proper transparency, and probably much cheaper in bulk as well. Also, rounded edges. Also, I could probably even incorporate the battery holder in the case itself, which would get rid of a tricky assembly step. The problem is that it would be quite expensive in small quantities, as the most expensive part is the mold itself.
Yet another option would be to use thicker top layer, and simply find buttons that would work with it better. I might go on another button-buying spree and see if I find something that would have a body that fits in that 2.5mm space, but has the button itself sticking more than the 2mm of the top layer.
Discussions
Become a Hackaday.io Member
Create an account to leave a comment. Already have an account? Log In.
What about just turning the screws around and using nuts on the back? I imagine the damage is mostly because of the radial force of the self-tapping screw. With countersunk heads, the front face could still be flat. (That again creates some radial force, but maybe little enough if you don’t tighten them too much.) The nuts would stick out on the back, but the battery holder already does that anyway. I wonder if there are solderable nuts that could be put on the front of the PCB…
I’m not thrilled about the idea of injection molding, even if you get enough volume to make the price viable, because it would make it much harder for individuals to produce their own version, moving the thing away from “open-source project” towards “commercial product”.
Are you sure? yes | no
The acrylic cracked when the device was being used/transported, and not when the screws were being inserted, which suggests that it's the sideways forces that were applied to the case itself (shifting the layers between them) that caused the damage. Solderable nuts do exist (I did that research for my micro:bit add-ons), and would probably improve the overall mechanical design, but I'm not convinced they would fix this particular issue. Moving the holes away from the edges seems like the safest bet here, but I'd like to explore other options as well.
I'm not thrilled with injection-molding myself, especially since I didn't even get into 3D-printing properly yet, and I only have very basic skills with 3D-modeling. Plus it's a huge risk. I'm not worried about reproduceability, though, as making it in singles is going to be more expensive than even a relatively small bulk batch anyways. And you can always 3D-print the case as well.
Right now I'm mostly leaning towards using a thicker top layer, and either raising the buttons somehow (I already have an order at OSHPark for tiny little PCBs that would go under the buttons to raise them a bit), or switching to a different kind of buttons that will work better with this design (I have those on order already: https://www.aliexpress.com/item/32864517011.html). Using 3D-printed, laser-cut or injection-molded button caps is an option as well — then I could use those simple metal switches.
Gluing the layers together (possibly with some printed foil in between) is also very tempting, mostly because it would improve the looks. I could have some colors in there, and the front of the device would be completely smooth, apart from the buttons.
As for the open project/commercial product thing, I consider it more in the "open commercial product" category — unlikely to be reproduced by an average person at home, but possible to be cloned and improved by any company that wishes to sell it. I don't have any illusions about people building this themselves.
Are you sure? yes | no