 Karthik Muthineni
Wiring the Hardware
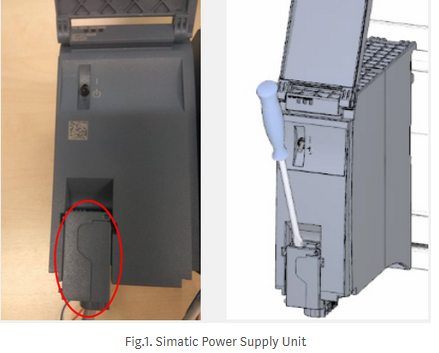
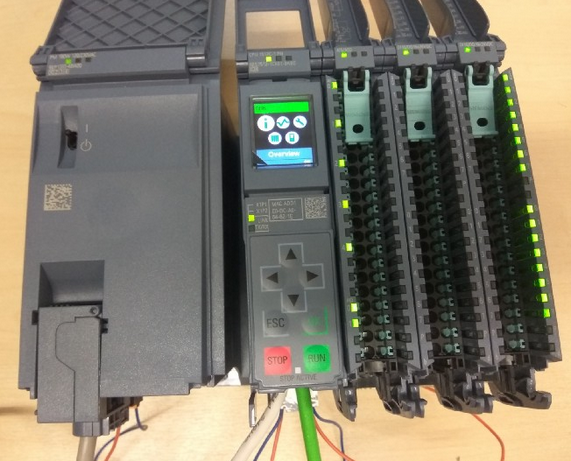
The S7-Controller requires power supply of 24V DC. Simatic PM1507 is used to power up the S7-Controller that converts input 230 V AC to output 24V DC. The power supply consist of small connector for connecting input 230 V AC. The connector has to be removed from the unit using suitable tool as shown in Fig.1.
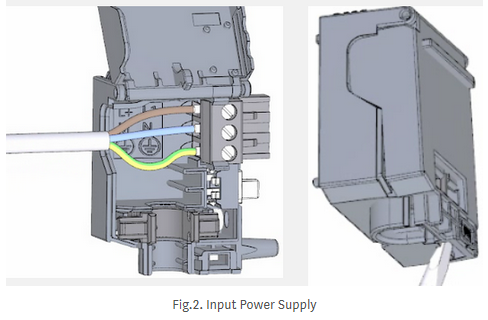
Once the connector has been removed from the unit, open the front cover of connector and connect input AC supply and tighten the screw as shown in Fig.2.
Close the cover and connect the connector to the power supply unit again.
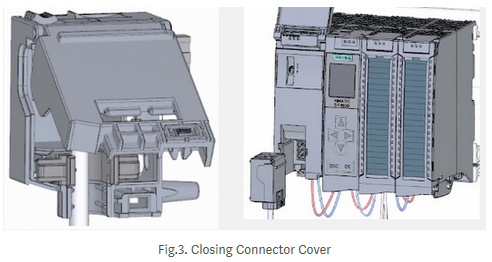
After wiring input AC supply, now connect output 24V DC of power supply unit to S7–1500 Controller as shown in Fig.4.

After completing the wiring, switch on the power supply unit. S7-Controller initializes in STOP Mode.
Configuring CPU1512C-1PN
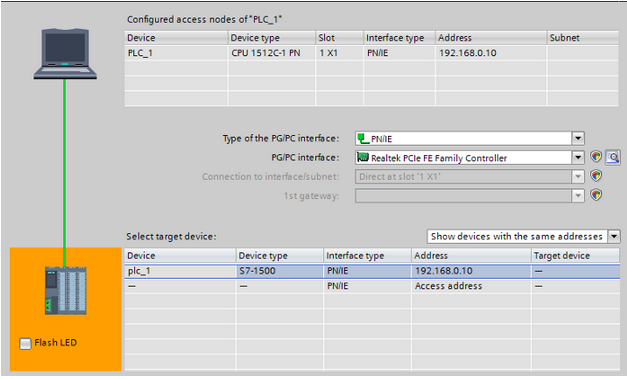
Assign IP address to the CPU by navigating to
Settings -> Select Addresses -> Select Interface X1 -> Select the IP Addresses from menu -> Assign IP Address 192.168.0.10 -> Set subnet mask 255.255.255.0 -> Apply -> OK
Now the interface X1 has assigned with IP Address 192.168.0.10.
Programming using TIA Portal
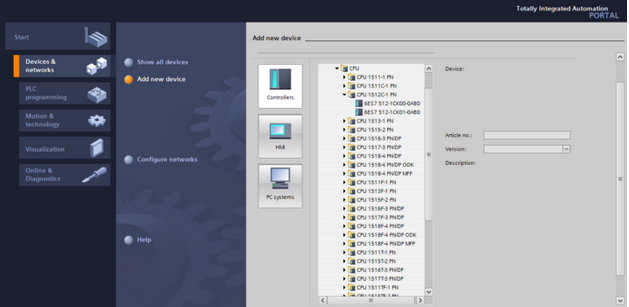
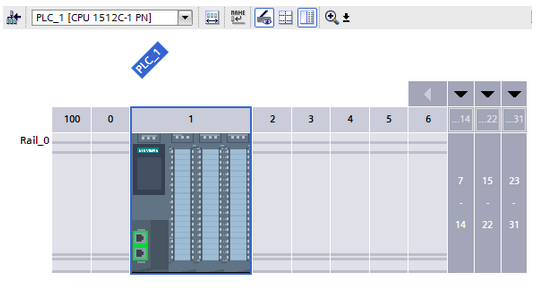
TIA Portal V15.1 is used for programming. Open TIA Portal -> Click Create new project -> Give name to the project -> Click Create -> Click configure a device -> Add new device -> Select S7–1500 -> CPU -> CPU1512C-1PN.
If you are not sure about the version of S7 Controller you are using, then TIA Portal can detect the type of Controller you are using. To do this, connect Ethernet cable to X1 port of Controller and other end to your PC. After choosing add new device, select unspecified CPU. TIA Portal opens with unspecified CPU. Go to, Online in menu -> Hardware Detection -> CPU from network -> Select PN/IE entry as type of PG/PC Interface -> Select PG/PC Interface -> Select CPU from compatible devices -> Click Detect to replace unspecified CPU with your CPU type.
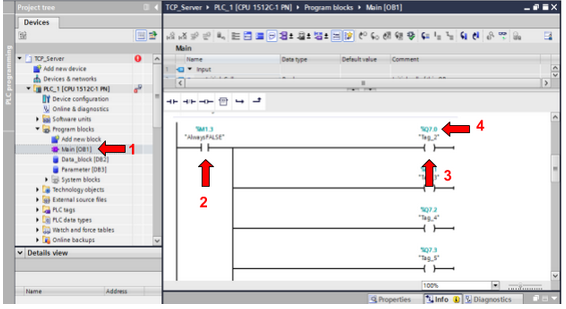
In the project tree,
- Select project blocks and click Organization Block Main [OB1]. Here you
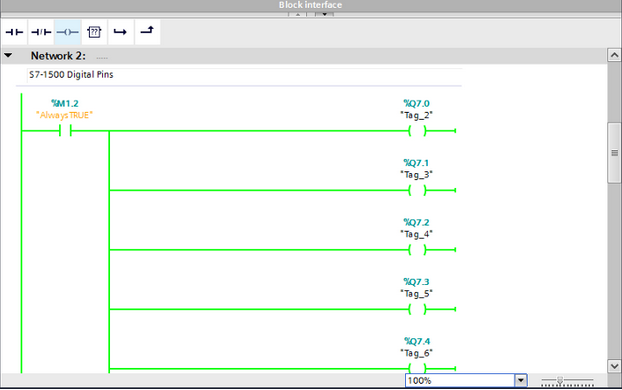
will create circuit to control digital LED'S of Simatic S7-Controller. - Insert Normally Open Contact into Network and assign ALWAYS TRUE Tag.
- Insert Assignment into Network.
- Every digital pin of S7-Controller has a TAG, that particular has to be
assigned to the Assignment in the Network for controlling.
Once the Tags are assigned to the Digital board of S7-Controller, you can view it in the device view.
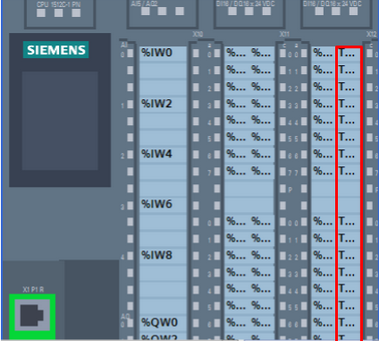
Save the project and compile, after compiling, download the project to S7-Controller. The led's turns ON and you can monitor the status of network in TIA Portal by clicking on Monitor on/off button.
Conclusion
Siemens S7-1500 Controller is the popular industrial controller that can be used for automating your tasks starting from small scale industries to large scale industries.

 catduck
 Andrey V
 Psyrax
 justin.richards