I recently picked this project up in November after a year or so of little to no progress. I'm happy to say that while it's not taking videos yet, I've made some good progress towards that goal. Here I'll list some of the updates I've made and try to throw in some pictures to keep your attention.
Turned the image sensors sideways
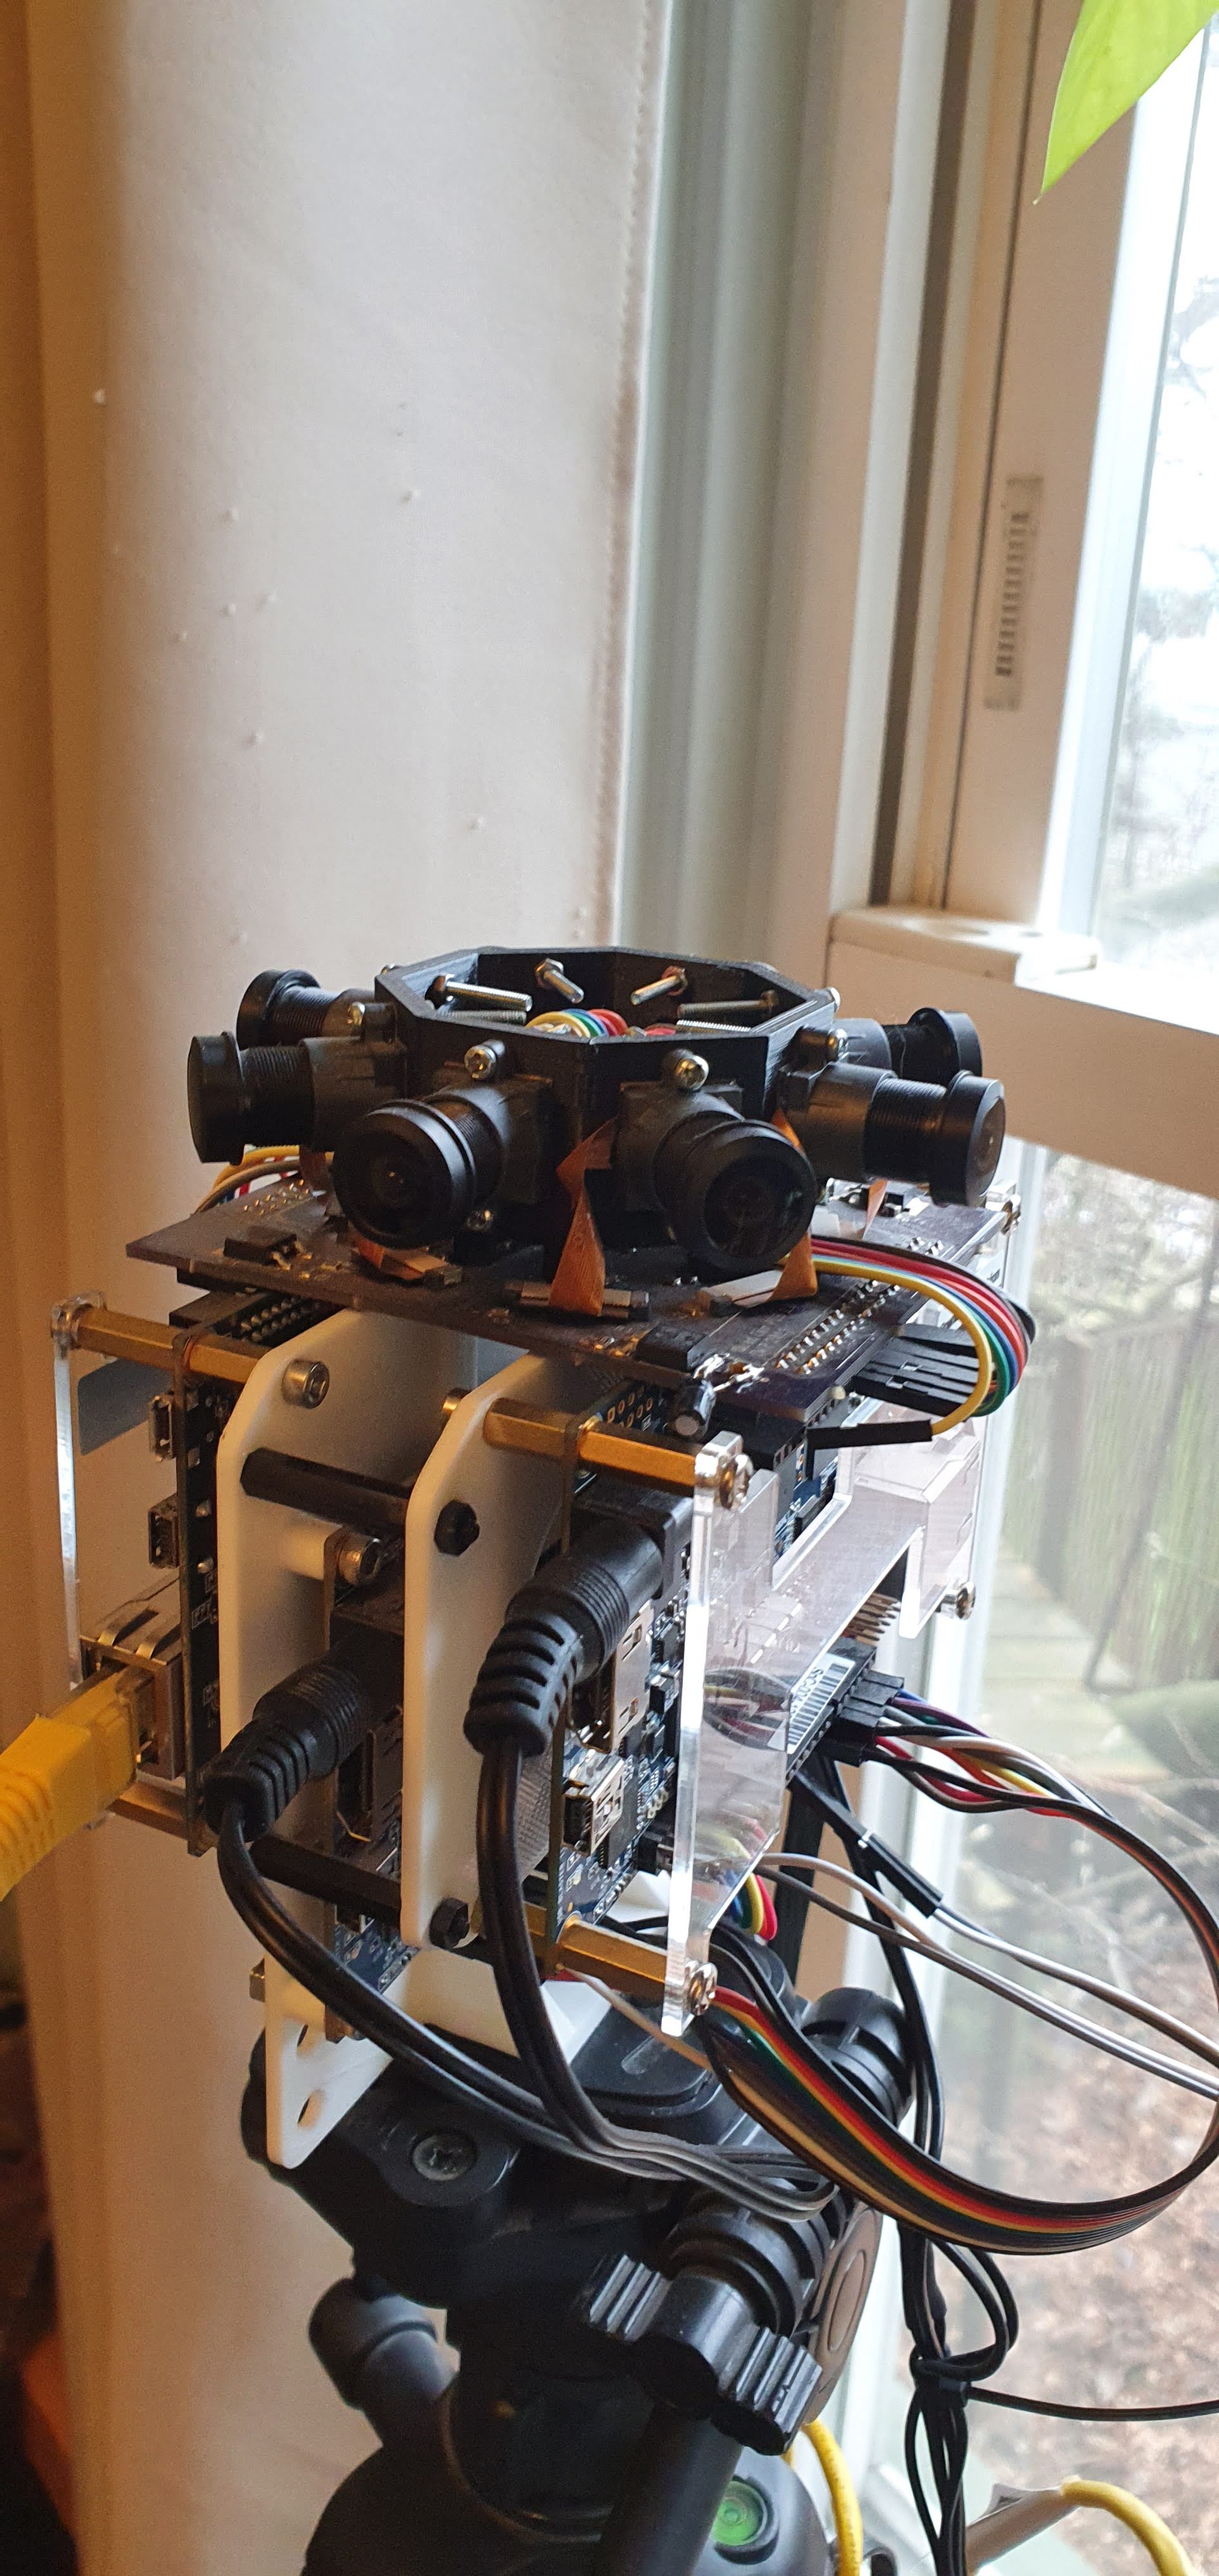
As it turned out the way I originally mounted the AR0330 image sensor modules had them sideways, so the image was longer in the vertical direction than in the horizontal. At first I thought this would be okay, but I quickly realized that with the 1.44mm focal-length lenses I'm using, the image circle is too large so I have less than the required 135 degrees of horizontal FOV if the image sensor is portrait-oriented. To rectify that, I printed a new camera bracket that you can see here. The ribbon cables get a little kinked but luckily none of them have displayed symptoms of reduced connectivity.
Power stuff and PCB fix
Ever since I put together the camera I've noticed an odd issue where images from some of the image sensors would have very low dynamic range, or have rolling stripes of darkness/lightness:
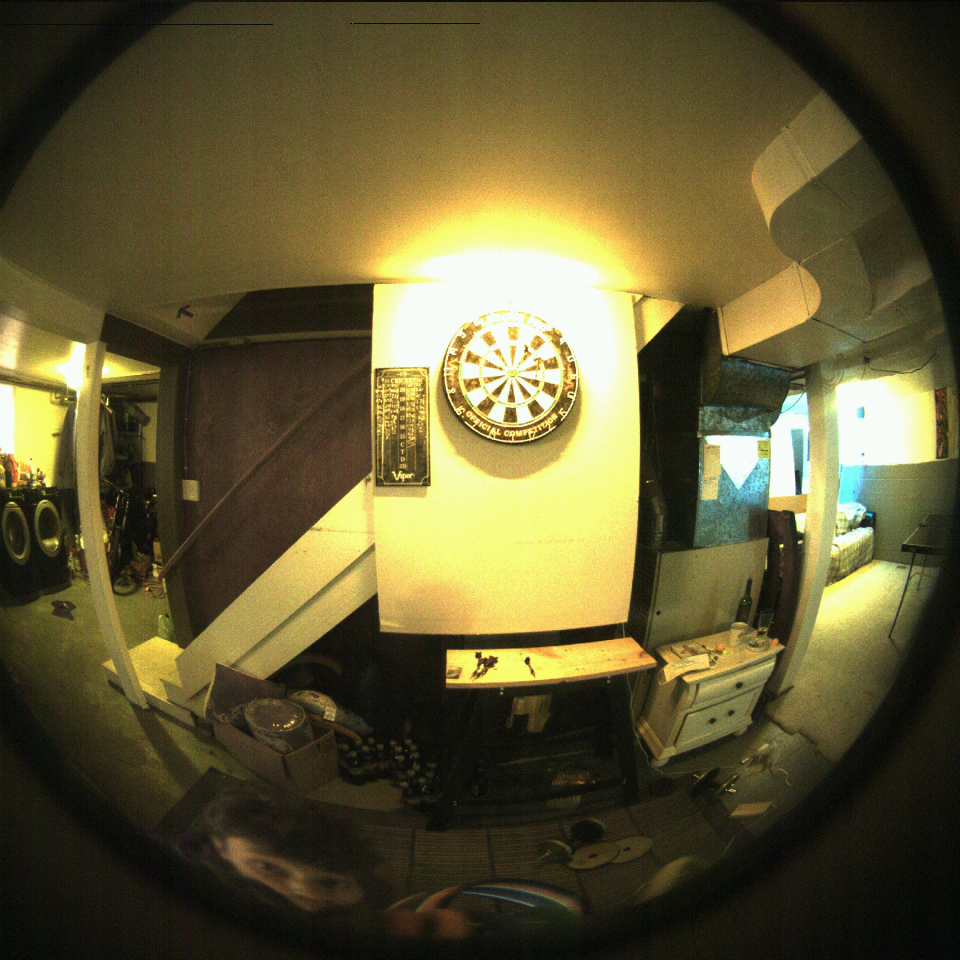
Above: Good one. Below: bad one.
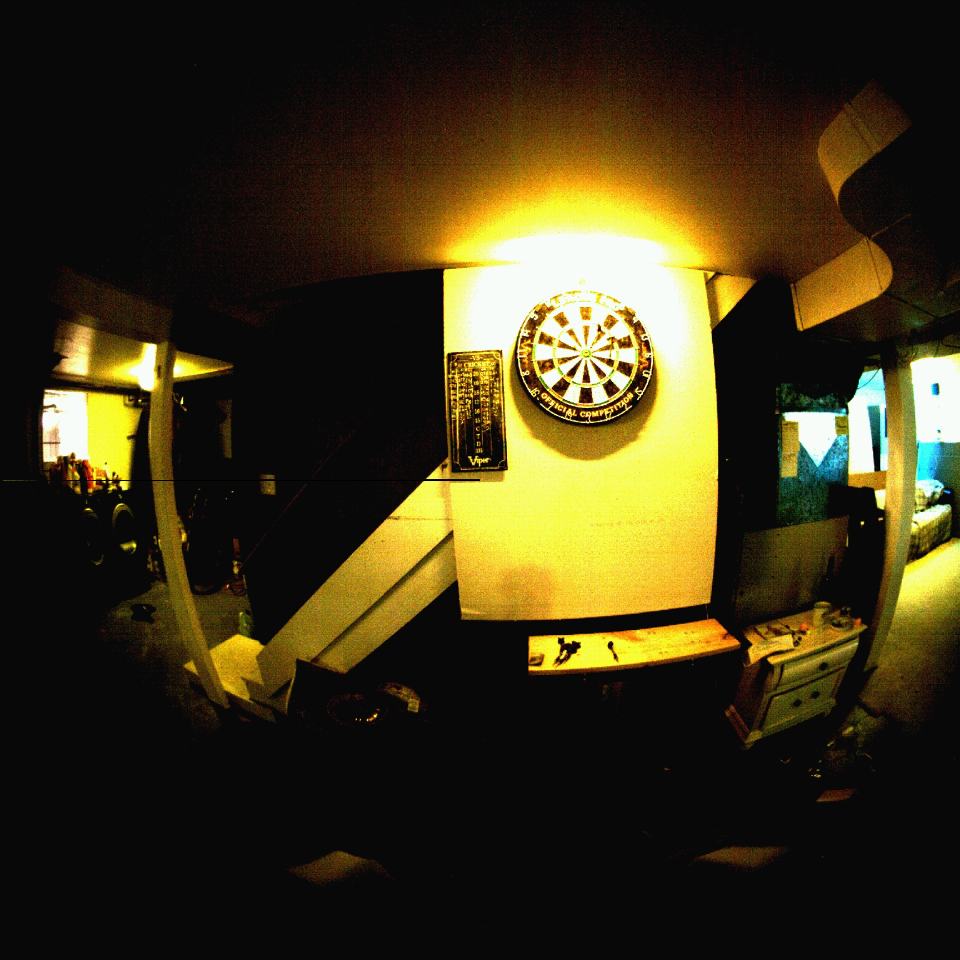
I recently got an oscilloscope and decided to do some probing. Turns out that the analog power supply to the image sensors (AVDD) was having some major noise issues at the image sensors that were farthest from the linear regulator that supplied it. Makes sense, as I made the supply traces pretty thin to those last couple cameras. I expected too much from those tiny ceramic capacitors I guess. Adding an electrolytic capacitor to the PCB across AVDD helped a lot. There are still some barely visible image quality issues but probing the supply voltage shows that it has gotten a lot cleaner.
I also decided to replace the 3 different 5V wall warts that I was using with a single 5V supply. This turned out to be a terrible idea at first, as the parallel busses between the FPGAs were causing major ground loops that didn't occur before since the supplies to each FPGA was isolated. However, shortening the power supply wires seems to have mostly fixed it.
Grayscale image transfer fix
As shown in the dataflow diagram for the project, there are two FPGAs that receive and warp color images from 4 image sensors each. They downsample and grayscaleify the color images and send them to the center FPGA, which is responsible for calculating the optical flow of the images (stereoscopic depth estimation, pretty much). This pipeline was sort of working but mostly not. It would get hung up and miss pixels or entire frames quite frequently. Turns out a major issue was that the remap FPGAs (ones that are connected to the cameras) were reading the grayscale images from DDR3 with a burst size of 16. The FIFO held 128 entries, which seemed like plenty. However, what I didn't realize was that the DDR3 slave interface supports up to 14 pending reads, so in rare cases, there could be 14 bursts of 16 words that came in all at once, overflowed the FIFO, and caused output pixels to be missed. Fixing that made it all happy again.
Quality of life stuff: VNC, code cleanup
A lot of the work I've done has centered around making it easy to work on the camera. I started by hooking up all the FPGAs to the internet so I could install VNC and remote into them rather than having to manually plug an HDMI cable and mouse and keyboard into each one to access the Linux GUI running on the SoC. For the remap FPGAs, I just hooked them up to ethernet and they worked, after following these instructions to set a static MAC and install VNC:
https://community.intel.com/t5/Programmable-Devices/MAC-Address-changes-on-reboot/td-p/124962
https://techloverhd.com/2015/05/install-lxde-vnc-gui-on-ubuntu-debian-server/
The middle FPGA was a whole 'nother story. When I made the 3D printed frame, I neglected to leave enough room for the ethernet jack. 2019 Colin decided I would never use the ethernet jack, so rather than just printing a new frame, I should just pull it off. 2020 Colin was very upset by his predecessor's poor decision but figured he'd just get a microUSB to ethernet adapter, and purchased the first one on Amazon, without thinking to check driver support. Several days of struggling and crying with kernel panics and confusion ensued. Don't be like 2019 Colin or 2020 Colin. I finally gave up and bought a mt7601u Wifi adapter since there is a driver called "mt7601u" in the LXDE kernel tree. It worked, and that terrible saga came to an end.
Another effect of putting the FPGAs on the network is that now I can just scp new bitfiles to them from my PC, and no longer have to manually remove the MicroSD cards and copy them over.
I also have all the C++ code on the FPGAs in a github repo, making it a million times easier to edit and keep in sync between the FPGAs rather than having to edit in a 1280x720 window in the LXDE GUI.
I also refactored the github repo for the remap FPGAs so there's less random Quartus artifacts and hopefully just the files that are needed to open the Quartus project, generate the IP, and build the FPGA. I haven't tested that yet though.
More stuff
That begins the list of things I've done. I'll continue with another, even more exciting project log.
Discussions
Become a Hackaday.io Member
Create an account to leave a comment. Already have an account? Log In.