 Simon Merrett
I decided this might be better as a log, which I can then reference from the instructions. This might seem like a long-winded explanation but I wanted to include details that might help people that aren't confidently doing this sort of thing frequently. Once it's set up, it is much less hassle than the explanation below may give you the impression that it is!
In summary, we are going to use the following collection of software tools:
- Arduino IDE (I used version 1.8.9)
- avrdude (may be optional - I used version 6.3)
- jtag2updi
- Atmel Studio (I used version 7) with ATtiny Device Pack (I used version 1.3.229)
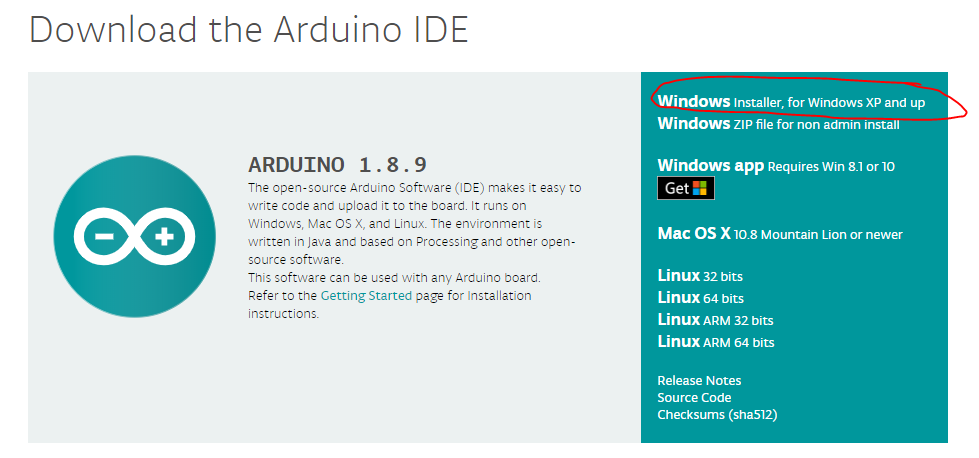
1. Install Arduino IDE
Available from https://www.arduino.cc/en/Main/Software. I used the Windows installer (not the Windows App Store version) but it probably doesn't make any difference.
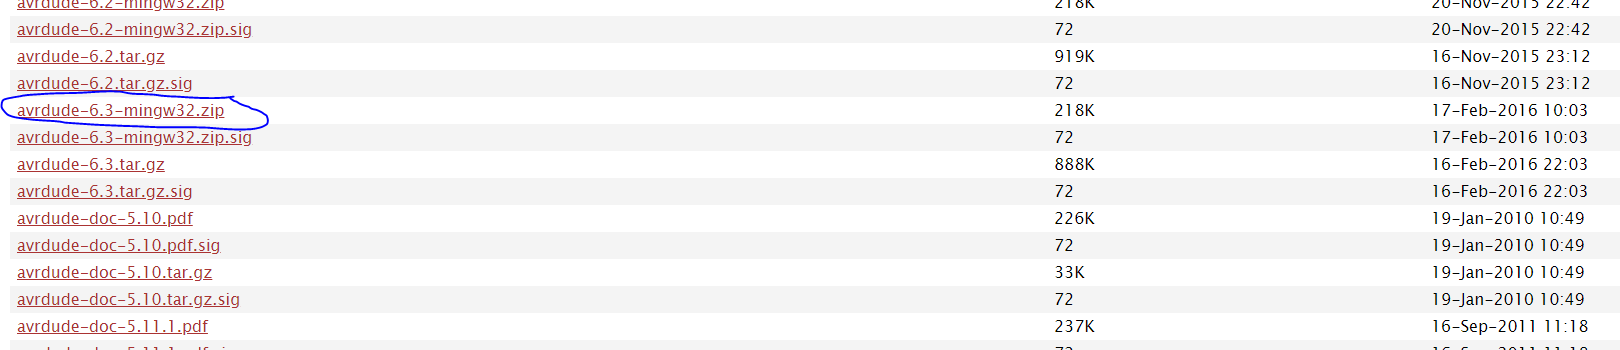
2. Install avrdude
This tool is used for uploading files to chips and reading memory from chips too. It is installed as part of your Arduino installation but we want to amend its default configuration specially for use with the new chips and the jtag2updi tool, so we'll install a separate instance somewhere that we can customise it. It is available from http://download.savannah.gnu.org/releases/avrdude/. I used version 6.3 for windows, named:
avrdude-6.3-mingw32.zip
Which sits here on the webpage:
You may prefer to create your folder for avrdude somewhere else but for ease, I created the folder:
C:\avrdude\
C:\avrdude\
and into it, I extracted from the zip folder:
avrdude.exe
avrdude.conf
So now we have:

We need to rename or delete avrdude.conf so that it is ignored by avrdude.exe and we will put the custom avrdude.conf file from the jtag2updi repository in the avrdude folder instead. I renamed my original avrdude.conf as:
ORIGINALavrdude.conf
3. Install jtag2updi
Available from https://github.com/ElTangas/jtag2updi. If you have never used code from github before, it's not always clear how to download it. I do run git but for this the simplest method for most people in my view is to press the "download Zip" option:
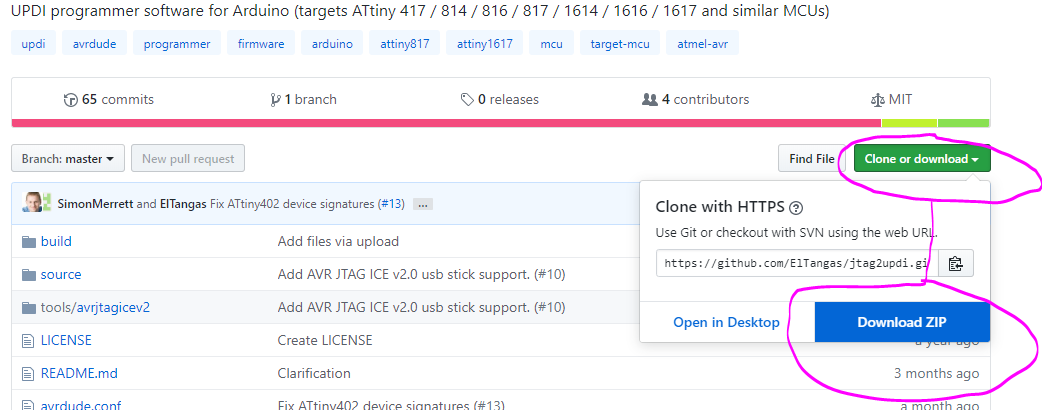
This will download a .zip folder in your Downloads folder called:
jtag2updi-master.zip
Open it and follow the instructions kindly provided by ElTangas here: https://github.com/ElTangas/jtag2updi#building-with-arduino-ide
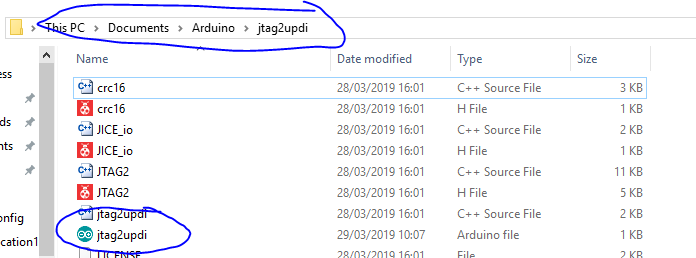
I extracted the contents of the Source folder in the zip folder to a new folder in the sketches folder of my Arduino installation. This would look something like:
C:\Users\"YOUR_PROFILE"\Documents\Arduino\jtag2updi
where "YOUR_PROFILE" is the account name that you use on a Win10 machine. These are the key elements you're looking for:
Now go back to the jtag2updi-master.zip folder and extract the jtag2updi version of avrdude.conf to the avrdude folder you set up in step 3. It is kept here in the jtag2updi-master.zip\jtag2updi\ folder:
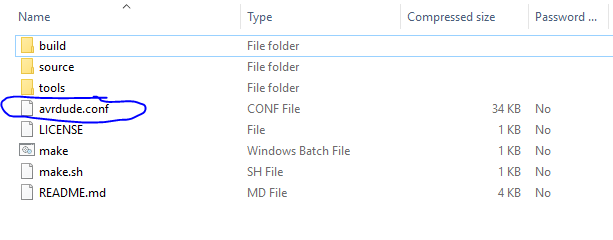 your avrdude folder should now have the avrdude.exe file and the jtag2updi version of the avrdude.conf file in it, as well as any renamed ORIGINALavrdude.conf file:
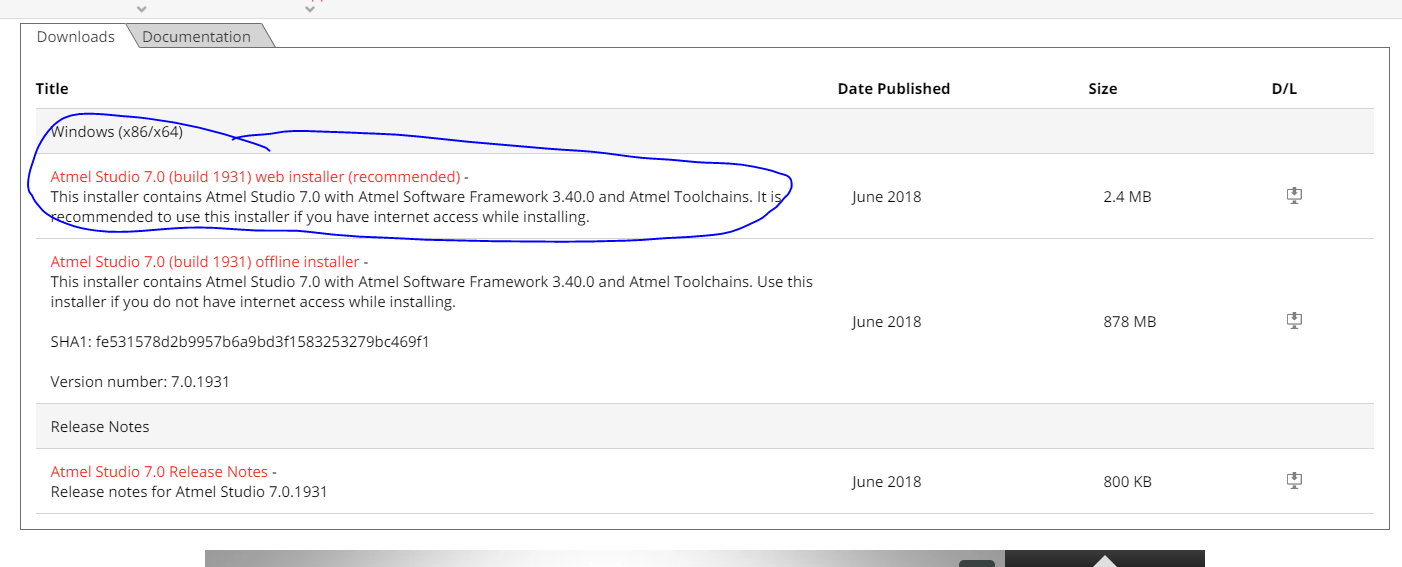
4. Install Atmel Studio
Available from this link: https://www.microchip.com/mplab/avr-support/atmel-studio-7
I used the web installer and I don't recall selecting anything other than the default options (if there are any options).
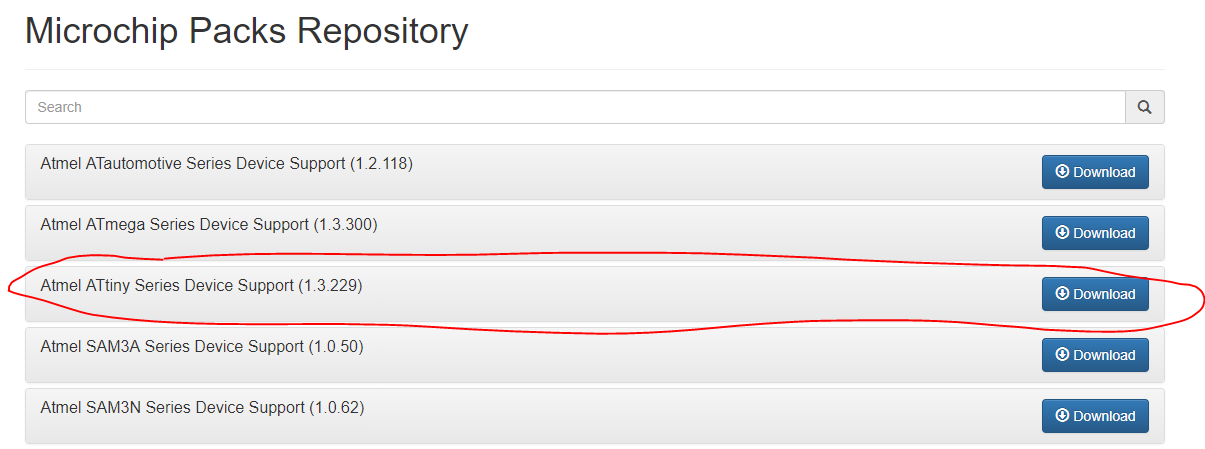
5. Install ATtiny Device Pack for Atmel Studio
This is a modular piece of software which describes the ATtiny chips, so as to keep chip definitions separate from the main software tool. It makes sense to allow bug fixes for individual chips without needing to install new versions of Atmel Studio but it's not obvious to many beginners that they ALSO need the relevant device pack installed for their chip-of-interest.
You can get the ATtiny device pack from here: http://packs.download.atmel.com/. I used version 1.3.229 and it is to be expected that there are bugs in the early stages of hardware releases. Some of these bugs are not just in the software but in the hardware too. Don't worry about this too much for now, I'll explain later.
Just in case you want to compare, here are all the relevant installer files I downloaded, as they appear in my Downloads folder:

That's the end of this log for initial software download and install.
Discussions
Become a Hackaday.io Member
Create an account to leave a comment. Already have an account? Log In.