 Alessandro Sottocornola
-
1Connect the Hardware
In the first step is necessary to link the sensor to Arduino using wires as schematic diagram, i suggest to use different colour, so it will be easy.
Now you can connect the display to Arduino. The display must be serial communication.
Once all the connections have been made, you can go to the programming part. -
2Installing IDE Arduino
The programming file has been published in these pages, as well as the library, so it will be easy to load the sketch on Arduino.
Download the Arduino IDE on your computer. To use the published library, we recommend the 1.6.x version of the IDE (version that I used to create the sketch), but by updating the library, you can also use more recent versions.
If you want to use the 1.6.7 version of the IDE, this can be downloaded from: https://www.arduino.cc/en/Main/OldSoftwareReleases#previous
On the page you will find both the version for Linux / Mac / Windows. All that remains is to choose the correct version and proceed with the installation in the operating system. I will not explain how to install the program, but in the next step I will explain how to load the library.
-
3Installing AS3935 Library
Now that the IDE is installed, it is important to install the sensor library in the IDE, otherwise error messages will be shown when compiling the sketch.
There are two ways to install the library, that is to download from these pages (recommended choice because I guarantee the operation with the sketch), or install the library through the IDE library manager. In this last case, if the latest version is installed, I'm not sure it can be compatible with the sketch I created.
I will explain how to use my library. Download the file from this site, so you will find a .ZIP file that you will have to decompress on the desktop for example. Now copy the AS3935 folder which has been decompressed, inside the directory where all the Arduino libraries are present, which is usually found among the documents on your computer, for example I use Windows and find it in this path "C: Users \ Alex \ Documents \ Arduino \ libraries ". When you copy the folder to the "libraries" directories, make sure that when you open the AS3935 directory you immediately find 4 files as below
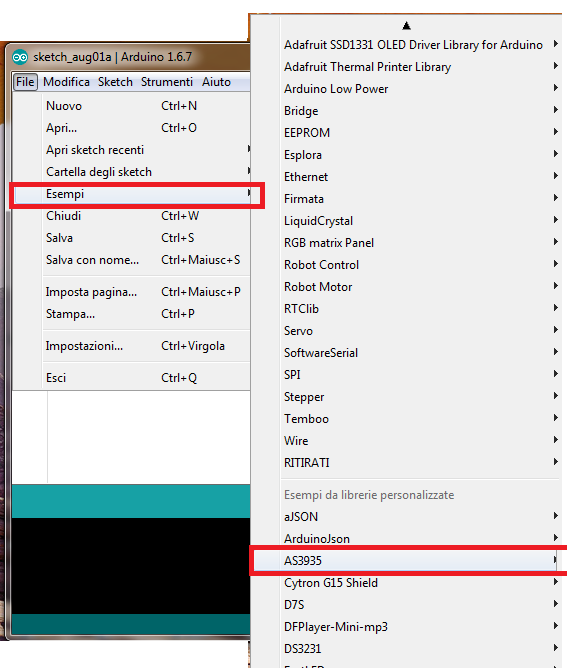
Now the library is ready to be used. If you want to verify that the IDE recognizes it, open the IDE, then opening "File> Examples" you will find the AS3935 folder
-
4Programmingg Arduino
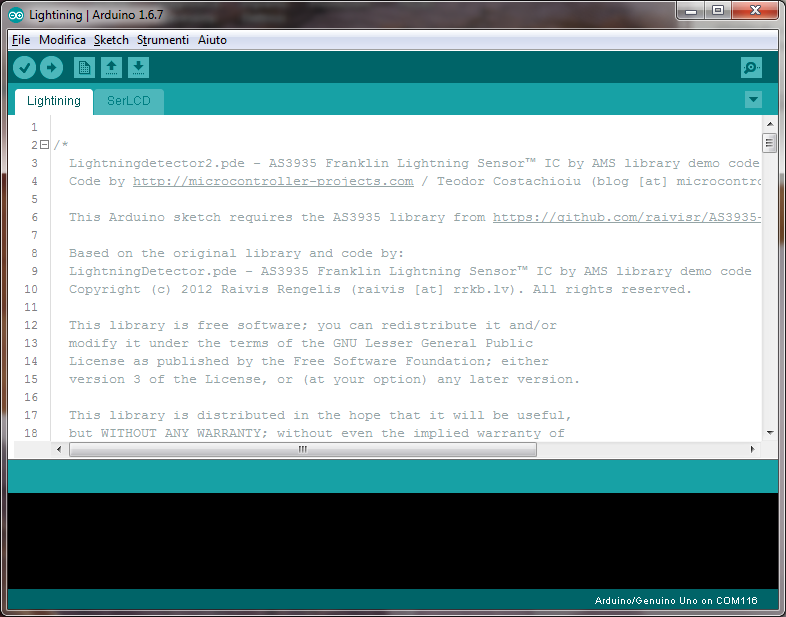
First, download the sample code I provided, or the "Sketch FT1324M.zip" file, then unzip it on your PC, for example on the desktop.
Now open the Arduino IDE version 1.6.7 and open the unzipped file from the "File> Open" menu. In the folder there will be two files, namely "Lightening.ino" and "SerLCD.ino", but you will have to open the "Lightening.ino" file via the IDE which will automatically open the second file as well.
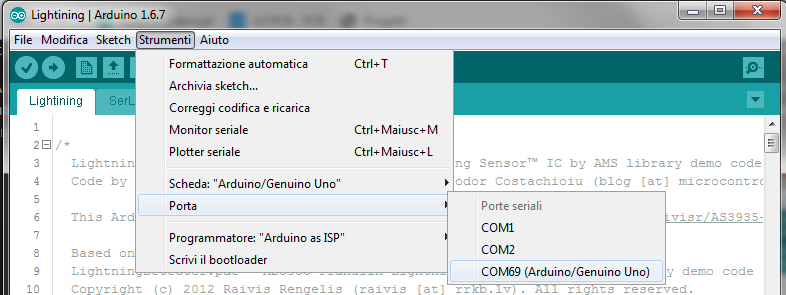
Connect the Arduino board via a USB cable to the computer and wait for the driver to be installed (usually in automatic mode). At the end of the installation a message will be shown with the indication of the installed COM, it would be good to keep note of the associated COM port, for example COM69.
From the "Tools" menu select "Arduino UNO" or "Arduino / Genuino UNO" as the "Tab".
Select the COM port associated with Arduino via the "Tools> Port" menu, for example select "COM69" as shown above
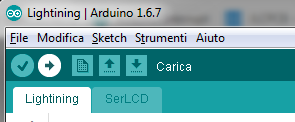
Now it is enough to program Arduino and everything is ready!
Press the second menu button to program Arduino and wait for the loading to end ... an information message will be shown below the code.Now there is nothing left to do but try the system!
-
5Test the System!
Disconnect the USB cable, then get a 12V power supply and connect it to Arduino.
If you like it and the day is bad and full of thunderstorms or lightenings, the test will be quick, but if this is not the case you will have to use a piezo gas lighter (without gas). For the test it is important to approach the gas lighter to the sensor and press the trigger repeatedly.The power of the piezo is very weak, so press the trigger many times (about 20) in a row to generate a weak magnetic field detectable by the system.
Have fun and we hope there are no storms!!!!
Lightning detector
sensor to detect electrical shock in the atmosphere capable of letting us know how near and how strong it is

Discussions
Become a Hackaday.io Member
Create an account to leave a comment. Already have an account? Log In.