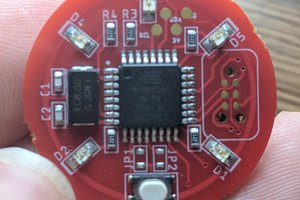
The current design uses a AAA battery to power a 900 MHz RFM69 radio, 12 white LEDs, and a capacitive touch sensor.
Look at the tab wedding badge 3 if you want to see current BOM.
To make the experience fit your profile, pick a username and tell us what interests you.
We found and based on your interests.
The current design uses a AAA battery to power a 900 MHz RFM69 radio, 12 white LEDs, and a capacitive touch sensor.
Look at the tab wedding badge 3 if you want to see current BOM.
|
lbr - 315.72 kB - 02/24/2022 at 15:53 |
|
|
|
brd - 141.11 kB - 01/31/2021 at 23:59 |
|
|
Wedding 5.schDo not use this for Atmega328P, uses Port "E" (only available on Atmega328PB)sch - 268.31 kB - 01/31/2021 at 23:59 |
|
|
bare bones test program from Sparkfun.ziprx/tx test for atmega328PB from sparkfunZip Archive - 5.33 kB - 01/31/2021 at 19:21 |
|
|
RadioHead69_RXTX_0425.ziprx/tx test for atmegaPB with rfm69Zip Archive - 7.70 kB - 01/30/2021 at 17:51 |
|
Before getting into the details of the project, I wanted to share a handy snippet of code that Matt and I add to all our code out so that if we haven't worked on your board in a while, we can see what program has been uploaded last when connected to the serial monitor:
uploaded: '/Users/dev/wedding_badges_rfm69/Arduino/RadioHead69_TX_0425b/RadioHead69_TX_0425b.ino' on May 20 2021
These lines of code are added to setup():
  // output last filename uploaded and date
  Serial.print("uploaded: '");
  Serial.print(__FILE__);
  Serial.print("' on ");
  Serial.println(__DATE__);
To program the sleep cycle, we use the elapsed millis library and power down function from the Low power lab library
#include  //get library from:https://github.com/lowpowerlab/lowpower

// timers for animation cycles
#include  elapsedMillis waitSleepElapsed;
int waitSleepDuration = 3000;

void loop(){
 if (awake == false) {
    LowPower.powerDown(SLEEP_2S, ADC_ON, BOD_OFF);
  }
}

void check_if_should_sleep(){
    if (waitSleepElapsed > waitSleepDuration) {
        awake = false;
        setAllOff();
    }
}
For the animation code. The first animation is a single pixel fade up and down in order. We create an array of integers that represent the pixel array and set all values to 0. When the receiver gets a message, it flips the value of the first pixel to 1:
void handleModeOnReceive(int receivedMessage){
  if (animationMode != receivedMessage){
    for (int i = 0; i < NUM_LEDS; i++) {
      setBrightness(i, 0);
      selected[i] = 0;
    }
    selected[0] = 1;
    animationMode = receivedMessage;
  }
}
Within the animation loop, we're checking to see if any of these values are equal to one, if they are, then that LED gets the animation sequence:
void animateFade() {
  float percentComplete = (((float)animationValue) / (float)animationDuration);
  // check each led
  for (int i = 0; i < NUM_LEDS; i++) {
    float fade = percentComplete; // fade up or down
    if (selected[i] == 0) {
      fade = 0.0;
    }
    // set the one on chase to fade up
    setBrightness(i, fade * brightness); //*random(1,3)); <- gives a sparkle
  }
}

// fade is float scaled between 0.0 and brightness
void setBrightness(int i, float fade) {
  SoftPWMSet(ledPins[i], fade);
}
There is another loop that flips the value of the next LED index in the array to 1 in order:
void animate_led_ordered() {
  // at every loop, flip the value of the next index to one
  // and self to zero
  for (int i = NUM_LEDS - 1; i >= 0 ; i--) {
    if (selected[i] == 1) {
      selected[i] = 0;
      selected[i + 1] = 1;
      break;
    }
  }
}
Within the main loop, is where we handle the timers:
if (awake == true) {
    // double animation duration to allow fade up and down
    if (animationElapsed > 2 * animationDuration) {
      animate_led_ordered();
      // start animation timer for led index with value 1
      animationElapsed = 0;
    }
    // fade down
    else if (animationElapsed > animationDuration) {
      animationValue = 2 * animationDuration - animationElapsed;
    }
    else {
      // fade up
      animationValue = animationElapsed;
    }
This creates the animation in the video at the top of the log.
After a couple of months, I pulled out the boards again and wanted to work on some programming. One of the boards uploaded fine, and the other I was getting errors such as:
avrdude: verification error, first mismatch at byte 0x0042         0x65 != 0x8d
avrdude: verification error; content mismatch
avrdude: verification error; content mismatch
I was also getting another error occasionally with USB device not recognized. Forums suggest that this could be a bootloader issue.
First I checked the power to make sure that it wasn't a power boost issue. Looking at the schematics I found the right pins to measure.
Since it wasn't a power issue, I pulled out the trusty tag connect and burned the bootloader again. I used the following setup and settings.
Note: At this point you can upload the program through the SPI pins, but it will wipe out the bootloader, so don't do this unless you're not planning to program through serial.
Then I switched to my FTDI programming cable. First couple times, I would consistently get the error message:
Using Programmer : arduino
Overriding Baud Rate : 115200
avrdude: stk500_recv(): programmer is not responding
avrdude: stk500_getsync() attempt 1 of 10: not in sync: resp=0x45
avrdude: stk500_recv(): programmer is not responding
avrdude: stk500_getsync() attempt 2 of 10: not in sync: resp=0x45
avrdude: stk500_recv(): programmer is not responding
avrdude: stk500_getsync() attempt 3 of 10: not in sync: resp=0x45
avrdude: stk500_recv(): programmer is not responding
avrdude: stk500_getsync() attempt 4 of 10: not in sync: resp=0x45
avrdude: stk500_recv(): programmer is not responding
avrdude: stk500_getsync() attempt 5 of 10: not in sync: resp=0x45
avrdude: stk500_recv(): programmer is not responding
avrdude: stk500_getsync() attempt 6 of 10: not in sync: resp=0x45
avrdude: stk500_recv(): programmer is not responding
avrdude: stk500_getsync() attempt 7 of 10: not in sync: resp=0x45
avrdude: stk500_recv(): programmer is not responding
avrdude: stk500_getsync() attempt 8 of 10: not in sync: resp=0x45
avrdude: stk500_recv(): programmer is not responding
avrdude: stk500_getsync() attempt 9 of 10: not in sync: resp=0x45
avrdude: stk500_recv(): programmer is not responding
avrdude: stk500_getsync() attempt 10 of 10: not in sync: resp=0x45

avrdude done. Thank you.
But trying a few times, once reburning the bootloader, it worked and I was able to upload my program. Hooray! It's not exactly clear why it works sometimes and doesn't other times, but note to self to keep repeating steps with the correct settings and eventually the program will take.
AVR ISP MKii + TC2030-MCP-NL Tag-connect cable hardwired together.
Using a USB 3.0 hub and one Macbook Pro for testing. Opening a second instance of the Arduino IDE can watch messages go back and forth.
I found this whole process to be hard to figure out and didn't find a tutorial online, so here's some notes.
In order to use the Arduino IDE, you need a bootloader on your Arduino compatible chip.
1. Use ICSP pins to get the bootloader onto the chip. I use an AVR mkii programmer for this step.
2. After the bootloader is on the chip, you can program the board using the serial port. There is a specific circuit that I found needed to be designed in. I used the FTDI basic as the programmer.
3. NOTES: I had to upload the bootloader twice and cycle power a couple of times to get this to work
Name/ Port/ Atmega pin/ Arduino IDE pin
BATTERY LIFE
pin voltage mV = (ADC value *system voltage mV) / max ADC value // 1 V = (ADC value * 3.3V)/ 1024 // Max ADC = 310
PINOUTS
// digitalWrite(0) //--> D0
// digitalWrite(1) //--> D1
// digitalWrite(2) //--> D2
// digitalWrite(3,LOW); //--> D3
// digitalWrite(4,LOW); //--> D4
// digitalWrite(5,LOW); //--> D5
// digitalWrite(6,LOW); //--> D6
// digitalWrite(7,LOW); //--> D7
// digitalWrite(8,HIGH); //--> B0
// digitalWrite(9,HIGH); //--> B1
// digitalWrite(10,HIGH); //--> B2 SSO
// digitalWrite(11,HIGH); //--> B3 MOSI
// digitalWrite(12,HIGH); //--> B4 MISO
// digitalWrite(13,HIGH); //--> B5 SCK
// digitalWrite(14,LOW); //--> C0
// digitalWrite(15,LOW); //--> C1
// digitalWrite(16,LOW); //--> C2
// digitalWrite(17,LOW); //--> C3
// digitalWrite(18,LOW); //--> XX
// digitalWrite(19,LOW); //--> XX
// digitalWrite(20,LOW); //--> XX
// digitalWrite(21,LOW); //--> XX
// digitalWrite(22,LOW); //--> XX
// digitalWrite(23,LOW); //--> E0
// digitalWrite(24,LOW); //--> E1
// pinMode(A2, INPUT_PULLUP); //-->25 (ALSO C2)
****************************
I received new PCBs early December, getting around to populating and bringing them up now. Here are the notes:
1. SDO/ SDI routed incorrectly everywhere, reversed on the radio and reversed on the programming connector.
2. LEDs are BRIGHT with a 100 ohm resistor. Maybe we'll go with less bright? TBD.
R13 & 14 are 100 ohm, the rest are 124 ohm
3. AA battery holder is bigger than the footprint was designed for. The oscillator and the on/off switch interfere. Not a show stopper here, but should be fixed for the next rev.
4. For battery life, we're using a AA 1.5V battery. There's a voltage divider measuring the battery which gives an input to pin 19: ADC6/ E2.
V(out) = V(in)*(R2/(R1+R2))
Combined both power and MCU boards into one.
Thinking about using a different chip altogether:
Also we might be able to remove:
I found the same code can work with both P and PB boards. if we line up our pinout properly we might be able to use existing atmega328p boards as a quick way test many (6x) talking together.
what do you all think worth switching things up a bit?
//    digitalWrite(0)         //--> D0  -- TX Serial OUT
//    digitalWrite(1)         //--> D1  -- RX Serial IN
//    digitalWrite(2)         //--> D2  -- RADIO_IRQ RFM_INT
//    digitalWrite(3,LOW);    //--> D3  --LED_0
//    digitalWrite(4,LOW);    //--> D4  --LED_1
//    digitalWrite(5,LOW);    //--> D5  --LED_2
//    digitalWrite(6,LOW);    //--> D6  --LED_3
//    digitalWrite(7,LOW);    //--> D7  --LED_4
//    digitalWrite(8,HIGH);   //--> B0  --LED_5
//    digitalWrite(9,HIGH);   //--> B1
//    digitalWrite(10,HIGH);  //--> B2  --SSO  RFM_CS
//    digitalWrite(11,HIGH);  //--> B3  --MOSI RADIO AND PROGRAMMING
//    digitalWrite(12,HIGH);  //--> B4  --MISO RADIO AND PROGRAMMING
//    digitalWrite(13,HIGH);  //--> B5  --SCK  RADIO AND PROGRAMMING
//    digitalWrite(14,LOW);   //--> C0  --LED_6
//    digitalWrite(15,LOW);   //--> C1  --LED_7
//    digitalWrite(16,LOW);   //--> C2  --LED_8
//    digitalWrite(17,LOW);   //--> C3  --LED_9
//    digitalWrite(18,LOW);   //--> XX  --LED_10
//    digitalWrite(19,LOW);   //--> XX  --LED_11
//    digitalWrite(20,LOW);   //--> XX  --BATTERY_SENSE
//    digitalWrite(21,LOW);   //--> XX
//    digitalWrite(22,LOW);   //--> XX
//    digitalWrite(23,LOW);   //--> E0
//    digitalWrite(24,LOW);   //--> E1
//    pinMode(A2, INPUT_PULLUP); //-->25 (ALSO C2)
This weekend we started thinking about the possible states of the badges and getting one of them working. We started with 4 of the LEDs on the board that have pwm enabled, writing a slow chase where each of the LEDs fade on and off.
We're using the elapsedMillis library that allows us to access clock time whilst other processes are going on in the loop. The main concept is when elapsed time is more than the set duration, we reset it.
Next thing was to set the state of each LED. All LEDs start in off state with only the first one on. In each loop, turn the next LED on, and turn the current one off.
Code is in - RadioHead69_RawDemo_RX_0419b.ino
Now that we have a setup for programming and testing the TX and RX boards, we're starting to explore a bit of programming. One of the possibilities is use sleep modes to conserve battery power. Lowpower labs has a library that puts the MCU to sleep and wakes it up and various intervals.
First download the library here, and put it into the Arduino library folder. To get it working for the PB variant, go to the LowPower.h file and add the PB variant to this line. Chage
#if defined (__AVR_ATmega328P__) || defined (__AVR_ATmega168__)
to
#if defined (__AVR_ATmega328P__) || defined (__AVR_ATmega168__) || defined (__AVR_ATmega328PB__)
Our test involved sleeping the MCU for 8s at a time, it would wake up, receive radio messages and go back to sleep. Adding this line to the code:
LowPower.powerDown(SLEEP_8S, ADC_ON, BOD_OFF);
To calculate the power draw, we disconnected the power board from the controller board, soldered cables to power and ground pins and connected to multimeter in A mode.
Initially the radios were chirping and LEDs were flashing to indicate messages received and acknowledgement. The power readings were all over the place. The sleep seemed promising as we'd note a shift to about 16ma when the sleep cycle kicked in and it would jump to 37ma when there was clearly no sleep happening. The LEDs drawing up to 20ma was a little concerning as we'd see the power bounce all over, so we decided to turn all LEDs off to get a better read on the situation.
At this point we still don't have a good sense of what the radios are doing when we're not explicitly sending or receiving anything. We hope not much. The power draw calculations without LEDs and unused radios are such:
After getting the first board rev from Sophi, I wanted to test out programming it using an FTDI programmer from Sparkfun. Couple of issues - using a new mac with USB-C hubs, the board didn't get recognized by the mac. The other problem was that the boards come wired at 5V, whereas our board was at 3.3V. I had initially mixed up these issues and thus corrupted the bootloader, this manifested in the board not being recognized anymore when trying to program.
To burn the bootloader, we used an AVR programmer and soldered some headers to the board according to these pinouts.
Connect the AVR programmer to your laptop USB port and then select these board options. The go to the bottom and select Burn Bootloader.
The board will light up. In order to program the bootloader, make sure that the headers are disconnected from the AVR programmer (even if the programmer is not connected to the laptop). Also cut the trace between the 5V and middle pad, and bridge the middle pad to the 3.3V pad with solder on the FTDI board.
Now I was able to upload the scripts again to the board and happy days!
Create an account to leave a comment. Already have an account? Log In.
Join forces ? https://hackaday.io/project/17997-s1g-rf-sub-1ghz-radio-modules-915mhz-and-433mhz I 've been wanting to finish a similar project
hi @AVR yessss, checking out your project now. sorry for late response, I didn't see this
Hi
Nice to meet you after viewing your profile i am Jacinda, from (jakarta) indonesia,
i have a project discussion with you please email me on: (jacinda.seiler@yahoo.com)
Become a member to follow this project and never miss any updates


 ElectronicABC
 Charles Dean Modrich
 selena1995
how are we feeling about charlieplexing these days? 20 leds? or 30? is that too many?